How to Fix com.apple.DiskManagement.disenter error 49153 [Ventura/Sonoma]
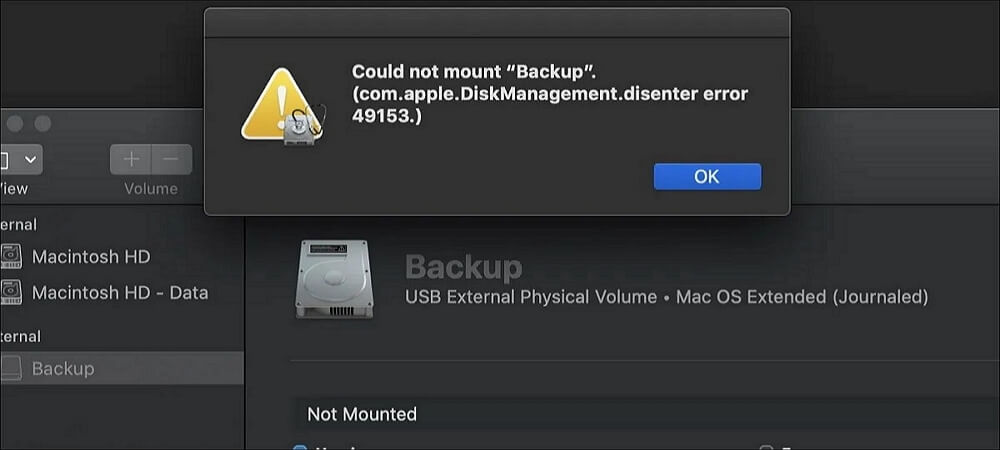
The "com.apple.DiskManagement.disenter error 49153" is a frustrating issue that prevents you from mounting your external hard drive on your Mac. This error can occur due to various reasons such as disk corruption, incorrect permissions, or outdated software.
The enigmatic error code 49135, often associated with the com.apple.diskmanagement.disenter error, indicates a problem with your external drive or the macOS itself, casting a shadow of potential data loss. However, there's no need to despair, as this article will delve into the possible reasons behind this error when using an external hard drive on your Mac.
We'll guide you through the process of fixing the issue and recovering your important data, ensuring a smooth and complication-free experience.
| Workable Solutions | Step-by-step Troubleshooting |
|---|---|
| Fix 1. Restart Your Mac | Click the Apple menu at the top, and choose the Restart option to restart your Mac...Full steps |
| Fix 2. Run First Aid in Disk Utility | Initiate Disk Utility by navigating to Applications > Utilities, and identify your drive on the left...Full steps |
| Fix 3. Use Terminal in Single User Mode | Access Single User Mode, and press and hold the Power button and the Command + S...Full steps |
| Fix 4. Disable Time Machine | Stop the Time Machine process to enable your drive's mounting and fix this error...Full steps |
| Other Effective Fixes | Delete Time Machine snapshots or format your drive to fix the error 49153...Full steps |
The com.apple.DiskManagement.disenter error 49244 on Mac can be fixed, and the same goes for error 49153. Before we dive into the solution, let's uncover the reasons behind this problem. Once we understand the root cause, we can help you fix it and get your digital life back to normal.
com.apple.DiskManagement.disenter error 49153: Possible Causes
The com.apple.DiskManagement.disenter error occurs due to complex interactions within the Disk Management framework, requiring a detailed investigation into its causes.
⚠️Corrupted System Files and Directories
Error 49153 on Mac is likely caused by corrupted or missing critical system files, which Disk Management relies on to function smoothly. This can be resolved by fixing the corrupted files.
❌Incompatible Software Installations
Conflicts between software installations can disrupt Disk Management, causing error 49153 if new software clashes with existing components, and also leading to Sonoma installer failure due to software incompatibility.
💾Insufficient Disk Space
Insufficient disk space can trigger error 49153, as Disk Management requires ample space to operate smoothly, and when space is lacking or not being freed up, this error may occur.
😰Hardware Issues
Error 49153 can occur due to underlying hardware problems, such as failing hard drives or malfunctioning disk sectors, which disrupt communication between the operating system and Disk Management.
⛔Improper Permissions and Security Settings
Incorrect permissions or security settings can cause Disk Management to malfunction, resulting in error 49153, which can be resolved by ensuring proper permissions are in place for disk-related tasks.
How to Fix com.apple.DiskManagement.disenter error 49153
Upon investigating the causes of the "com.apple.DiskManagement.disenter error 49153", actionable solutions can be implemented to restore optimal functionality in Ventura and Sonoma systems. Users can systematically address these remedies to regain control over their devices.
For a clearer understanding of the process and to assist you further, we have included a helpful video guide. Be sure to watch the video to ensure a smooth formatting process. Here are some of its parts to help you out with the problem:
- 00:00 - Introduction
- 02:03 - Drive sets to APFS format by default
- 02:49 - Two partitions of external HDD
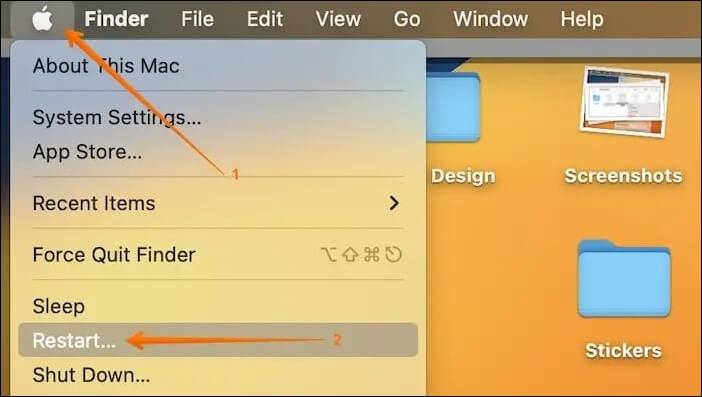
Fix 1. Restart Your Mac to Fix Mac Error 49153
Rebooting a Mac or force restarting a Mac can effectively address various minor issues. If you still need to attempt this, consider initiating a reboot of your Mac. Click the Apple menu and select the "Restart" option.
To resolve an unmountable drive issue on your Mac, start by safely ejecting the drive and disconnecting it. Then, restart your Mac and reconnect the drive. This straightforward approach can often resolve common problems.
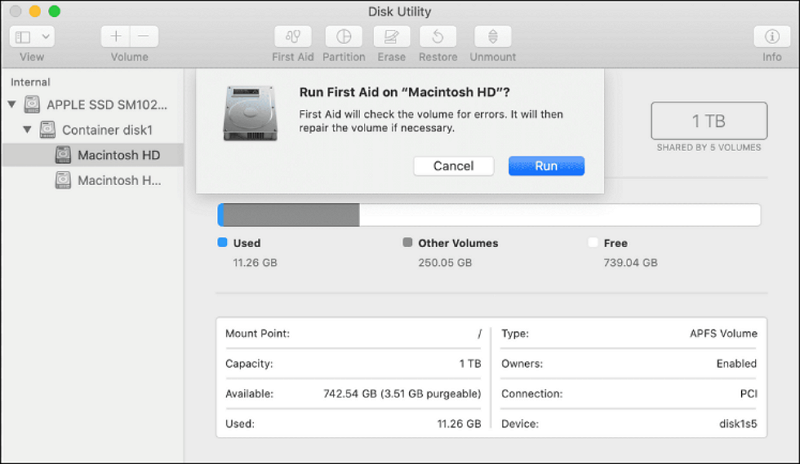
Fix 2. Run First Aid in Disk Utility
To resolve the issue, consider repairing your drive using Disk Utility, which can be accessed through the Utilities folder in your Applications folder.
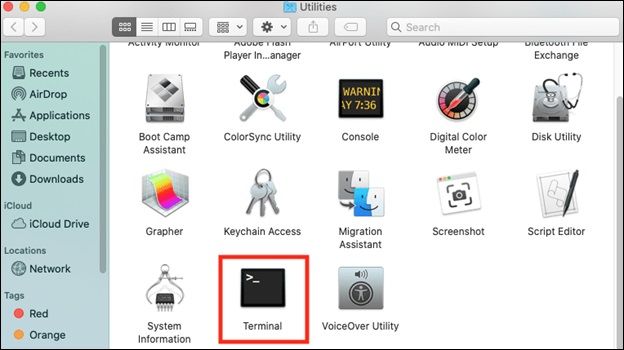
Step 1. To initiate the "Disk Utility" on your Mac, go to the "Finder", then click on "Applications", and from there, select "Utilities".

Step 2. Identify your drive in the left sidebar and tap the "First Aid" button at the window's top section.
Step 3. Upon encountering the dialogue box, activate the "Run" option.
Step 4. To manually mount your hard drive in Disk Utility, select your drive or volume from the left sidebar and click the "Mount" button. This action allows you to access and utilize the contents of your hard drive.
If you encounter the "couldn't unmount disk 69888" error on your Mac, the steps below can help! It provides a solution to resolve the unmountable error 69888.
If you're experiencing issues with unmounting Disk 69888 on your Mac, don't worry - there are several methods to fix this problem. You can try restarting your Mac, using the Disk Utility app, or checking the permissions of the disk.
This article will provide six effective methods to resolve the "couldn't unmount disk 69888" error on Mac, allowing users to troubleshoot and fix this issue with ease.
Fix 3. Use Terminal in Single User Mode
To use the Terminal in single-user mode, you must follow these steps:
Step 1. Access "Single User Mode" by restarting your Mac.

Step 2. Press and hold the Power button and the "Command + S" keys together to restart your Mac.
Step 3. When in Single User Mode, a Terminal-like window appears. Wait for the white text to stop, then input the command `/sbin/fsck -fy` and press return.
Step 4. After the process is complete, enter the command "reboot" to instruct your Mac to restart itself.
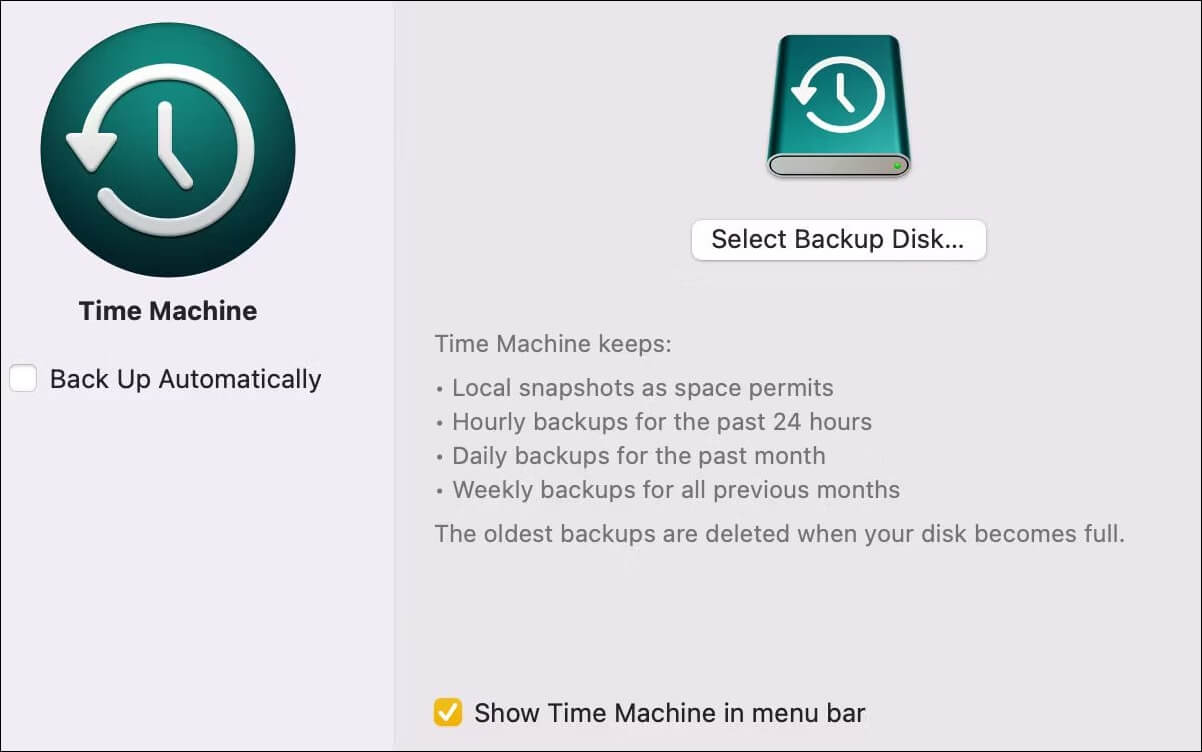
Fix 4. Disable Time Machine to Fix Error 49153
To resolve the error that prevents your drive from mounting, you can stop the Time Machine process by accessing its settings through System Preferences, then deselecting the "Back Up Automatically" checkbox. This will allow your drive to mount and potentially fix the error.
The "com.apple.DiskManagement.disenter error 49153" on Mac can be frustrating, but it's often caused by a software issue rather than a hardware problem. To fix it, try restarting your Mac in Safe Mode, then booting normally.
Fix 5. Delete Time Machine Snapshots
To resolve the disk utility error on your Mac, you can try erasing Time Machine snapshots from your computer using the Terminal app. To do this, open the Terminal app and type in the following command: `tmutil delete /Volumes/Time Machine Volume`, replacing "Time Machine Volume" with the actual name of your Time Machine volume. Then, press Enter to execute the command.
Step 1. Open Terminal.
Step 2. To list the locally stored Time Machine snapshots, use the following command in the Terminal: `tmutil listbackupdates`. This command will display a list of snapshots, including the date and time each snapshot was taken, and the size of the snapshot. Simply input the command and press the "Return" key to execute it.
tmutil listlocalsnapshots /
Step 3. Execute the next command by typing it and pressing "Return":
tmutil thinlocalsnapshots /99999999999999
Step 4. Delete all snapshots by running the following commands repeatedly: `aws s3api delete-object --bucket your-bucket-name --key your-snapshot-key`, `aws s3api delete-object --bucket your-bucket-name --key your-other-snapshot-key`, and so on, replacing `your-bucket-name` and `your-snapshot-key` with the actual names of your bucket and snapshots. Run each command separately, and confirm the deletion of each snapshot before proceeding to the next one.
Fix 6. Format Drive to Fix Diskmanagement Disenter Error 49153
Before formatting an internal hard drive on a Mac, create a backup of your data to avoid losing it, as formatting will erase all existing files.
Deep Data Recovery for Mac is a software tool that helps recover data from formatted hard drives on Mac devices, providing a solution for users who have lost important files due to accidental formatting.
This professional data recovery tool is designed to recover permanently deleted files on Mac, helping to retrieve valuable files from various situations such as errors, accidental deletions, emptied Trash Bins, and more, with a simple and easy-to-follow process.
🏆Key Features of Deep Data Recovery for Mac
- Recover deleted photos, videos, music, documents, emails, and more on your Mac with ease. With the right tools and techniques, you can restore lost files and regain access to your cherished memories and important documents.
- Support for various Mac devices is available, including recovery of data from HDD, SSD, and SD cards, all on the Mac platform.
- Supports restore files without Time Machine backups or iCloud Drive.
To format your Mac's hard drive, start by backing up your essential data. Once you've secured your files, you can proceed with the formatting process.
Step 1. To erase and reformat a drive, launch the "Disk Utility" application, then locate your target drive in the left sidebar of the Disk Utility window.
Step 2. To erase the contents of the window, click the "Erase" button at the top of the window. This will begin the formatting process.
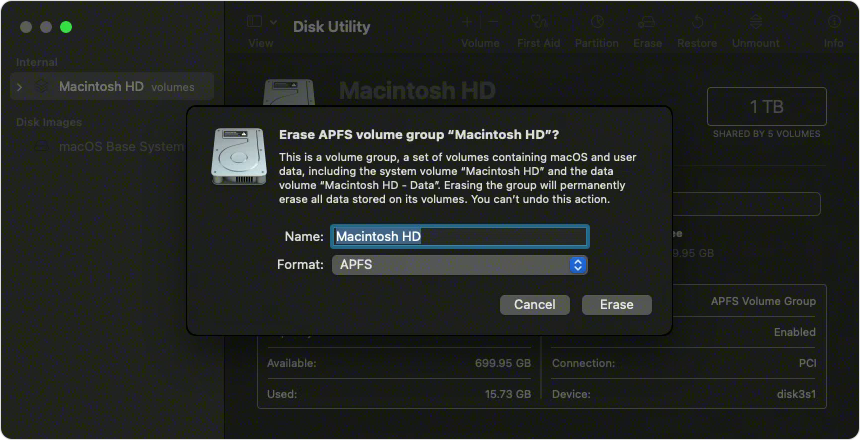
Step 3. A dialogue box will appear, where you can assign a name to your drive and select a specific format.
Step 4. Choose the GUID Partition Map scheme, which is ideal for compatibility with modern Mac systems.
Step 5. Once you've configured the settings, click the "Erase" button to proceed with the formatting procedure.
Conclusion
Encountering data loss due to the "com.apple.DiskManagement.disenter error 49153" can be distressing, but there's a silver lining with Deep Data Recovery for Mac. This powerful tool is designed to address a wide range of data loss scenarios, including the error itself, accidental deletions, emptied Trash Bin, and more, making it a reliable solution to recover lost data on Mac.
com.apple.DiskManagement.disenter error 49153 FAQs
The "com.apple.DiskManagement.disenter error 49153" on Mac can be frustrating. Users often ask about the causes, symptoms, and solutions to this error.
1. What is error 49153 on Mac?
The "com.apple.DiskManagement.disenter" error, commonly seen on Macs, occurs during disk formatting or partitioning. It signifies a failure in the Disk Utility's operation, possibly due to conflicts or issues with the drive.
2. How can I compel my Mac to mount an unresponsive hard drive?
Ensure your external drive is connected to your Mac. Open Disk Utility, select your external drive from the left sidebar, and click the "Mount" button at the top of the window to initiate the mounting process.
3. How to resolve the issue of a Mac not mounting a hard drive?
If a Mac hard drive doesn't mount, check the physical connections and cables for any issues. Try connecting the drive to a different USB or Thunderbolt port. If the problem persists, use Disk Utility to repair the drive and check its health. If that's unsuccessful, consider data recovery options and seek professional help.
4. How do I remount my internal hard drive Mac?
To access the unmounted drive, open Disk Utility, select the drive on the left panel, and click the "Mount" button. If successful, the drive will reappear on your desktop and in Finder.
Related Articles
- Disk Cleanup Not Working Windows 10/8/7? Here Are the Free and Easy Fixes!
- Google Chrome Sync Keeps Pausing? Find Fixes Here
- (Solved!) How to Backup Gmail Emails with Attachments for Windows 11/10/8/7
- How to Factory Reset Nintendo Switch | Detailed Steps with Video
If you want to factory reset your Nintendo Switch, it's a relatively simple process that requires following a few steps. However, keep in mind that you'll need to set up the console again from scratch, which includes re-entering your Wi-Fi passwords, creating a new account, and other initial setup tasks. - [SOLVED] The Action Can't Be Completed Because the File Is Open in Another Program
Fix the action cannot be completed because the file is open error. Close apps, stop processes, restart Explorer, and delete or move files safely. - Backup Windows Registry with 3 Possible Ways
Do you know what Windows registry is and how to backup Windows registry? This article will describe the Windows registry and ways to back up the Windows registry. After reading this post, you will have an overview of the Windows registry.