There Was an Error Connecting to the Apple ID Server on MacBook [Fixed👍]
9 practical fixes for the "There was an error connecting to the Apple ID server" prompt on your screen, including checking your internet connection, restarting your device, and more. 1. Check your internet connection.
| Workable Solutions | Step-by-step Troubleshooting |
|---|---|
| Fix 1. Check Network Connection | Hit the Apple menu > System Settings. After that, click Network in the sidebar...Full steps |
| Fix 2. Check Apple Servers Status | Visit Apple's official website to confirm if your required services are out of the server yet...Full steps |
| Fix 3. Reset Network Settings | Select System Preferences > Network. Eliminate your Wi-Fi connection...Full steps |
| Fix 4. Change Time & Date Settings | Click System Preferences > Date & Time, and check Set date and time automatically...Full steps |
| Other Practical Fixes | Sign out and sign in with Apple ID, reset the Apple ID password, get a verification code, etc...Full steps |
The "There was an error connecting to the Apple ID server" error occurs when your device is unable to connect to Apple's servers, which can be caused by a weak internet connection, a problem with your Apple ID account, or an issue with your device's settings. To resolve this issue, try restarting your device, checking your internet connection, and ensuring that your Apple ID account is active and not suspended. If the problem persists, you may need to reset your network settings or contact Apple support for further assistance.
Why There Was an Error Connecting to the Apple ID Server
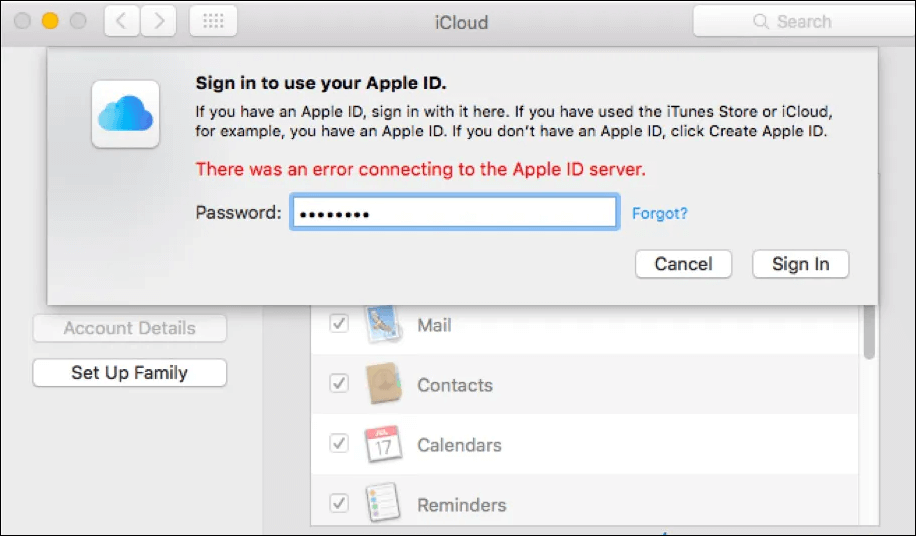
If your MacBook displays a "Verification breakdown" notification saying "There was an error connecting to the Apple ID server", it's likely due to a connection issue with iCloud services, which are required for iTunes, backups, or accessing the App Store.
Sometimes, the issue with your Apple ID may not be the cause of the error, and it could be related to date & time settings, Wi-Fi connection, a bug in the OS, or VPN interference instead.
Here are the common causes of this error in one paragraph:
- Unstable Wi-Fi connection
- Missed verification code
- Incorrect settings for Date & Time
- Imprecise Apple ID password
- Third-party app interference, such as anti-virus or VPN
- iTunes authentication token glitch
- System flaws
- Utilizing mobile data while retrieving an iCloud backup
Now that you've understood the potential causes of the "There was an error connecting to the Apple ID server" issue, it's time to explore the probable fixes to resolve this problem.
How Do I Fix the Error Connecting to Apple ID Server
If you're experiencing the "Error Connecting to Apple ID Server" pop-up notification while trying to log in to your App Store or iCloud, don't panic - it's a common issue that many MacBook users have faced. To resolve the issue, try one of the following nine tips: restart your MacBook, check your internet connection, update your MacBook's operating system, reset your Apple ID password, sign out and back in to your Apple ID, check for any pending updates, remove any recently installed apps, reset your App Store and iTunes Store settings, or contact Apple support for further assistance.
Fix 1. Check Network Connection
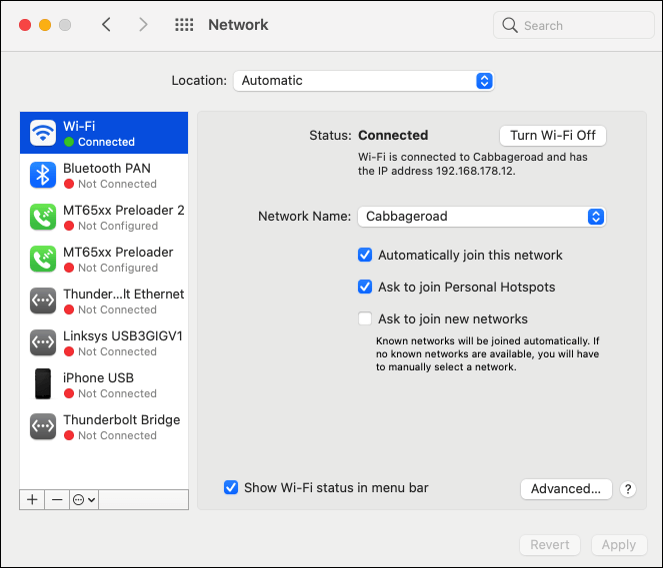
To troubleshoot the issue of being unable to log into the Apple ID server, it's likely due to a problem with the internet connection. Apple attempts to log you in using both Wi-Fi and cellular connections, so ensuring a strong internet connection is crucial. To verify the network status on a Mac, follow these steps:
Step 1. To access the Network settings on your Apple device, click the Apple menu and select System Settings (or System Preferences). From the sidebar, click on "Network".
Step 2. Your network connection status is displayed on the right side of the screen.
- 🟢Green: the network is connected;
- 🟡Yellow: the web isn't connected but is active.
- 🔴Red: the service is not operational.
Fix 2. Check Apple Servers Status
To fix the "There was an error connecting to the Apple ID server" issue, first, check the Apple server's status on Apple's official website to see if the required services are available. If you're trying to access the App Store and sign in with an Apple ID, look for the green indicator next to the Apple Store service, which means it's available.
Fix 3. Reset Network Settings on macOS
In case the above-To reset network settings on macOS, delete and re-add your Wi-Fi connection by following these steps:
Step 1. To access the Network settings on your Apple device, go to the Apple menu and select "System Preferences" followed by "Network".
Step 2. Eliminate your Wi-Fi connection by picking and then pressing "-".
Step 3. Go to your phone's settings, then tap on "Wi-Fi". Tap on the "+" icon, then select "Wi-Fi network" from the list.
Step 4. Hit the "Create" button, and then "Apply".
Fix 4. Change Time and Date Settings
If you're having trouble logging into Apple services like iTunes or iCloud, it's likely due to a mismatch between your device's time and date and the Apple servers' time and date. This can cause verification failures, so make sure to sync your device's time and date with the Apple servers to resolve the issue.
To resolve Apple ID errors on your MacBook, set the time and date to automatic by following these steps:
Step 1. To change the time on your Mac, go to the Apple menu and click on "System Preferences", then select the "Date & Time" option from the list.
Step 2. Check the box adjacent to "Set date and time automatically".

Fix 5. Sign out and Sign in with Apple ID
If you're experiencing issues linking with the Apple ID server, try signing out of your Apple ID and then signing back in. This can resolve any glitches. To do this, follow these steps: sign out of your Apple ID, wait for a few seconds, and then sign back in.
Step 1. To sign out of Apple ID, go to System Preferences and select Apple ID.
Step 2. The overview tab needs to be opened.
Step 3. Hit the "Sign Out" option.
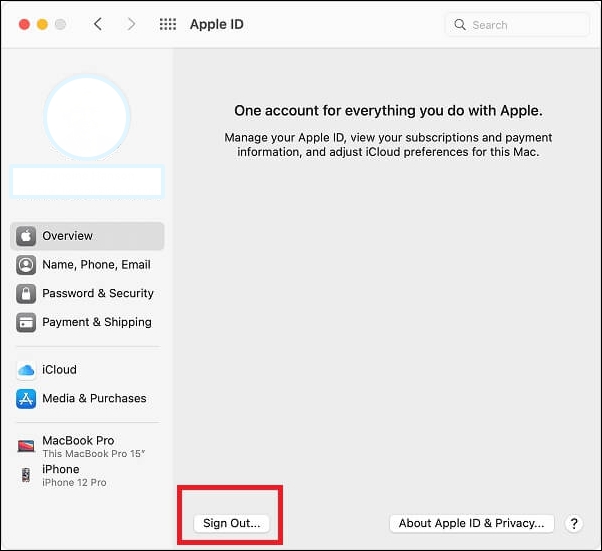
Step 4. In case there are any applications to save data, hit the "Keep a copy" button. This will ensure that any important information is preserved and can be accessed later if needed.
Step 5. Now, select the "Sign In" button right away.
If you're experiencing the error "There was an error connecting to the Apple ID server", try restarting your device, checking your internet connection, and ensuring you're using the correct Apple ID credentials. You can also try signing out and back in to your Apple ID, or resetting your password if you're unable to sign in.
Fix 6. Reset Apple ID Password
If the issue "There was an error connecting to the Apple ID server" persists, it's likely that you need to reset your Apple ID password. This can resolve the issue by forcing the system to start over. To reset your Apple ID password, you can follow these steps:
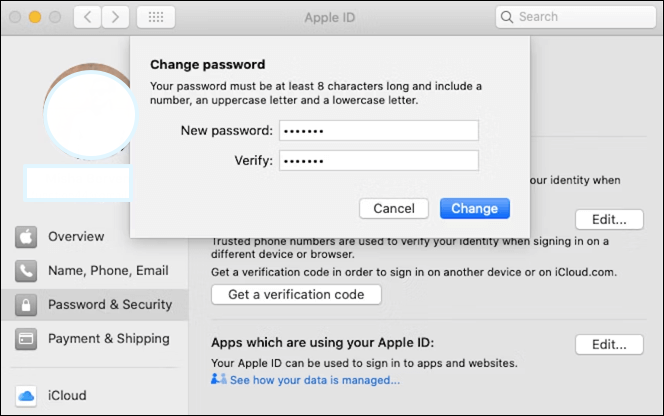
Step 1. You need to select "System Preferences > Apple ID".
Step 2. Head to "Password & Security".
Step 3. Opt for "Change password".
Step 4. Type the password of your MacBook.
Step 5. Double-enter the new Apple ID password and select "Change".
Fix 7. Get a Verification Code for Apple ID
To obtain a verification code for an Apple ID, you can try logging into iCloud on a non-Apple device, use the Apple ID account page to request a verification code, or contact Apple Support for assistance. If you're unable to receive a verification code, you may need to reset your Apple ID password and follow the setup process again. Alternatively, you can use the "Get verification code" option on the Apple ID account page, which will send a verification code to your trusted phone number.
Step 1. Go to "System Preferences > Apple ID".
Step 2. Opt for "Password & Security".
Step 3. Hit the option "Get a Verification Code".
Step 4. Copy and paste this code when logging into a different device or icloud.com.
Fix 8. Restart Mac
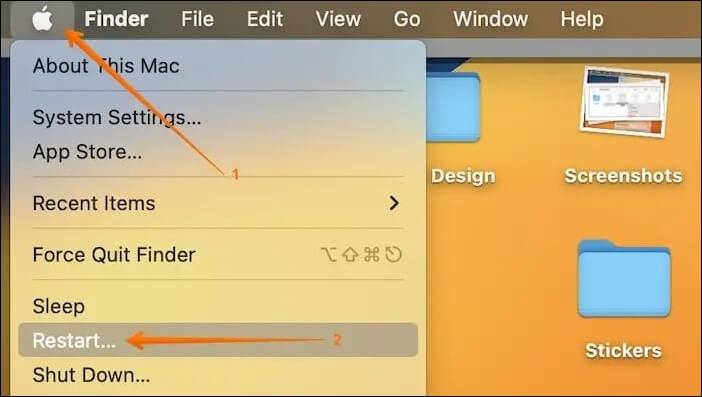
To resolve the "Error connecting to the Apple ID Server" issue on your MacBook Pro or Air, restarting your device might be a helpful solution. To restart your MacBook, follow these steps:
Step 1. Hit the Apple menu on the screen.
Step 2. Click on "Restart".
Step 3. To enable the computer to reopen windows when logging back in, you should tick the box adjacent to "Reopen Windows when logging back in" on your computer. This feature allows you to pick up where you left off, with all your open windows and applications restored to their previous state when you log back in.
Step 4. Hit the "Restart" button again to finish the restart.

If the "Restart" potion doesn't work, you can hard restart MacBook by pressing the "Command + Control + Power" keys.
Fix 9. Update Software on Mac
If none of the fixes work, you can try the most apparent yet drastic option by getting a new macOS, which can be initiated by verifying if there's any update available, and then following the steps to perform a software update on your Mac.
Step 1. Open "System Preferences > Software Update".
Step 2. Hit the "Download & Install".
To reinstall your macOS, start by checking for any available updates through System Preferences > Software Update and install them. Once updated, restart your Mac and ensure you're fully updated again.
Step 1. Restart your MacBook Air or Pro.
Step 2. Hold down the "Command + R" keys while booting your Mac to enter Recovery Mode, or start it in Recovery Mode if you prefer.
Step 3. Hit the "Reinstall macOS" button, then hit the "Continue" button.
Step 4. Go through the on-screen installation instructions.
Reinstalling macOS may not technically erase your data, but many users have reported unexplained data loss after doing so. If you experience this, don't panic - there are effective solutions available to recover your essential data.
If you've performed a factory reset on your Mac or reinstalled macOS, you may be worried about losing important files. Fortunately, there are ways to recover them.
This article shows you 3 effective ways to recover lost files after reinstalling macOS, providing a helpful guide for those who have accidentally deleted or lost important files during the process.
✨Bonus Tip: Recover Lost Files After Updating
If you've recently updated your macOS and lost valuable data, such as photos after updating to Sonoma, don't panic! Updating your operating system can sometimes lead to data loss, which is why it's essential to back up your files before updating. If you've already lost data and are unsure how to recover it, Deep Data Recovery is a reliable solution that can help you get your files back.
Mac users can use Deep Data Recovery to recover information from various Mac-based devices, including SD cards, USB drives, cameras, and internal hard drives, with a success rate of 79% in recovering lost documents and deleted files, even without Time Machine.
Deep Data Recovery for Mac offers a wide range of sophisticated features to support Mac data recovery, helping to recover lost data quickly in scenarios such as system crashes, unforeseen shutdowns, macOS updates, virus attacks, and hardware failures.
Note: To create a backup, click on "Disk Backup" on the left. This will allow you to recover data from a damaged disk or retrieve lost data if it's accidentally deleted, by restoring it from the backup image.
Step 1. Select the location
After updating to macOS Sonoma/Ventura/Monterey/Big Sur, if you've lost data, select the disk where the data was lost. Then, click "Search for lost files" to recover your lost data.

Step 2. Find lost data after the scan
Deep Data Recovery for Mac scans the selected disk volume, displays the scanning results, and allows users to find specific data using file type and file path.

Step 3. Recover data after macOS update
Select the target files that were unknowingly lost during or after the update and click the "Recover" button to recover them.

Conclusion
To eliminate the "There was an error connecting to the Apple ID server" error on your MacBook, try these 9 fixes in order: if one doesn't work, don't be disheartened, try another. While attempting these fixes, you may encounter data loss, but with the help of professional data recovery software like Qiling, you can recover every type of file without any hassles. So, download this tool now!
There Was an Error Connecting to the Apple ID Server FAQs
Consider these FAQs below to get information about this error:
1. Why is my MacBook saying there is an error connecting to the Apple ID Server?
Poor internet connection is one of the main reasons a MacBook may face errors while connecting to the Apple ID server. To resolve this, try switching to a stable Wi-Fi connection, especially if you're currently using mobile data.
2. Why does it say verification failed: "There was an error connecting to the Apple ID Server"?
A slow or unstable internet connection can prevent Apple ID authentication from being successful, even if you've entered the correct login credentials. This can occur when trying to link Apple devices and services, and a stable internet connection is required for this process.
3. Why can't I access my Apple ID?
You may need to correct your Apple ID or password on your MacBook if it's not logging in correctly, and trying to change your Apple account's password might resolve the issue.
4. What does server error mean on Apple?
Ensure your MacBook's date and time are correct while dealing with network- and server-related difficulties. This server error typically indicates a non-credible server.
Related Articles
- How to Free Download Candy Crush Saga on PC/Android
- [2023 Updated] Macbook Pro Is not Charging? Find Your Solutions Here
- Will System Recovery Delete My Files? Answered Here!
- 4 Ways to Open Microsoft Management Console [2023 Step-by-Step Guide]
- How to View and Clear Clipboard History to Windows
A clipboard is a Windows tool that temporarily holds texts, images, files, and other items before they are pasted somewhere else. It's particularly useful for moving files and copying texts from one location to another. - What If Error Message -- We Couldn't Find Any Drives Appears? [2023 Fixed]
When installing Windows on your computer, it may encounter an error that says “Windows cannot be installed to this disk. The selected disk is of the GPT partition style.