Disk Utility First Aid Process Has Failed [with 5 Proven Ways to Fix It]
The First Aid feature on Mac, found within Disk Utility, is a crucial tool that locates and repairs disk errors. It allows users to assess the errors and, if possible, fix them, ensuring the smooth operation of their Mac.
Several users have reported that the First Aid process has failed in Disk Utility.
You unplugged your hard drive without properly ejecting it, which caused the drive to not mount. Running "First Aid" under Disk Utility resulted in an error message "First Aid process has failed". This indicates a potential issue with the drive's file system or hardware. You may need to try other troubleshooting steps or seek further assistance from a professional to resolve the issue.
The "First Aid process has failed" issue in Disk Utility can be resolved through multiple solutions. This guide will explore ways to resolve this problem, providing a comprehensive approach to addressing the failed First Aid process.
| Workable Solutions | Step-by-step Troubleshooting |
|---|---|
| Fix 1. Relaunch First Aid | To fix the First Aid process problem, relaunch the app or run First Aid from Recovery Mode...Full steps |
| Fix 2. Restart Your Mac | Another simple solution to fix the First Aid process problem is restarting your Mac...Full steps |
| Fix 3. Check Compatibility | Choose the hard drive you want to see from the left side in the Disk Utility on Mac...Full steps |
| Fix 4. Run FSCK Command | Open Disk Utility. Choose the external hard drive you want to fix. Memorize the device name...Full steps |
| Fix 5. Use Terminal to Mount Disk | Choose Applications > Utilities, and open Terminal. Type the command and press Return...Full steps |
Why Disk Utility's First Aid Process Has Failed
Here are the possible reasons why the First Aid process has failed: knowing the specific reason is vital to apply the right solution. The reasons include the wound being too severe, the first aid treatment was not done correctly, the wound was contaminated, the first aid treatment was not done promptly, the wound was not properly cleaned and disinfected, and the wound was not bandaged properly. Knowing the specific reason is vital to apply the right solution.
- Corrupted firmware
- Out-of-date macOS
- Damaged hard drive
- Malware attack on the disk
- Bad sector or corrupted data on the disk
To quickly fix the First Aid failure on your Mac, first back up your disk using Time Machine to prevent potential data loss. This precautionary step is essential as data loss, although not guaranteed, is still a possibility. Once your data is safely backed up, you can proceed with the solutions to resolve the First Aid failure. These solutions will be discussed in the following steps. By taking this precaution, you can ensure that your important files and data remain protected.
Step 1. Go to the Apple menu.
Step 2. Choose "System Preferences/System Settings".
Step 3. To access the Time Machine feature, go to the left-hand side of the menu and select "General", then proceed to the Time Machine option on the right-hand side.
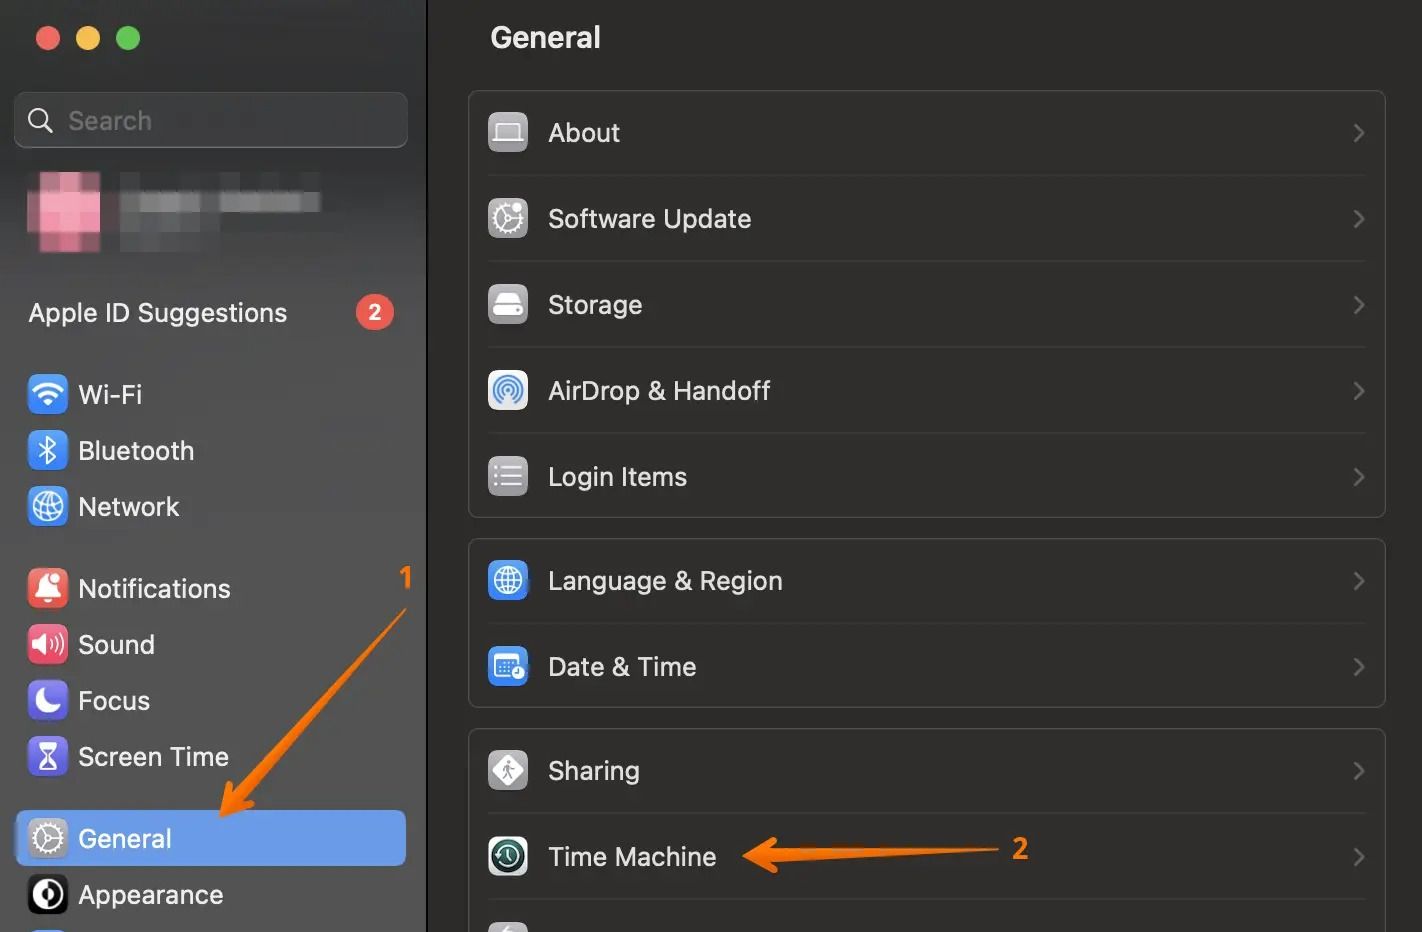
Step 4. Click on "Select Backup Disk".
Step 5. Choose the disk you want to back up.
Step 6. Click on the "Use Disk" button.
You can also use professional data recovery software like Deep Data Recovery to recover disks that First Aid can't repair, and even recover deleted Time Machine backups on your Mac.
The Qiling Mac recovery tool is an efficient and easy-to-use recovery tool that helps recover permanently deleted files on Mac from various situations, including malware attacks, hardware damage, formatting errors, and more.
How to Fix the First Aid Process Has Failed
If you're experiencing issues with the First Aid Process, don't worry, there are potential solutions to resolve the problem.
Fix 1. Relaunch First Aid to Fix the Error
The easiest solution to fix the First Aid process problem is relaunching the app or running First Aid from Recovery Mode. If this works, there's no need to go for other methods. Apple encourages users to run First Aid again before choosing any other solutions. If the rerun works, there is no need to go for other methods.
First Aid is a feature that automatically assesses errors, locates them, and repairs them. If First Aid doesn't work, you can try other alternatives such as reinstalling the app or seeking help from the developer.
Fix 2. Restart Your Mac to Fix First Aid Process Has Failed
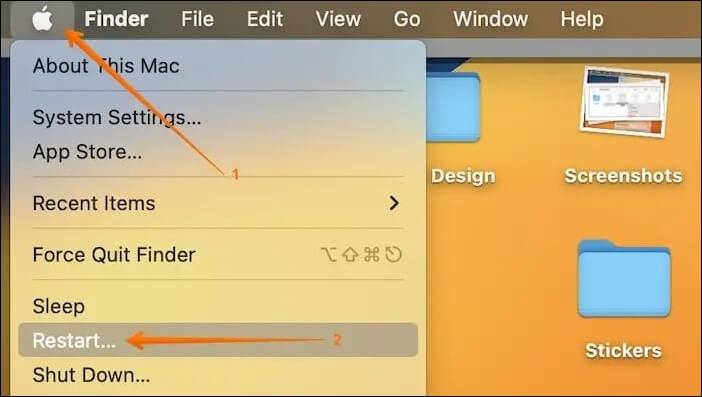
To fix the First Aid process problem on your Mac, you can simply restart or force restart your computer. This will refresh the operating system and eliminate any temporary glitches. To do this, click on the Apple icon, then select "Restart" from the drop-down menu. This is a quick and easy solution to get your Mac running smoothly again.
Fix 3. Check If the File System Is Compatible with macOS
The incompatibility of the file system with macOS is a cause of First Aid failure, which highlights the importance of understanding Apple's file systems, specifically the HFS+, APFS, and HFS file systems that are supported.
- ExFAT: It is a cross-platform system that works with both macOS and Windows.
- Mac OS Extended, also known as HFS+, is a file system type that is compatible with macOS High Sierra and previous OS versions.
- macOS 10.13 or later uses the Apple File System (APFS).
You must check if the drive is compatible with the First Aid run. Here is what you can do:
Step 1. Go to "Disk Utility".
Step 2. Choose the hard drive you want to see from the left side.
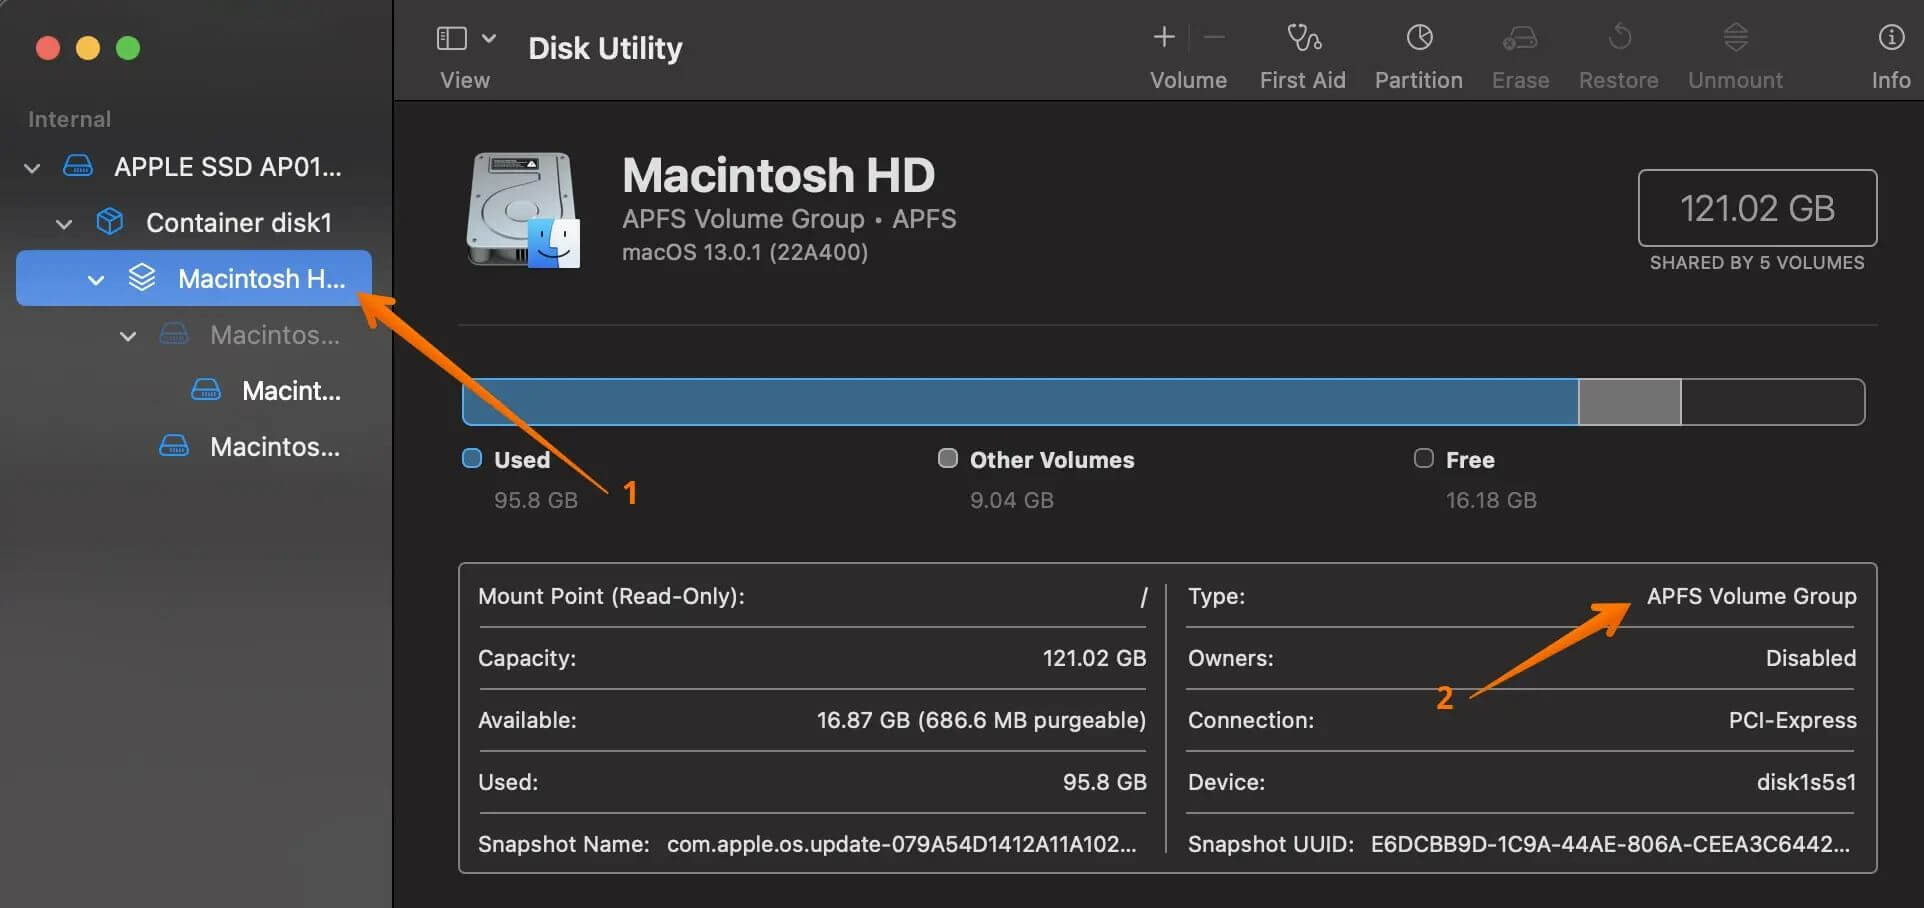
You will see a Type section on the right side, providing you with the information you need.
Fix 4. Run FSCK Command in Single User Mode
The File System Consistency Check (FSCK) is a crucial feature of Mac that thoroughly checks the file system and attempts to fix possible damages, and can also be run manually to repair non-boot and boot disk errors.
To run the FSCK command, you need to quit the operating system and enter Single User Mode. This allows you to run the command without any interference from the operating system. You can do this by rebooting your system and selecting the option to enter Single User Mode. Once in Single User Mode, you can run the FSCK command to check and repair any file system errors.
Step 1. Open the Disk Utility app, select the external hard drive you want to repair, and follow the on-screen instructions to run a First Aid scan and repair any issues.
Step 2. To troubleshoot the issue, first, memorize the device name and file system. Then, restart the system.
Step 3. To save a file on a Mac, press and hold the "Command + S" keys simultaneously. When the white text "Save As" appears on the screen, release the keys. Then, you can choose where to save the file and give it a name.
Step 4. To run a file system check on a Mac, type the command `/sbin/fsck_hfs -fy/dev/disk3s2` (replace "hfs" with the actual file system type, such as "hfs" for HFS, "hfsplus" for HFS+, or "apfs" for APFS, and replace "disk3s2" with the actual device name of the drive you want to check).
Step 5. Wait till the process completes, and run the reboot command.
If you're experiencing issues with the First Aid process failing, it's likely due to a corrupted or incomplete iOS update. To resolve this issue, try restarting your iPhone in recovery mode by connecting it to a computer and opening iTunes.
Fix 5. Use Terminal to Mount Disk
You can use Terminal to mount a disk on a Mac, which can be handy when you need to do it often or for multiple disks, using the command utility to speed up the task.
Take a look at the steps you need to follow:
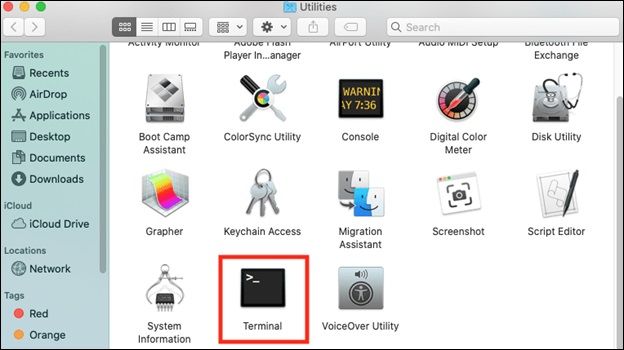
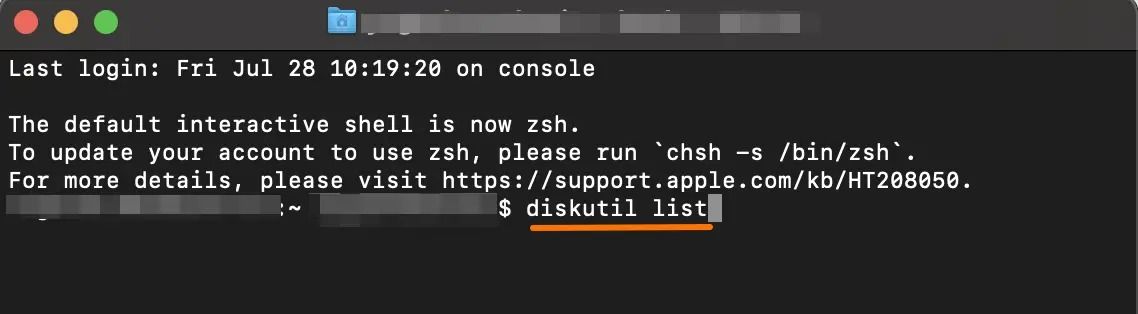
Step 1. Choose "Applications > Utilities", and open Terminal.
Step 2. Type diskutil list and press "Return" to show all devices on the system.
Step 3. Locate the identifier of the drive you want.
Step 4. To access the found hard drive, type "diskutil mount /dev/disk0" in the terminal, replacing "disk0" with the actual disk identifier. This command will mount the hard drive, making it accessible.
If First Aid in Disk Utility can't repair the issue, such as the error "First Aid found corruption that needs to be repaired", you may need to use a professional data recovery software like Deep Data Recovery to recover lost data and fix the corrupted disk on your Mac.
The software provides an easy solution to recover data in various challenging loss scenarios, making it accessible and user-friendly for both beginners and experts.
Conclusion
First Aid, a crucial feature of a Mac, helps locate and repair disk errors. It's easy to run and has been a lifesaver for many Mac users. However, some users have encountered issues with its failure, but fortunately, there are several solutions that can resolve the problem.
If you're experiencing issues with your Mac, you can try relaunching First Aid or restarting the system. Alternatively, you can run the FSCK command in Single User Mode to see if the problem is resolved. However, be aware that this may result in data loss. A more reliable option is to use a powerful data recovery software like Deep Data Recovery for Mac to recover your data.
First Aid Process Has Failed FAQs
To know more about how the First Aid process has failed, the First Aid process has failed because it was not followed, and the person was left to suffer for a long time. The person was left on the ground for a long time, and the first aid was not provided in time.
1. What if the First Aid process has failed on Mac?
If the First Aid process fails on a Mac, it's not a cause for concern. It's possible that the process just needs to be run again or that the system needs to be restarted. This is a common occurrence and doesn't necessarily indicate a deeper issue with the computer. Simply rerunning the First Aid process or restarting the system can often resolve the issue.
2. What does First Aid do on Mac?
First Aid checks the status of the disks, volumes, and external devices, identifies errors, repairs them, and notifies the user once the repair is complete.
3. How long does it take to run First Aid on Mac?
First Aid, a built-in tool on Macs, typically takes around five minutes to run, assuming there are no errors. However, if errors are present, the process can take longer to resolve them, and the time may also vary depending on the disk volume size and the amount of data it contains.
4. Why is command R not working on Mac?
The command R not working on Mac can be attributed to various reasons, including damaged USB ports, Bluetooth issues, or a broken keyboard, which may be caused by a damaged specific key.
Related Articles
- Reinstall macOS Not Working: 4 Tested Ways to Fix It
- How to Solve Windows Can't Convert MBR to GPT [2023 100% Working Solution]
- Create Windows 10 Bootable USB on Mac | Beginners' Guide
- How to Change the Read/Write Permission on a Flash Disk/Memory Card
- PDF Files Full Information | How to Open PDF Files
Learn what a PDF file is, why Portable Document Format is widely used, and how to open, view, print, and share PDF documents on different devices. - [PNG Files] What Is a PNG File? Everything You Should Know
PNG is a popular picture file format, perhaps a second format only to JPG nowadays. It is easier to work with than JPG and has a few advantages over that format. What you should know is as follows.