Create Windows 10 Bootable USB on Mac | Beginners' Guide
| Workable Solutions | Step-by-step Troubleshooting |
|---|---|
| 1. Create Windows 10 Bootable USB on Mac with Boot Camp | Go to Finder. Choose Applications. Select Utilities. Open Boot Camp Assistant. Click on Continue...Full steps |
| 2. Create Windows 10 Bootable USB on Mac with UUByte ISO Editor | Install UUByte ISO Editor on your Mac. Connect the USB drive to the system. The software will detect the...Full steps |
| 3. Create Bootable USB on Mac for Windows with Disk Utility | Plug the USB drive into the system. Open Disk Utility. Format the USB flash drive via MS-DOS (FAT)...Full steps |
| 4. Using Terminal to Create Windows 10 Bootable USB on Mac | Plug the USB drive into your Mac. Open Terminal. To do so, choose Terminal from Utilities folder. Type...Full steps |
Create Windows 10 Bootable USB on Mac Overview
To create a Windows 10 bootable USB on macOS Ventura, Monterey, or Big Sur, you can use the built-in Disk Utility and Terminal apps. First, download the Windows 10 ISO file and create a bootable USB drive on your Mac. Then, open Terminal and type the command "diskutil list" to see the list of available disks. Next, type "diskutil unmountDisk /dev/disk2" (replace disk2 with the name of your USB drive). Finally, type "dd if=~/Downloads/Windows10.iso of=/dev/rdisk2 bs=1m" (replace ~/Downloads/Windows10.
Creating a Windows 10 Bootable USB on a Windows computer is straightforward, but can you create one on a Mac without Bootcamp? Yes, it is possible! Additionally, you can also create a Mac bootable USB from a Windows computer.
The latest silicon chips on Macs no longer have Bootcamp installed, making it impossible to install Windows conventionally due to the new ARM chip architecture. However, Mac users can still find solutions to aid them, and it's actually quite easy to create a Windows 10 bootable USB on Mac using Terminal.
How to Download Windows 10 ISO File for Bootable USB
The best option to obtain the Windows 10 ISO file is to visit Microsoft's official website, where you can follow the steps to download it.
Step 1. Visit the Microsoft Windows 10 download page.
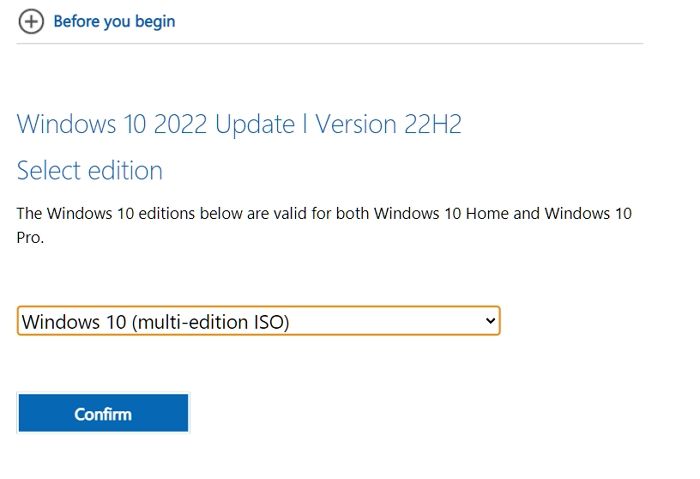
Step 2. To update Windows 10, click on the dropdown under Windows 10 version, and then click on confirm.
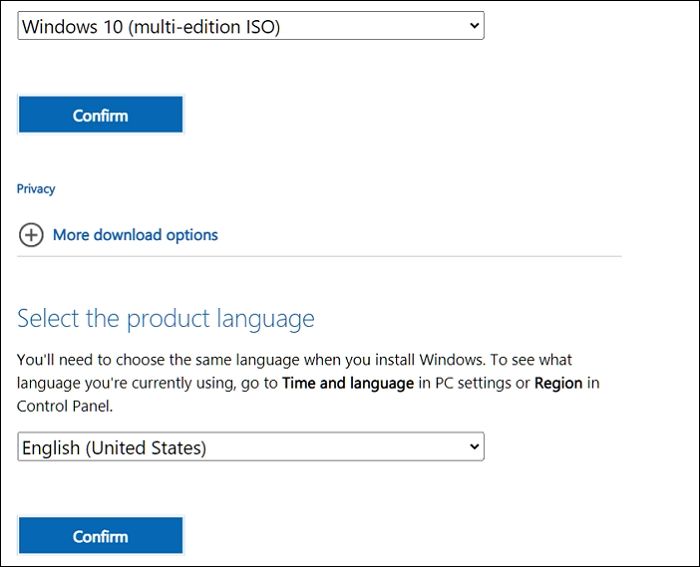
Step 3. Next, select the language and edition. Click Confirm.
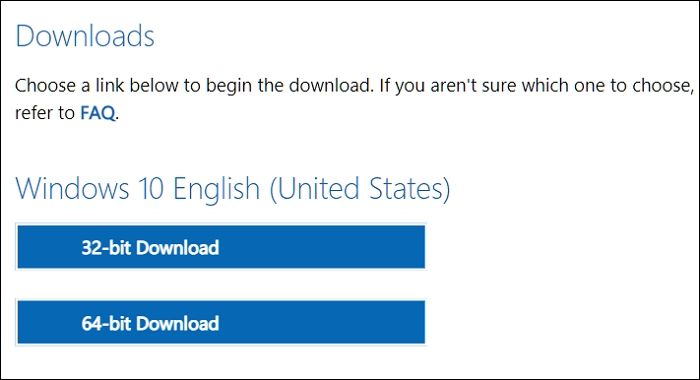
Step 4. You can download the Windows 10 ISO file from Microsoft's official website. After clicking on the download link, another page will open, giving you a download link. You can choose between Windows 10 32-bit ISO or 64-Bit ISO.
Step 5. Save the ISO file to your desired location, then wait for the download to finish.
How to Format a USB Correctly to Create Windows 10 Bootable USB
Before creating a Windows 10 Bootable USB on Mac, it's essential to format the USB, which will erase all existing data and make the space free for the download. This formatting should be compatible with the system you'll use it with, ensuring a smooth process.
Here are the steps to format a drive on a Mac in one paragraph:
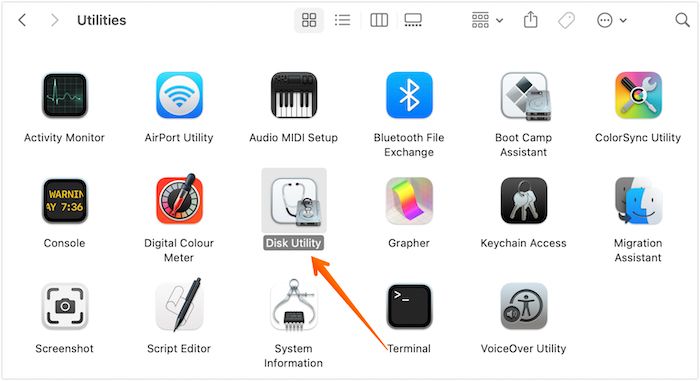
Step 1. To access Disk Utility, plug in a USB drive, open the Applications folder, and then the Utilities folder, where you will find the Disk Utility app.
Step 2. Select the USB drive from the list provided on the left-hand sidebar.
Step 3. Choose "Erase" and then type the name you want for the drive.
Step 4. Choose the Format you want. Select Erase.
Step 5. After some time, choose Done. This will allow the process to complete, and then you can proceed further.
Download Recovery Software to Avoid Data Loss [Important]
When using a Mac to create a bootable USB for Windows, there's a risk of losing data, especially if your Windows PC needs to recover data or if you format the USB drive. In such cases, it's a good idea to seek the help of professional data recovery software to ensure your data is safely recovered.
The Deep Data Recovery is a highly efficient and user-friendly data recovery tool for Mac that can recover lost data due to various causes, such as malware attacks, USB formatting, accidental deletion, etc., and also retrieve data from Mac-based devices like SSD, HDD, fusion drive, and more.
Deep Data Recovery
- Recover data from a formatted USB drive on Mac, including deleted files, documents, photos, audio, and music.
- The software supports data recovery on multiple devices, including USB drives, memory cards, internal hard drives, and digital cameras, allowing users to recover lost or deleted files from various storage mediums.
- If your Mac is unbootable, you can create bootable media using a recovery tool to recover your data.
Deep Data Recovery for Mac offers various exciting features, including file filters, data protection, and iCloud recovery. Additionally, users can seek remote IT support if they encounter any issues. To use the software, follow the simple steps listed for a hassle-free experience.
Step 1. Search for lost files
To search for lost files on macOS, select the disk location, which can be an internal HDD/SSD or a removable storage device, and click the "Search for lost files" button.
Note: Before attempting data recovery, it's recommended to create a backup of your Mac by clicking "Disk Backup" from the left sidebar, which will prevent further data loss. Once backed up, the software can recover data from the Mac backup, allowing your computer to write new data again.

Step 2. Go through the scanning results
Deep Data Recovery for Mac will immediately scan your selected disk volume and display the scanning results.

Step 3. Select the file(s) and recover
Select the desired file(s) from the scan results, then click the "Recover" button to restore them.

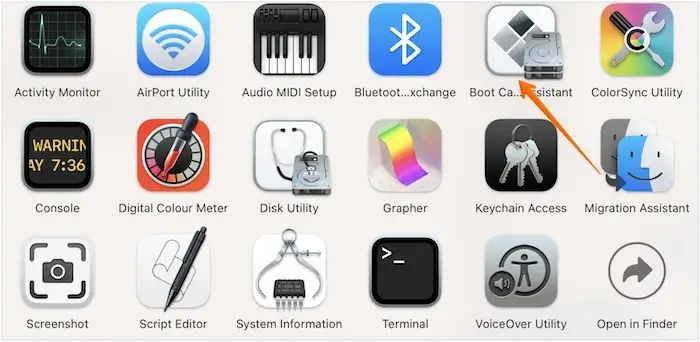
Method 1. Create Windows 10 Bootable USB on Mac with Boot Camp
To create a Windows 10 Bootable USB on Mac, one of the most straightforward solutions is to use Mac Boot Camp Assistant. This program requires an installed Windows ISO file and a USB drive, making it a convenient option for users.
Take a look at the steps you need to follow:
Step 1. Go to Finder.
Step 2. Choose Applications.
Step 3. Select Utilities.
Step 4. Open Boot Camp Assistant.
Step 5. Click on Continue.
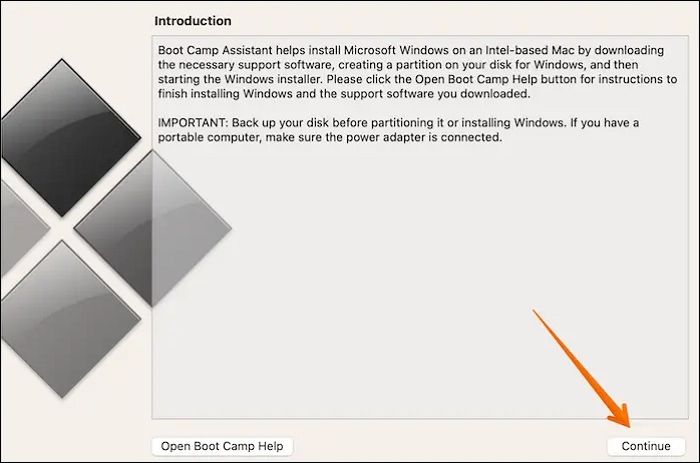
Step 6. Select the "Create a Windows 10 or later version installs disk" option and click on Continue. Then, select Choose.
Step 7. To import the ISO file, click on the "Import" button and select the ISO file from your computer. Then, click on "Continue" to proceed with the import process. The system will then wait for the import process to complete, during which you will see a progress bar indicating the status of the import. Once the import is complete, you can proceed with the next steps.
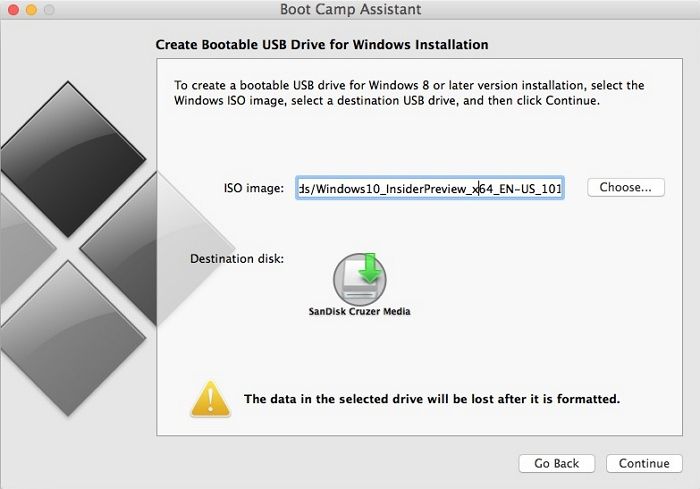
Step 8. Check if the bootable USB is named WININSTALL.
Step 9. If it appears so, you can remove the USB.
Note: If you're using a Mac with an M1 chip, there are alternative methods you can use.
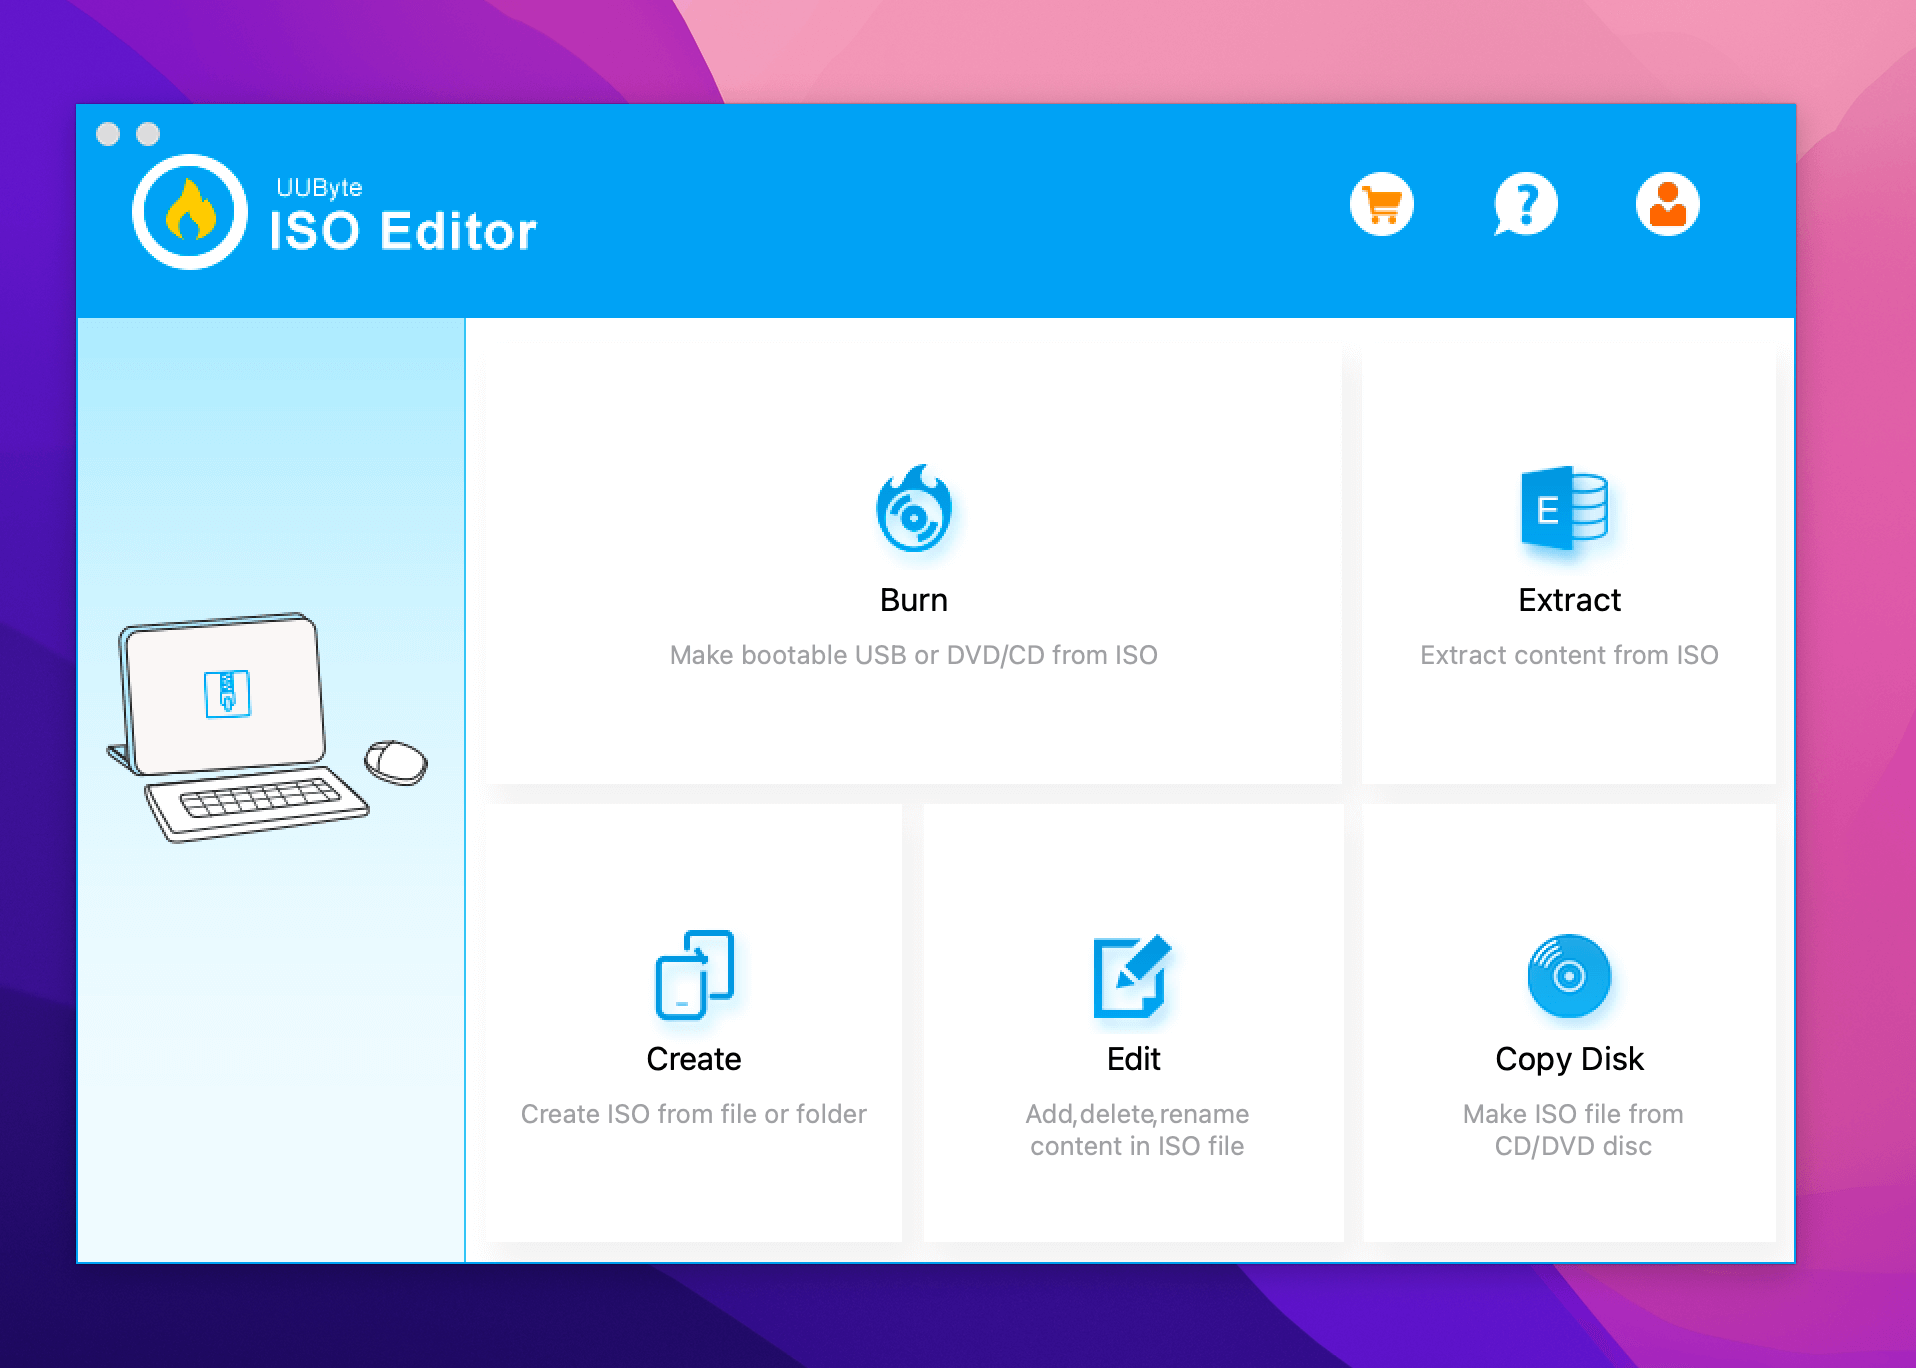
Method 2. Create Windows 10 Bootable USB on Mac with UU Byte ISO Editor
Another excellent method to create a Windows 10 Bootable USB on a Mac is using UUByte ISO Editor, a robust tool that makes the process easy and fully compatible with Apple M1 and M2 Mac, as well as the latest macOS Ventura. To do this, follow the steps provided.
Step 1. Download the UUByte ISO Editor app from this link and install it on your Mac.
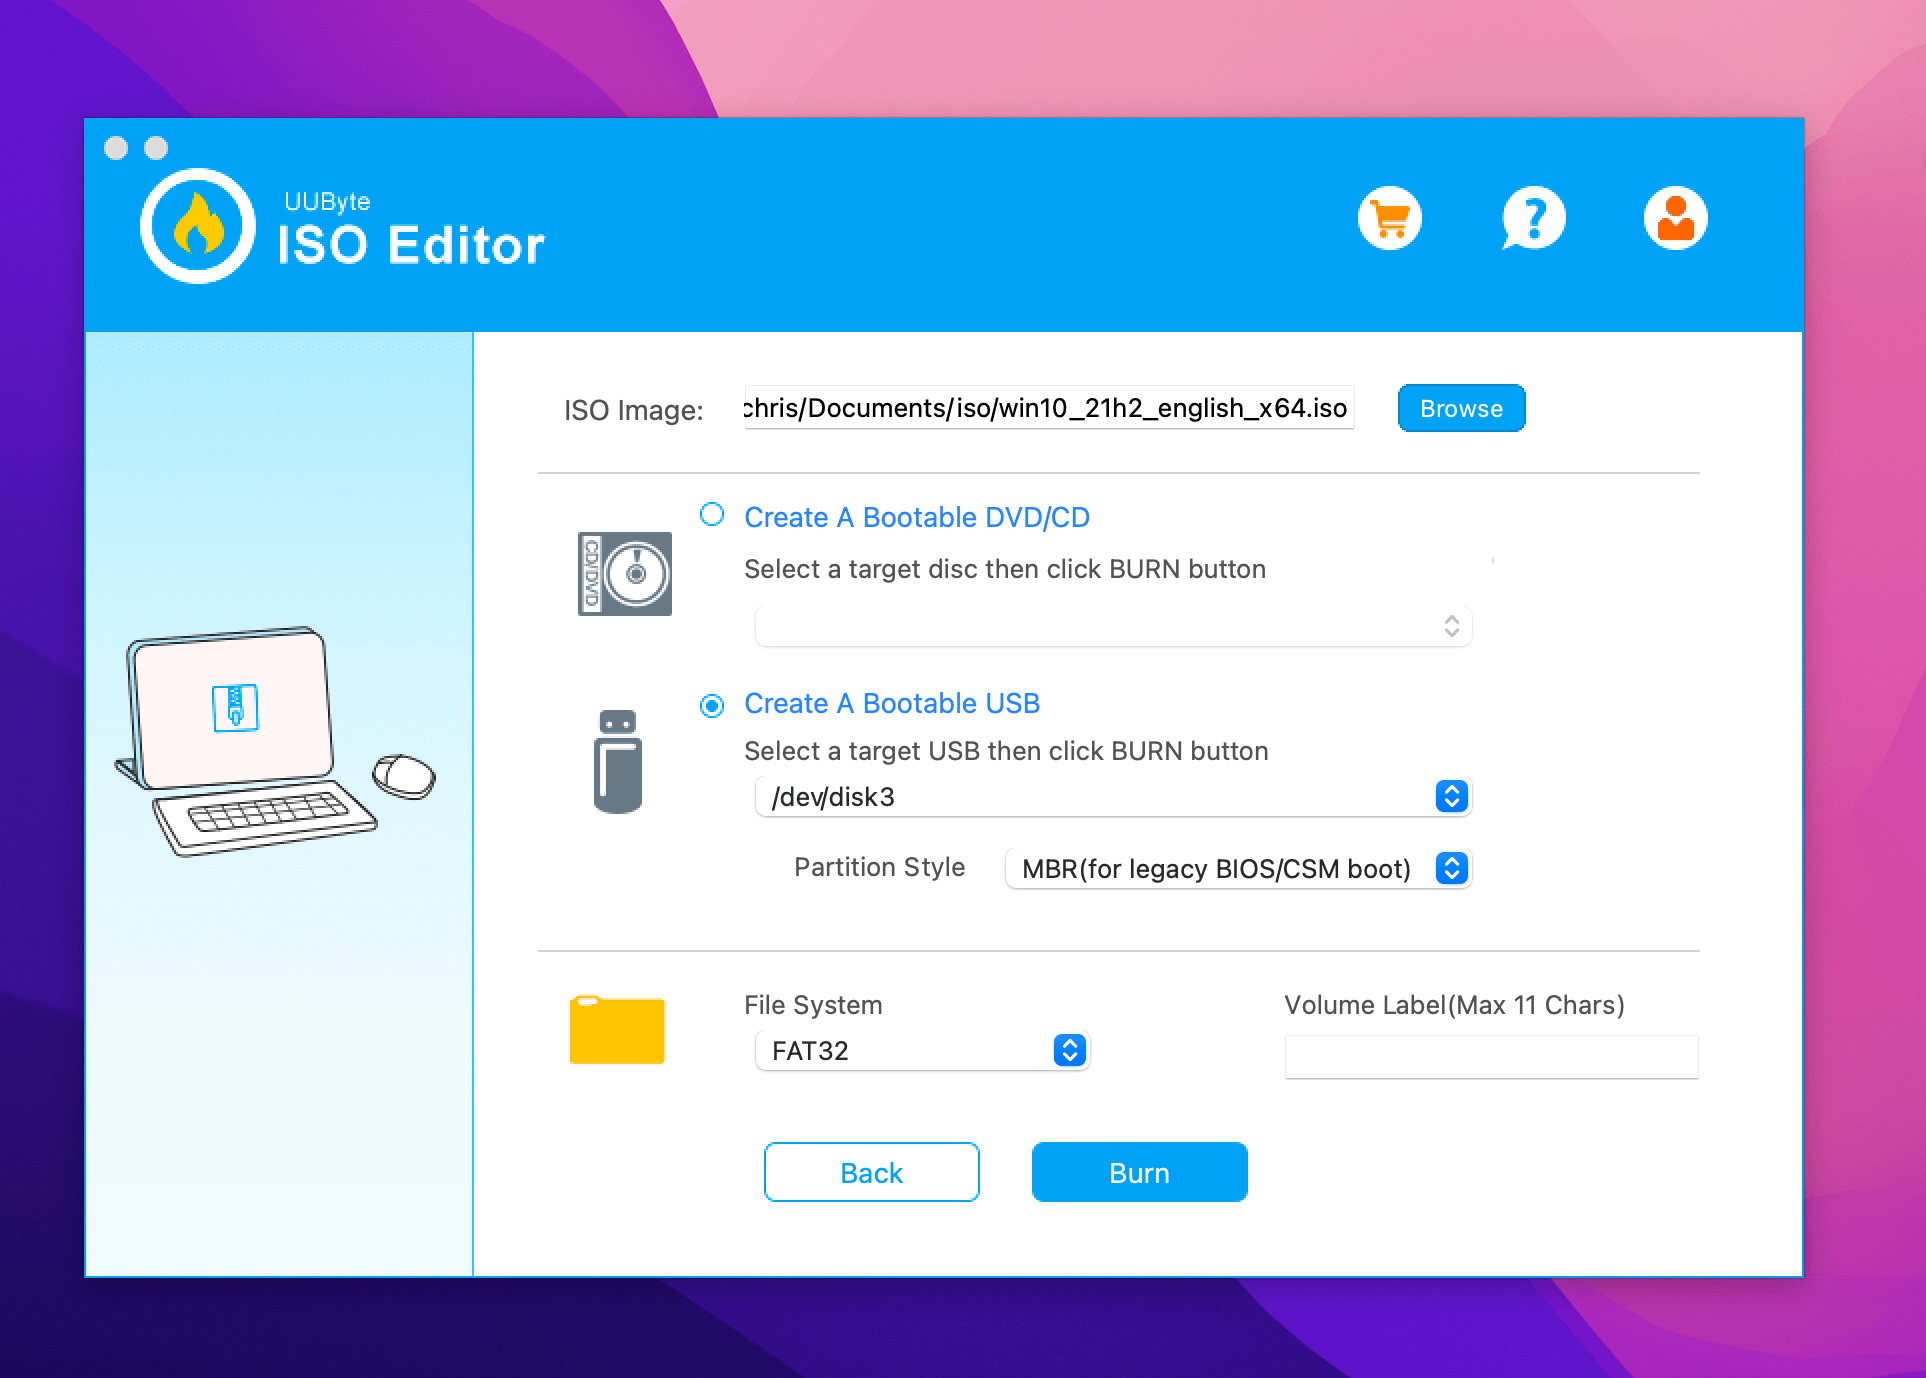
Step 2. Connect the USB drive to the system.
Step 3. The software detects the USB after clicking the Burn tab on the welcome screen.
Step 4. To install Windows 10, you need to import the ISO file into the app and select the correct USB drive. This will allow you to create a bootable USB drive that can be used to install Windows 10 on a computer. The process typically involves downloading the Windows 10 ISO file, importing it into the app, selecting the USB drive, and then creating the bootable drive.
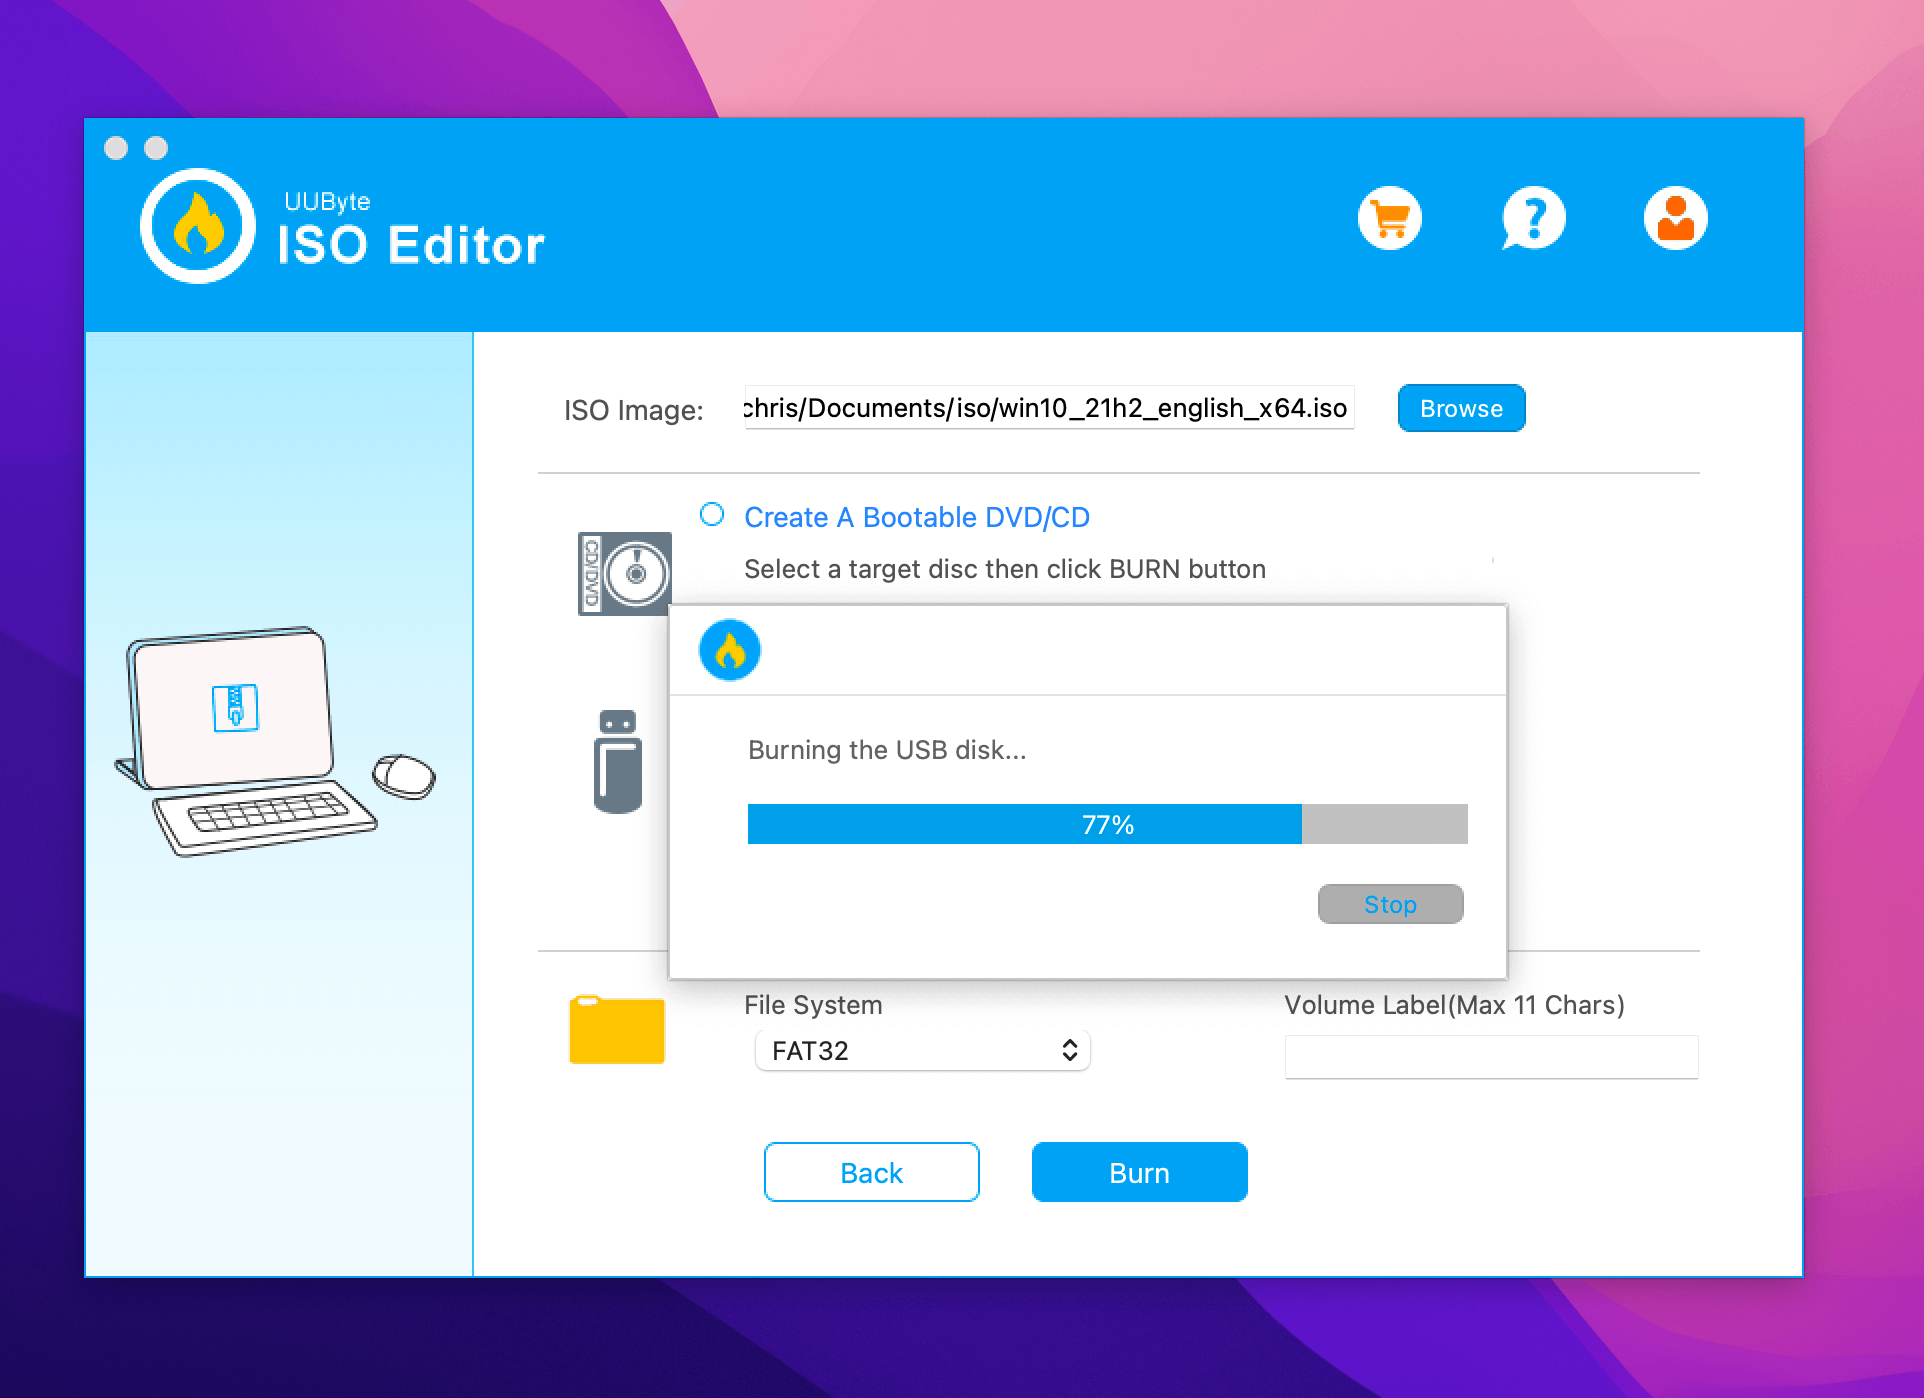
Step 5. Click the Burn button to start the process, then wait for approximately 7 minutes for the creation of a bootable USB on Mac, during which the ISO Editor will split the install.wim file automatically.
Note: Creating a Windows 10 bootable USB is a straightforward process, but it requires care, especially when handling the USB device. If you successfully create the bootable USB, be sure to share this post with others to help spread the word.
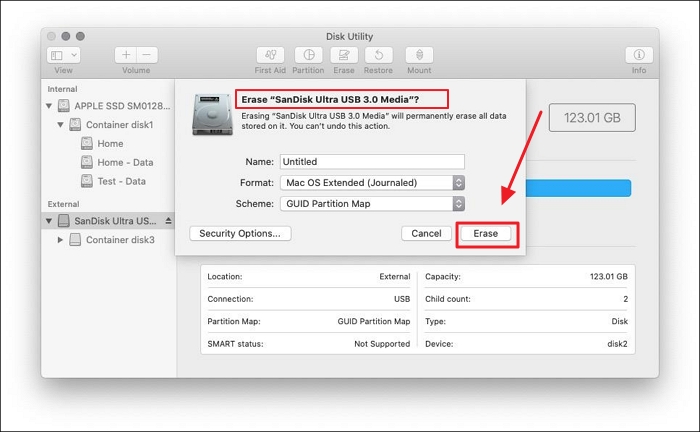
Method 3. Create Bootable USB on Mac for Windows with Disk Utility
To create a Bootable USB on a Mac for Windows, you can use Disk Utility. Simply open Disk Utility, select the USB drive from the sidebar, click the "Erase" tab, and choose the "MS-DOS (FAT)" format. Then, click "Erase" and wait for the process to complete.
Step 1. Plug the USB drive into the system.
Step 2. Open Disk Utility.
Step 3. Format the USB flash drive via MS-DOS (FAT).
Step 4. Send the Windows ISO file to the USB.
Step 5. Wait for the ISO file writing process to complete.
You can use a USB to install Windows on a Mac, but this method is more suitable for older Mac models. If you have the latest version, you may need to explore other solutions.
Method 4. Use Terminal to Create Windows 10 Bootable USB on Mac
Here is how to create a Windows 10 Bootable USB on a Mac using the Terminal:
Check out the written steps to follow:
Step 1. Plug the USB drive into your Mac.
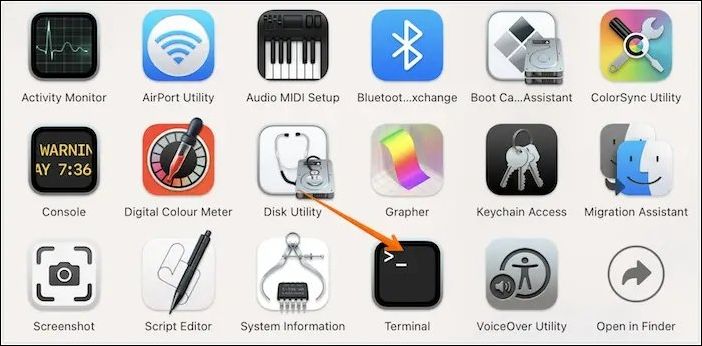
Step 2. Open Terminal. To do so, choose Terminal from Utilities folder.
Step 3. To find the name of the USB drive, type `diskutil list` and press the Enter key. This will display a list of disks on the system, including the USB drive, which you can then use to identify and select the correct drive to erase.

Step 4. The command `diskutil eraseDisk MS-DOS "WINDOWS10" GPT` will format the specified drive (identified by its name) using the MS-DOS file system and the GPT partition scheme, creating a volume labeled "WINDOWS10".
Step 5. Download the Windows 10 ISO file.
Step 6. Type `hdiutil mount ~/Downloads/WINDOWS10IMAGE.iso` and replace `WINDOWS10IMAGE.iso` with the actual name of your Windows 10 ISO file.
Step 7. Type `cp -rp /Volumes/MOUNTED-ISO/* /Volumes/WINDOWS10/` in the terminal, replacing `MOUNTED` with the name of the mounted ISO. This will copy all files from the mounted ISO to the Windows10 directory. The `-rp` flag is used to preserve permissions and recursively copy all files and directories.
Step 8. To create a bootable USB, first, open the Terminal app on your Mac. Then, type hdiutil convert -format UDRW -o MOUNTED-ISO /path/to/your/ISO.image to convert the ISO file to a format that can be used on a USB drive.
To create a macOS Sonoma bootable USB on a Mac, you can use the built-in Disk Utility app. First, download the macOS Sonoma installer from the App Store, then open Disk Utility and select the USB drive as the destination.
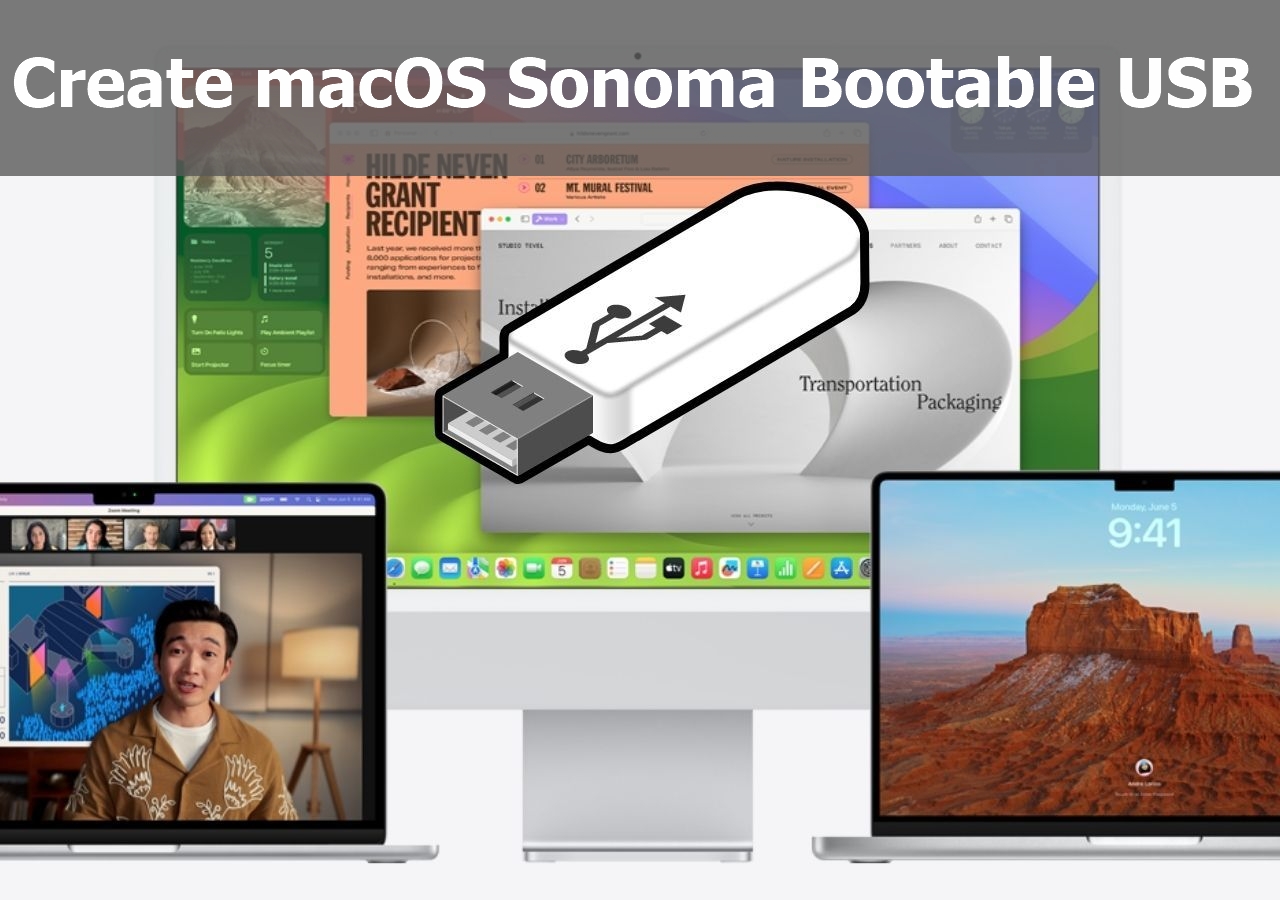
Create macOS Sonoma Bootable USB Installer
If you have macOS Sonoma installed, it's a good idea to create a bootable USB drive in case of any issues with the operating system, allowing you to boot from the USB drive and potentially troubleshoot or reinstall the OS.
Summary
Creating a Windows 10 Bootable USB on a Mac can be a straightforward process. This article outlines four methods to achieve this, making it easy to follow the hassle-free steps and get the job done.
If you're creating a Windows 10 Bootable USB on a Mac, be aware that data loss is always a possibility. In such a case, you can rely on data recovery software like Deep Data Recovery for Mac to help you recover lost data. This practical and easy-to-use tool can aid in recovering your lost data.
Haven't you installed Deep Data Recovery for Mac yet? Download it today!
Create Windows 10 Bootable USB on Mac FAQs
You can create a Windows 10 Bootable USB on a Mac in several ways. For more information, you can refer to the questions and answers listed below.
1. How to create macOS Ventura bootable USB on Mac?
To create a macOS Ventura bootable USB on a Mac, connect your USB drive, go to System Settings, select Software Update, click on "Create a bootable installer," choose your USB drive as the destination, and click "Create." Wait approximately 30 minutes for the process to complete, then use the USB drive to boot up your Mac and install macOS Ventura.
- 1. Go to the Apple Store and download macOS Ventura.
- 2. Run Terminal on the system.
- 3. Connect the USB to the Mac.
- 4. To run the command, type the following in the Terminal: `sudo /Applications/Install\ macOS\ Ventura.app/Contents/Resources/createinstallmedia --volume /Volumes/MyVolume`
- 5. Hit the Return key.
- 6. Enter the password when prompted.
2. How to rescue data from an unbootable Windows computer?
If your Windows computer won't boot, don't worry - there are still ways to rescue your data. You can try unplugging cables and resetting the connection, or use the BIOS feature or eject RAM to see if that resolves the issue. If all else fails, you can use professional data recovery software, such as Deep Data Recovery for Mac.
3. Can I create Windows 10 bootable USB on a Mac with Terminal?
You can create a Windows 10 bootable USB on a Mac using Terminal, but it requires some specific commands. You'll need to use diskutil and hdiutil to mount and unmount the USB, and also copy the Windows 10 ISO to the USB. This process involves a series of Terminal commands, including mount and unmount, to prepare the USB for the Windows 10 installation.
- 1. Download the ISO file from Windows.
- 2. Plug the USB drive into your system.
- 3. To identify the USB drive, enter the command "diskutil list" in the Terminal. This will display a list of all connected storage devices, including the USB drive, along with their unique identifiers.
- 4. Enter "diskutil eraseDisk MS-DOS "WINDOWS10" GPT@"
- 5. Now, enter "hdiutil mount ~/Downloads/WINDOWS10IMAGE.iso"
- 6. After that, type "cp -rp /Volumes/MOUNTED-ISO/* /Volumes/WINDOWS10/"
- 7. At last, enter "hdiutil unmount /Volumes/MOUNTED-ISO".
4. How to install macOS Ventura on a Windows PC?
To install macOS Ventura on a Windows PC, you'll need to create a bootable USB drive with the macOS installer and use a virtualization software like VMware or VirtualBox to run the installer. First, download the macOS Ventura installer from the App Store on a Mac, then use a tool like TransMac or PowerISO to extract the installer to a USB drive.
- 1. Create a Bootable USB installer for macOS Ventura.
- 2. Go ahead with the EFI partitions configuration.
- 3. Adjust BIOS settings.
- 4. Install macOS Ventura on the system.
Related Articles
- How to Perform Windows 10 Factory Reset from Boot [Step-by-step with Pictures]
- How to Fix a Disappearing Dock in macOS Ventura/Monterey/Big Sur
- My Computer Turns on but the Screen Is Black Windows 10, How to Fix
- Sorry, No Manipulations with Clipboard Allowed on Mac [with 5 Proven Fixes]
- Overall Solutions: How to Ungroup the Taskbar In Windows 11
Wondering how to ungroup a taskbar? Find out everything about Windows 11 Ungroup Taskbar here! - Windows 11 Update Slows Down SSD Performance? Newest Guide
Windows 11 update slows down SSD performance. Is that true? How to fix it? If you are considering updating to Windows 11 or have updated to Windows 11, don't miss this article.