Full Guide of Boot Camp on Mac & How to Use It
To install Windows on your Mac using Boot Camp, you'll need to create a partition on your Mac's hard drive to hold the Windows operating system. This will allow you to dual-boot between macOS and Windows. You'll also need a valid Windows installation media, such as a USB drive or ISO file.
Boot Camp is a free utility built into macOS that makes this process straightforward. This article will guide you through each step, from preparation to installation, so you can have Windows running on your Mac in no time.
What Is Boot Camp on Mac
Boot Camp is a free utility that allows Mac users to install Windows on their computer without deleting the macOS system, enabling them to switch between the two operating systems.
Boot Camp now supports multiple Windows operating systems, including Windows XP, Vista, 7, 8, and higher, allowing for installation on Intel Macs.
On Apple silicon Macs, Boot Camp Assistant is not available, so users with an M1 Mac will need to use Parallels or another virtual machine.
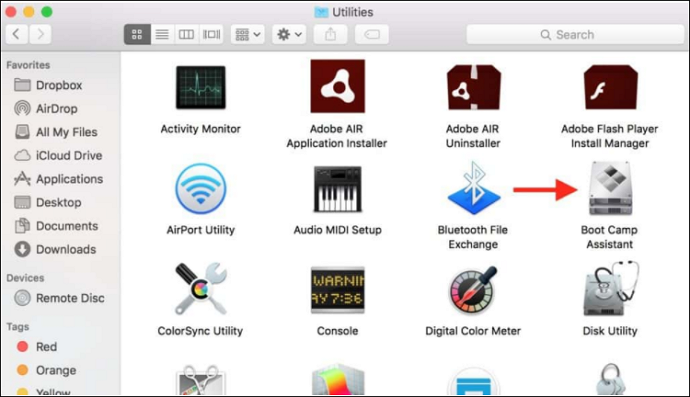
You can find Boot Camp Assistant in Applications > Utilities or Launchpad on your Mac.
What Are the Pros and Cons of Boot Camp on Mac
Boot Camp is a free system-switching tool that offers both advantages and disadvantages. Understanding these pros and cons can help you make informed decisions about whether it is the right choice for your needs.
Pros
- The software is free and safe to use, and it is built into the Mac.
- This computer offers more stable performance for playing games and using resource-intensive applications, making it suitable for gaming and other demanding tasks.
- Anti-cheat software is often necessary for playing certain games on Mac, such as Hogwarts Legacy, which may not be compatible with the platform otherwise.
Cons
- Boot Camp does not allow you to run Windows and macOS simultaneously. Instead, it creates a separate partition for the second operating system, requiring a reboot to switch between them.
- No interoperability and no access to macOS files on Windows.
- A second partition will take up a lot of space on the hard drive.
- After adding more storage to a Mac and completing a Windows installation using Boot Camp, it's not possible to go back and change the partition size.
How to Install Windows on Mac with Boot Camp
Now that you understand what Boot Camp is and its advantages and disadvantages, it's time to learn how to use this tool. The first step is to prepare your Mac for Windows installation by backing up your data, checking your Mac's compatibility, and ensuring you have enough free space on your hard drive.
Guide 1. Preparations Before Installing Windows via Boot Camp
1. To use Boot Camp, you need to have an Intel-based Mac with an up-to-date version of macOS.
2. To get the best experience, your computer should have at least 60GB of storage space, but ideally 128GB or more. This will ensure that you have enough space to store your operating system, programs, and data without running out of room. 128GB is the sweet spot, providing a comfortable buffer for future software updates and file growth.
3. This process might take a while, so make sure your computer's power level stays above 60% to avoid any issues.
4. Boot Camp is preinstalled on macOS, but if you don't have it, please download the Boot Camp support software.
5. The first installation of the software requires a full version of Windows, not an upgrade, which means you'll need to have a valid Windows license to proceed.
Guide 2. Install Windows on Mac via Boot Camp
Step 1. Download Windows 10 ISO file
- Go to Microsoft Windows 10 ISO download page.
- Select Windows 10 version.
- Confirm language and 64-bit download and save.

Step 2. Create a Windows partition via Boot Camp Assistant
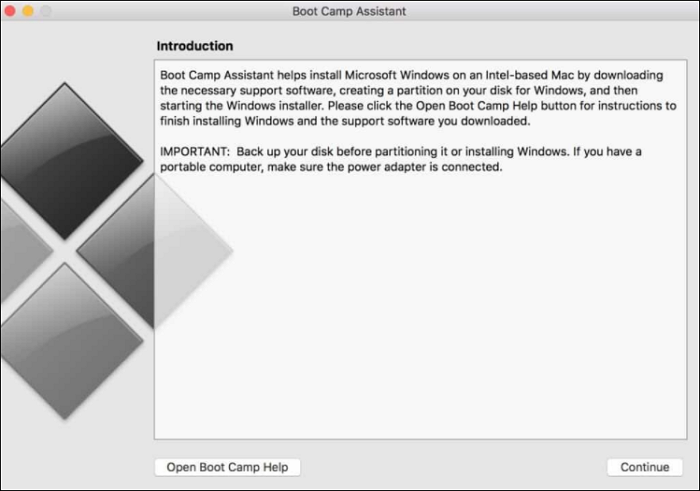
- Plug in the USB and open Boot Camp Assistant.
- Select the ISO image archive for Windows 10.
- Drag the slider to set the size of the Windows partition. Boot Camp Assistant will recommend a minimum size, but you can allocate more space based on your needs.
Step 3. Format the Windows Boot Camp partition
- After the Boot Camp Assistant completes, reboot the Windows installer.
- Select the Boot Camp partition and click Format.
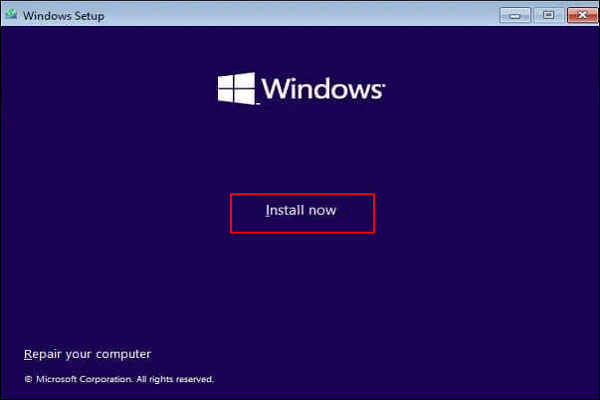
Step 4. Install Windows
Click Next and follow the on-screen instructions for Windows installation.
Step 5. Use the Boot Camp installer on Windows
- To open the "Welcome to the Boot Camp Installer" window in Windows, follow these steps:
- Follow the on-screen instructions to install Boot Camp and Windows support software (drivers). This will ensure your Mac hardware such as keyboard, trackpad, and graphics work properly in Windows.
Once the installation is complete, you can switch between macOS and Windows by pressing and holding the Option (or Alt) key during startup.
Further Reading: How to Install Windows on Mac without Boot Camp
Conclusion
Boot Camp is a free and useful tool for Mac users, offering a straightforward way to install Windows on their device. It has its advantages and disadvantages, making it a practical choice for those who need to run Windows on their Mac.
This article provides a step-by-step guide to installing Windows on a Mac using Boot Camp, covering preparation, downloading, and installation in simple and easy-to-follow steps. Its aim is to assist users in understanding and utilizing Boot Camp on their Mac.
Related Articles
- Discord Hardware Acceleration: Everything You Need to Know
- Crucial BX500 VS MX500: What's Their Difference [2023 New]
- What Is NTFS? A Great Substitute For FAT
- How to Access Startup Security Utility Mac? [Latest Tips]
- Hogwarts Legacy Cloud Save on Steam/Xbox/PS5
Learn how Hogwarts Legacy cloud saves work on Steam, Xbox, and PS5, including how to access, sync, download, and protect saves. - [How to Fix] Hogwarts Legacy Save File Gone
Under the spotlight, Hogwarts Legacy, which Harry Potter fans have been waiting for for a long time, was finally released. But many players have encountered the problem of the Hogwarts Legacy save file gone. This article will guide you how to fix this problem and teach you the best save file backup method to prevent similar data risks.