How to fix the error DNS PROBE FINISHED NO INTERNET? [A Complete Guide]
The DNS Probe Finished No Internet Error is a network issue caused by DNS (Domain Name System) mistakes, often due to cache, cookies, or issues with the DNS server itself. Various fixes can resolve this problem, but let's know what specific reason is causing the issue to provide a tailored solution.

DNS (Domain Name System) is like a mapping system that helps connect users to websites. It converts human-readable domain names (e.g. google.com) into IP addresses, allowing users to access the requested site.
The error occurs quickly if you are trying to access a site online because the device uses DNS to match the requested site on the server and process your request, and if there is an error at the DNS level, the system shows DNS_PROBE_FINISHED_NO_INTERNET.
When It Happens in a Browser
The issue is often related to the browser, specifically Google Chrome, where users, including myself, experience frequent errors while other browsers work fine for the same URL. If this issue persists on different search engines, it might be caused by cache issues in Chrome.
Clearing cache, cookies, and browsing data may resolve the DNS-PROBE_FINISHED_NO_INTERNET error.
Here are the steps to clear all browsing data and cache on different browsers in one paragraph:
1. Google Chrome
Step 1. Open Google Chrome on your device.
Step 2. To access the menu, click on the three dots in the top-right corner of the screen.
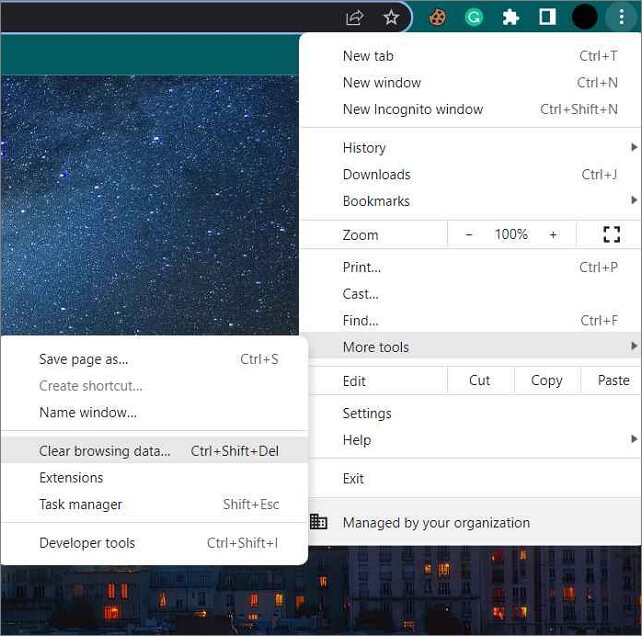
Step 3. The "Clear Browsing data" options can be accessed by moving your cursor onto "More tools" in the Dialog box.
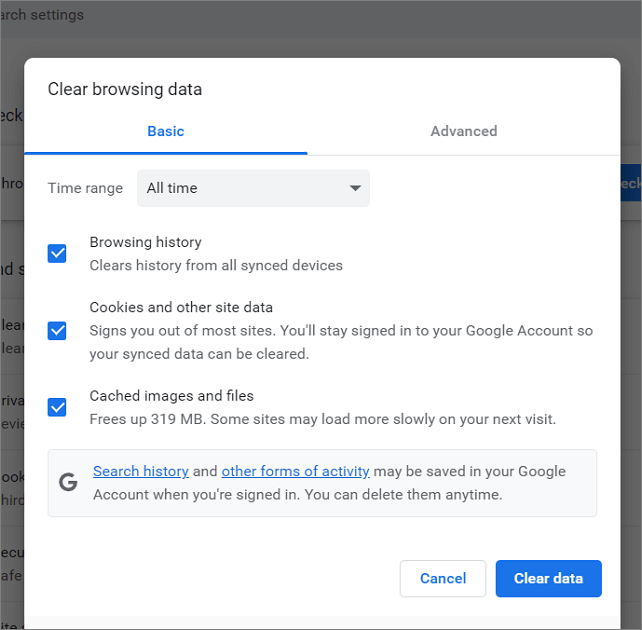
Step 4. To clear browsing data, click on the three dots on the top right corner of the browser, then click on "More tools" and select "Clear browsing data." In the time range, select how far back you want to clear the data. You can choose from options like "the past hour," "the past 24 hours," "the past 7 days," and so on.
You can choose and customize the type of data you want to keep while clearing your browsing data.
2. Microsoft Edge
Step 1. To open the browser and click on the three dots in the top-right corner of the screen, locate the browser on your device, click on the browser icon to open it, and look for the three dots or lines in the top-right corner of the screen. Click on the three dots or lines to open the menu or settings panel, where you can find various options such as bookmarks, history, settings, and more.
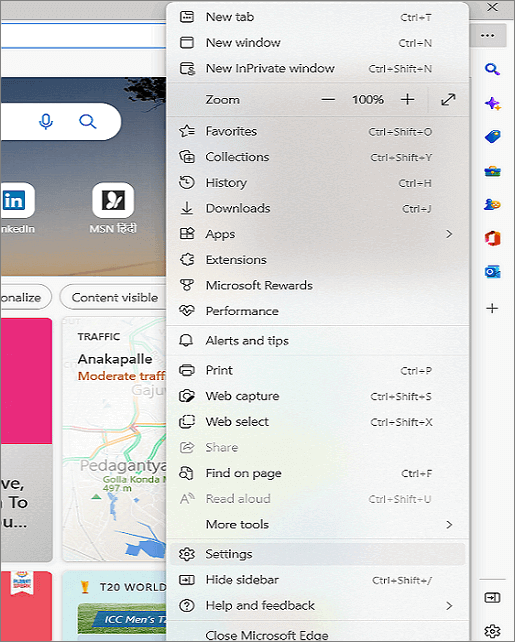
Step 2. Navigate to the Settings.
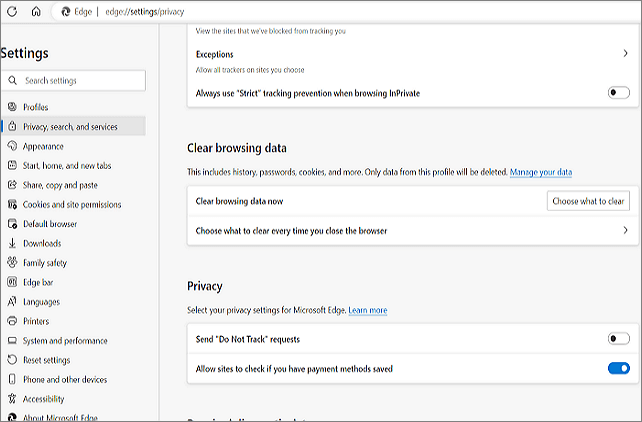
Step 3. Click on "Privacy, Search, and Services".
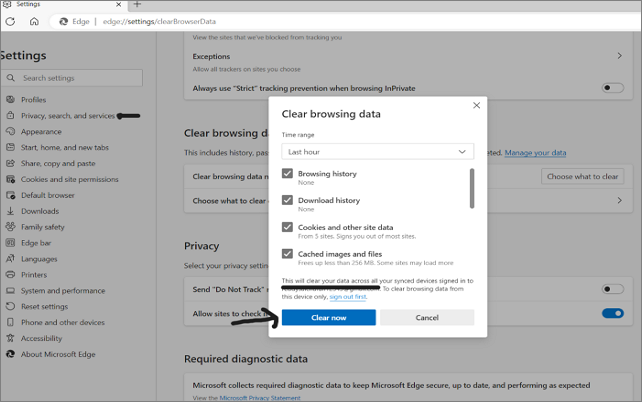
Step 4. To clear browsing data, scroll down and click on "Choose what to clear," select a time range, and then click on "Clear browsing data."
When It Happens on Your Device
If clearing browser data and cache doesn't resolve the issue, potential causes may include network adapter, Wi-Fi, or DNS-related problems. Solutions could involve checking and restarting network adapters, resetting Wi-Fi, or modifying DNS settings.
- 1. Router/Modem Problems
- 2. Release and Renew the current IP Address
- 3. Clear the DNS cache
- 4. Network Adapter or Winsock Reset
- 5. Update the Network Driver
- 6. Change your Device's DNS Server
1. Router/Modem Problems
If all devices connected to a single router are experiencing errors, but browsing works fine with mobile data, it's likely a router issue.
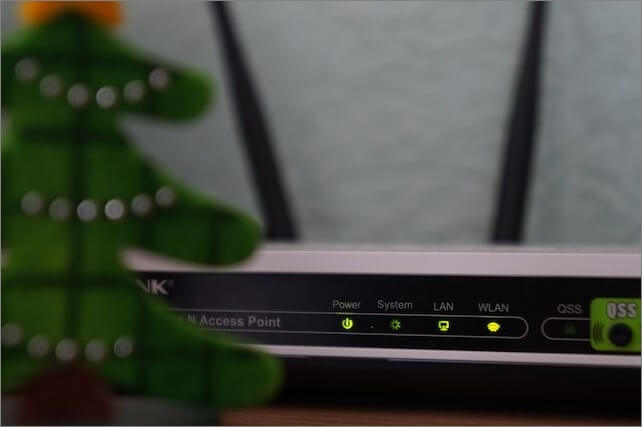
The first step to resolve the issue is to perform a power flush. This involves disconnecting the power to the router or modem, waiting for a short period, and then reconnecting. After this, check if the error persists.
Try restarting the Wi-The problem lies in the router, as it's not allowing you to connect to the internet. To troubleshoot, right-click on the Wi-Fi icon in the taskbar, and check your network. If it's not working, try using another router and see if it connects fine.
2. Release and Renew the current IP Address
Computers use unique IP addresses to connect securely with other servers on the Internet, and the DHCP server assigns these addresses by leasing and monitoring them on computers. Once the lease period expires, the IP addresses are withdrawn, ensuring secure and unique data transfer.
When the withdrawal or assignment of a domain name does not automatically renew, it may lead to internet connectivity issues, such as inability to access certain websites or online services. This can occur when the domain name is not properly renewed or is deleted, causing a disruption in the connection between the user's device and the internet.
Here are the steps to release and renew the current IP address in one paragraph:
Step 1. To run the Command Prompt as an administrator, first, search for "Command Prompt" on your computer. Once you've found it, right-click on the result and select "Run as administrator" from the context menu. This will open a new Command Prompt window with administrator privileges, allowing you to run commands and execute tasks with elevated permissions.

Step 2. After the windows shows up, type the following commands and click "Enter" after entry.
ipconfig /release

ipconfig /renew
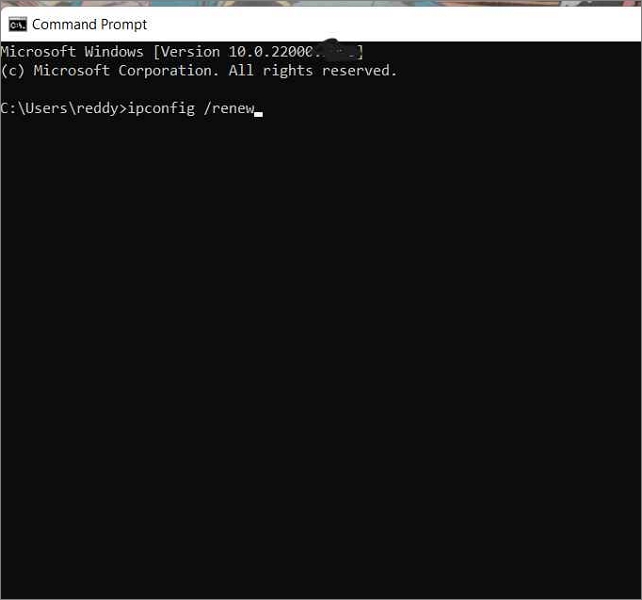
Step 3. Restart the device and check for the error. You can also do this on Windows PowerShell.
3. Clear the DNS cache
The devices stores DNS info of frequently typed URLs while surfing the Internet, which over time can corrupt and slow down network speed or cause internet issues.
To get rid of the DNS cache, you can flush it on your computer by following these steps:
Step 1. Open the Command Prompt on your computer.
Step 2. Type the following command and press "Enter."
ipconfig /flushdns
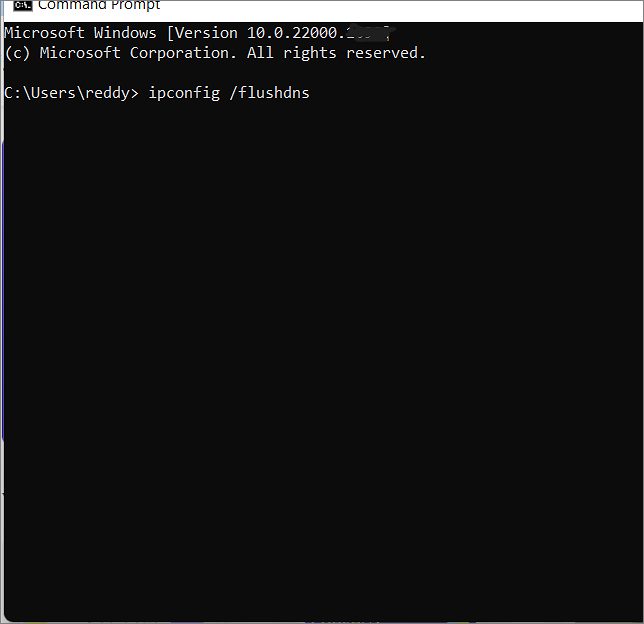
Step 3. Restart the computer after this.
4. Network Adapter or Winsock Reset
Winsock, also known as Windows Socket, is an API that monitors a computer's network usage. If Winsock encounters a problem, it can lead to issues with the device's internet access, making it difficult to browse websites and access online resources.
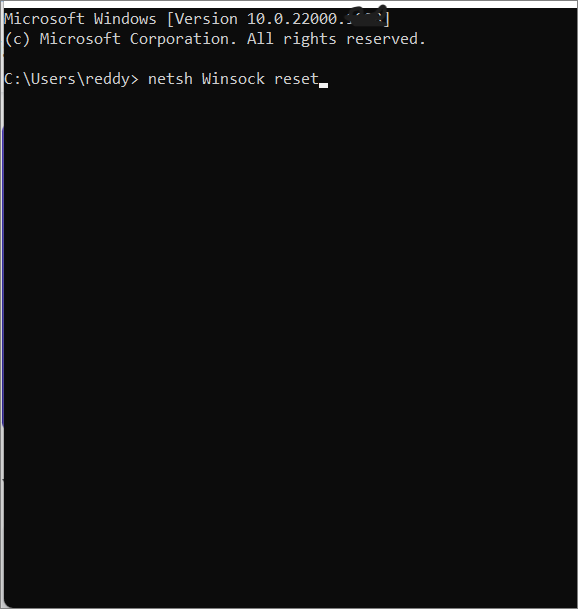
Steps to reset Winstock/network adapter:
Step 1. Open the command prompt on your computer.
Step 2. Type the following command and press "Enter."
netsh Winsock reset
5. Update the Network Driver
Outdated network drivers can also cause such errors, as they are responsible for communicating between the operating system and hardware to process internet requests.
To update network drivers using Device Manager, follow these steps:
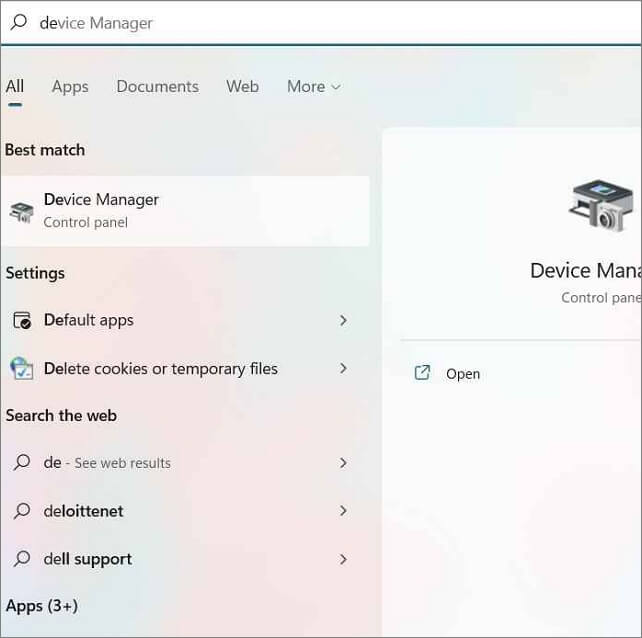
Step 1. Search for Device Manager on your computer.
Step 2. Find and Expand the "Network Adapters."
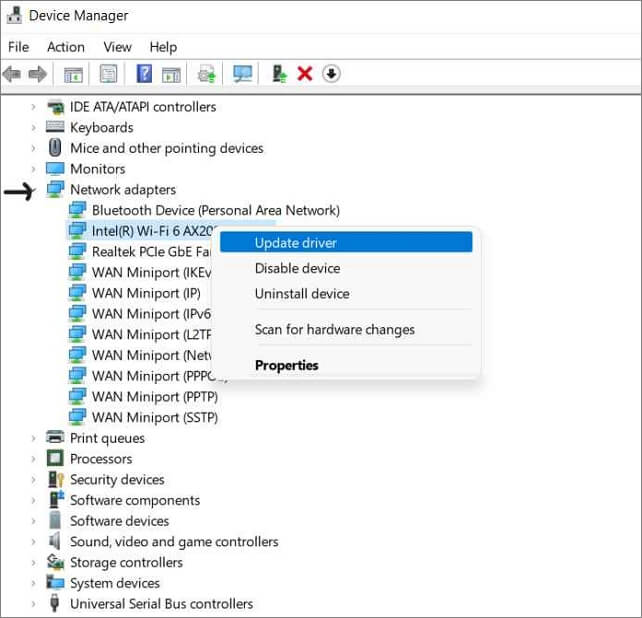
Step 3. To update the Wi-Fi driver, you can search for the driver in your computer's device manager, right-click on it, and select the option to update the driver. This will typically prompt a search for the latest driver from the internet, which you can then install to ensure your Wi-Fi connection is stable and functioning properly.
If you see multiple network drivers, look for the "Wi-Fi" driver and update it.
6. Change your Device's DNS Server
Your internet service provides a DNS server to handle internet requests, but these servers can be unreliable and cause network issues.
If you're experiencing issues with your internet connection, you might want to consider changing your DNS server. This can be done by following a few simple steps. To start, you'll need to determine which DNS server you want to use - popular options include Google Public DNS, Cloudflare DNS, and OpenDNS.
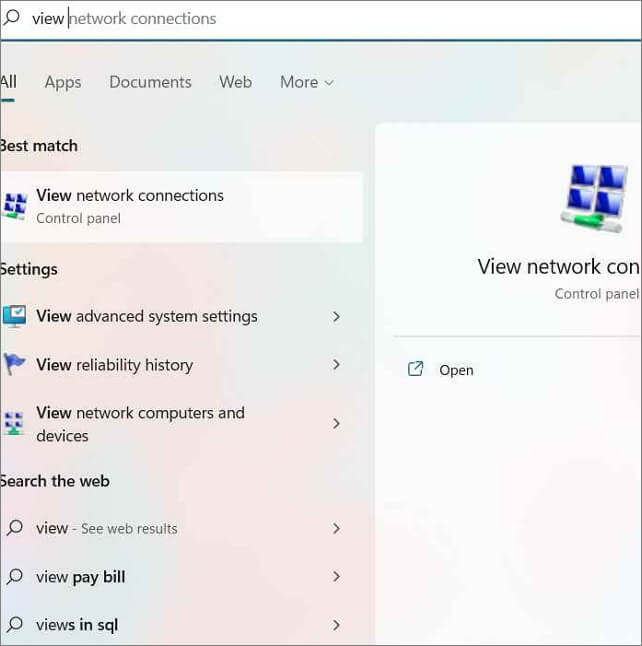
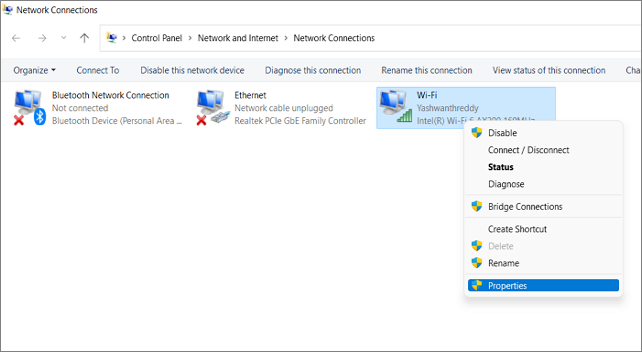
Step 1. Search for View Network Connections on your computer.
Step 2. To access your internet connection properties, open a new window showing all your connections, right-click on your internet connection, and select Properties.
Step 3. Select Internet Protocol Version 4 (TCP/IPv4) and click on the Properties button.

Step 4. Enter the given DNS server addresses in the "Preferred DNS server" and "Alternate DNS server" fields, and select "OK" to apply the changes.
Preferred DNS Server: 8.8.8.8
Alternate DNS Server: 8.8.4.4
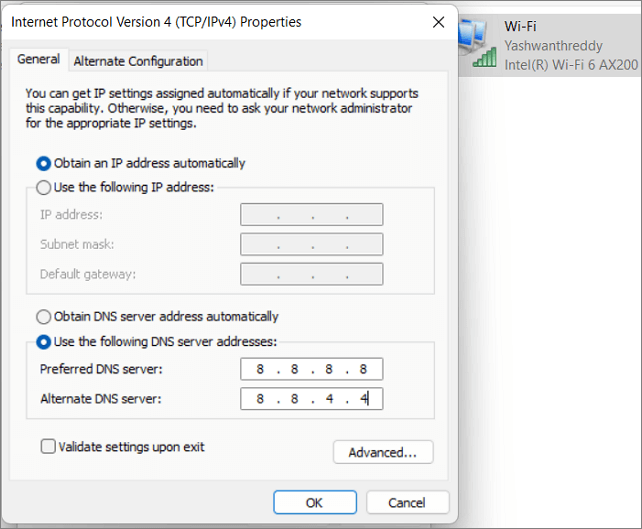
Step 5. Click "OK" and check for the error.
Conclusion
The DNS_PROBE_FINISHED_NO_INTERNET error is a common network error that can occur due to various issues on the browser and network. Fortunately, the solutions are quite simple and can be rectified by following some basic steps.
Chrome users commonly encounter the error, which can be resolved with six fixes, allowing users to browse as usual. If the issue persists, the Microsoft Community may provide further assistance.
If you find this article, share it with your friends, and leave a comment below to let me know about it. If you have any queries regarding the fixes, let me know in the comment box.
FAQs
The article provides answers to most questions related to DNS Probe Finished on the Internet. However, let's summarize the most frequently asked questions about this topic.
1. Can you Ping Google?
We can ping Google from our computers using the command prompt. To do this, open the command prompt and type "Ping google.com." followed by pressing enter. This will display the IP addresses of the website.
2. Does it happen with all devices on the network?
If the error occurs on all devices connected to a single network, it could be due to a problem with the router, Wi-Fi, or Ethernet cable, and resetting the router, restarting the Wi-Fi, and reconnecting the Ethernet cable may resolve the issue.
Related Articles
- How to Fix Integrated Webcam Not Working on Windows 10 [Full Guide]
- How to Delete a User Profile From Windows 10 [Fixed]
- Windows Mail Backup and Restore [Everything You Need Know]
- How to Delete File PowerShell [with Precise Command Lines]
- Atomic Heart Save File Location on a PC [2024 Tips]
Where are the save game files located? How to find Atomic Heart save file location? You can get all the answers here. Besides, If you lost Atomic Heart game data, run Deep Data Recovery to get them back. - How to Clear Windows Update Cache | Top Answers
Learn how to clear the Windows Update cache and troubleshoot common update issues with our top answers and step-by-step guides. By following these tips, you can keep your Windows system running smoothly and up to date.