Fixed: "Server DNS Address Could Not Be Found"
If you're experiencing the "Server DNS Address Could Not Be Found" error, there are several solutions to try. First, check your internet connection and ensure it's stable.
| Workable Solutions | Step-by-step Troubleshooting |
|---|---|
| Method 1. Restart the Router/Modem | Remove the power source of your router, wait for a few seconds, and connect it back again...Full steps |
| Method 2. Clear Your Browser and Host the Cache | Step 1. Open your browser and click on the three dots in the top-right corner...Full steps |
| Method 3. Run the Network Adapter Troubleshooter | Step 1. Open the "Settings" app...Full steps |
| Method 4. Renew the Network Configuration | Step 1. Open Command Prompt/cmd.exe and "Run it as administrator"...Full steps |
| More Solutions |
It is common for software to have glitches and behave abnormally...Full steps |
When using Chrome to search for important work or study-related information, you may encounter the frustrating error message "Server DNS address could not be found." This issue typically arises when the DNS server fails to match a domain name with its corresponding IP address, often due to problems in Network settings or DNS server configurations. To resolve this issue, it's essential to identify and address the underlying cause, which can range from simple network settings adjustments to more complex DNS server configurations. By understanding the root cause, you can take the necessary steps to fix the DNS address not found issue and get back to your work or study without any further interruptions.
Users on Windows 8, 8.1, and 10 frequently encounter server issues when accessing certain websites, resulting in a browser redirect to an error message. This issue affects some users' entire browser, while others experience it only with specific searches, such as YouTube and Facebook.
The Internet Protocol (IP) addresses play a crucial role in tracking and connecting nodes on the Internet, but they are uniquely assigned to represent websites. To make it easier for humans to remember and search, websites use Domain Name Servers (DNS) to map IP addresses to corresponding domain names.
When trying to access a website, DNS maps the domain name to the IP address, allowing the page to load on your browser. If DNS fails, you'll get the "Server DNS Address Could Not Be Found" error.
Methods to Solve the "Server DNS Address Could Not Be Found" Issues.
The reasons for the issue are varied and include router problems, website issues, DNS servers being inaccessible, system cache, and several other factors.
Method 1. Restart the Router/Modem
Sometimes, internet router issues can also cause DNS errors. This may be due to clogged memory or internal connections, which can be resolved by simply restarting the router to free up the clogged memory and rectify internal issues.
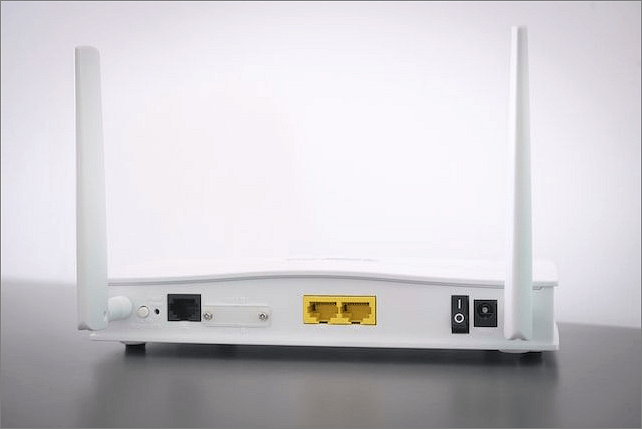
Unplug your router, wait a few seconds, and plug it back in while your device is still on. This can often resolve connectivity issues.
Method 2. Clear Your Browser and Host the Cache
The browser's cache stores frequently visited websites to speed up searches, but issues with third-party extensions and plugins can cause errors. Clearing the browser and host cache is essential to resolve these issues and prevent them from occurring.
Steps to Clear Browser Cache:
Step 1. Open your browser and click on the three dots in the top-right corner.
Step 2. Redirect to "More Tools" and click "clear browsing data."
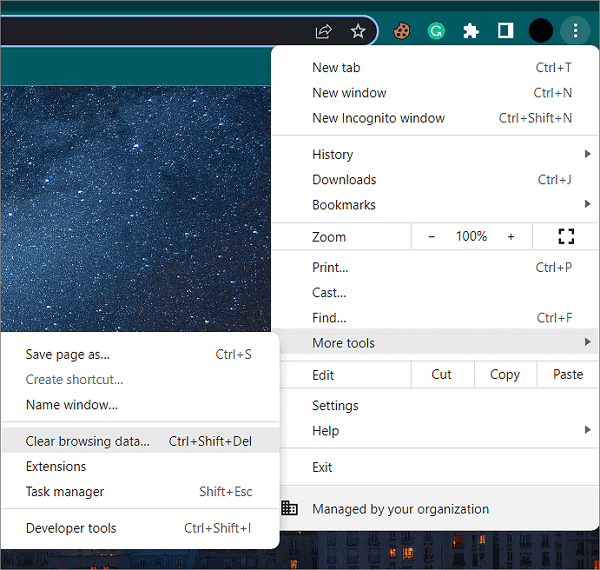
Step 3. Click on "Clear data" to remove the browser cache.
Steps to clear host cache:
Step 1. Open a New Incognito Tab on your computer.
Step 2. Type "chrome://net-internals/#dns" and click "enter."
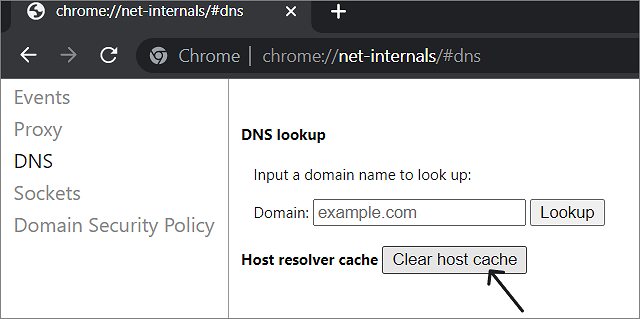
Step 3. Click "Clear host Cache" on the page and try using the browser.
Method 3. Run the Network Adapter Troubleshooter
Windows has built-in troubleshooters that can help resolve issues with various software and hardware, such as running the Network Adapter Troubleshooter to fix network-related problems.
Steps to run Troubleshooters on Windows 10/11:
Step 1. Open the "Settings" app.
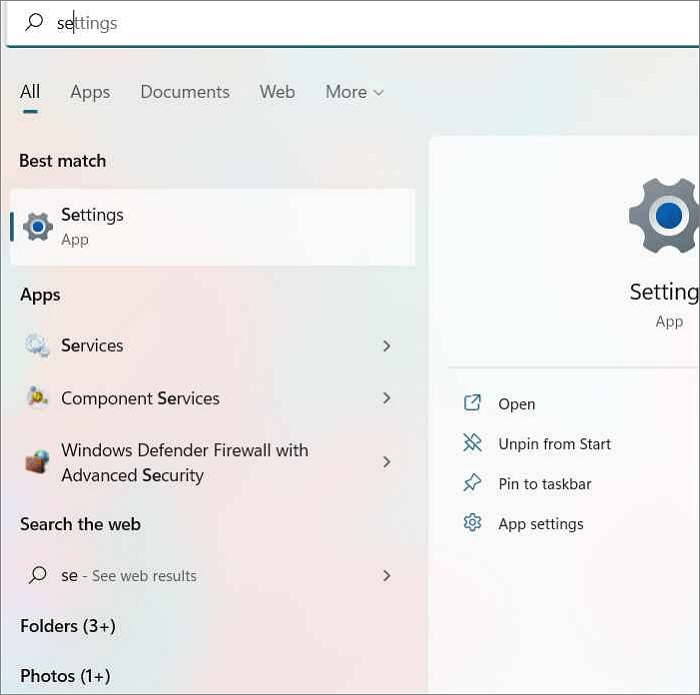
Step 2. To update Windows, click on the "Update and Security" option on Windows 10, or the "System Options" option on Windows 11.
Step 3. To resolve the issue with your network adapter, go to the "Troubleshooter" options and navigate to the "Network Adapter."
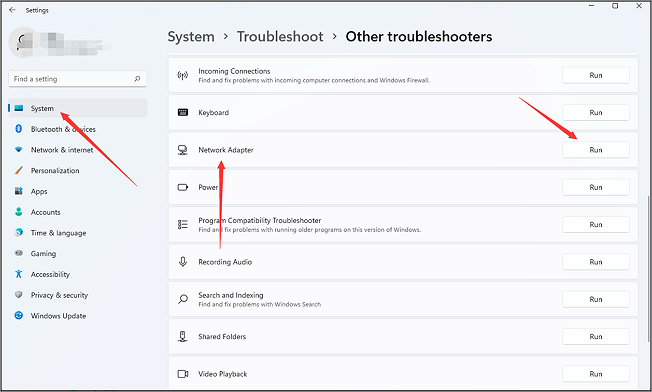
Step 4. Click on "Run" to start the process.
Method 4. Renew the Network Configuration
To resolve the issue, you can simply reset your network settings to their default values, which will likely resolve the problem caused by altered configurations.
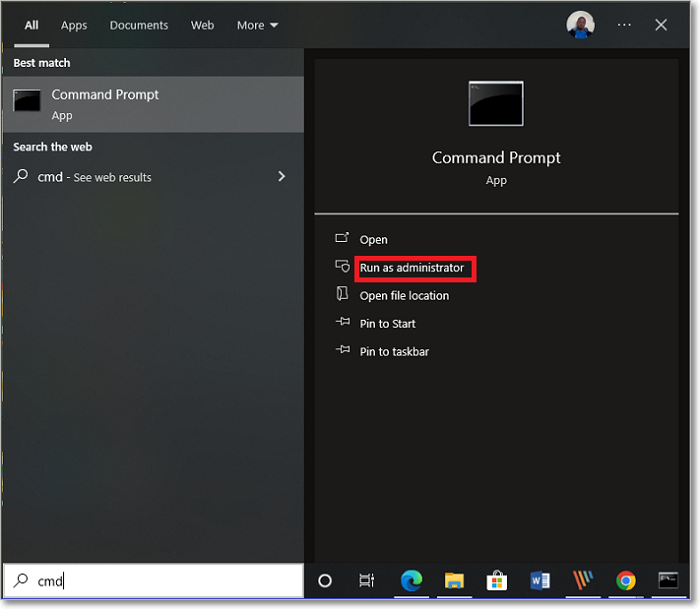
Step 1. Open Command Prompt/cmd.exe and "Run it as administrator."
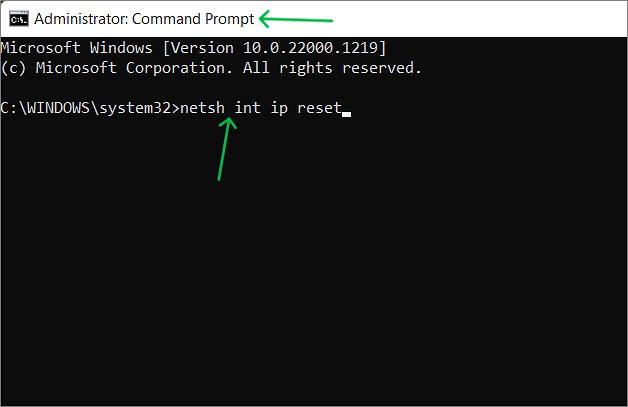
Step 2. Enter the following commands one after the other to reset the configurations. Press "Enter" after every command.
netsh int ip reset
netsh winsock reset
ipconfig /release
ipconfig /renew
ipconfig /flushdns
Step 3. Try using your browser to see the changes.
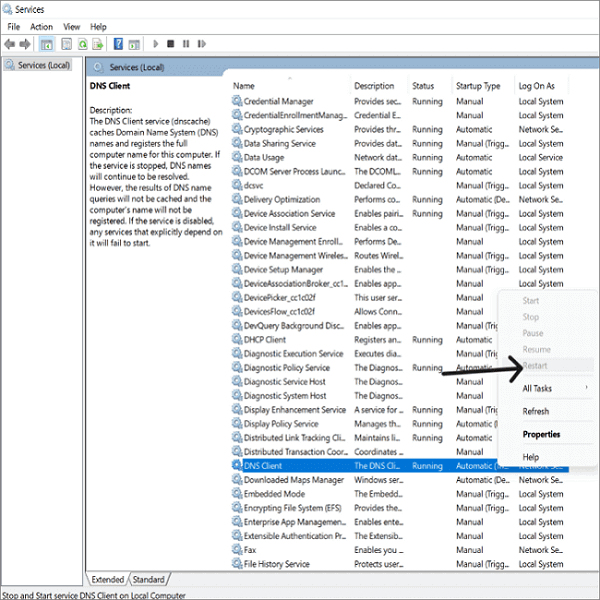
Method 5. Restart "DNS Client"
The DNS Client software, which handles DNS mapping, is experiencing a glitch, causing abnormal behavior. Restarting the software is likely the solution to rectify the issue.
Steps to restart DNS Client:
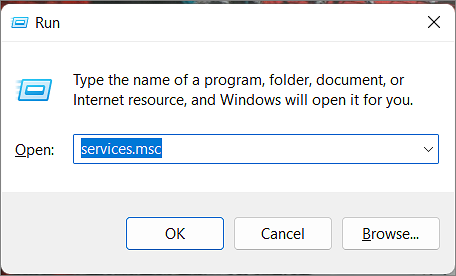
Step 1. Press "Windows + R" to open the Run app.
Step 2. Enter "services.msc" in the dialog box and press "OK."
Step 3. To resolve the issue, scroll through the service manager list, click on "DNS Client," and restart the service.
Method 6. Reinstall the Google Chrome App
Sometimes, the issue may be with something other than your network or device but the browser itself, so we have to reinstall the chrome browser to rectify the problems in such cases.
Step 1. Before uninstalling Chrome, exit all open tabs and close the browser. This will ensure that all data associated with Chrome is removed, including browsing history, cookies, and cached data.
Step 2. Open the Settings app and navigate to Apps and Features.
Step 3. Find Chrome and click "Uninstall."
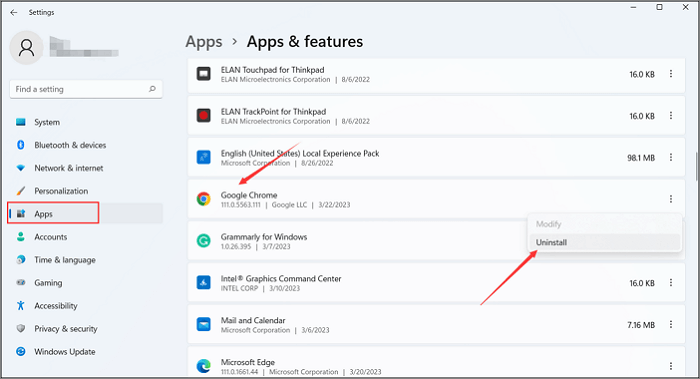
Step 4. To resolve the issue, go to the default browser on your device and navigate to the app store. From there, reinstall Google Chrome by searching for it, clicking on the result, and selecting the "Reinstall" or "Install" option.
Method 7. Remove Unnecessary Files in the ETC Folder
In some cases, users have found that unnecessary files in the ETC folder might be causing the error. As one of the essential folders in Windows OS, the ETC folder supports various operations. To resolve the issue, we recommend locating and removing any unwanted files in the folder. Before deleting them, please make sure to backup and restore your files to avoid any potential data loss.
Step 1. Follow the below line to navigate to the etc. file location.
C:\Windows\System32\drivers\etc
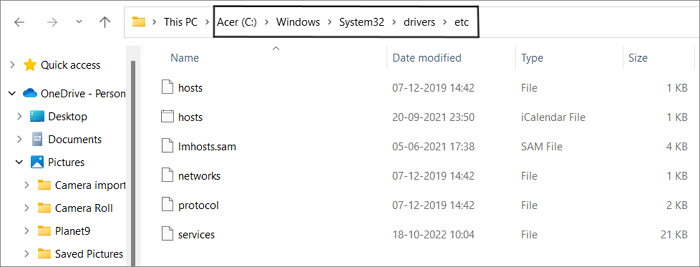
Step 2. Select all the files and delete them from the computer.
Method 8. Configure New DNS Settings
Your internet provider offers a DNS server to manage internet requests. If issues arise with the current DNS server, errors will occur, so it's essential to configure it to handle DNS requests more effectively.
In such cases, you should change your DNS server. Let us see the steps to do the same.
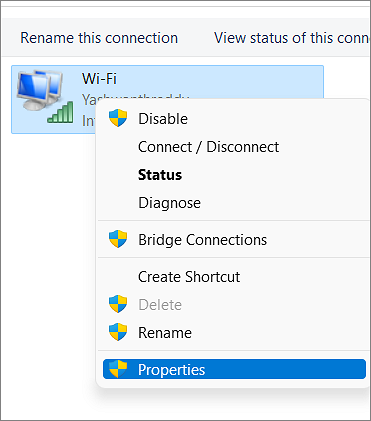
Step 1. Search for View Network Connections on your computer.
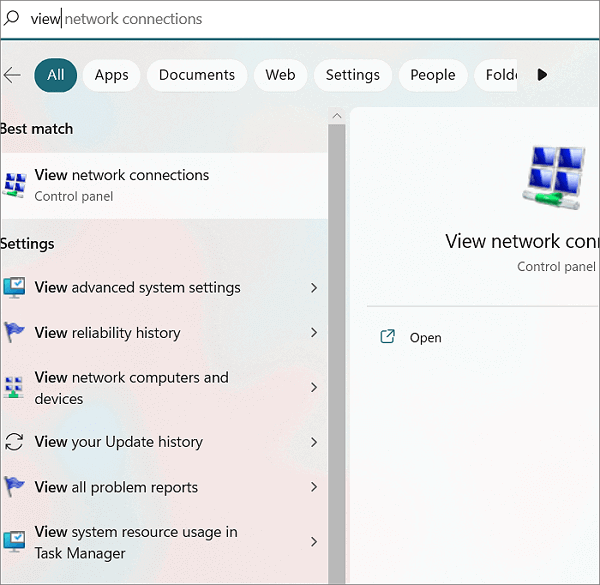
Step 2. To access the properties of your internet connection, go to the window showing all your connections, right-click on the internet connection, and select "Properties."
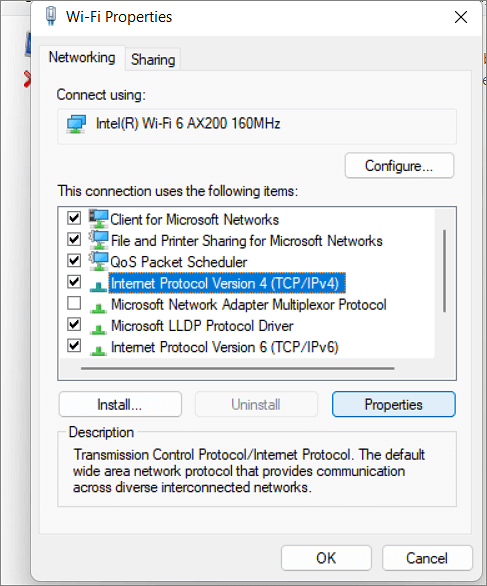
Step 3. Select "Internet Protocol Version 4 (TCP/IPv4)" from the list and click on the "Properties" button.
Step 4. Please enter the given DNS server addresses in the next window, selecting "Use the following DNS server addresses".
Preferred DNS Server:8.8.8.8
Alternate DNS Server:8.8.4.4
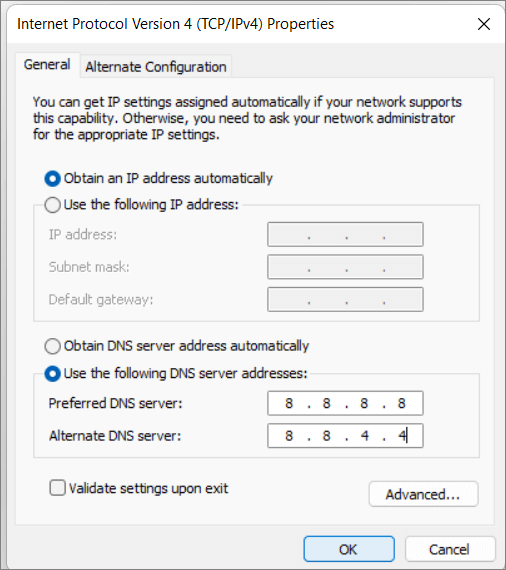
Step 5. Click "OK" and check for the error.
Final Verdict
DNS errors are a common issue for browsers and can also appear in the operating system, causing frustration for Windows 8, 8.1, and 10 users. One specific error, "Server DNS Address Could Not Be Found," is a common problem that can be caused by a variety of reasons, ranging from simple to complex. To resolve this issue, solutions can be tried in order of simplicity, from basic to more complex, as outlined in this article.
Do follow the guide and follow the instructions to overcome the problem and start googling again.
I hope you found the article helpful and informative. If you have any questions or need further clarification, feel free to comment below. I'd be happy to assist you. You can also share the article with others who may be interested in the topic.
Related Articles
- Should You Compress Backups or Not [Pros & Cons]
- [100% Working] 3 Easiest and Successful Ways to Unprotect Excel
- [Fixed] Windows Cannot Delete the Active System Partition on This Disk
- How to Fix WAN Miniport Driver Issues in Windows OS [Updated 2024]
- Media Storage on Android: Can You Disable Data in Media Storage
Accidentally cleared Media Storage on Android? Learn how to recover lost ringtones, photos, and media files with 4 proven methods. Restore your deleted data from Android internal storage and SD card easily. - How Do I Activate Windows If I Lost My Product Key?
Lost your Windows product key? Learn how to find and recover it using your Microsoft account, Command Prompt, Registry Editor, or Qiling Key Finder. Activate Windows without buying a new license.