How to Hard Reset Mac [New Possible Plans in 2023]
Hard Reset Mac Overview
If your Mac is experiencing issues like freezing, slow performance, or software errors, a hard reset may be necessary to resolve the problem. This involves resetting the computer's hardware and software, which can potentially resolve the issue. Situations where a hard reset may be necessary include a Mac that is experiencing freezing, slow performance, or software errors.
- If your Mac is freezing or experiencing other startup issues, a hard reset can help clear up the problem and restore normal function by restarting the computer in a way that bypasses the operating system. This can be done by pressing the power button and the Command (⌘) + Option (⌥) + P + R keys simultaneously, which will restart the Mac in a mode that clears out any problematic system files and allows the computer to start up normally.
- If your Mac is running slow or experiencing software errors, a hard reset can help clear any issues and improve performance.
- When planning to sell or give away your Mac, a factory reset (also known as hard reset) will erase all data and restore the computer to its original factory settings.
- If your Mac, especially Ventura or Monterey, is experiencing issues that can't be fixed with normal troubleshooting methods, a hard reset can be a solution to restore it to its normal functioning state.
Rescue Data from Your Mac Which Need Hard Reset
Since a hard reset will erase all content and settings, it's always a good idea to back up your data before performing a hard reset. You can back up your data reliably on Mac and need a professional data recovery and backup tool, such as Deep Data Recovery for Mac.
Deep Data Recovery for Mac is a powerful software that helps recover deleted files and data from Mac hard drives or external storage, including photos, videos, documents, and more, in situations such as accidental deletion, hard drive failure, or data recovery from a formatted or inaccessible drive.
Key Features
- The software supports the recovery of various file types, including photos, videos, documents, and other file formats, making it a versatile tool for retrieving lost or deleted data.
- Advanced scanning algorithms are used to recover lost or deleted files quickly and efficiently. These algorithms utilize sophisticated techniques to rapidly scan through storage devices and identify deleted or lost files, allowing for their speedy recovery.
- Preview files before recovery, allowing users to select which files to recover and which to discard.
- User-The user-friendly interface of the software makes it simple for users to navigate and execute data recovery tasks, providing a seamless and stress-free experience.
Now that you know what Deep Data Recovery is and why you need to back up your Mac data, you can start using this tool by following the steps below:
Step 1. Search for lost files
Select the disk location to search for lost files, it can be an internal HDD/SSD or an external hard drive where you lost data and files, then click the "Search for lost files" button.
Note: Before attempting data recovery, it's recommended to create a backup of your disk by clicking "Disk Backup" from the left sidebar to prevent further data loss. Once backed up, the software can recover data from the backup, allowing you to reuse the HDD or SSD.

Step 2. Go through the scanning results
This software will scan your selected disk volume and display various file types, including pictures, documents, audio, videos, and emails, in the left pane.

Step 3. Select the file(s) and recover
To recover deleted files, click the data to preview, and then click the "Recover" button to retrieve them back.

Pan 1. How to Hard Reset Mac in macOS Recovery Mode
To hard reset a Mac, you can use macOS Recovery Mode, which allows you to reinstall macOS, repair the disk, restore the system, or erase the hard drive, but first, back up your data to avoid losing it.
First, you need to enter the recovery mode, which you can learn from the following:
• Recovery Mode on an Intel-based Mac: To restart your Mac and access the macOS Utilities screen, simply restart your Mac and hold down the Command + R keys until the Apple logo appears. Release the keys when you see the macOS Utilities screen.
• Recovery Mode on a Silicon-based Mac: To restart your Mac in recovery mode, shut it down, press and hold the power button until the startup options window appears, then release the power button and press and hold the Command + Option + R keys until you see the Apple logo or spinning globe.
Note: To enter Recovery Mode on some Mac models, press and hold the power button, then press and release the volume up or down button, and finally press and hold the power button again.
Using Disk Utility Option
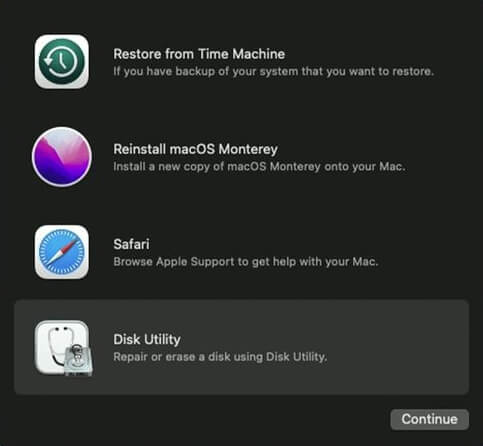
To hard reset your Mac, start by entering the recovery mode. Once in recovery mode, you can use the Disk Utility option to reset your Mac. This process involves following a series of steps, including using the Disk Utility option, which can be accessed by clicking on the Disk Utility option from the Utilities window.
Step 1. Open the Disk Utility app in the Recovery Mode by clicking on the "Mac Disk Utility" option.
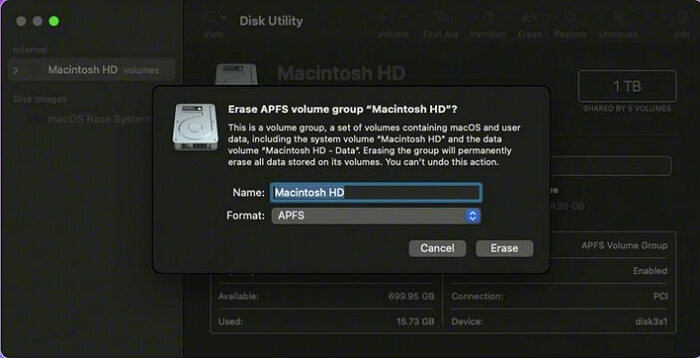
Step 2. Select the disk named Macintosh HD in the next window.
Note: The startup disk, which is usually named "Macintosh HD", may need to be identified if its name has been changed previously. In such cases, you must find and select the renamed disk.
Step 3. To reset your Mac, click on the Apple logo in the top left corner, then select Restart. Hold down the Shift key while your Mac is restarting.
Using the Reinstall macOS Option
To hard reset your Mac using the Reinstall macOS option, go to the Apple menu, select Restart, hold down the power button until it shuts down, then press the power button again to turn it back on and immediately hold down the Command (⌘) + R keys. This will open the macOS Utilities window, from which you can select Reinstall macOS and follow the on-screen instructions to complete the process.
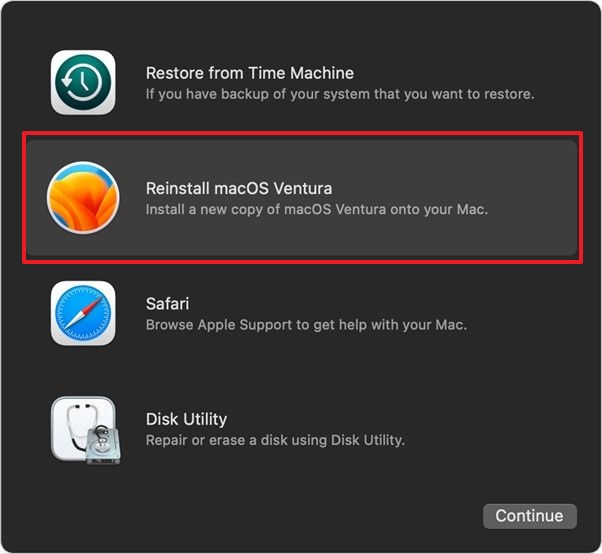
Step 1: To reinstall macOS, go to Recovery Mode and select the "Reinstall macOS [version]" option.
Note: The version of your Mac, also known as the operating system, can be found in the "About This Mac" section, typically found in the Apple menu. This version number can differ between users due to various factors, such as different operating system installations, software updates, or hardware configurations.
Step 2: To reset your Mac, follow the onscreen instructions after clicking Continue, selecting the disk, and completing the hard reset process.
Plan 2. Hard Reset Mac with Erase Assistant on macOS
Mac's Erase All Content and Settings feature, also known as Erase Assistant, allows users to completely wipe their devices and return to Apple's default configuration, permanently deleting all information and applications. This feature can be trusted to erase all content and settings.
To erase all content and settings on your Mac, follow the guides for either macOS Monterey or Ventura, as the steps differ between the two operating systems. On Monterey, go to Erase Assistant, select your Mac, and follow the on-screen instructions.
Access Erase Assistant on macOS Monterey:
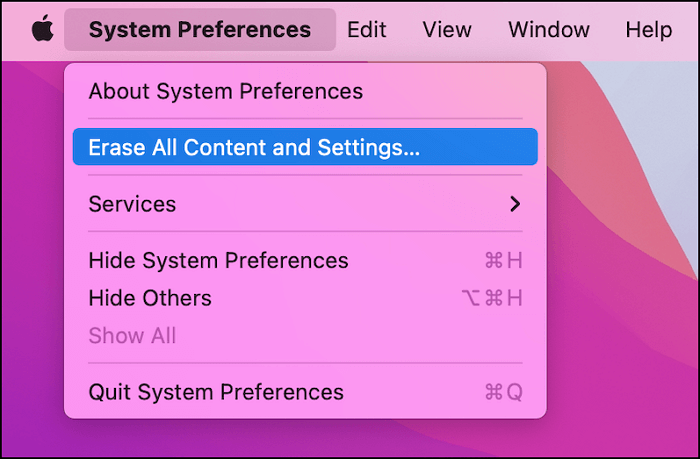
Step 1. Click on Apple Logo from the top menu.
Step 2. From the dropdown menu, select System Preferences.
Step 3. In System Preferences, click on the dropdown menu and select "Erase All Content and Settings" to reset your device to its factory settings.
Access Erase Assistant on macOS Ventura:
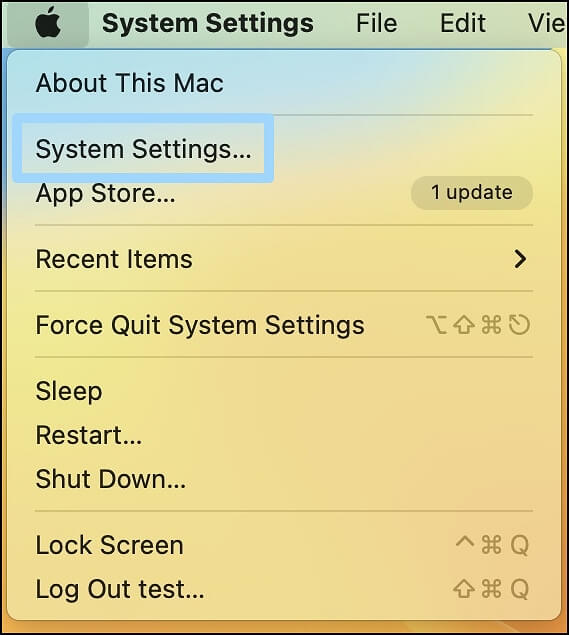
Step 1: To access the System Settings, click on the Apple logo located at the top menu and select System Settings.
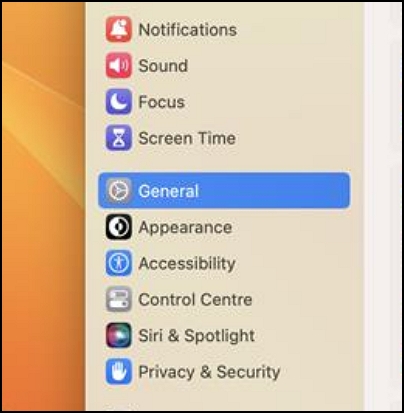
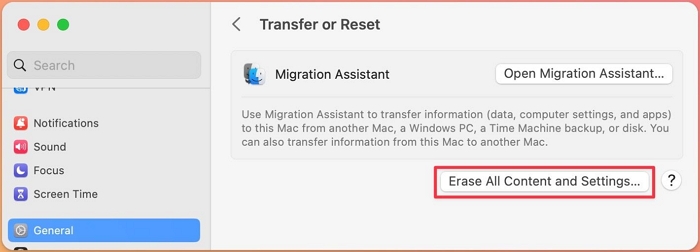
Step 2: Now, click on General and select Transfer or Reset in the General window.
Step 3: To reset your Windows 10 device, click on the "Transfer or Reset" option from the Settings window. Then, click on "Erase All Content and Settings" in the next window that appears.
After accessing Erase Assistant on your macOS Monterey/Ventura, follow these steps to hard reset your Mac:
Step 1. Enter the password for your Mac and click on Continue on the Mac Time Machine backup screen.

Step 2. To sign out of your Apple ID, click on the "Continue" button and enter your Apple ID and password.
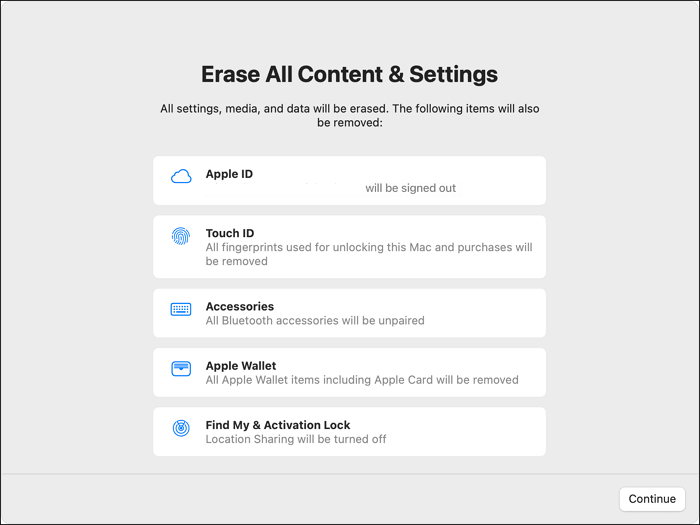
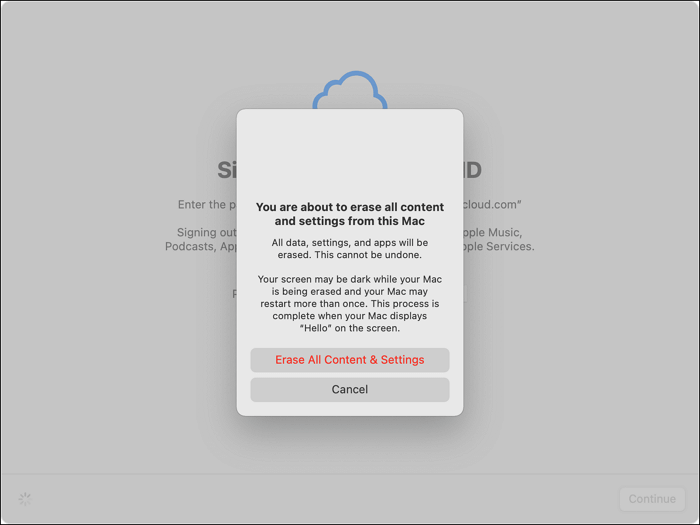
Step 3: To reset your Mac successfully, click on Erase All Content & Settings in the popup after initiating the procedure, and confirm. Wait for the process to complete, then click on Restart. This will erase all content and settings, effectively resetting your Mac.
Summary
Although Macs are powerful and reliable for business and other uses, they can sometimes experience performance and software issues. In such cases, a hard reset is recommended, and this article can guide you through the process. If you also want to recover or back up your Mac data before factory resetting, you can use Deep Data Recovery for Mac.
Hard Reset Mac FAQs
What are some general questions people have after learning how to hard reset Mac?
1. Does a hard reset on Mac erase everything?
A factory reset on a MacBook erases all data, so it's recommended to back up your data before performing the reset using a tool like Deep Data Recovery for Mac.
2. Can I hard reset my Mac without a password?
You can factory reset a Mac without a password by putting it in recovery mode and following the prompts to reinstall macOS or use Disk Utility.
3. How to force a hard reset on my Mac?
To force a hard reset on your Mac, follow these steps:
- 1. Enter the recovery mode on your Mac.
- 2. Click on Reinstall macOS and click Continue.
- 3. Follow the onscreen instruction to reset your Mac.
4. How to hard reset my Mac automatically?
To hard reset your Mac, you'll need to use Erase Assistant, which can be accessed by restarting your Mac and immediately holding down the Command (⌘) + R keys. This will launch the Erase Assistant, which will guide you through the process of resetting your Mac to its factory settings. Once Erase Assistant has finished, your Mac will automatically restart and boot up as if it were brand new.
- 1. Access Erase Assistant on your Mac.
- 2. To sign out of your Apple ID, click on the "Continue" button and enter your Apple ID and password.
- 3. After the reset, go to the settings, select Erase All Content & Settings in the popup and click on Restart.
Related Articles
- How to Check If Disk Is Failing in Windows/Mac [2023 Complete Guide]
- Fix Unallocated Space Cannot Create Partition in Disk Management [Windows 7/8/10/11]
- Windows 10 Quick Access Not Working, Not Responding, Slow to Open
- Windows 11 Keeps Crashing - All Methods to Fix
- Main Differences Between Disaster Recovery and Backup [Updated 2023]
In this article, we will introduce what disaster recovery is and what backup is separately to you first. We will also discuss about the main differences between disaster recovery and backup. - Answers in 2023 | Does a Factory Reset Delete Everything?
Does a factory reset delete everything? Learn what a factory reset actually removes, how to recover data after a reset, and the differences between factory resetting Windows, Android, and iPhone.