How to Install Dmg Files on Mac 13/12/11 [4 Fixes]
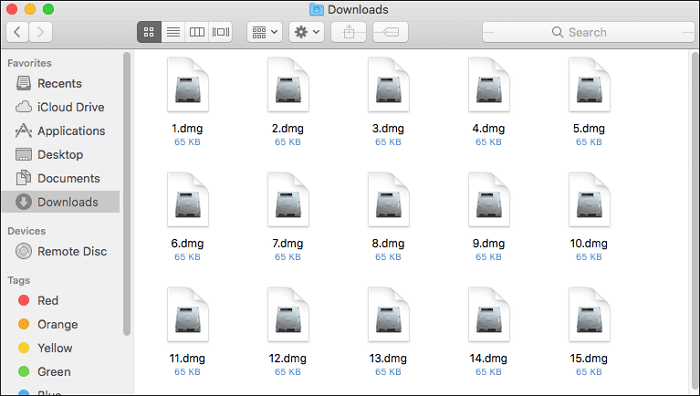
DMG files are digitally reconstructed physical discs used on macOS to store software installers, compressing and replacing physical discs. They support file spanning, compression, encryption, and password protection.
To install a DMG file on your Mac, simply double-click the file, and the installer will guide you through the process. You may need to enter your administrator password to complete the installation. Alternatively, you can drag the DMG file to the Applications folder to install it, or use the Disk Utility app to mount the DMG file and then drag the application to the Applications folder.
| Workable Solutions | Step-by-step Troubleshooting |
|---|---|
| Fix 1. Install from Command Line | You can customize your Mac by installing the required software to perform some particular...Full steps |
| Fix 2. Terminal Install DMG Files | You can use Terminal to install DMG files on Mac. If the menu on the right tap gets grayed out...Full steps |
| Fix 3. Install DMG Files from Store | When you double-tap on DMg files, there is a possibility of receiving a notice that the file...Full steps |
| Fix 4. Disk Image Mounter | In case you recently double-tapped on the disk image but cannot open it using your Mac...Full steps |
As a Mac user, you can benefit from DMG files, which are used for daily backups and include checksums, but sometimes issues may arise when downloading them, especially if they're not compatible with macOS 9. Additionally, be cautious when downloading DMG files from unknown sources, as they may contain malware or viruses that can harm your system.
To make the installation and use of DMG files on Mac easier, you can use a tool like Pacifist to open and explore the contents of DMG files without having to mount them. This can save time and effort, especially when dealing with large or complex DMG files.
Why: Mac Makes Use of DMG Files
Apple's DMG file format is used primarily on Macs to contain and verify apps, ensuring files are intact with a checksum. If you're unsure how to install DMG files on your Mac, you can refer to our write-up for a step-by-step guide.
But first, here are some reasons why Mac uses DMG files. Check them out;
Proper download: The software verifies the integrity and authenticity of downloaded files, ensuring they are in the correct format and have not been altered or tampered with.
Compression: DMG files are a type of disk image file used for Mac operating system, which contains a complete copy of an operating system, applications, or data. They are often used for backups, software distribution, and archiving.
Multipurpose: You can open DMG files as removable disks, which can contain background images, content encryption, text descriptions, and more.
Readable /Writeable: You can read and write on DMG files and add files to them.
Easily Operable: You can do their installation without using decompression.
Saves Space: You can save space on your PC using DMG files.
Fixes: How to Install DMG File on Mac
To install a DMG file on your Mac, it's recommended to first ensure the security of your data, and then proceed with the suggested fixes to resolve the issue.
Fix 1. Install DMG File on Mac from Command Line
To customize your Mac, you can download software from the internet and install it using trusted sources. You can also use the Command Line to accomplish this task with commands like cp and hdiutil. This process typically involves downloading a compressed software package, mounting it in Finder, and then dragging the icon to the Applications folder. This allows you to install and run various apps on your Mac.
For OS X, you can install the VNC client "Chicken of the VNC" to remotely access Mac, Linux, or Windows hosts. The downloaded file is named "content-20b4.dmg."
Step 1. Mounting the Disk image
First, do mounting of the disk image and use the command: $ hdiutil mount content-20b4.dmg
You will receive output as a result, then in Finder, you will see a mounted disk image on your desktop screen, and a directory in the /Volumes section. The last output line shows the mounting location of the disk image.
To confirm that the disk image has been mounted, you can use the command `diskutil list` to list all mounted volumes, including the newly created disk image. This shows you the disk image's name and location on the system, confirming that it has been successfully mounted.
When mounting a disk image, you may be prompted to agree to its license. The license text will appear in the Terminal window instead of a dialog box. To proceed, type 'Y' after reading the license, and to stop, type 'N'.
Step 2. Installation of the Application
To copy the application to /Applications, use the following command: `sudo cp -r "/Volumes/Chicken of the Cave/Chicken of the Cave.app" /Applications`
When copying the 'Chicken of the VNC.app' directory, it's essential to copy it recursively, including subdirectories and files. Make sure to leave off the trailing '/' from the directory name, as this will ensure that the manual is also copied along with its contents. After entering the password, you'll be able to access the application.
Most applications can be copied to the \Applications directory, but if they're in the .pkg format, use the installer command to install them instead of copying with cp.
For installing a .pkg file, you can use the command: '$ sudo installer -package /path/to/package.pkg' where you replace '/path/to/package.pkg' with the actual path to the .
Step 3. Unmounting the Disk Image
To tidy up, navigate back to the home directory and run the command `umount` followed by the name of the disk image, such as `umount /mnt/usb` or `umount /mnt/cdrom`, to unmount the disk image. This will ensure that the disk image is properly disconnected from the system.
$ cd -
S hdiutil unmount "/Volumes/Chicken of the VNC/."
The unmounting process has been successfully completed. The file system has been removed, and the device is now ready to be reused.
/Volumes/Chicken of the VNC/" unmounted successfully.
Step 4. Removing the App in the Finder
For this, you need to follow the given steps;
- Once in Finder, try navigating to the folder of Applications.
- Select the applications you want to uninstall and drag them to the Trash. This will remove them from your computer.
- Then do authentication as a Local Administrator.
- To empty the trash, open Finder, select "Empty Trash" from the menu, and confirm the action by tapping on the "Empty Trash" button in the dialog that appears.
Fix 2. Install the DMG with the Terminal
To install a DMG file on a Mac using Terminal, you can drag the file to the desktop and then follow the installation process. If the right-click menu becomes grayed out or "Open With" options are not working, using Terminal is a viable alternative. By dragging the DMG file to the desktop, you can bypass the unresponsive menu and proceed with the installation. This method allows you to install the DMG file even when the usual methods are not working.
Step 1. Open Finder, go to Applications, and then Utilities, and finally open Terminal.

Step 2. To navigate to the Desktop folder, type the command "cd ~/Desktop" into the Terminal window and press the Enter key. This command tells the Terminal to change the current directory to the Desktop folder, which is located at the user's home directory (~). The ~/ symbol represents the user's home directory, and Desktop is the folder within it that you want to access.
Step 3. To attach the macOS installer, open the Terminal app and type `hdiutil attach filename.dmg` (replace `filename.dmg` with the actual `.dmg` file you're working with), then press Enter. This will mount the installer and make it available for installation.

Step 4. After executing the command line operation, the DMG files are mounted on your Mac, making them accessible for use.
Fix 3. Install the DMG Files from the Store
When you double-If you tap on DMG files, you may receive a notice that the file can't be opened, but this could be due to the file not being downloaded from the App Store, which would prevent it from being opened.
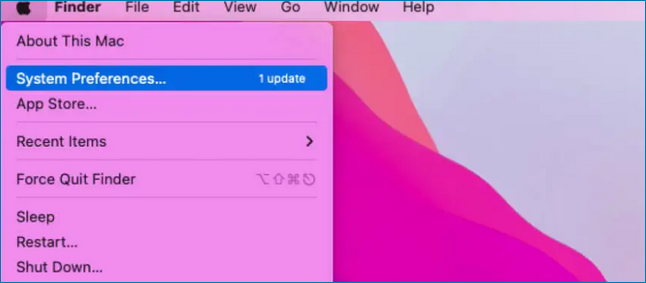
Step 1. From the top left corner of the screen, tap the Apple logo and select "System Preferences."
Step 2. Under System Preferences, select "Security and Privacy."
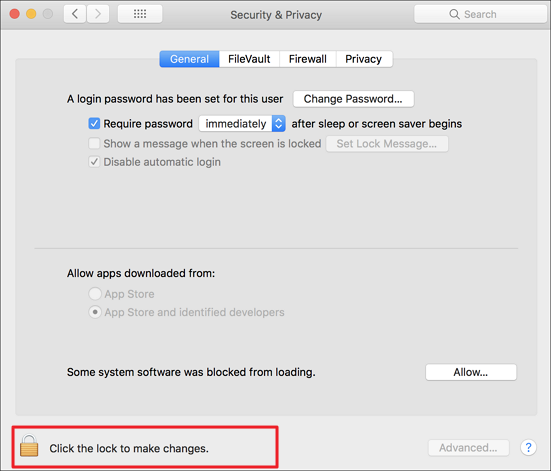
Step 3. To lock your device, tap on the lock icon located at the bottom left corner of the screen.
Step 4. It is needed to make an entry for your password for updating the page.
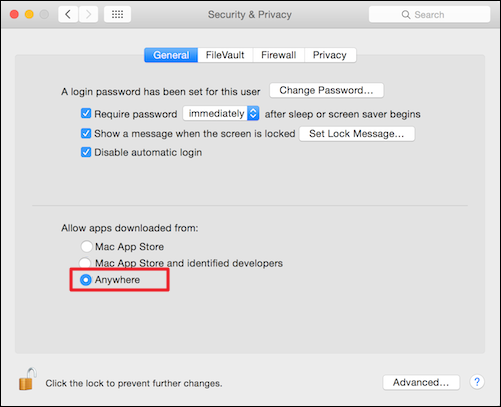
Step 5. Select the "Anyway" option and open DMG files.
Fix 4. Open DMG Files Using the Disk Image Mounter
In case you recently double-If you're unable to open a disk image on your Mac, such as after tapping on it but getting an error like "No mountable file system," it may be due to corruption. In this case, you can try downloading the disk image again. Alternatively, you can use the Disk Image Mounter to resolve the issue.
Step 1. To open a DMG file, you can either right tap on it to open it, or you can tap on "Command +" to open it.
Step 2. There will be an option list under the button for "Open with," then select "Disk Image Mounter."
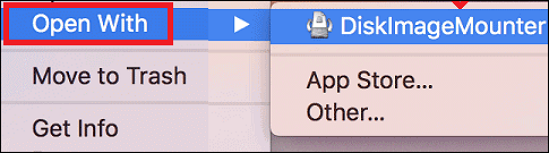
Step 3. You can see content for the DMG file directly on your screen once you have mounted it.
Bonus Tip: Recover Deleted DMG Files on Mac
You may need to permanently delete your files or recover data on a regular basis, especially if you frequently experience data loss. This includes DMG files, which can be recovered using specialized tools, especially if you're a Mac user. Practicing data safety can help prevent the need for frequent recovery, but having a reliable recovery tool on hand can be a lifesaver when you do need to recover your data.
You can install Deep Data Recovery, a robust data recovery program, to quickly recover lost data due to file system malfunction, system crash, or unintentional file deletion, even as a novice user, thanks to its user-friendly interface.
- The advanced functionality offers various functions, including previewing files, allowing you to see what you're recovering before the actual recovery process.
- There are "Quick" and "Deep" modes available for scanning.
- The utility assists in scanning the hard drive of a Mac, as well as locating DMG files.
- The software helps recover deleted DMG files, which can be a lifesaver if you accidentally delete important files.
- It helps to extract data from a backup using Time Machine or iTunes.
- It supports almost all video file formats.
Here is a step-by-step tutorial on how to use a professional DMG recovery tool to recover deleted files on Mac.
Step 1. Select the location to scan
Launch Deep Data Recovery for Mac, choose the storage device where data was lost, and click "Search for lost files" to initiate scanning.
Note: Before attempting data recovery, it's recommended to click "Disk Backup" from the left sidebar to create a backup of your Mac, preventing further data loss. Once backed up, the software can recover data from the Mac backup, allowing your computer to be used for new data again.

Step 2. Filter lost Mac data
The software will automatically scan a MacBook/iMac for lost data. Once the scan is complete, users can filter the recovered data by type and path.

Step 3. Recover lost data or files
Double-To recover lost data, click on a file to preview it, and then click the "Recover" button to restore it to another location.

Final Thoughts
As a Mac user, you may find yourself frequently installing and uninstalling programs, but using the right software can help you customize your Mac to quickly achieve any task. For instance, when you install or download DMG files, it enables you to use additional apps not originally available on your Mac, making it easier to install files.
Deep Data Recovery for Mac is a software that can rescue lost data by allowing you to get your critical information back seamlessly, even after you've lost the ability to recreate your document from scratch.
Install DMG File on Mac FAQs
After going through our fabulous read on DMG files, if you have any further queries related to the topic, check them out here.
1. How do I open DMG files on Mac?
To open a DMG file, simply double-click on it. This will automatically mount the file on your device, allowing you to access its contents. No additional effort is required.
2. How to install the DMG file on Mac without an admin password?
To install DMG files on a Mac without needing an admin password, follow these steps. You can use the built-in Disk Utility app to mount the DMG file, which will allow you to access its contents without needing admin privileges.
- Start by downloading your DMG file.
- Shift it on the Mac desktop and open it.
- To access the app's package contents, right tap on the app icon and select "Show Package Contents" from the menu.
- Copy them.
- By closing the window, create a new folder by the name of 'App' on the desktop.
- Go ahead by pasting the contents into the folder.
3. Can you mount the DMG file on Mac?
To mount a DMG file on a Mac, tap on the file and select "Open With" followed by "DiskImage Mounter".
4. How to install DMG files in Ubuntu?
Follow the steps:
- Start by opening the Terminal.
- Enter the command as
Dmg2dmg /path/to/name.dmg/path/to/name.img
Herein 'name' relates to the DMG file name.
- Now enter the order as
Sudo mkdir /media/name sudo modprobe hfspllus sudo mount -t hrsplus -o loop name.img /media/name
Herein, 'name' relates to the IMG file name.
- To start, open Ubuntu's native program Brasero from the 'Sound & Video' section. Once open, select 'Data Disk' and tap on 'Enable Side Panel.'
- To burn an image file, tap on 'Image file' and then select the 'Burn' option. Let the process finish.
- Now in Terminal, enter the command as;
Sudo mkdir /media/name sudo modprobe hfsplus sudo mount -t hfsplus -o loop name.iso /media/name
The installation will start once the ISO name is entered. It is case-sensitive and should be entered exactly as it appears in the installation menu. The name is case-sensitive and should be entered precisely as it appears in the installation menu.
Related Articles
- How to Download and Install ADB Drivers on Windows 11[2023 Updated]
- [Quick Fixed] No Login Screen on Windows 10/11 Issue
- Mac Safe Mode | Boot Mac to Safe Mode in macOS 13/12/11 [ 2023 Guideline ]
- Can I Clone a Damaged Hard Drive [Detailed Guide]
- 6 Ways to Fix C Drive Keeps Filling Up for No Reason
Does c drive keep filling up for no reason? You are going to learn six practical ways to fix C drive getting full automatically in Windows 7/8/8.1/10. - GoPro Support: How to Fix Corrupted GoPro Video Files Efficiently
Stay calm if you cannot play GoPro video files on the camera. 3 reliable methods - Qiling video recovery software, with GoPro SOS, and VLC are available here to help you fix the corrupted video files, making your shots viewable again on GoPro cameras.