How to Install macOS Monterey | macOS 12 Clean Install
An Introduction to macOS Monterey
macOS Monterey is the operating system that evolved from macOS Big Sur, allowing users to connect, accomplish more, and work efficiently across various Apple devices.
macOS Monterey's new features
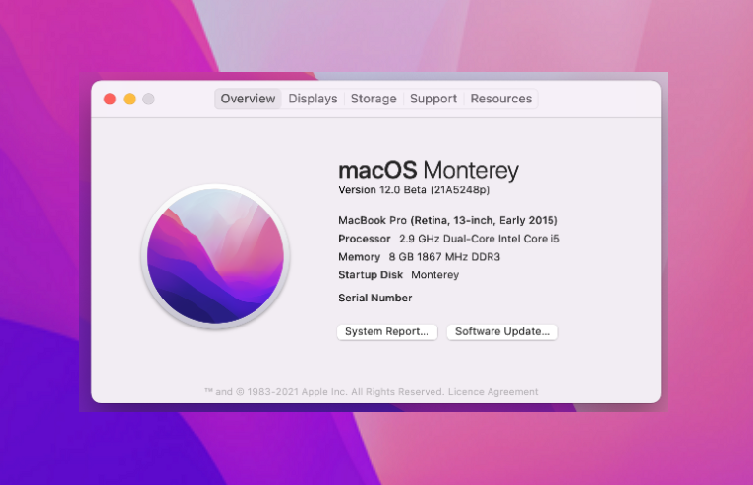
macOS Monterey macOS Monterey, the latest version, offers a refined experience with features like a new Safari, Universal Control, Share Play, and more. Like previous generations, its performance varies and upgrades in many ways, with Apple continually refining the system. As of now, there are six versions available, with the most recent being macOS 12.6.
System Requirements to install macOS Monterey
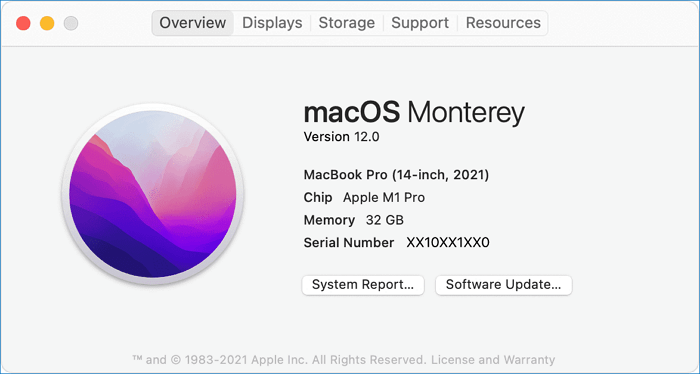
macOS Monterey is the first notable release from Apple, including capabilities from the new Apple M1 chips present to the most recent MacBook Air, MacBook Pro, and Mac mini models. It supports devices such as the 2020 MacBook Air, MacBook Pro, and Mac mini, as well as the 2019 and 2020 Mac Pro, and the 2017 and later iMac Pro, among others.
- iMac - Late 2015 onwards
- iMac Pro - 2017 and later
- Mac Pro - Late 2013 onwards
- Mac mini - Late 2014 onwards
- MacBook - 2016 and later
- MacBook Air - 2015 and later
- MacBook Pro - 2015 and later
How to Download and Install macOS Monterey
Before installing macOS Monterey, first verify that your Mac device is compatible with the new operating system. It's also essential to back up your data and files to prevent losing them during the installation process.
Download the macOS Monterey
The macOS Monterey installer is available for download from the App Store.
Step 1. Activate the App Store.
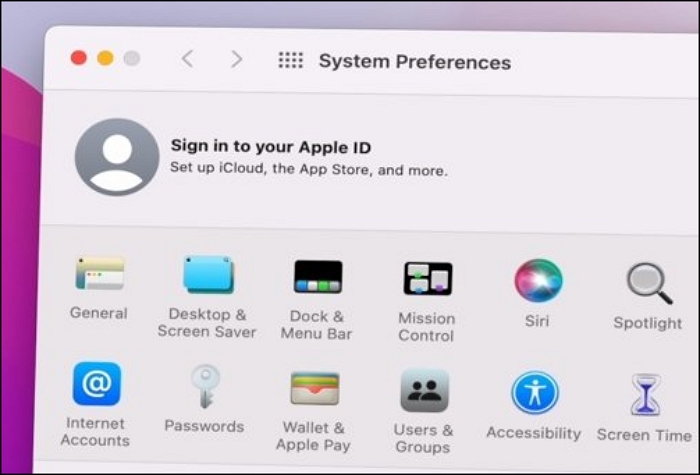
Step 2. To update to macOS Monterey, click the Apple menu and select System Preferences. Click Software Update, then click the Update Now button.
Step 3. In the search results, select "macOS Monterey".
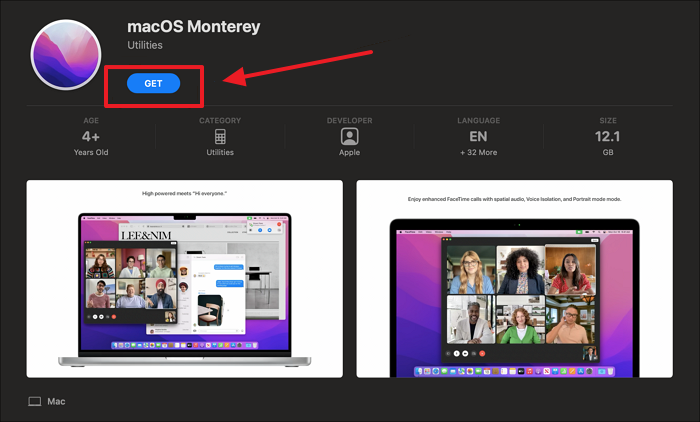
Step 4. To download the macOS Monterey installer, click the "Get" button.
Step 5. Attend to the download's completion.
Create a bootable macOS Monterey USB drive to install Monterey
In this section, you'll learn how to make a bootable USB Mac and install macOS from USB, making macOS 12 Monterey upgrades easier across various Mac devices.
Step 1. Insert a USB stick.
Step 2. If you've used any crucial files during the process, make sure to check the stick for them before proceeding. This will ensure you don't miss anything important.
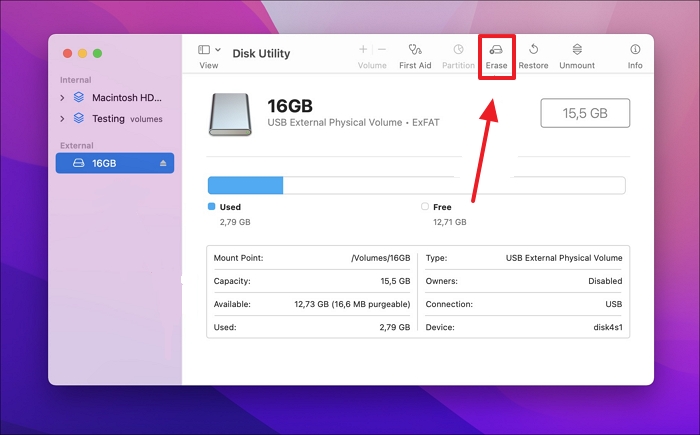
Step 3. To format a USB flash drive, select your USB drive, then click "Erase" to begin the process.
Step 4. Open the Terminal on your Mac.
Step 5. Enter the following command into the terminal window: `sudo /Applications/Install\ macOS\ Monterey.app/Contents/Resources/createinstallmedia -volume /Volumes/YOURUSBDRIVE -nointeraction`.
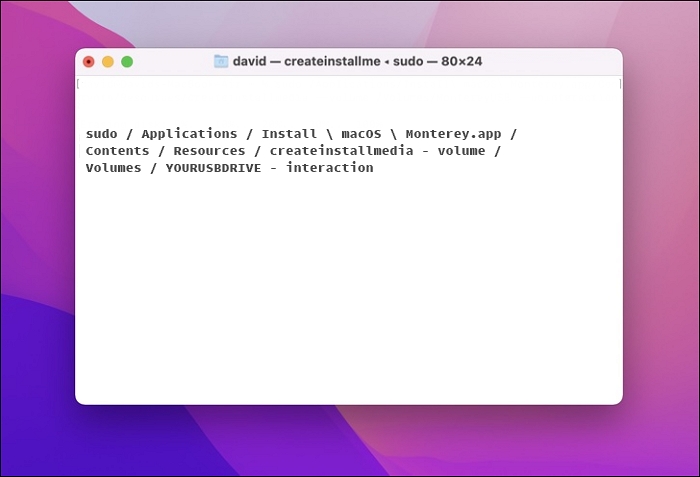
- Notice:
- YOURUSBDRIVE should be replaced by the USB drive's actual name.
Step 6. To complete the setup process, enter your password for the primary admin account and press the enter key.
Clean install macOS Monterey with detailed guides
To start the clean installation of macOS Monterey, you should shut down your computer and restart it from the USB stick you generated, rather than the primary drive.
Step 1. Connect the bootable installer USB drive to your Mac.
Step 2. Shut down your Mac.
Step 3. Hold down the Option or Alt key while the Mac is starting up, and keep it pressed until a screen with the bootable volume appears.
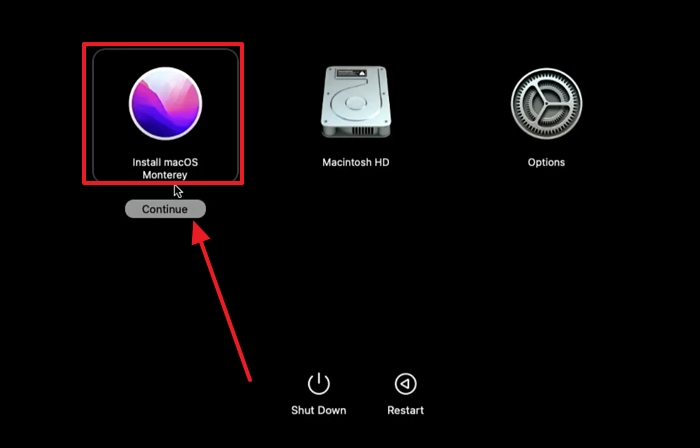
Step 4. The instructions are to select the installer volume that can be booted and then click Next.
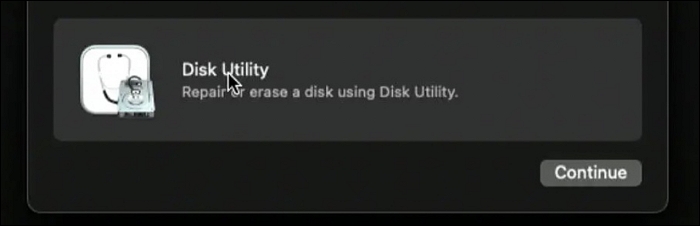
Step 5. From the utility window that displays, choose Install macOS.
Step 6. Finally, click Next to finish the procedure.
Now you can perform your clean install of macOS 12 Monterey.
How to Upgrade and Install macOS Monterey (macOS 12)
Upgrading to macOS 12 Monterey can be a straightforward process as Apple starts rolling out the new operating system upgrade.
Step 1. Click the "Apple Menu" and select "System Preferences."
Step 2. Go to System Preferences, then click on "Software Update" and look for the "Monterey update for macOS 12".
Step 3. Select "Update Now." to start the installation process.
Step 4. If the Mac App Store can't find the update, select "Updates" instead, then restart your Mac and launch the Mac App Store again.
Step 5. To download and install the OS update, click on the notification and follow the on-screen directions.
How to Recover Data When macOS Monterey Installation Failed
When you install or upgrade your operating system, your computer's operating system is replaced with a new one. This can cause your installed programs and files to be lost, as the new operating system may not be able to read the old files. However, there are ways to recover your data, such as backing up your files to an external hard drive or cloud storage, or using a data recovery software to scan your computer's hard drive for any recoverable files.
You can start by attempting to use free backup software, which enables you to save your data and retrieve it later. If you don't have a backup tool, backing up your data to Cloud storage is an option, such as storing data online using Apple's iCloud.
If you didn't back up your data and files, another option is to attempt using a third-party recovery tool, such as Deep Data Recovery for Mac.
- You can easily recover deleted files on a Mac with this reliable recovery tool, which can restore lost files immediately on macOS Monterey, even if the installation becomes stalled.
- Deep Data Recovery can assist you to restore Mac trash data if you unintentionally erase files and folders and empty the Mac Trash.
Continue reading the guide after downloading Deep Data Recovery for Mac, a powerful tool designed to scan and recover lost or deleted files from various storage devices, including Mac hard drives, external drives, and more.
Step 1. Select file types and click "Next" to start
Launch Deep Data Recovery on your Windows computer, select the file types you want to recover, and then click "Next" to begin the recovery process.

Step 2. Select the location
After updating to macOS Ventura/Monterey/Big Sure/Catalina, select the disk where you lost data and click "Search for lost files".

Step 3. Find lost data after the scan
Deep Data Recovery for Mac scans the selected disk volume, displaying the results in the left pane, allowing users to find specific data using file type and file path.

Step 4. Recover data after macOS update
Select the target files that were unknowingly lost during or after the update and click the "Recover" button to recover them.
Install macOS Monterey FAQs
Here are 4 questions that you might be interested in. Check here for the answers.
1. How long does Mac Monterey take to install?
The installation of macOS Monterey on a Mac typically takes around 10 minutes to complete. However, if the process becomes stuck for an extended period, it may be helpful to restart the Mac to resolve the issue.
2. How to install macOS Monterey on an unsupported Mac?
The macOS Monterey patcher program can be used to complete the task, but since your Mac wouldn't receive the software update directly from the Mac App Store, there is no simple way to install the macOS Monterey on an incompatible Mac.
3. Can I install macOS Monterey from USB without the internet?
A bootable installation of macOS Monterey doesn't require an internet connection to download the operating system itself, but it does need a connection to download firmware and other device-specific information.
4. How do I reinstall macOS?
All installers for macOS Monterey, Big Sur, and Catalina can be found on the Mac App Store, while installation instructions for each version can be generated using Terminal commands.
Conclusion
Downloading and installing macOS Monterey is a relatively simple procedure. To avoid problems, it's best to carefully read the instructions and follow each stage. Once installed, you can enjoy all the new features and enhancements that macOS Monterey has to offer.
If your Mac is having trouble booting into Recovery Mode, you can try using the Qiling recovery tool to create a bootable drive and recover your data. This tool can help you create a bootable drive and recover your data, even if your Mac is unable to boot into Recovery Mode.
Related Articles
- 6 Ways to Fix Windows Update Not Working Windows 11/10
- How to Format External Hard Drive for PS4 [2022 Full Guide and Choice]
- Dash Cam Card Full Error: How to Fix 'Dash Cam Says SD Card Full'
- 3 Ways | How to Enable and Disable Offline Files in Windows 10
- 5 Best 2022 Office Key Finder Free Download with Full Guide - Qiling
This page recommends the 5 best Office key finder software that you can download for free. With these tools, you can easily find your lost or missing Office key using the provided guidelines. - What Is Offsite Backup? [All You Need to Know]
Do you want to make your business data backup full-proof? Then follow our guide on Offsite backup. It ensures your data survives cyberattacks and natural disasters with the flexibility of scaling.