How to Turn off Windows Defender on Windows10 [A Complete Guide]
Windows Defender, now called Windows Security, is the default anti-malware program that comes with Windows, protecting against viruses, ransomware, spyware, and other malware, as well as hackers. It's a reliable alternative to other antivirus software, but you may still want to turn it off occasionally.
This guide will show you how to disable Windows Defender on Windows 10.
Why Disable Windows Defender on Your Computer
Here are some common reasons that people need to disable Windows Defender on Windows 10 temporarily or permanently:
- To install another third-party antivirus program like Bitdefender or McAfee on your computer, you need to disable Windows Defender. This allows the new antivirus software to function properly and provide real-time protection against malware.
- Windows Defender is flagging a legitimate application as a potential threat, causing installation issues. This can happen when the application's code or digital signature is not recognized or is outdated, leading Windows Defender to block the installation. To resolve this, you can try adding the application to the Windows Defender exclusion list or updating the application's digital signature.
- Some system settings on your computer conflict with Windows Defender, and you need to disable it to fix the issue.
- You don't use Windows Defender as you already got another powerful antivirus program on your computer.
Unfortunately, it's not possible to completely uninstall Windows Defender from your computer, so the only option is to disable it instead.
How to Turn off Windows Defender on Windows 10
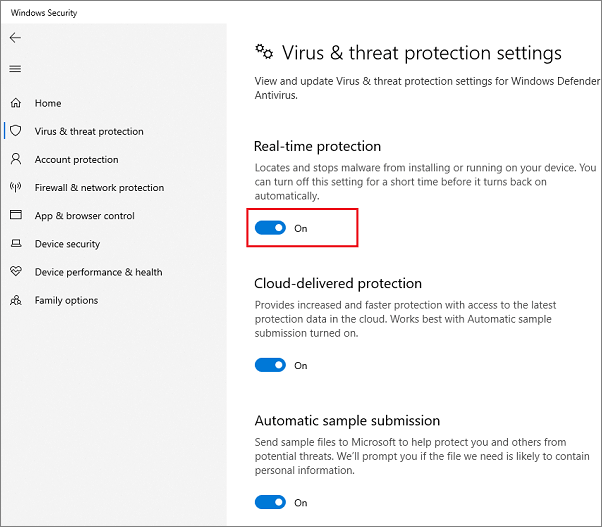
To temporarily disable Windows Defender on your Windows computer, go to Start, then type "Windows Security" in the search bar and click on the result. On the Windows Security window, click on the "Virus & threat protection settings" option. Under the "Virus & threat protection settings" page, toggle the switch next to "Real-time protection" to the "Off" position.
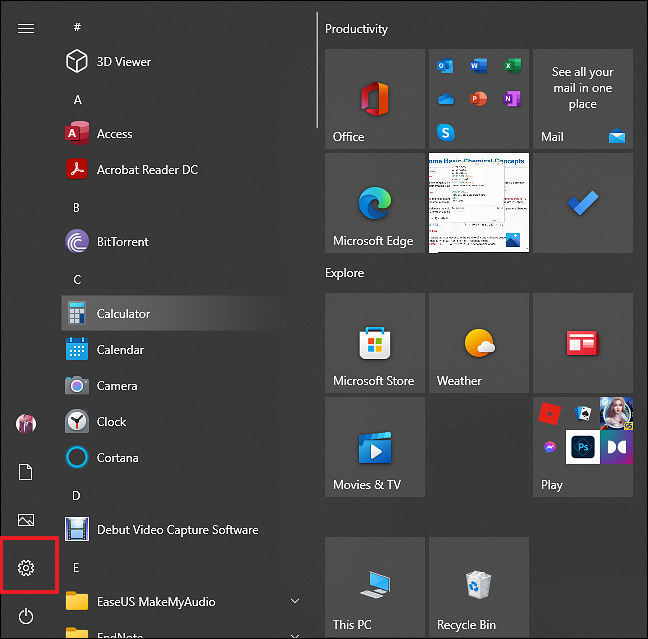
Step 1. To access the Settings menu in Windows, click on the Start button, typically located at the bottom left corner of your screen, and select "Settings" from the menu that appears.
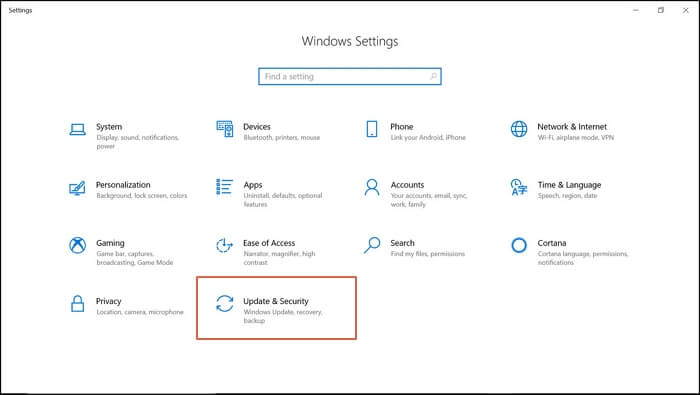
Step 2. Click "Update & Security" on the Windows Settings page.
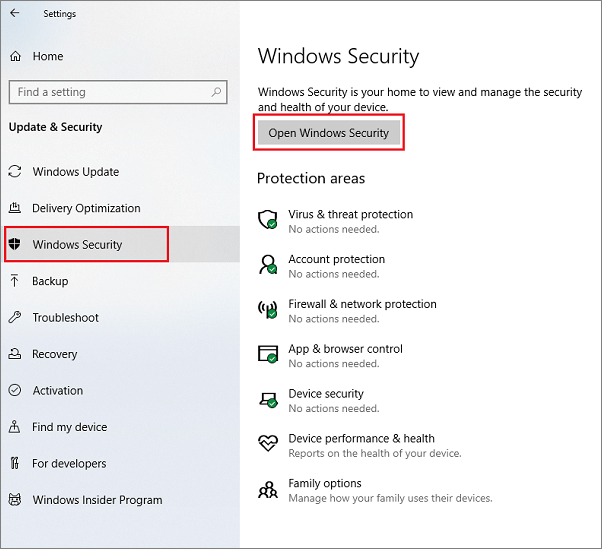
Step 3. To access the Windows Security feature, select it from the left panel, then click on "Open Windows Security."
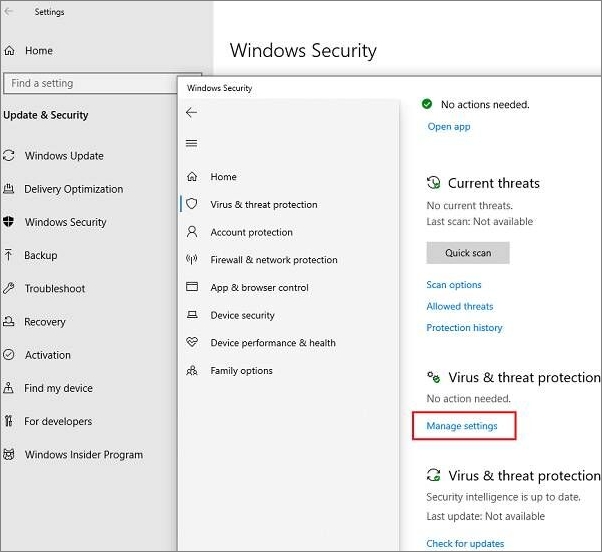
Step 4. To access the virus and threat protection settings, click on "Virus & threat protection" and then scroll down the page to find "Manage settings." Click on it.
Step 5. To disable Windows Defender on Windows 10, you can access the Virus & threat protect settings, where you can disable the Real-time protection and toggle the Windows Security on/off button. This will temporarily disable Windows Defender. You will then need to confirm your operation to complete the process.
After turning off Windows Defender on Windows 10, you can perform desired operations without its interference. To re-enable it, simply follow the same process as disabling it. Alternatively, waiting for the next reboot will automatically reactivate Windows Defender's real-time protection.
How to Permanently Disable Windows Defender on Windows 10
To permanently disable Windows Defender on Windows 10, you can modify your Registry file, which may seem daunting but is actually a quick and straightforward process that can be easily reversed by modifying the registry again to enable it.
- Notice:
- It's not recommended to permanently turn off Windows Defender on Windows 10, as it can leave your computer vulnerable to malware and other online threats.
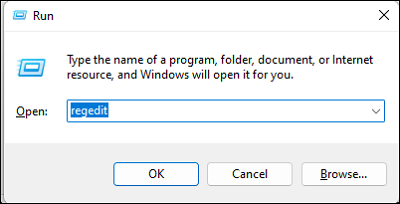
Step 1. To open the Registry Editor, press the Windows key + R to open the Run dialog, type "regedit" and click "OK".
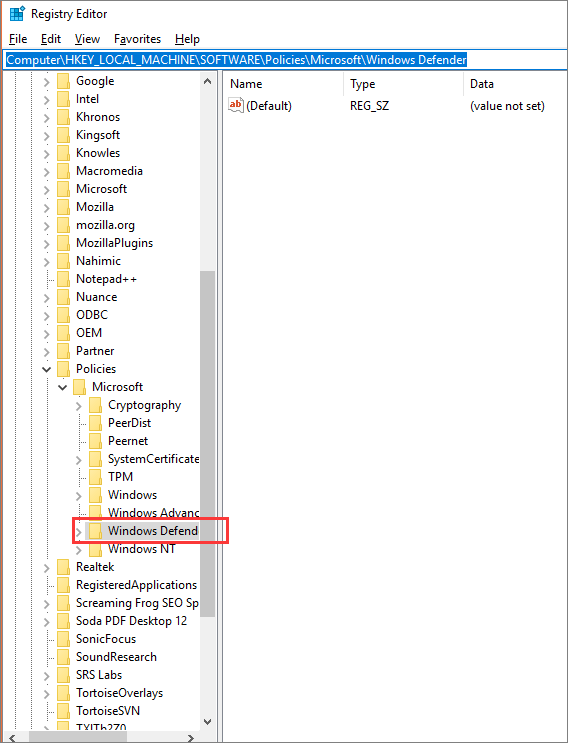
Step 2. To locate Windows Defender in the right panel, you need to navigate to the Windows Defender section in the Settings app. This can be done by clicking on the Start menu, then selecting the "Settings" icon, followed by clicking on "Update & Security", then selecting "Windows Security", and finally clicking on "Virus & threat protection" or "Protection updates". Once you're in the Windows Defender section, you should see the relevant settings and options to manage Windows Defender.
\HKEY_LOCAL_MACHINE\SOFTWARE\Policies\Microsoft\Windows Defender
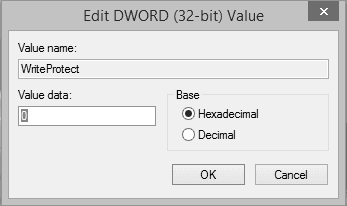
Step 3. To disable Windows Defender, create a file named "DisableAntiSpyware" in the Windows Registry. If it doesn't exist, create a new DWORD (32-bit) Value with the name "DisableAntiSpyware".

Step 4. To validate the file, right-click on it, select "Modify...", and enter "1" as the value data.
When you start your computer, Windows Defender won't run. For more details, you can click here to view the Windows 11 Defender disable instructions.
Conclusion
Windows Defender is a useful program that helps prevent unwanted malware, but it can sometimes limit your accessibility. Disabling it in specific circumstances may be the best option, but in most cases, it's recommended to keep it on.
You can check more guides about Windows Defender from the site, like Windows Defender is missing or not working.
Related Articles
- How to Fix macOS Ventura WindowServer Prevents from Sleeping [10 Available Solutions]
- 5 Best SSD For Long Term Storage Recommendations in 2022
- How Many CPU Cores Do I Have [Fixed]
- 2022 Tips| Are You Sure You Want to Copy This File Without Its Properties [Fixed]
- BitLocker Recovery Screen: How to Fix It After Windows Booting
If you're stuck on the BitLocker recovery screen, you can try to bypass it or enter the recovery key to regain access to your system. This is crucial as without the key or bypass, you won't be able to recover data from the system. - Black Screen After BIOS Update [Causes & Fixes]
If your PC displays a black screen after a BIOS update, it's not the end of the world. The issue could be due to a corrupted BIOS, a faulty power supply, or a malfunctioning graphics card. To resolve this, try booting in safe mode, checking for loose connections, or resetting the BIOS to its default settings. If none of these work, you might need to reinstall Windows or seek professional help.