How to Fix macOS Ventura WindowServer Prevents from Sleeping [10 Available Solutions]
If your Mac is having trouble sleeping due to the WindowServer process in macOS Ventura, there are ten potential solutions to try. To find out more, click on the "Full Steps" link in the chart below to jump straight to the tutorial.
| Workable Solutions | Step-by-step Troubleshooting |
|---|---|
| Fix 1. Quit Process in Activity Monitor | After checking the prevent sleeping applications or processes with Activity...Full steps |
| Fix 2. Restart Your Mac | Choose "Shut Down" under the Apple menu, and hit the power button...Full steps |
| Fix 3. Adjust macOS Ventura Lock Screen Settings | Click the Apple icon and choose "System Settings" on macOS Ventura...Full steps |
| Fix 4. Turn Off the Sharing Options |
You need to open the "System Settings" on macOS Ventura. In the sidebar, you should click "General"...Full steps |
| Other solutions |
Open the System Settings and click "Battery" in the sidebar. Click "Options" and set it to never...Full steps |
What Prevents macOS Ventura from Sleeping
If your Mac's battery drains during sleeping after downloading macOS Ventura, it's likely due to some applications or the WindowServer holding your Mac from sleeping. To resolve this, check the Activity Monitor to identify the culprit, and then force quit the problematic application to allow your Mac to sleep properly.
How to check with macOS Ventura Activity Monitor:
Step 1. Use Spotlight to search Activity Monitor and launch it.
Step 2. You can view the columns by clicking on the "View" tab and then selecting "Columns" from the dropdown menu, where you will find the option to "Preventing Sleeping" at the bottom.
Step 3. To see which applications on your Mac are preventing it from sleeping, you can check the "Users" tab in the Activity Monitor app. Look for applications that show "Yes" in the "Sleep" column, indicating that they are preventing the Mac from sleeping. This can help you identify which apps are consuming system resources and keeping your Mac awake.

If you find out the macOS Ventura WindowServer prevents your Mac from sleeping, you don't have to force quit WindowServer. Instead, you should identify and quit any related applications that may be causing the issue. Alternatively, you can try various methods to resolve the problem.
Fix macOS Ventura WindowServer Prevents from Sleeping [10 Workable Solutions]
If you're looking to use the Sleep Mode on your Mac or MacBook without issues, there are multiple plans that can help. You can continue reading to find a suitable solution that suits your needs.
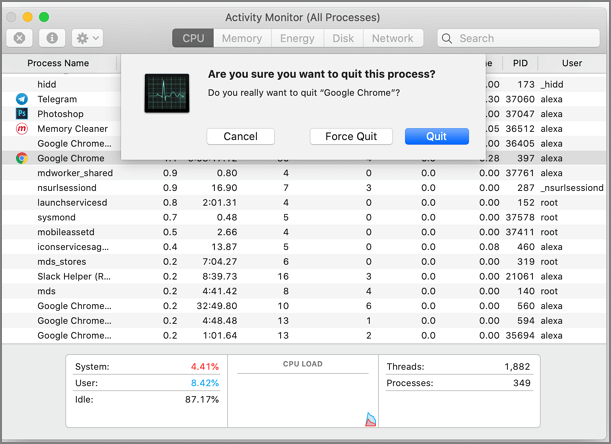
Fix 1. Force Quit Processes or Applications Prevents from Sleeping
After checking the prevent sleeping applications or processes with Activity Monitor, double click on the target application or process to select it. Then, click "Quit" or "Force Quit" to force quit the application or process.
Fix 2. Restart Your Mac to Solve the Sleep Mode Issue
Sometimes, restarting your Mac can help resolve some macOS Ventura issues. You can restart your Mac in three ways: by clicking the Apple logo in the top menu bar, using the keyboard shortcut Command (⌘) + Option (⌥) + Power button, or pressing and holding the Power button until it shuts down, then turning it back on.
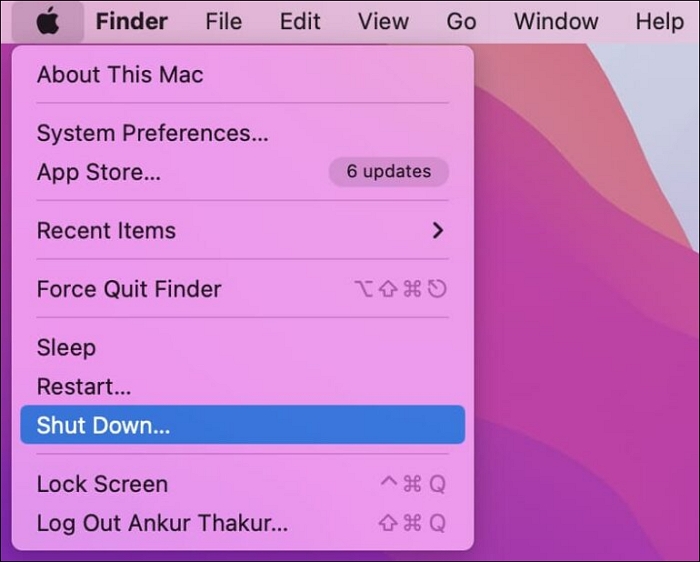
Method 1. To shut down your Mac, select "Shut Down" from the Apple menu, then press the power button or use Touch ID to restart your device.
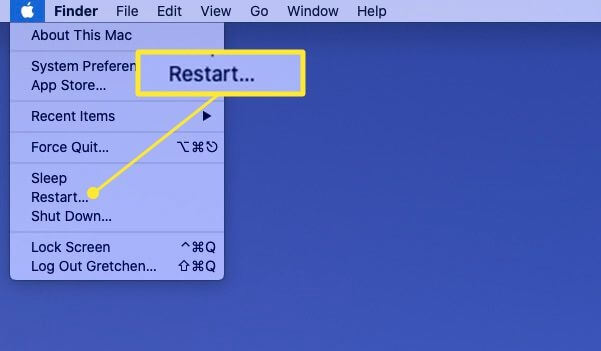
Method 2. To restart your Mac or MacBook, click on the Apple menu and select "Restart". This will initiate the shutdown process, and your device will automatically restart once it has finished shutting down.
Method 3. Hold your Mac's power button for 10 seconds to force shut down, then press it again to turn it back on and boot up.
Fix 3. Adjust macOS Ventura Lock Screen Settings on Mac
If your Mac won't sleep, it might be because you've set it to never sleep in the lock screen settings. To fix this, you can check and adjust the lock screen settings on your macOS Ventura device.
Step 1. On macOS Ventura, click the Apple icon located in the top left corner of the screen, then select "System Settings" from the dropdown menu.
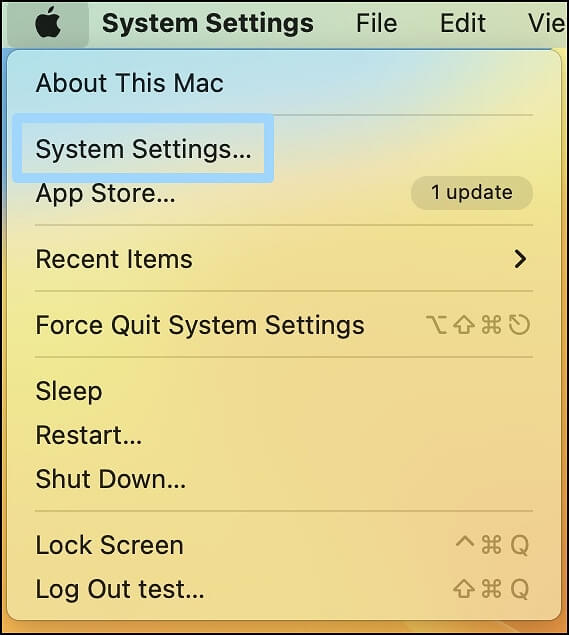
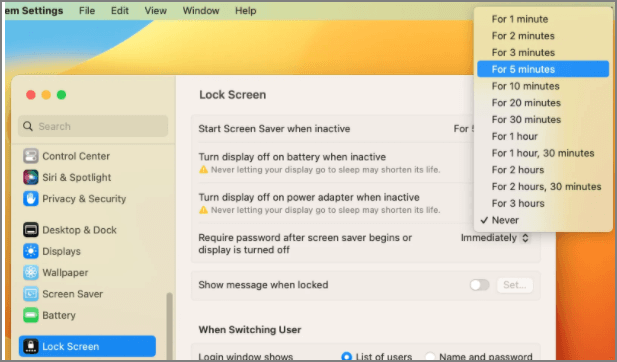
Step 2. Click "Lock Screen" from the sidebar.
Step 3. Make sure you don't set your Mac to never sleep.
Fix 4. Turn Off the Sharing Options on macOS Ventura
If you're experiencing issues with your Mac not turning to sleep on macOS Ventura, it may be due to having screen sharing or printer sharing enabled. To resolve this, you can disable these sharing options by going to System Settings > Sharing, then toggling off the switches for Screen Sharing and Printer Sharing. This should allow your Mac to turn to sleep normally.
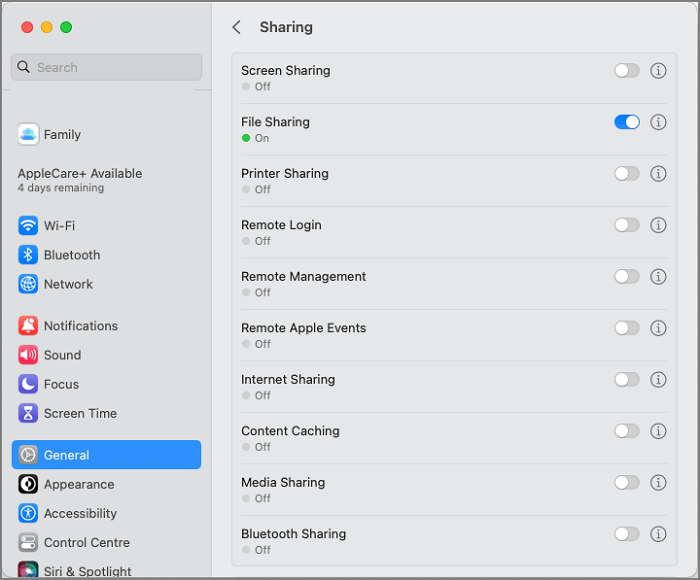
Step 1. You need to open the "System Settings" on macOS Ventura.
Step 2. In the sidebar, you should click "General".

Step 3. To turn off screen sharing and printer sharing on a Mac, scroll down and click on "Sharing", then toggle off the options for "Screen Sharing" and "Printer Sharing" as needed.
Fix 5. Set to Never Wake for Network Access in Battery Settings
If you turn on sharing options on your Mac, your Mac won't sleep if others access your printer or screen through the internet.
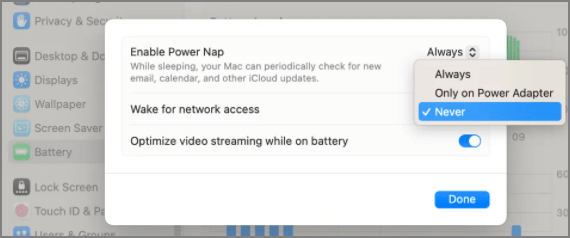
Step 1. Open the System Settings and click "Battery" in the sidebar.
Step 2. To prevent your computer from waking up for network access, go to the "Options" menu and select the option to never wake for the network access.
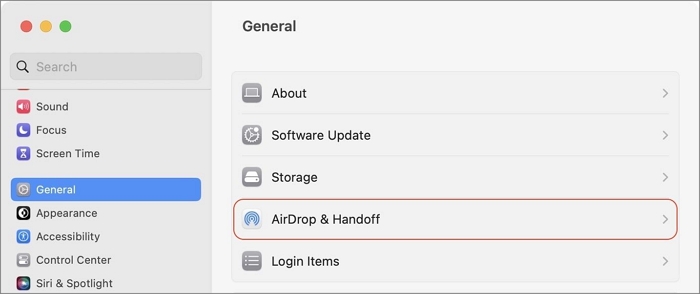
Fix 6. How to Disable Handoff on macOS Ventura
If you have multiple Apple devices, you can turn on AirDrop and Handoff on your Mac. However, this feature can sometimes prevent your macOS Ventura from entering Sleep Mode. If you're experiencing this issue, you may want to consider turning off the Handoff option.
Step 1. Open the System Settings and click "General" in the sidebar.
Step 2. To disable AirDrop & Handoff, go to System Preferences, select "Sharing", and toggle the switch beside "Allow Handoff between this Mac and your iCloud devices" to the off position.
Fix 7. Fix macOS Ventura WindowServer Prevents from Sleeping in Safe Mode
To troubleshoot macOS Ventura software issues, you can boot your Mac into Safe Mode, which can also help check if your Mac can enter Sleep Mode. To do this, shut down your Mac, then press the power button to turn it back on. As soon as the boot chime sounds, hold down the Shift key.
Intel-based Mac:
Step 1. To restart your Mac and boot in safe mode, simply restart your Mac and hold the Shift key. Release the key until the Apple logo appears on the screen. This will boot your Mac in safe mode.
Step 2. To enable Safe Mode on your account, you need to log in to your account first, and then the Safe Mode option will appear.
Apple Silicon Mac:
Step 1. Shut down your Mac and hold the power button.
Step 2. Release the power button until you see the startup options on the screen.
Step 3. To start your computer in Safe Mode, press the Windows key + X and select Restart while holding down the Shift key. This will allow you to choose the startup options, and you can select "Continue in Safe Mode".
Fix 8. Spotlight Indexing may Cause Mac Fail to Enter Sleep Mode
When macOS Spotlight indexes your Mac, it keeps the device awake until the process is complete. This can take minutes or hours, depending on the size of your hard drive. Once the indexing is finished, you can put your Mac to sleep.
Fix 9. Update macOS Base System to Fix the System Issue
If you're having trouble with your Mac sleeping, try updating the macOS base system through Software Update, which might resolve the issue.
Fix 10. Contact Apple Support to Solve the Sleeping Issues
When you're stuck with a problem you can't solve, it's best to seek help from a professional. For a swift resolution, consider visiting an Apple Retail Store.
Recover Lost Data While Fixing the macOS Ventura Issues
Fixing macOS Ventura WindowServer issues may result in data loss, along with other problems like applications not quitting properly and failed updates.
To recover data lost while fixing macOS Ventura issues, you can use Deep Data Recovery for Mac, a safe and efficient tool that quickly and safely retrieves lost data.
This reliable macOS Ventura data recovery software can help recover deleted files on macOS Ventura from different storage devices, including SD cards, USB flash drives, external hard drives, memory cards, and more, allowing you to recover photos, music, videos, audio, emails, and other files.
Whether you're looking to recover lost photos after a macOS Ventura update or restore data after a factory reset, Deep Data Recovery for Mac can help you rescue data in just three steps.
Step 1. Select file types and click "Next" to start
Launch Deep Data Recovery on your Windows, select the file types you want to recover, and click "Next" to begin the recovery process.

Step 2. Search for lost files
Select the disk location to search for lost files, which can be an internal HDD/SSD or an external hard drive where you lost data and files, and then click the "Search for lost files" button.

Step 3. Go through the scanning results
This software scans the selected disk volume and displays various file types, including pictures, documents, audio, videos, and emails, in the left pane.

Step 4. Select the file(s) and recover
To recover deleted data, click the "Recover" button after previewing the data. This will restore the deleted files and folders to their original location.
macOS Ventura WindowServer Prevents from Sleeping FAQs
We have prepared three additional questions and answers in case you want to learn more about a topic, such as a product or service, or a concept. These questions and answers can provide further clarification and details, helping you to better understand the subject matter.
How to fix can't install macOS 13 Ventura on Mac?
Users may encounter issues installing macOS Ventura on their Mac due to insufficient storage space or a poor internet connection. To resolve this, they can try deleting unnecessary files, reinstalling macOS, or using an external drive to free up space. Additionally, ensuring a stable internet connection or using a different network can also help.
- 1. Free up storage space.
- 2. To check if your Mac device can install macOS 13, you can go to the Apple website and use the "System Requirements" tool. This tool will guide you through a series of questions about your Mac's specifications, and based on your answers, it will tell you whether your device is compatible with the new operating system.
- 3. Have a stable internet environment.
- 4. Restart your Mac.
- 5. Reinstall macOS Ventura in Recovery Mode.
How to fix WindowServer quit unexpectedly on macOS Ventura?
Fixing the "WindowServer quit unexpectedly" issue on macOS Ventura involves several solutions. One approach is to reset the System Management Controller (SMC) and the Power Management Unit (PMU) by pressing the power button, the command (⌘) + option (⌥) + Shift + power button, and then pressing the power button again.
- 1. Adjust settings in Mission Control.
- 2. Delete display preference files on Mac.
- 3. Change the Lock Screen settings on macOS Ventura.
- 4. Update macOS Ventura.
- 5. Downgrade macO Ventura.
- 6. Create a new account on macOS 13.
How to fix WindowServer's high CPU usage on Mac?
To reduce WindowServer's high CPU usage on Mac, consider deleting unnecessary items from the desktop, closing unneeded windows, and disabling visual effects. Additionally, manually removing any viruses may also help to alleviate the issue.
Related Articles
- How to Format USB to exFAT on Mac [Ultimate Guide]
- Fix Windows (11/10/8/7) Won't Boot From USB Error
- 3 Proven Ways to Download & Install macOS 12 Monterey for Free [2022 Tips]
- Windows Backup 0 Bytes | Get the Answer here!
- How to Check If Disk Is Failing in Windows/Mac [2023 Complete Guide]
Learn how to check if a disk is failing. Review warning signs, SMART status, disk tests, and backup steps before data loss. - Checksum Error in WinRAR? How to Fix the Checksum Error (2023)
If you're experiencing a Checksum error in WinRAR, you can try repairing and recovering incomplete or partially corrupt files using professional recovery software. This can help you recover files that were not fully downloaded or were damaged during the download process.