How to Create a Disk Image on Mac
What Is a Disk Image on Mac?
A disk image is a copy of a disk or partition that can be used for backup or to save space by storing infrequently used large files in one place. It comes in various formats and can be used on Windows, macOS, and Linux, with the .dmg format being specific to macOS.
How to Create a Disk Image on Mac?
On a Mac, you can use the Disk Utility tool to erase, format, and mount disks, as well as create a disk image.
#To Create A Disk Image on Mac
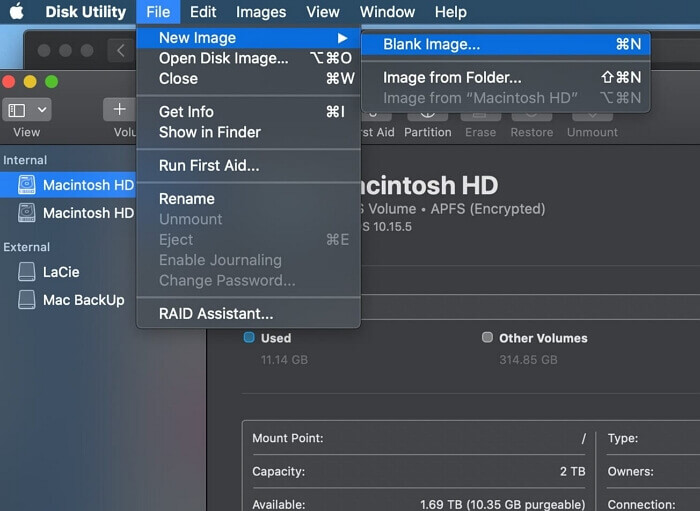
Step 1. Open Disk Utility and create a blank image by going to File > New Image > Blank Image.
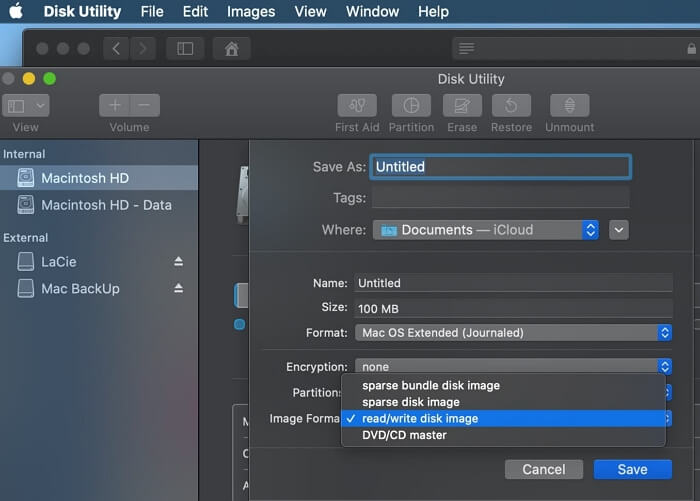
Step 2. To create a disk image of a drive or folder, enter a file name, add tags if necessary, and choose where to save it, which will be the name that appears in the Finder when saving the disk image file before opening it.
Step 3. Enter the name for the disk image in the Name field, which will be displayed on your desktop and in the Finder sidebar after opening the disk image.
Step 4. In the Size field, enter the desired size for the disk image.
Step 5. To change the format of a disk, click the Format pop-up menu and select the desired format from the options provided.
- If the disk will be used with Macs, choose Mac OS Extended (Journaled) or Mac OS Extended (Case-sensitive, Journaled).
- If the disk will be used with Windows or Mac computers and is 32 GB or less, choose MS-DOS (FAT).
- If the disk will be used with Windows or Mac computers and is over 32 GB, choose ExFAT.
- To encrypt the disk image, click the Encryption pop-up menu and choose an encryption option.
#To Partition and Format the Disk Image
Step 1. Click the Partitions pop-up menu, then choose a partition layout.
Step 2. Click the Image Format pop-up menu, then choose an option:
- Sparse bundle: A sparse bundle is a type of disk image that stores the directory data for the image in a different way than a sparse image. It uses the .sparsebundle file extension.
- Sparse disk image: This command creates an expandable file that dynamically shrinks and grows as needed, without using any additional space, and is saved with the .sparseimage file extension.
- Read/write: This tool allows adding files to a disk image after it's been created, using the .dmg file extension.
- DVD/CD master: The image size was changed to 177 MB (CD 8 cm) and saved with the .cdr file extension.
Step 3. Click Save, then click Done.
When you need to use a disk image, double-click it to open it. If it's encrypted, enter the password. Once mounted, access its contents in the Finder like any other disk, then eject it by dragging it to the Trash or choosing Disk Utility > Eject from the menu bar.
The Benefits of Creating Disk Image
Whether you're a Mac or Windows user, the benefits and functions of a disk image remain the same. Disk images offer several advantages, such as allowing you to create a snapshot of your system or data, compress and encrypt files, and easily transfer them to other devices, all while preserving the original file structure and permissions.
- Install the software on multiple computers without having to download it each time, by creating a centralized location where the software can be accessed and installed from, such as a network drive or a cloud storage service. This allows users to access and install the software from a single location, eliminating the need to download it multiple times.
- You can use the Terminal app to copy files to a disk or partition that can't be copied using the Finder. This is often necessary when working with external drives or network shares that don't support Finder operations.
- Create a bootable disk or partition.
- Restore a disk or partition to its original state.
Bonus Tip: How to Back Up Mac without Time Machine
In addition to Disk Utility, Mac also has a built-in tool called Time Machine, which is specifically designed for backing up data. However, for a more comprehensive and user-friendly backup experience, a third-party tool like Qiling Backup for Mac is recommended. This tool allows for easy and hassle-free backups to external hard drives or other storage devices with just three simple steps.
You can directly Google "Qiling Backup for Mac" or download and install the software for free to back up your Mac data under all Mac OS X without using Time Machine.
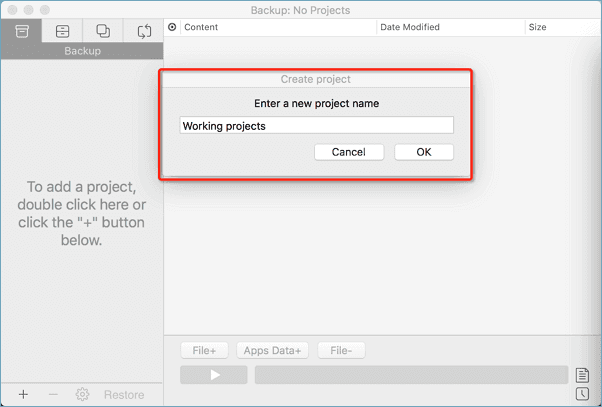
Step 1. Launch and run Qiling Backup for Mac.
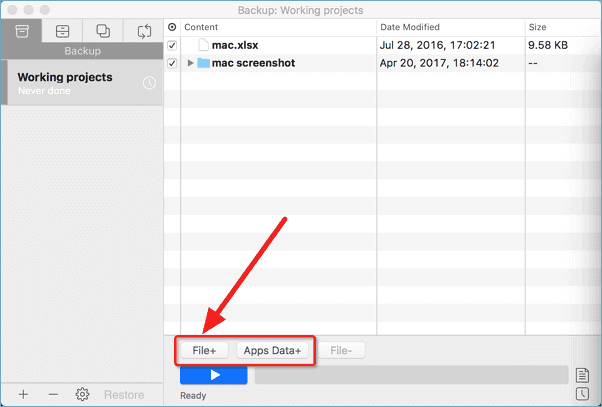
To create a backup project, click on the first "Backup" tab or the "+" button in the bottom-left corner, then name the backup project and click "OK".
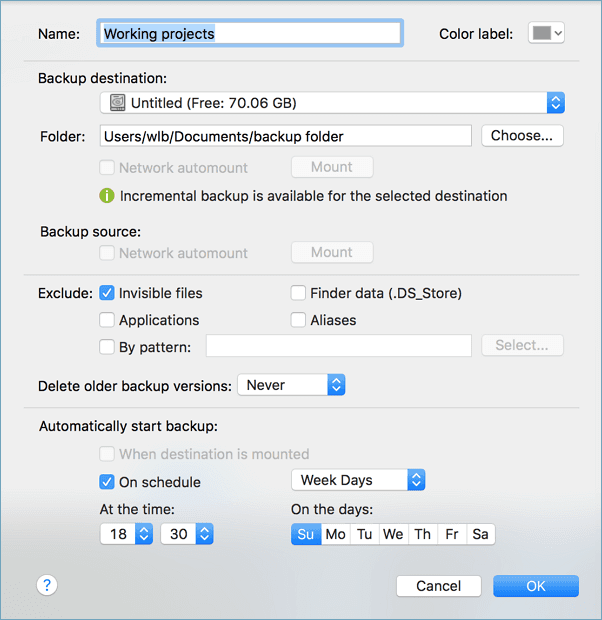
Step 2. Set up the backup destination where you want to store Mac files as backups, automatic backup frequency, etc and click OK.
Step 3. Add files and folders to the backup project.
To back up your Mac, click on File+ to select the files and folders you want to add to the backup, and then click the blue start button to initiate the backup process, sending the selected data to another drive or external device.
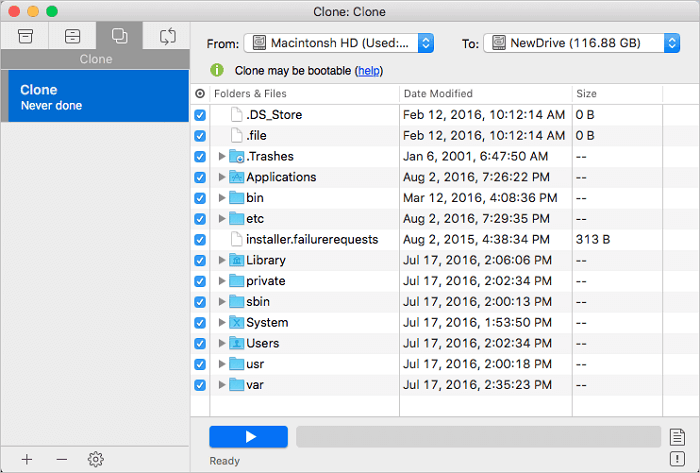
How to Clone a Hard Drive on Mac
You can download the most popular Mac cloning software to clone your Mac hard drive to an SSD without having to reinstall your operating system and applications.
The Bottom Line
Now you know how to create a disk image on Mac and the benefits of disk images. Just follow the steps above to make your own disk images. If you have any other questions, feel free to leave a comment below. Thanks for reading!
Related Articles
- Saving Mac Data | How to Back Up Mac Computer
- [Top 10] Best Disk Cloning Software for Mac - Free Download
- How to Fix Mac Migration Assistant Stuck or Frozen
- How to Clone USB Drive on Mac
- Fixed: ASUS Recovery Partition Not Working
Have you ever encountered "ASUS recovery partition not working"? See this article and you can learn to fix it within a few steps. - Computer Stuck in Windows 7 System Restore - How to Fix It Easily (5 Ways)
It is annoying that computer stuck on windows 7 system restore when use one key recovery. There are collecting some common situations to help you solve the problem that computer stuck on system restore.