System Image Backup Error 0x80070002: File Not Found
Quick Navigation:
- What 0x80070002 Means Here
- Find the Missing Object
- Rebuild the Backup Job
- Image the System Disk Cleanly
- Frequently Asked Questions
Windows Backup or the older System Image tool reports 0x80070002 and stops before the progress bar moves. The code is the system error ERROR_FILE_NOT_FOUND, and in a backup context it does not describe your data. It describes something the job expected to find at the moment it started: a settings file from an earlier plan, a volume it was told to include, a shadow copy component, or a destination folder that has moved. The image was never written, so nothing on the source disk was touched.
What 0x80070002 Means Here
During the preparation stage the backup service reads its schedule, resolves the volumes it has to capture, starts the volume shadow copy service, and opens the destination. A missing file in any of those four steps ends the job with the same code. That is why two machines can show identical errors for completely different reasons, and why the repair begins by identifying which object was absent rather than by deleting anything.
The stage matters. If the failure appears within the first seconds, the job never reached the disk, so the source drive is not the suspect. If it appears after the shadow copy is created and released, the error often belongs to a file inside a volume, such as a component of the system reserved partition that was removed by a third-party tool.
Codes that appear next to it help narrow the field. 0x800704CF points at a network destination that is no longer reachable, 0x80070020 at a file another process holds open, and 0x80780119 at a shadow storage area that is too small. When 0x80070002 stands alone, the missing entry is almost always local.
Find the Missing Object
Open Event Viewer and look under Windows Logs, then Application, for entries from Backup and from VSS around the time of the failure. The general text repeats the code, but the detail line and the faulting path name the object that could not be opened. Copy that path before you change anything, because clearing the schedule removes the record as well.
Check the destination next. A mapped drive that only exists in one user session, a USB disk that receives a new letter when it is reconnected, or a folder that was renamed all produce the same result. Recreate the folder or reselect the drive in the job settings, then confirm that the account running the backup can write there.
Then check the source side. A backup schedule left over from an older Windows installation can still point at partition identifiers that no longer exist after a reinstall or a repartition. Volume shadow copy components can also be missing when a prior cleanup tool removed them. vssadmin list writers and vssadmin list shadowstorage show the current state; vssadmin is a Microsoft tool used here only for diagnosis and is not part of Qiling Disk Master.
Rebuild the Backup Job
A stale schedule is easier to replace than to repair. In Backup and Restore (Windows 7), choose Turn off schedule, wait for the setting to be removed, then configure the schedule again against the current disks. Delete the old image folder only after you have confirmed that no current job refers to it.
If the system image tool itself refuses to start, remove the registry entry that holds its previous destination and let Windows recreate it on the next launch. Make the change on a machine you can restore, keep a note of the original value, and reboot before testing, because the backup service caches the path until it restarts.
When the missing item belongs to a system partition, run chkdsk on that volume in read-only mode first. chkdsk is another Microsoft utility supplied with Windows and serves only to report file system damage here. If it finds errors that cannot be corrected without a reboot, schedule the check and let it finish before you try the image again.
Image the System Disk Cleanly
The most reliable way past a corrupted plan is to stop depending on it. Qiling Disk Master builds its own job from the disks it can see at that moment, so a leftover path in the Windows scheduler has no effect on it. Pick the system disk as the source, choose a destination, review the plan, and proceed.
Step 1. Open System Backup from the Backup tab. Launch Qiling Disk Master, open Backup and Recovery, and click System Backup. The job is built from the disks visible at that moment, so there is no path to type and no old plan to inherit.
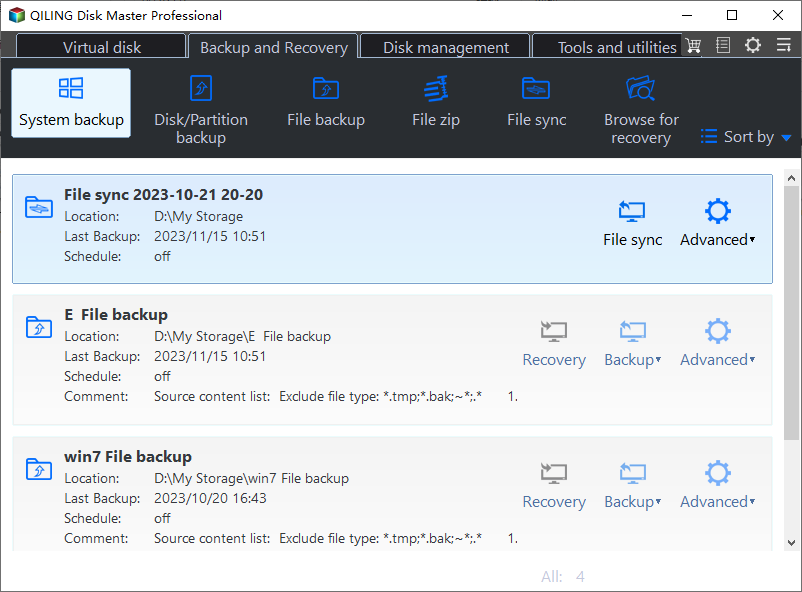
Step 2. Confirm the volume and boot files the program selected. System Backup identifies the partition that holds Windows and ticks it together with its boot and recovery partitions, showing each one with a letter, a size, and a file system. Check that the highlights match your own disk layout before you go on.

Step 3. Select a backup destination on a disk that is online and writable. An internal second drive or a USB disk that keeps its letter is the safest choice. A network share works when the credentials are stored for the service account; a drive letter that appears only after sign-in does not.
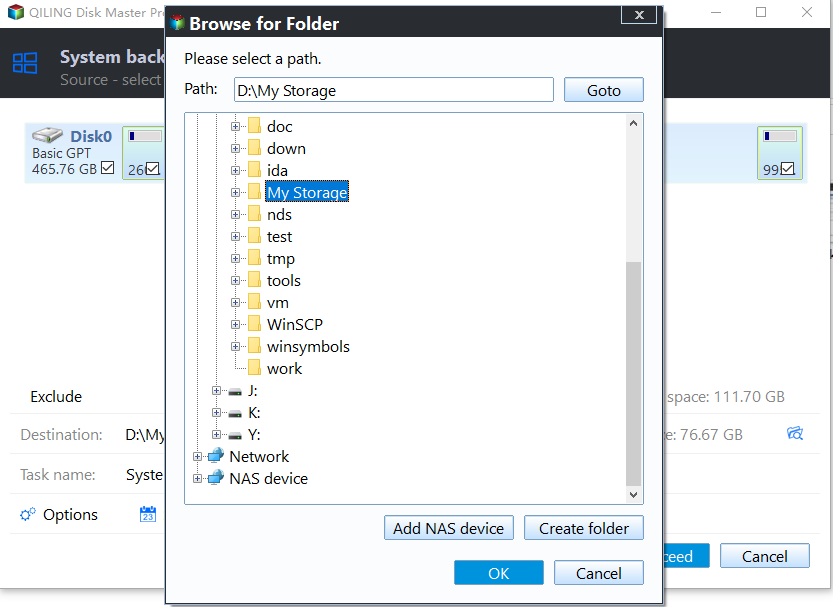
Step 4. Check the summary and click Proceed to start the image. The preview lists the source partition, the destination path, and the compression setting. Confirm them, then let the job run to the end without shutting the machine down, and verify that the image file exists at the stated size.
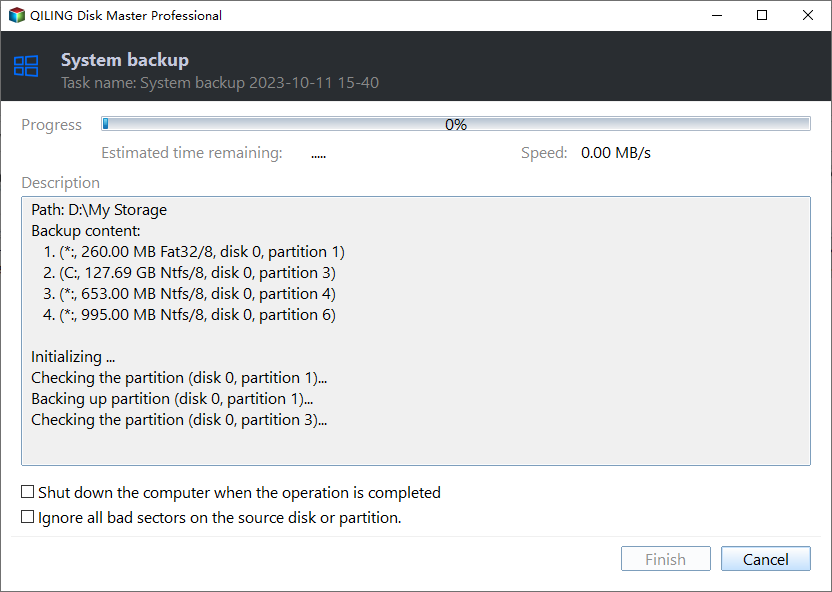
Keep the old image until the new one has been tested. Boot from a rescue medium once and confirm that the image is visible to the restore wizard; that single check is worth more than any log entry.
Frequently Asked Questions
Does 0x80070002 mean my files are damaged?
Usually not. The code reports a file the backup job could not find, and that file is most often a settings entry, a destination folder, or a shadow copy component. The source volume is read only after preparation succeeds, so a failure at this stage leaves your data exactly as it was.
Can I fix it without deleting the backup schedule?
Sometimes. If Event Viewer names a destination path, correcting that path may be enough. When the schedule points at partitions from an earlier installation, rebuilding the job is faster and safer than editing its stored identifiers, because a wrong edit can make the service skip volumes silently.
Why does the error return after a Windows update?
Feature updates can change partition identifiers and reset shadow copy components. A plan created before the update then refers to objects that no longer exist. Recreate the job after the update, or use a tool that builds the job from the live disk layout each time.
Related Articles
- System Image Backup Fails With 0x80780151 While Compacting the VHD
- System Image Restore Failed With 0x80042412
- Backup Error 0x80780119: Shadow Copy Storage Area Too Small
- System Image Recovery in Windows 11, 10, 8.1 and 7
- Backup Error 0x800704CF: Network Location Unavailable
Products
Articles & Tutorials
- Data Recovery
- Data Backup
- File Recovery
- File Backup
- System Backup and Restore
- Disk and Partition Clone
- Technical articles
- Mobile articles
- Disk Master Help
- Windows Data Recovery Tutorials
- Windows Secure Delete Tutorials
- Windows Partition Management Tutorials
- Windows File Backup and Restore Tutorials
- Windows System Backup and Restore Tutorials
- Windows Disk Backup and Restore Tutorials
- Windows Clone Tutorials