How to Fix the Task Image Is Corrupted or Tampered With (4 Ways)
| Workable Solutions | Step-by-step Troubleshooting |
|---|---|
| Delete the Corrupted Task | Go to Task Scheduler Library. Open the Microsoft and then Windows...Full steps |
| Delete the Windowsbackup File | Go to "My Computer". Open the drive where your operating system has been installed...Full steps |
| Delete/Re-Create the Schedule Key | To complete this task, you need to open the Registry Editor...Full steps |
| Re-Enable the User Feed Synchronization Task | If nothing is working for you, it can help you in resolving the error regarding...Full steps |
When running a program on your computer, it's not uncommon to encounter errors. Regular users often face issues, and one common notification is related to the Task Schedule Manager, specifically an error stating that the Windows 7 backup task image is corrupt.
This guide will show you how to respond when you get a tab on your computer with "Windows 7 backup task image is corrupted or tampered with". To understand all the possible solutions, you should read this blog till the end. Let us show you the process to get rid of this problem.
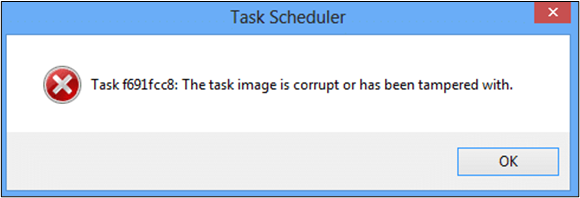
Error - The Task Image Is Corrupted or Tampered With
You may encounter error code 0x80041321 when setting up your Windows operating system, often accompanied by a message related to an error on the screen. This error typically indicates that there's a corrupted file associated with the scheduled backup task, which can cause issues with the configuration process.
The "the task image is corrupted or tampered with" error is not a significant issue, but rather a problem that needs to be addressed. The main focus should be on finding a solution to fix this error, rather than dwelling on why it occurs. In the following sections, we will provide the best fixes to adopt in this regard.
Back Up Windows 7 Files Before Fix The Task Image
To ensure the safety of your data, you should take a backup of your work before proceeding to fix the error. This can be done by saving your work in a cloud storage service or by copying it to an external hard drive. This way, you can rest assured that your data is safe and can be recovered if something goes wrong during the error-fixing process.
To avoid losing valuable data, it's essential to back up your Windows 10/8/7 files regularly to ensure your important files are safe and can be recovered in case of data loss or corruption. This can be done using the built-in backup features in Windows or by using external backup software. By taking this simple step, you can protect your data and avoid the stress of losing valuable information.
By using Qiling's free backup software, you can focus on the upcoming solutions without the hassle of using an ordinary tool to get back up, making the process much easier.
Qiling Backup is one of the best disk imaging software available, allowing you to back up data before performing actions. Its simple interface and one-click working method make it easy to get a backup of your files with just one click.
Qiling Backup is a free tool that performs proper and deep disk imaging to recover lost data. It will also save the recovered files for later use. The tool has several features that make it a valuable asset for users.
- Extensive cloud storage space
- Extraordinary level of security
- High efficiency in data backup
- Easy to use with a user-friendly interface
Step 1. Click the "File backup" button to start backup.

Step 2. Files from both local and network locations will be displayed on the left, allowing you to expand directories and select the files you want to back up.

Step 3. Select the destination where you want to save the backup, following the on-screen guide.

Step 4. To encrypt the backup with a password, click on the "Options" button and navigate to the "Backup Options" section, where you can customize the backup task to suit your needs.

Set the backup schedule and choose to start backing up at certain event in "Backup Scheme".

Step 5. The backup can be stored on a local drive, Qiling's cloud service, or a NAS.

Step 6. Qiling Backup allows users to back up data to both third-party cloud drives and its own cloud drive, providing users with flexibility and redundancy in their data storage and backup needs.
To back up data to a third-party cloud drive, select Local Drive, scroll down to add Cloud Device, add and log in to your account.
Step 7. Click "Proceed" to start the backup task. Once completed, it will be displayed as a card on the left panel. To further manage the backup task, right-click on it.

Fix Windows 7 Backup Task Image Is Corrupted or Tampered With
If you've backed up your data using the tool, you're in a safe position to address the issue. Not every solution will work for everyone, so we've listed four methods you can try to resolve the problem.
If one method doesn't work, don't worry, you can try the other. We'll guide you through both methods step by step. Let's start with the first method, and if that doesn't work, we'll move on to the second. We'll show you how to follow each method carefully.
Fix 1. Delete the Corrupted Task in the Registry
To open the task scheduler, click the Start button using your keyboard, which is one of the easiest methods to adopt. You don't need to be a technical person in this field to perform this activity, making it accessible to everyone. By doing so, you can easily access the task scheduler and start using it to manage your tasks efficiently.
To continue, search for Task Scheduler and navigate to the options shown in the window. Then, use the navigation to open Windows Backup, following the steps to complete the process.
- Go to Task Scheduler Library
- Open the Microsoft and then Windows
- Look for WindowsBackup
- Click on the folder to open it
- Look for Automatic Backup and Windows Backup Monitor
- Delete both tasks
Once the backup is done, you need to restart the backup process using the Backup and Restore Center.
Fix 2. Delete the WindowsBackup File to FixTask Image Is Corrupted
If you're having trouble finding the WindowsBackup files, you can simply delete the entire WindowsBackup folder. If you're unable to locate the files, follow these steps to delete the folder:
- Go to "My Computer"
- Open the drive where your operating system has been installed
- Click on the Windows folder and then the System32 folder
- After that, look for Tasks, then Microsoft and Windows
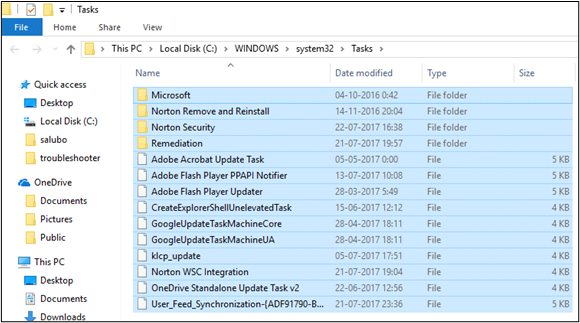
- Here, you will get the "WindowsBackup" file
- Right-click on that file and delete it
- Permit to delete if asked
This process is simpler and easier than the previous one. You can easily navigate to your desired file using the steps above, and the preview will be clear, making it a more straightforward and efficient way to access your files.
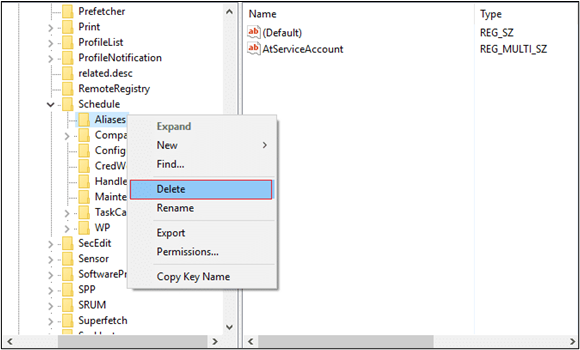
Fix 3. Delete/Re-Create the Schedule Key from the Registry
To resolve Windows 7 backup task image corruption and the associated 0x80041321 error, consider modifying your computer's registry manually, requiring some technical knowledge. This approach can be effective but demands a certain level of expertise to execute correctly.
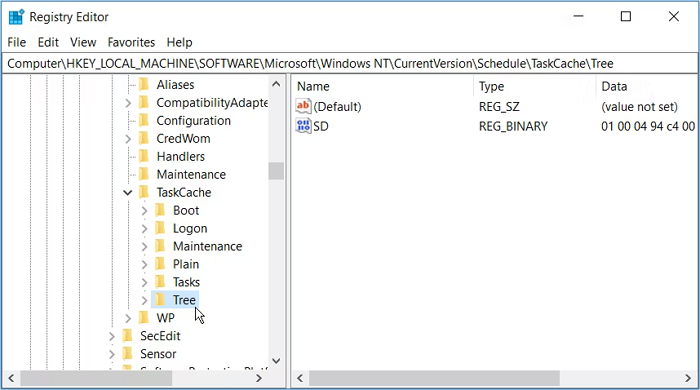
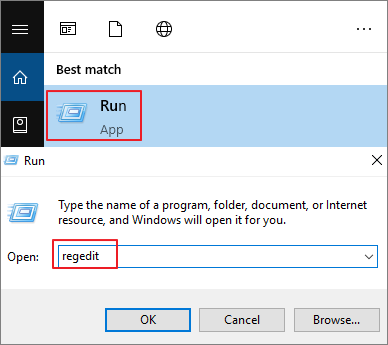
Step 1. To complete this task, open the Registry Editor by pressing Windows & R simultaneously, search for "Regedit" and click enter.
Step 2. To access the Schedule file from the registry, follow the navigation pane: Task Scheduler Library > Microsoft > Windows.
Step 3. To delete the Schedule key with all of its sub-keys, navigate to HKEY_CURRENT_USER\Software\Microsoft\Office\16.0\Outlook\Options\Schedule. Delete all the sub-keys under Schedule, then save the changes and close all windows.
Fix 4. Re-Enable the User Feed Synchronization Task
If you're experiencing issues with the Task Scheduler, running the "User feed synchronization" might help resolve the error related to a corrupted or tampered task image. This feature updates the RSS feed and works in conjunction with the Task Scheduler.
To resolve the issue of a Windows Update error, you can try disabling and re-enabling the Windows Update service. This can be done by accessing the elevated command prompt, navigating to the Run As Administration window, and performing the necessary commands to disable and then re-enable the service. This process can help resolve the issue and allow Windows Update to function properly again.
Conclusion
To resolve the Windows 7 backup task image corrupted or tampered with error, it's essential to approach the process with care, ideally when you have sufficient time.
A minor mistake can lead to permanent data loss, so it's essential to be cautious. Additionally, you should automatically back up your data using the Qiling free tool mentioned above, which will keep you safe even if you've deleted files that were previously corrupted.
Windows 7 Backup Task Image Corrupt FAQs
If you are still looking for an answer to your query, you can read the following section. We have written the quick answers to the most common question asked by the users.
How do I fix a corrupt Task Scheduler?
To solve this problem, you can use any of the methods mentioned above, which are workable in different conditions related to the reason behind the error.
How do I know if my Task Scheduler is failing?
To check if a task is enabled or not, you can use the `is_enabled()` method. This method returns a boolean value indicating whether the task is enabled or not. You can also use the `get_next_run_time()` method to check the scheduled time for your task. This method returns the next scheduled run time for the task, or null if the task is not scheduled. If you want to check both the enabled state and the scheduled time, you can use a combination of these methods.
Is Windows Task Scheduler a service?
Yes, this is a service that enables you to perform tasks on your computer automatically.
What is the MsCtfMonitor task?
The task monitors the TextServicesFramework system service, running when the computer is turned on or the user logs in.
Related Articles
- Windows 10 Backup No Usable Drives Found [Updated Issue Solved!]
- Clone SSD to HDD with SSD to HDD Cloner for Windows 10/11
- (Updated!) Top 5 Driver Backup Software for Windows 11/10/7/XP
- Seagate Backup Plus Software Downloads and Explanation [perfect tips]
- Top 10 Best Gmail Backup Tools in 2024 (Free & Paid)
This post provides an overview of the 10 best Gmail backup tools, highlighting their features and details to help you choose the one that best meets your needs. - Boot Device Not Found Hard Disk 3F0 Error on HP [FIXED]
If you facing hard disk 3f0 errors and looking about How to fix hard disk 3F0 errors, this article has it all. We discuss the potential reasons and practical solutions to fix boot device not found hard disk error (3f0) on hp.