How to Transfer and Play Windows 10 Games on Windows 11
| Workable Solutions | Step-by-step Troubleshooting |
|---|---|
| #1. Use Qiling Disk Master | Step 1. Select the transfer mode; Step 2. Connect the two computers; Step 3. Choose the files you want to transfer...Full steps |
| #2. Manual Way | Method 1: Move Steam Games to Another PC...Full steps Method 2: Steam Backup and Restore...Full steps Method 3: Move Origin Games to Another PC...Full steps |
Are you ready to upgrade your Windows to the latest version? If you're looking to transfer and play Windows 10 games on Windows 11, you're in the right place. We've got you covered with helpful information and assistance to make the transition smooth and seamless. Keep reading to learn more!
The launch of Windows 11 has been a game-changer, bringing exciting new features to the market. The integration has been seamless, and the premium features have elevated the gaming experience to a whole new level, making it more convenient and enjoyable for users.
The integration of Windows 11 into the marketplace has made gaming a fun and exciting experience, thanks to its numerous features that enhance the gaming experience. This guide provides a comprehensive overview of upgrading from Windows 10 to Windows 11, offering complete information to help users make a smooth transition.
Why Transfer and Play Windows 10 Games on Windows11?

The introduction of Windows 11 has generated a lot of excitement, with its advanced features making gaming even more enjoyable. From subtle improvements to next-generation features, it offers an excellent package for users to consider.
- PC Upgrade
The main reason games are moving to a new OS is because Windows 10 is outdated and no longer receives sufficient hardware support, making it necessary to upgrade to a new operating system.
- Superior Game Pass
Game Pass offers a seamless gaming experience in Windows 11, with a smooth and bug-free interface that rivals the Xbox experience.
- High-end performance and efficiency
The Game Mode in Windows 11 has been optimized to prioritize non-game processes, allowing gamers to fully utilize their hardware's capabilities.
- Auto-HDR for existing games
Auto-HDR technology, previously exclusive to Xbox gaming, has now been integrated into Windows 11, bringing a new level of excitement to gaming on the platform. The updated HDR feature offers an improved gaming experience, making it even more enjoyable for users.
- DirectStorage
Video games often require a lot of loading times, but asset streaming can help minimize them. However, many modern PCs struggle to take full advantage of the fast speeds offered by modern SSDs. The integration of DirectStorage has helped to unlock the full potential of this technology, enabling the GPU to accelerate transfer speeds and provide a smoother gaming experience.
- Support DirectX
Windows 11 supports DirectX 12 natively, enabling developers to create visually stunning games with the latest features.
- Absolute CPU Support
Windows 11 features next-generation CPU support, offering a hybrid architecture that combines high-end performance cores with efficient cores to provide users with optimal performance and gaming capabilities.
How to Transfer and Play Windows 10 Games on Windows 11?
If you're willing to transfer and play Windows 10 games on Windows 11 but don't know how to do that, there are two solutions for you. Transferring from Windows 10 to Windows 11 is not difficult and can be done through two processes, allowing you to easily enable the same. I corrected the ending sentence to make it grammatically correct and flow better.
#1. Use Game Migration Tool -Qiling Disk Master
Qiling Disk Master is a reliable tool for transferring data from Windows 10 to Windows 11, ensuring a smooth gaming experience with no data loss. It facilitates quick and automatic transfer, making it an ideal option for users.
Step 1. Select the transfer mode.
- Download and install Qiling Disk Master on both computers.
- Launch Qiling Disk Master on the PCs and select "File sync" to transfer files based on the network connection, or choose "Backup and Restore" if the PCs are not on the same LAN.
- Ensure your PCs meet the requirements of network-based transfer.

Step 2. Connect the two computers.
- To access the target PC, first establish a connection to it, and then enter the account password or verification code that is associated with the target PC.
- Check the verification code on the right top of the "PC to PC" main screen on the target PC.
- Specify the transfer direction and click "Connect".

Step 3. Choose the files you want to transfer.
- Hover on the "Files" option and click "Edit".
- Check the files you want to transfer.
- If you want to change the default storage path, click the "Edit" icon.
- Afterward, click "Finish".
Step 4. Transfer files between two different operating systems.
- After selecting the files you want to transfer, click "Proceed" to initiate the transfer process.
- To check the files on the target PC, you can go to the "My Computer" or "This PC" folder and look for the files that were copied from the source PC. You can also check the "Documents", "Pictures", "Music", and other folders to see if the files are present.

Features:
- To securely move games from one PC to another PC or another drive, follow these steps:
- No need to reinstall the program and set it up again.
- Automatic transfer of programs, files, and settings
- The transfer is possible via a Network connection, local, or via image files.
#2. Manual Way - Copy and Paste
Transferring games from one computer to another can be a hassle, but there are manual options to make the process smoother. If you're not interested in using Qiling Disk Master, you can manually copy your games by saving them to an external hard drive or cloud storage, then transferring the saved files to the new computer. This method allows you to migrate your games without relying on a specialized software.
Method 1: Move Steam Games to Another PC
To transfer a game from one PC to another, start by installing Steam on the new PC and copying the game from the source PC. Then, transfer the game to the new PC using a large drive, ensuring the default Steam folders are available.
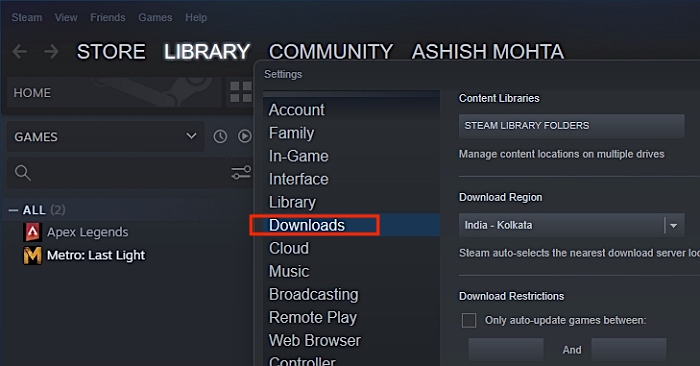
Step 1: To access your Steam downloads, go to the Steam client, click on the "Settings" icon, which looks like a gear, then click on "Downloads" from the menu that appears. This will take you to a page where you can view and manage your downloaded games, including updating or reinstalling them.
Step 2: To transfer a game from one drive to another, open the Steam Library Folders and click on the game you want to move. Right-click on it and select "Browse Local Files" to access the game's folder. Then, go back to the previous step and copy the folder. Finally, paste it into the destination drive to transfer the game.
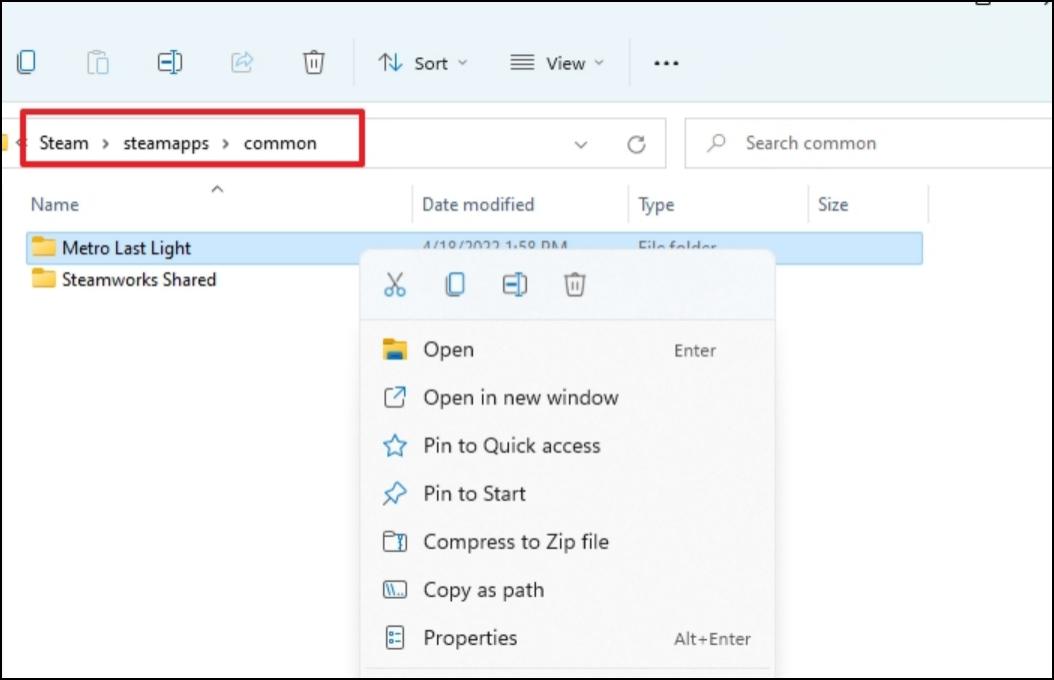
Step 3: To navigate to the new Steam library folder, create a new folder named Steamapps, and inside it, create another folder named Common, you will need to do this if you have already installed steam. If you have not installed steam, these folders should be there. If they are not, you will need to create them. The Common folder is required for steam to work. The Steamapps folder is also required.
Step 4: You need to copy the game folder from the drive and paste it here, then we'll make sure the game is registered.
Step 5: To reinstall the game, tap on the Install button. After that, go to the Choose Location dropdown menu and select a Steam folder on your new hard drive. Steam will automatically detect the game and update if necessary.
Method 2: Steam Backup and Restore
To move the game to a Windows 11 PC, consider using the built-in backup and restore method. This will require an external drive to back up the game folder, which can then be used to restore the game on the new PC.
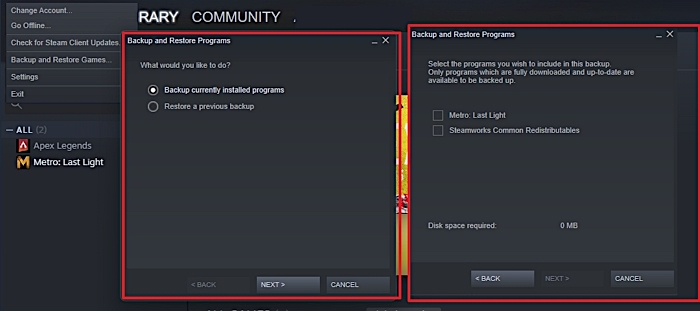
Step 1: Open Steam, click on the Steam menu, and select Backup and Restore Games, then choose whether to back up existing games or restore from a previous backup.
Step 2: Select Backup currently installed programs, and it will list the game you want to back up. Check the box next to it and click next.
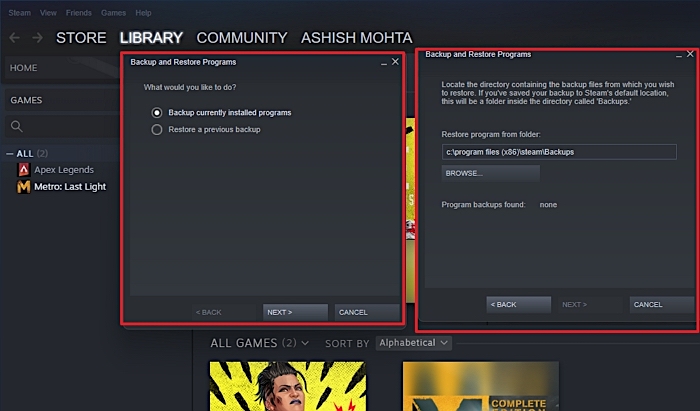
Step 3: To transfer your Steam games to a new Windows PC, first select a location on the old PC where Steam will backup the games. Steam will then create a backup of the games in that location. Next, connect the backup drive to the new Windows PC and launch Steam on it.
Step 4: To restore a previous backup, repeat Step 1 and select the "Restore a previous backup" option. Then, select the location of the backup, which will automatically detect the game. Choose what you wish to restore, and once done, the backup will be restored to its original state.
Method 3: Move Origin Games to Another PC
To set up the new PC, make sure to install the Origin Game software into the new PC. This will allow you to access and play games that are linked to your Origin account.
Step 1: Go to the default Origin Games folder, find the game you're willing to move, and proceed from there.
Step 2: To move the game files, copy them to an external drive, then connect the drive to the new PC.
Step 3: To install the Origin game, go to the default location of the Origin game on your computer, and then paste the game from drive to this location.
Step 4: To access the Origin settings, open the Origin option and navigate to the path: Origin > Application Settings > Advanced > Download Games.
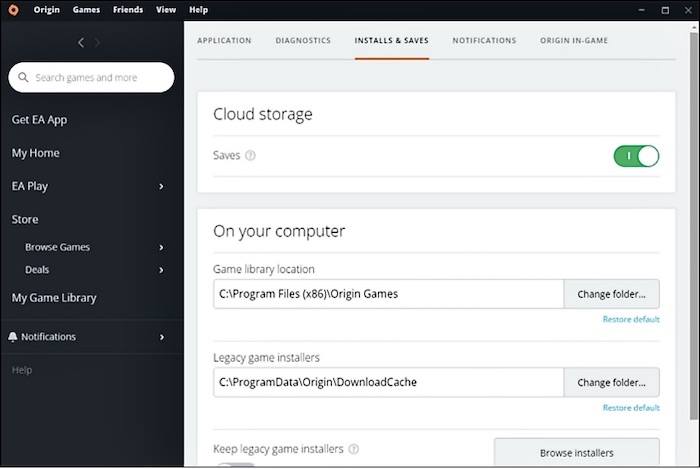
Step 5: Select Change to modify your folder location to enable successful transfer. It will automatically detect the game.
To move Epic Games to another drive, you can either use the Epic Games Launcher or manually move the files. Using the Epic Games Launcher, go to Settings, then Library, and select the game you want to move. Click on the three dots next to the game title, then select "Move Game" and choose the new drive.
Conclusion
Unfortunately, manually moving games can be a hassle and may not always result in a smooth registration, potentially leading to errors. However, some apps, like QilingQiling Disk Master, can simplify the process and ensure a faster and more reliable game transfer experience.
To successfully transfer and play Windows 10 games on Windows 11, follow the detailed solutions provided, and if you still have any queries, you can ask for the same in the comments section.
Related Articles
- How to Set Up a Server to Server File Transfer Successfully
- ArcGIS Software Mover|How to Transfer ArcGIS License to Another Computer
- How to Transfer Adobe Flash Player to Another Computer?
- How to Transfer Youtube Data to Another Account [Channels, Subscription, Playlist]
- How to Restore When Outlook Favorites Missing[2024 Guide]
If you're wondering why your Outlook favorites are missing or how to restore them, this article has you covered. we will explain the most common reasons for Outlook favorites disappearing and provide step-by-step instructions for getting them back. - How to Solve Outlook Not Syncing with Gmail[2023 Tutorial]
Is your Outlook Not Syncing with Gmail? You can find out the reasons and the right techniques for syncing your Outlook with Gmail here!