How to Transfer Youtube Data to Another Account [Channels, Subscription, Playlist]
YouTube is the best video platform for influencers to reach a large audience, thanks to its user-friendly features and global reach. However, there may be reasons why you need to transfer YouTube data, such as moving videos or playlists to other channels, subscriptions, or playlists, making it a valuable platform to utilize.
Transferring YouTube data can be a hassle, especially when trying to move ownership to another account or creating a separate account for a business channel. YouTube frequently updates its website and introduces new features, making it essential to check the requirements before transferring data to avoid losing any content.
Don't worry, transferring YouTube data to another account is a straightforward process! This article will guide you through the different methods to do so without any issues, so let's get started!
Can I Transfer YouTube Data to Another Account?
To move some of your YouTube data to an account, you need to know your Google account type, which will determine the steps you need to follow to transfer your data.
YouTube requires an active Google account linked to the channel, and you can't transfer YouTube accounts, including those set up for kids. Additionally, G-Suite accounts created for work or school purposes cannot be transferred to another account.
If you have a YouTube account that has been suspended or terminated, you can shift your content to another account, provided you have a Google account that is not suspended or terminated. This is because a suspended or terminated YouTube account does not necessarily mean that your Google account is also suspended or terminated.
Brand Account
A YouTube account for a brand can have multiple managers and owners, each linked to their own Google account, making it easy for a team to collaborate and manage the account together.
Google brand accounts allow users to manage multiple YouTube channels under a single account, keeping all Google-related information confidential, and enabling a distinct name for each channel, eliminating the need for separate passwords or usernames.
Non-Brand or Personal YouTube Account
A personal YouTube account is linked to a personal Google account, which may not be suitable for businesses with multiple contributors. By default, signing in to YouTube through a Google account will link the YouTube channel name to the Google account name.
Transfer YouTube Data to Another Account - Channel
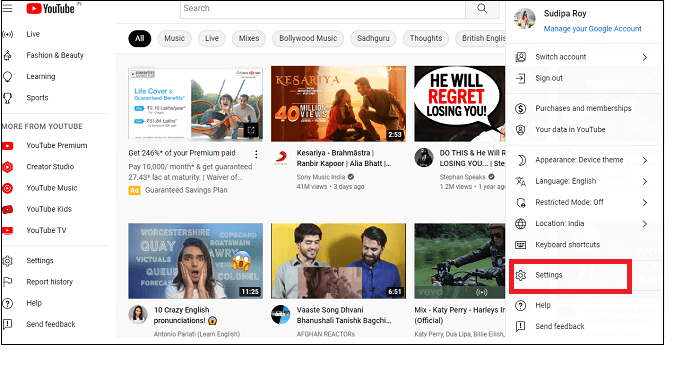
Step 1: You can transfer content from your old YouTube account to a new Google account by going to your profile icon, selecting Settings, and following the process to establish a Brand account and transfer ownership.
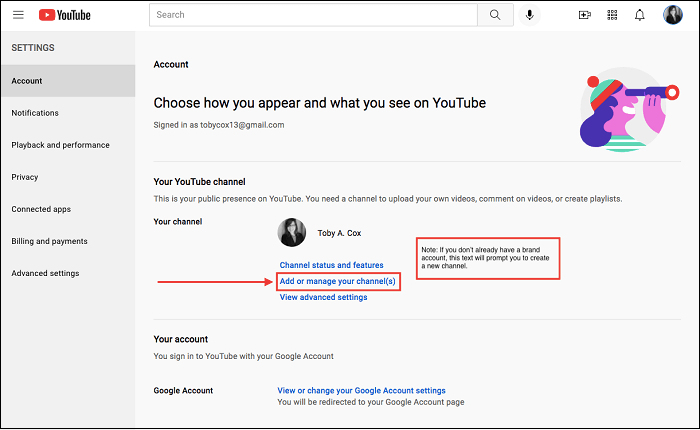
Step 2: To add a new channel, go to the Settings page, click on the Account section, and select the "Add or manage your channel" link, then click the "Create a channel" button.
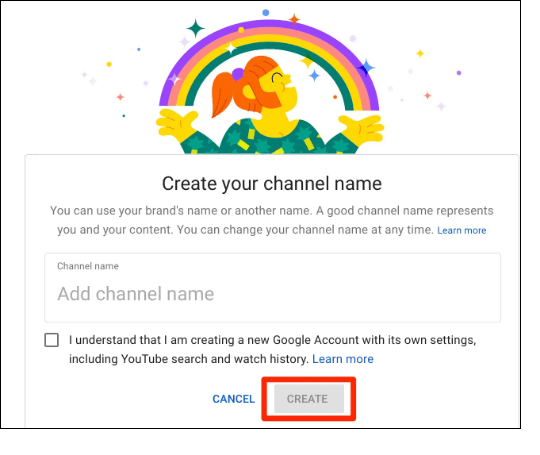
Step 3: Provide a name for your latest Brand channel, and check the box under the name domain. Now, finally, hit the "create" button.
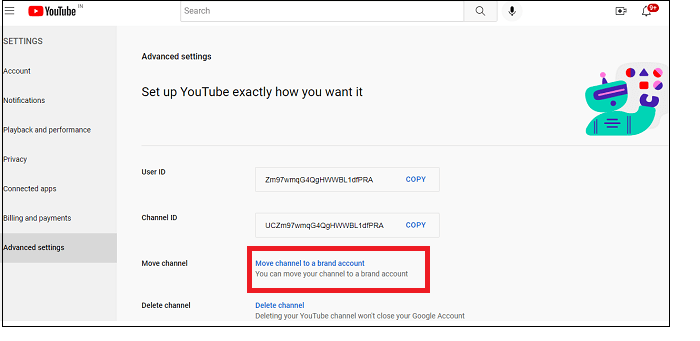
Step 4: To sign back into YouTube with your previous Google account, visit Settings > Advanced Settings, then hit the "Moving channel to a brand account" link.
Step 5: A confirmation option will appear at the bottom of the Account screen of YouTube's settings page. You can confirm the change by hitting the "Replace" button.

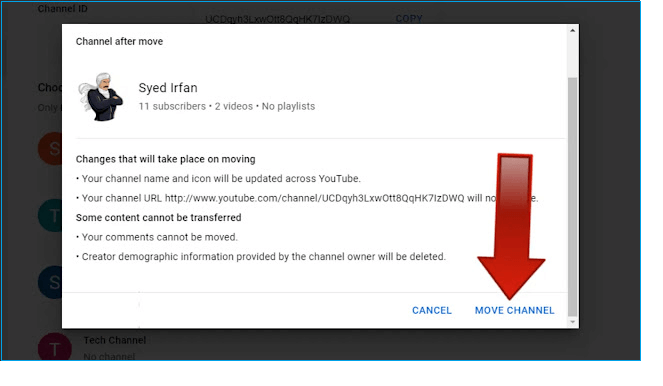
Step 6: A pop-up window will quickly emerge and ask you to confirm the deletion of your previous account. Simply check the box and select the "Delete Channel" option. Then, on the next window, choose "Move Channel".
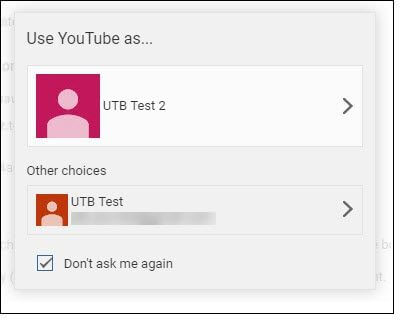
Step 7: You can sign out from the older account and sign back in with it, then select the "Brand Account" you just created when the new window appears, asking you to choose a channel.
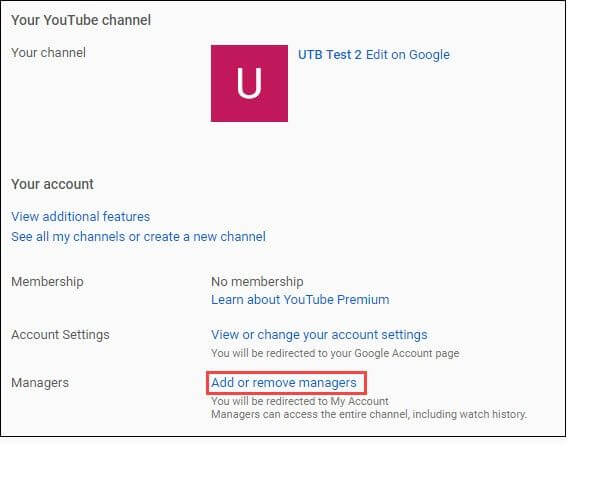
Step 8: Go to Settings > Account, click on the "Add or eliminate manager" link, and then initiate the connection process to the new Brand account.
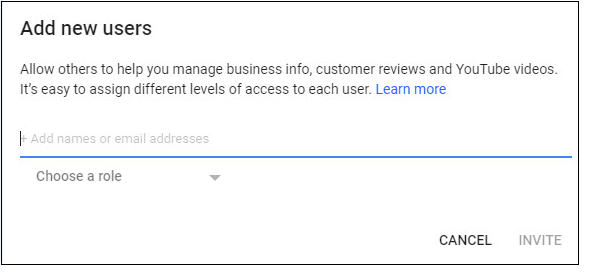
Step 9: To add a new user with owner permissions, select the "Manage permissions" button and then click on "Invite new users" from the top right corner. Enter the new user's email address and choose a role from the dropdown menu, selecting "Owner" as the option. Click the "Invite" button and then "Done" to complete the process.
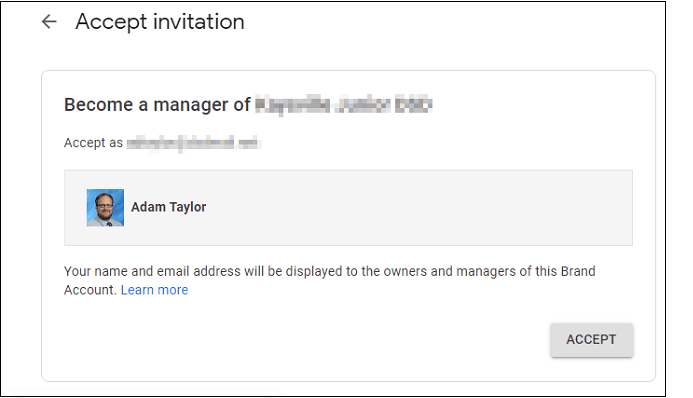
Step 10: Review your email with the new Google account, search for the invitation text, and click "Accept Invitation". Then, on the Accept Invitation page, select the "Accept" button.
Step 11: To set your new account as a primary owner, Google takes 7 days to complete the process. After 7 days, sign into the "Brand account page" for your brand-new Google account, select your YouTube account at the bottom, and choose "Manage This Account".
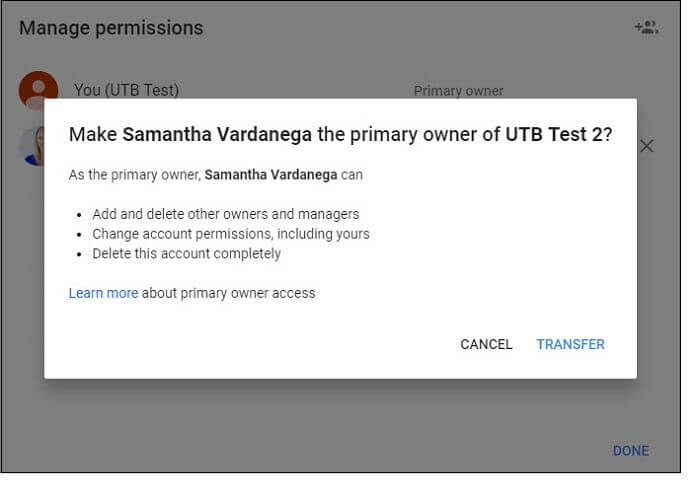
To transfer a YouTube channel to another account, go to the account you want to transfer from, click "Manage Permission," and then select the new account from the drop-down menu. Next, change the role to Primary Owner, and finally, click "Transfer" and then "Done" to complete the transfer.
Transfer YouTube Data to Another Account - Subscription
Follow the step-Here's a brief, step-by-step guide to transferring YouTube subscriptions from one account to another:
Step 1:Export your subscriptions
You need to export your subscribed channels from your previous account by visiting the "Manage subscriptions" page on YouTube, logging in with your older account details, scrolling down to the last of the page, and obtaining "Export Subscriptions."
Once the button is clicked, a .xml file will be downloaded to your system automatically.
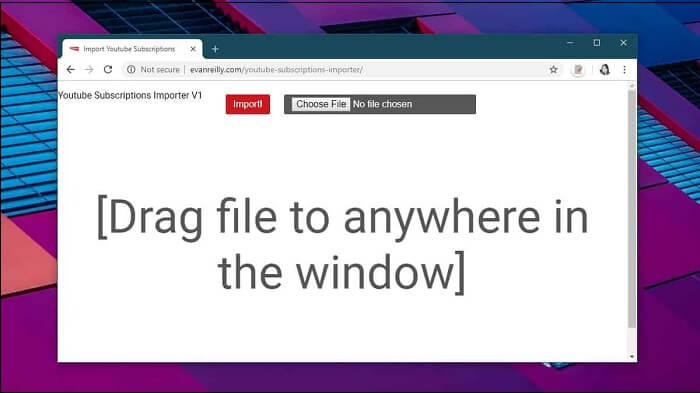
Step 2:Visit the Subscriptions Importer Tool
Once the .xml file is downloaded, head to the Subscriptions Importer Tool where you can upload the file by selecting the "choose file" option and then click the "Import" button.
To fix the issue, click import again after granting the tool access to your YouTube account. Once done, you'll see a detailed list of your subscribed channels in your new account. Finally, disconnect your YouTube account by revoking access via the "Revoke Access" button on the left side of the screen.
Transfer YouTube Data to Another Account - Playlist
Transferring YouTube data to another account can be a straightforward process. To transfer a YouTube playlist to another account, follow these detailed steps.
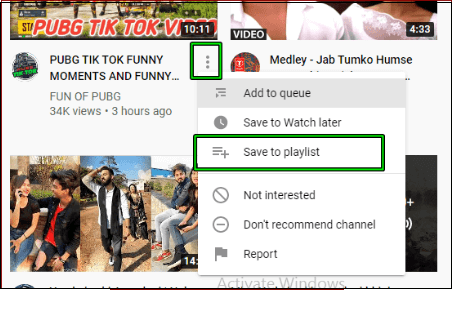
Step 1: To transfer saved YouTube videos to a previous account, save them as a playlist. From the left-hand side menu, select a category such as history, library, watch later, or likes videos.
You could then hit the three-dot icon to a video you want to be saved in a playlist and choose "save to playlist."
Step 2: To make a Spotify playlist public or unlisted, first select the playlist you want to share. Then, from the playlist page, click the dropdown arrow next to the playlist name and choose whether to make it public or unlisted. After that, click the "Share" button and copy the URL to share with others.
Step 3: Sign into your new YouTube account from a different web browser, paste the URL into the address field from the playlist, and hit the "save playlist" icon to save it under your new account.
Bonus Tip: Transfer YouTube App to Another PC
Besides the methods of shifting YouTube data to another account mentioned earlier, there's another solution that stands out for all your data migration needs: Qiling Disk Master. This tool offers the fastest way to transfer data from one account to another, making it a convenient option.
Qiling Disk Master allows for the transfer of installed programs, including YouTube, using different flexible transfer modes, enabling users to move applications to different locations on their computer.
- Transfer via PC to PC
- Transfer via image files
- Transfer locally
The biggest advantages of using this software are:
- Entirely intuitive and automatic to use
Install this software, allowing you to get by data rapidly.
- Free technical support
Qiling offers free access to a professional technician who can assist you remotely via phone and email.
- Shift your files and favorites without facing data loss
You can customize your experience by adjusting settings within your account, selecting files, and more.
To learn more about its data transferring ability, users can watch their YouTube downloads on a new device without re-downloading.
To transfer your YouTube App to another computer, you can use intelligent software that helps you with the process. Simply follow these steps to get started.
Step 1. Run Qiling Disk Master on both PCs
On the source PC, select "File sync" on the main screen of Qiling Disk Master and proceed with the process.

Step 2.Connect two computers
1. Connect to your target PC via its IP address or device name by selecting it and clicking "Connect".
2. To confirm your login details, enter the password of the target PC and click "OK".
If you didn't see the target PC in the listed devices, you can also manually connect the target PC by adding it, where you can input its IP address or device name.

Step 3. Select apps, programs, and software and transfer to the target computer
1. You can select and choose what you want to transfer from the current computer to the target PC, giving you control over what data and files are copied over.
2. To begin the process, select the desired applications and programs you want to transfer, then click on "Proceed".

Maybe you want to know more:
Conclusion
If you're ready to transfer your YouTube data to another account, you're in luck! With the options available, now is a great time to do so. To make the process even smoother, consider using Qiling Disk Master, a helpful software that can assist with transferring your YouTube data to another account.
Related Articles
- 3 Ways to Migrate Installed Games from C Drive to Another Disk in Windows 11
- How to Quickly Transfer Large Files Over Network
- How to Transfer Files from PC to PC Using/Without USB Cable | Check Your Full Guide
- How to Move Minecraft to Another Hard Drive on Windows 10 | Move Minecraft to SSD
- How to Transfer Files from PC to PC in Windows 10
To transfer files from PC to PC in Windows 10, you can use the built-in “File Transfer” feature, which allows you to transfer files wirelessly using WiFi. - How to Transfer Files from Windows 10 to Windows 11 (New Guide 2022)
If you've recently upgraded to Windows 11, you may need to transfer files from your old Windows 10 device to your new one. Fortunately, there are several methods to do so, and this article will guide you through them.