How to Transfer iTunes to a New Computer [Windows & Mac]
Introduction
To transfer iTunes to a new computer, start by installing the latest version of iTunes on your new computer. Then, open iTunes on your old computer and select "File" > "Library" > "Export Library" to export your iTunes library. Next, open iTunes on your new computer and select "File" > "Add to Library" to add the exported library to your new computer. You can also use the "iTunes Library.xml" file to transfer your settings, playlists, and ratings to your new computer.
Transferring iTunes to a new computer can be a bit tricky for Windows users, but we recommend using Qiling Disk Master, a software that can easily transfer data, files, and applications. For Mac users, however, the process is relatively straightforward, and we have two methods to help you transfer your iTunes to a new computer, which can be found by jumping to the full steps on the "Transfer iTunes to a New Computer on Mac" page.
What is iTunes?
iTunes is a media player, media library, and mobile device management utility developed by Apple, used to purchase, play, download, and organize digital multimedia on personal computers. It allows users to access and manage their digital media, including music, movies, and more.
- Listen to music and audiobooks
- Download and streaming media from the iTunes store
- Apple offers various services, including Apple Music, iTunes Match, and iCloud Music Library, which allow users to access and manage their music collections, as well as the Podcasts service for listening to and discovering new podcasts.
- Import and export playlists
This software is compatible with both Mac and Windows operating systems.
Transfer iTunes to a New Computer on Windows
If you've switched from a Mac to a Windows computer, you may wonder how to transfer your iTunes library to the new system. Fortunately, there are two methods to help you do so, which we'll outline in this guide.
Method 1 - Transfer iTunes to a New Windows with Qiling Disk Master
Qiling Disk Master can safely transfer programs from one computer to another, making it an excellent software for transferring large files, especially application files or server files that take up much disk space, and supports common applications like MS Office and iTunes.
Qiling Disk Master P
- Automatic transfer between PCs using the same software.
- Recover data from a broken or dead computer.
- Transfer applications without reinstallation and activation.
To transfer your iTunes library using Qiling Disk Master, follow these steps: First, download and install Qiling Disk Master on your computer. Then, launch the program and select the source disk (where your iTunes library is stored) and the destination disk (where you want to transfer the library).
Step 1. Open Qiling Disk Master on both of your computers. Choose "File sync" to proceed.

Step 2. To connect two PCs via the network, you need to enter the password or verification code of the target PC, select the correct transfer direction, and click "Connect" to proceed.
The verification code is located on the top right corner of the main screen for the "PC to PC" feature on the target computer.

Step 3. To transfer files, select "Files" and choose the specific files you want to transfer. You can also customize the storage path for the transferred data by clicking the Edit icon.

Step 4. The process of transferring files from one PC to another PC involves clicking the "Proceed" button to initiate the transfer, which takes a time proportional to the size of the file being transferred. During this process, it is essential to be patient and wait for the transfer to complete.
Method 2 - Transfer iTunes to a New Windows Using an External Hard Drive
To transfer your data to a new computer using an external hard drive, start by preparing the drive by formatting it to the correct file system. Then, connect the external hard drive to your old computer and copy all your files to it. Next, disconnect the external hard drive from the old computer and connect it to the new computer. Finally, copy all the files from the external hard drive to the new computer, and you'll have all your data transferred.
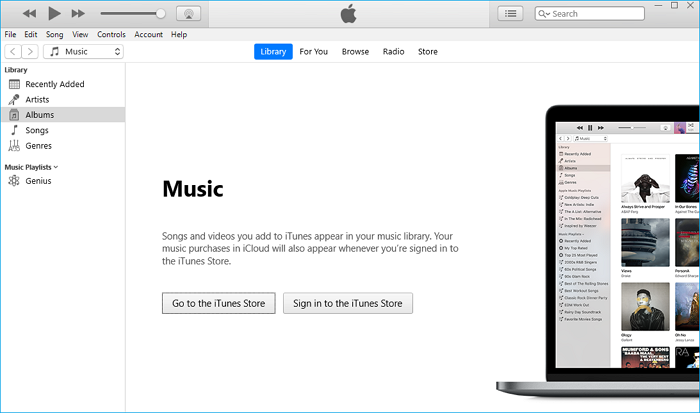
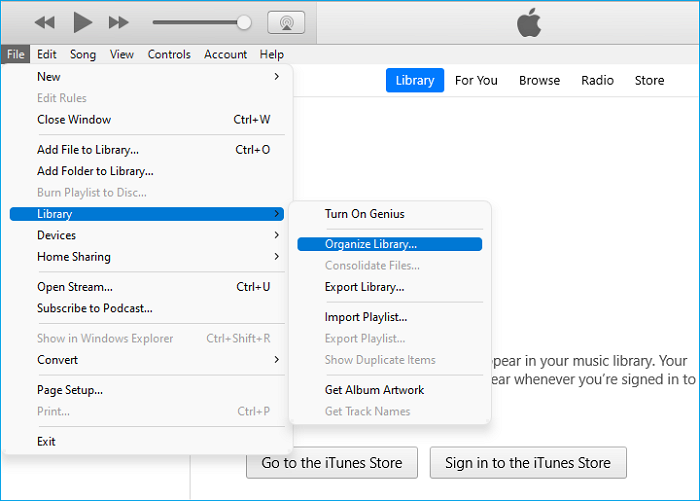
Step 1. Open the iTunes app, click on 'File', select 'Library', and click on 'Organize Library'.
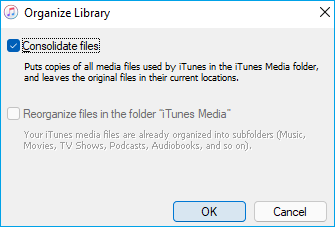
Step 2. To consolidate files, click on the checkbox next to "Consolidated Files" and then click OK.
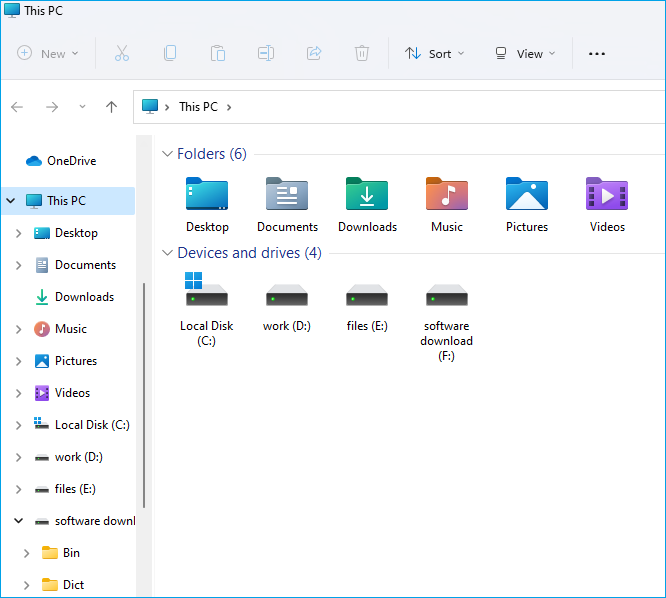
Step 3. To open File Explorer, press the keys "Windows + E" simultaneously, select the present user, and then click on the Music option.
Step 4. To find the iTunes folder, go to Finder > Go > Go to Folder, type in ~/Music/iTunes and press enter. Once you've located the iTunes folder, you can copy it to your hard drive by dragging and dropping the folder into your desired location.
Step 5. To transfer your files, open your old computer's hard drive, locate the folder you want to transfer, and copy it. Then, plug the drive into your new computer and access the folder to use your files.
Step 6. Copy the iTunes backup from your hard drive and paste it to the "Music > iTunes" folder on your new computer.
The iTunes library has been successfully transferred to another computer. To access it, simply open iTunes on your new computer.
Transfer iTunes to a New Computer on Mac
If you're tired of losing your iTunes media every time you switch computers, we can help. There are two methods to transfer your iTunes library to a new Mac computer, and you can follow the full guide of either one depending on your preference.
Method 1 - Transfer iTunes to a New Mac with Home Sharing
To share music, movies, and other media between two computers using Home Sharing in iTunes, both devices must be connected to the same WiFi network and share the same Apple ID. This feature is available in iTunes 9 and later versions. If your iTunes is outdated, update it before proceeding with the transfer.
Step 1. To sync your iPhone with your computer, launch iTunes on both systems and ensure they are connected to the same network. This will allow them to communicate and facilitate the syncing process.
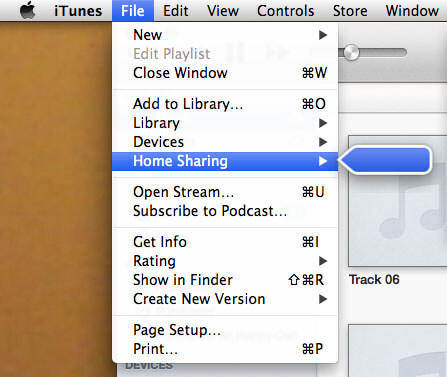
Step 2. To enable Home Sharing in iTunes, go to the iTunes menu, select "File", and then click on "Home Sharing". This will turn the feature on.
Step 3. Enter your Apple ID and start home-sharing.
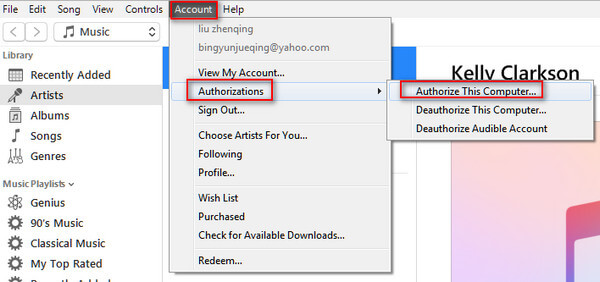
Step 4. To get started, open iTunes on your new computer and navigate to Account > Authorizations > Authorize This Computer.
Step 5. To link iTunes on your new computer to your existing account, enter the same Apple ID you used on your previous device. This will sync your music, movies, and other media content, as well as any purchased items, across both devices.
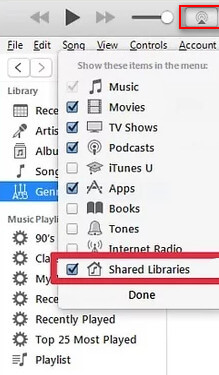
Step 6. To set up Home Sharing on the first computer, go to iTunes, click on Home Sharing, and select the option to enable the Shared Library from the list of things you can sync.
Step 5. Once you've set up your iTunes library on the target system, it may take a while for all your music to sync. This process can take anywhere from a few minutes to several hours, depending on the size of your library and the speed of your internet connection.
After these operations, you can find the newly transferred data in your iTunes library later.
Method 2 - Transfer iTunes to a New Mac with iTunes Match
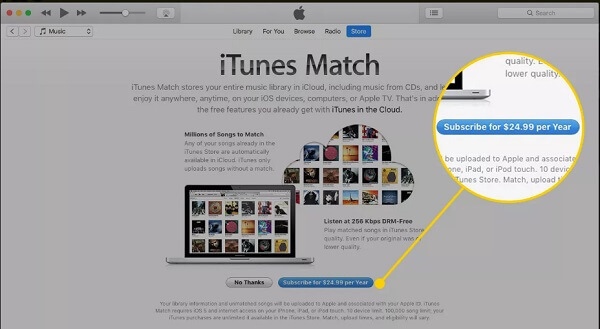
Apple's iTunes Match allows users to easily transfer their music library to another computer, but it only works for music and requires an active subscription, costing $24.99 a year. To transfer iTunes to a new computer, follow these steps.
Step 1. Launch iTunes on your old computer and go to Store > iTunes Match to see if it's turned on.
Step 2. Launch iTunes on your target system, and browse to Store > iTunes Match.
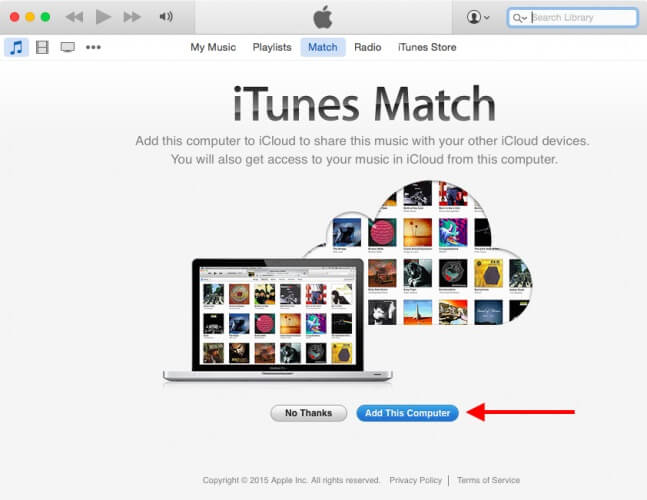
Step 3. Click on "Add This Computer" and log in to your Apple ID.
Step 4. This will sync your linked library to your Apple account, allowing iTunes to access and synchronize your music, movies, and other media with your Apple account.
To access your transferred content on your new system, simply visit your iTunes on that system. Your music, movies, TV shows, and other media will be available for you to enjoy.
Conclusion
Transferring your iTunes to a new computer is a straightforward process, and there are methods for both Mac and Windows users. For Windows users, Qiling Disk Master is a convenient option that saves time and effort. For Mac users, you can use Home Sharing or iTunes Match to transfer your iTunes, giving you two options to choose from. Regardless of the method you choose, you'll be able to successfully transfer your iTunes to your new computer.
Related Articles
- Transferring Installed Programs from One Computer to Another Windows 11/10 - Here Is the Best Way
- How to Move Files From SSD to HDD in Windows 11 (2 Methods)
- (Four Ways) Move Users Folder to Another Drive Windows 10 or Windows 11
- How to Move Installed Programs to Another Drive in Windows 11
- Backup Solutions for Small and Mid-sized Companies of 2022
This blog provides top-notch backup solutions tailored for small and mid-sized businesses, ensuring their business data is safeguarded with effective backup strategies. - How to Back Up Thunderbird Emails Windows 10 [Latest Tips]
Thunderbird is a widely used email client, but backing up and recovering emails can be a challenge. Fortunately, there are ways to back up Thunderbird email and data on Windows 10, which we'll explore in this article to help users safeguard their important emails and data.