How to Upgrade Windows 7 to Windows 11/10
Introduction
Windows 11/10 is a significant departure from Windows 7, not only in its user interface but also in its stability and security features. As a free upgrade for many with a valid key, it also offers built-in security software, eliminating the need for antivirus software. Additionally, it includes features like Ransomware protection, OneDrive Personal Vault, and a new browser, Microsoft Edge, making it a comprehensive and secure operating system.
Upgrading Windows no longer means risking data loss, as users can now back up their files and settings, and restore them in case of an issue.
When upgrading to Windows 11/10, the installer offers an option to back up files, which remain available after the upgrade. Alternatively, users can utilize professional software like Qiling Disk Master to back up only data or data and apps, allowing for quick restoration later on.
You can easily trust this software and upgrade to Windows 11/10, getting a better experience afterwards. The upgrade process will also leave behind files and programs, which you can recover afterwards.
PAGE CONTENT:
Using Qiling Disk Master to Backup Windows 7 PC
How to Install Windows 11/10
Restore Programs and Files to Windows 11/10 PC
Using Qiling Disk Master to Backup Windows 7 PC
When upgrading Windows, it's crucial to back up all data to a USB or external device to prevent accidental file and program deletions. Disconnect the backup drive before upgrading to avoid installing Windows on it. This ensures a safe and successful upgrade process.
This software offers a Backup and Restore feature that allows you to take a backup of files, programs, and user accounts, which can then be restored after upgrading to Windows 11/10. To take a backup, you can follow the feature's instructions.
Step 1: To start, launch the Qiling Disk Master software and navigate to the Backup and Software section. Ensure that an external drive or USB with sufficient storage space for the backup is connected.
Step 2: To begin the Windows Backup process, click on the Start button and then select the "Backup" option. You will then be taken to the Backup window where you can choose the "Set up a backup" option. Follow the prompts to give your backup a name and select the location where you want to save your backups. Once you have done this, click on the "Confirm" button to proceed.
Step 3: Select the apps, files, and accounts you want to back up, and click on the Backup button to create a backup on the external drive. This will display the required storage space, giving you a clear idea of how much space is needed.

How to Install Windows 11/10
Now that all files are backed up, it's time to upgrade to Windows 11/10. This requires enough storage space on your primary or system drive.
Step 1: Download the Windows Upgrade Assistant from Microsoft's official website, and run it. The installer will first check if your device is compatible and then proceed to the next step. If there are any apps that may not work after the upgrade, you can either update or uninstall them, as they can be reinstalled later since you've already taken a backup.
Step 2: When upgrading to Windows 10, you have two options: Upgrade or Clean install. Choose the former. You'll also have the option to back up personal files, which is a good idea for a second backup. If you're doing a clean install, make sure you have your Windows 7 key handy so you can activate it later by contacting Microsoft support.
Step 3: Finally, start the installation process. The computer may restart multiple times during this process. Once the installation is complete, you will be able to log in using the same account as before.
Post-To install Windows 11/10, you'll need to create a Microsoft account or sign in with an existing one. Be aware that this process may require you to connect to a Microsoft account later on. Additionally, note that there are significant changes from Windows 7 to Windows 11/10, so it's a good idea to familiarize yourself with these changes.
Restore Programs and Files to Windows 11/10 PC
After upgrading your Windows 7 PC to Windows 11/10, it's time to restore your programs and files to their original locations. To do this, you should have installed the Qiling Disk Master software, which should be present on your system. If it's not installed, download and install it again to ensure a smooth restoration process.
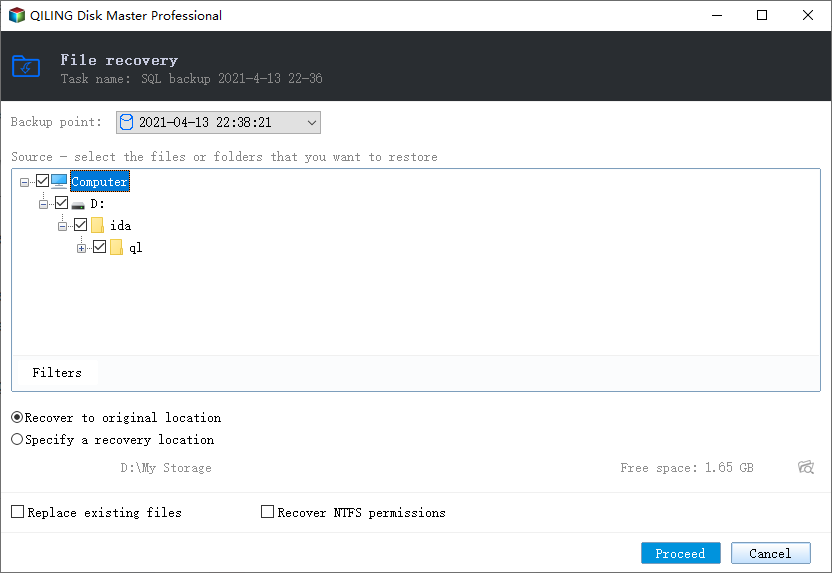
Step 1: To restore a backup using Qiling Disk Master, launch the software and go to Backup and Software > Restore. Then, connect the USB or external drive where the backup was stored.
Step 2: To open the file pickup window, click the Next button. From there, you can browse to select the backup file and then click the Next button again.
Step 3: The backup will be unpackaged, displaying a list of software, which can be selected and installed. Similarly, files and folder backups can be chosen for restoration, and then the restore button can be hit, allowing the software to place the backup in its exact location.
Make sure to verify that all the software is installed and files are backed up to the expected location after the Windows 11/10 upgrade. Additionally, you may notice some new programs installed as part of the upgrade.
Conclusion
Upgrading to Windows 11/10 from Windows 7 is easy and hassle-free. The Windows upgrade process automatically creates a backup, but it's also recommended to use professional software like Qiling Disk Master to back up apps, files, and accounts. This ensures that everything is safely stored and can be easily restored to its original location once the upgrade is complete.
If you have any questions about the software or the process of upgrading, you can contact Qiling Support at support@idiskhome.com.
Related Articles
- How Do I Transfer Google Photos to Another Account [4 Ways]
- How to Speed Up File Transfer in Windows 10 | Windows 11 Slow File Transfer
- How to Transfer Documents from PC to PC Windows 10 in 3 Different Ways
- How to Transfer TurboTax to New Computer with Windows 11, 10, 8, 7
- [2022 Update] How to Use Lenovo Migration Assistant and its Alternatives
Lenovo Migration Assistant is a helpful tool for transferring files from an old PC to a new one. However, if you encounter issues with the assistant not working or getting stuck, there are alternative methods to consider. We'll explore how to use Lenovo Migration Assistant effectively and provide some workarounds for when it doesn't cooperate. - How to Migrate Dropbox to OneDrive: Step-by-Step Guide
If you're looking to migrate your files from Dropbox to OneDrive, this blog post provides the best solutions to do it quickly and easily. We'll guide you through the process of transferring all your files from Dropbox to OneDrive, whether you've exceeded your free storage limit or simply want to switch cloud services.