Windows Backup Error 0x8078005D on System Images
Quick Navigation:
- What the Error Tells You
- Check the Target and the Shadow Storage
- Repair or Replace the Built-In Job
- Take a System Image With Qiling Disk Master
- Frequently Asked Questions
Backup and Restore copies files first and builds the system image afterwards. When the job fails at that second stage with 0x8078005D, the file copy is usually fine and the image is not. The cause is normally shadow storage on the target, a drive that drops out, or a target file system that cannot hold the image.
What the Error Tells You
The code is produced by the imaging stage rather than by the file copy. In the log you will see the volume snapshot succeed and then the image write fail, often within seconds of each other.
Three causes cover most cases: the destination is formatted exFAT or FAT32 and cannot hold the image file, the destination has less free space than the system volume needs, or the external drive disconnects when the write becomes sustained.
Because the failure happens after the file copy, users often assume the backup succeeded. Check the job status and the destination folder; a task that stops during imaging leaves no usable system image.
Check the Target and the Shadow Storage
Confirm that the destination is NTFS and that it holds at least the used space of the system volume. An image is large, and a destination that only looks generous in gigabytes may still fall short.
Look at the shadow storage allocation on the destination volume. A small maximum size can stop the image writer even when free space is plentiful.
If the target is a USB drive, disable selective suspend for USB devices and stop the drive from powering down. A single disconnect during the image phase produces exactly this error.
Repair or Replace the Built-In Job
Restart the Windows Backup service and run the job once with the destination freshly formatted as NTFS. If it fails again at the same point, the built-in tool is not the right path for this machine.
A block-level image written by a dedicated tool does not depend on the Backup and Restore imaging components, and it can be verified by mounting the result.
Keep at least one working image before you change anything else. A failed backup job is not the moment to experiment with the only copy of the system.
Take a System Image With Qiling Disk Master
Qiling Disk Master writes a block-level image of the system and boot partitions and reports its own progress, so a failure is visible at the stage where it happens rather than at the end.
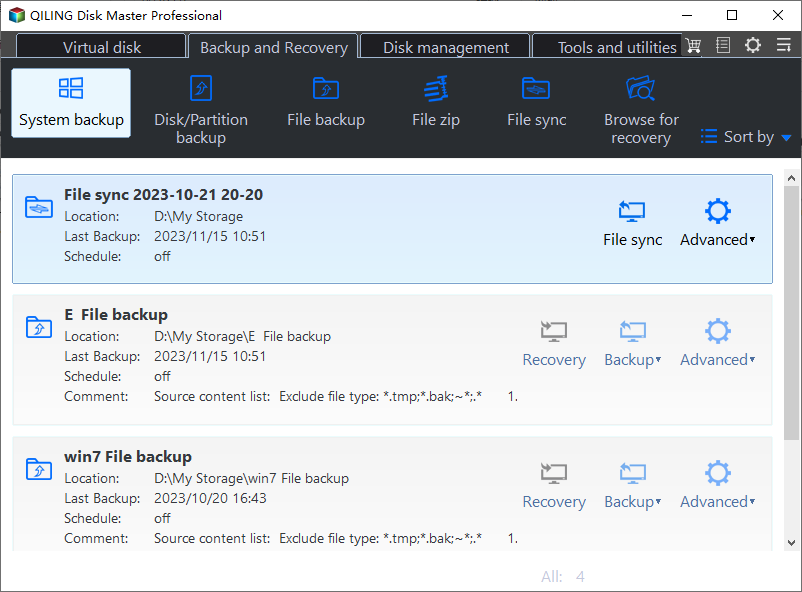
Step 1. Choose System Backup
Open the program and select System Backup. It includes the EFI or System Reserved partition automatically, which is what the built-in job was struggling to write.
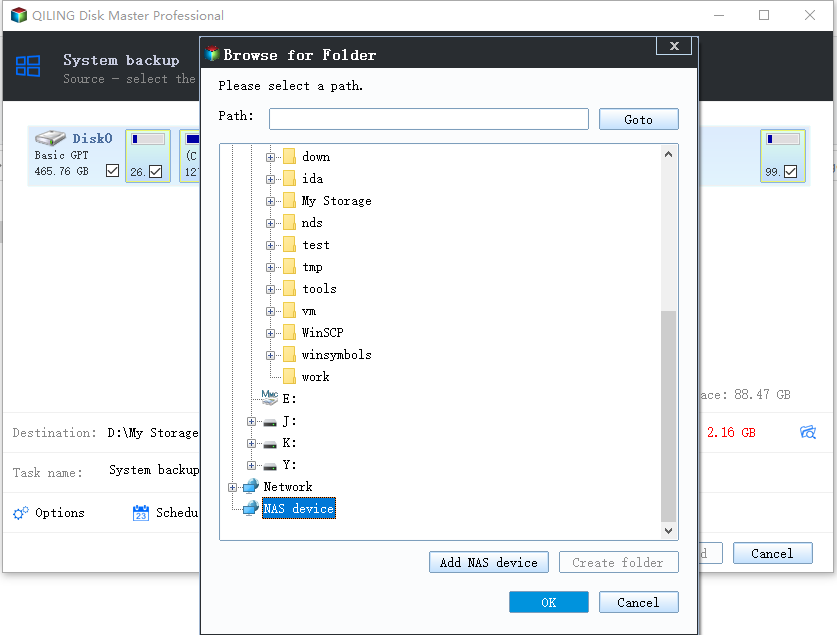
Step 2. Select an NTFS Destination
Choose an internal disk or a USB drive formatted as NTFS. Check the free space against the used space of the system volume before you continue.
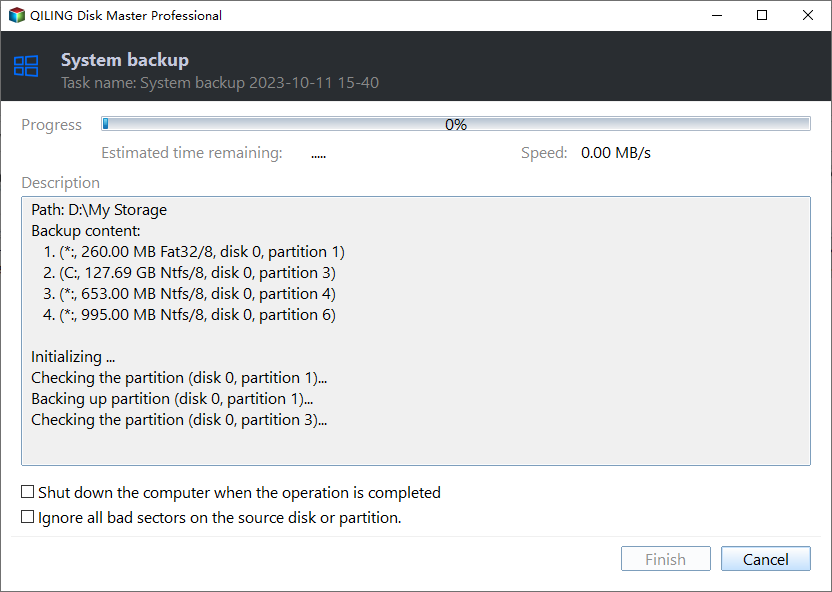
Step 3. Preview and Proceed
Review the task summary and start the job. Keep the drive connected and the machine powered until the progress bar finishes.
Step 4. Verify the Image
Open the image afterwards and browse a folder from it. An image that cannot be browsed is not a backup, even when the job reported success.
Frequently Asked Questions
Did the file backup part succeed?
Often yes, but the job is reported as failed. Do not rely on it; run a complete job again after fixing the imaging stage.
Can I back up to an exFAT drive?
Not with the built-in imaging tool. Format the destination as NTFS, or use a tool that writes its own container format.
Why does the job fail only sometimes?
Intermittent failures usually come from the USB link or from shadow storage limits. Both produce a failure at the image stage rather than at the start.
Is 0x8078005D specific to Windows 11?
No. The same imaging failure appears on Windows 10 and on Windows 7, where the Backup and Restore tool originated.
For the wider backup routine behind this job, see how to set up Windows Backup.
Related Articles
- How to Set Up Windows Backup
- Windows 10 System Backup
- System Image Backup Removed in Windows 11
- How to Back Up a Hard Drive
- Windows Server 2025 Bare Metal Backup and Restore
Products
Articles & Tutorials
- Data Recovery
- Data Backup
- File Recovery
- File Backup
- System Backup and Restore
- Disk and Partition Clone
- Technical articles
- Mobile articles
- Disk Master Help
- Windows Data Recovery Tutorials
- Windows Secure Delete Tutorials
- Windows Partition Management Tutorials
- Windows File Backup and Restore Tutorials
- Windows System Backup and Restore Tutorials
- Windows Disk Backup and Restore Tutorials
- Windows Clone Tutorials