Windows To Go for Mac: How to Install and Use
If you've bought a Mac with standard 256 GB storage space and need to run a Windows-only program, don't worry, you have options. You can install a virtual machine or emulator, such as VMware or Parallels, which allows you to run Windows on your Mac without affecting the native storage. Another solution is to use cloud services like Microsoft Azure or Amazon Web Services, which provide virtual machines that can be accessed remotely.
If your Mac's SSD is running low on space, you can still run Windows on an external drive using Windows To Go, which is ideal when you need to use Windows programs urgently and have limited space on your Mac's hard drive.
Although Apple and Microsoft haven't shared any configuration to support Windows To Go on Mac, we'll explore whether it's possible to use Windows To Go on a Mac in this article.
What's Windows To Go?
Windows To Go is a Microsoft feature that allows users to run a full Windows system from an external storage device, such as a USB drive. This feature is available in Windows 8/8.1/10 Enterprise and Windows 10 Education, and enables users to create a portable Windows environment that can be run on a Mac without the need for installation.
Windows Enterprise users can deploy Windows To Go workspaces on compatible host computers using Volume Activation for Windows licensing. However, a Microsoft-certified USB drive and a host computer are required to create a Windows To Go workspace, and Mac users must use a host computer to do so.
* Check the solution to how to create Windows To Go without the Enterprise edition.
A Windows To Go host computer requires specific technical specifications to ensure a smooth workflow. These specifications include a 64-bit operating system, at least 64GB of free disk space, 4GB of RAM, and a processor that supports booting from a USB device.
- 1 GHz or faster processor
- 2 GB or higher RAM
- The system is equipped with a DirectX 9 graphics device, which is compatible with Windows Display Driver Model (WDDM) 1.2 or later graphics drivers. This means that the graphics capabilities are somewhat outdated, but still supported by modern graphics drivers.
- USB 2.0 port or higher
- USB boot enabled in the firmware
- The firmware architecture is designed to be compatible with the architecture of the image used for Windows To Go workspace, allowing for seamless integration and operation of the operating system on a removable device.
Windows To Go supporting USB drives include IronKey Workspace W700, Kingston DataTraveler, and Spyrus Portable Workplace, among others.
When Is Creating Windows To Go on Mac Useful?
Windows To Go on Mac is a highly useful feature for modern workspaces implementing a BYOD (Bring Your Own Device) policy. It's particularly useful in two situations, allowing users to boot a fully functional Windows operating system from a USB drive, enabling them to work on a Windows environment without affecting their Mac's native operating system. This feature provides flexibility and convenience, making it an ideal solution for users who need to access Windows-specific applications or services while still using their Mac as their primary device.
- If your Mac's internal drive space is limited, you might not be able to dual boot between macOS and Windows OS, making it difficult to switch between the two operating systems.
- When you want to run Windows-only games and applications on Mac.
* Interesting "Game" topics on Mac including:
Can I Use Windows To Go on Mac?
Microsoft discontinued Windows To Go in 2020, making it only available for Windows Enterprise and Education editions, which means it cannot be used on a Mac.
Apple has a software called Boot Camp Assistant that allows users to create a Windows environment on a bootable drive, enabling them to run Windows on a Mac. This is equivalent to Windows To Go.
How to Create Windows To Go USB Drive Using Boot Camp Assistant
- MacBook 2015 or higher
- MacBook Air 2012 or higher
- MacBook Pro 2012 or higher
- Mac mini 2012 or higher
- iMac 2012 or higher
- iMac Pro (all models)
- Mac Pro 2013 or higher
If you have a compatible Mac, you can run Windows on your Mac via USB. To do this, you'll need to purchase a USB drive with a minimum of 16GB of storage, which will be used to install Windows.
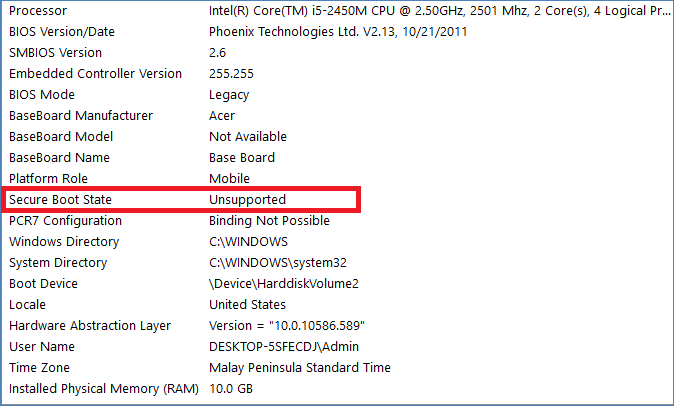
Step 1. Check Secure Boot Settings
To ensure a smooth installation of Windows, change the Secure Boot settings to Full Security before installation. This will allow you to use any Secure Boot settings without affecting the start-up process. If you've previously altered the settings, revert back to the default Full Security configuration. This precautionary step will prevent any potential issues during the installation process.
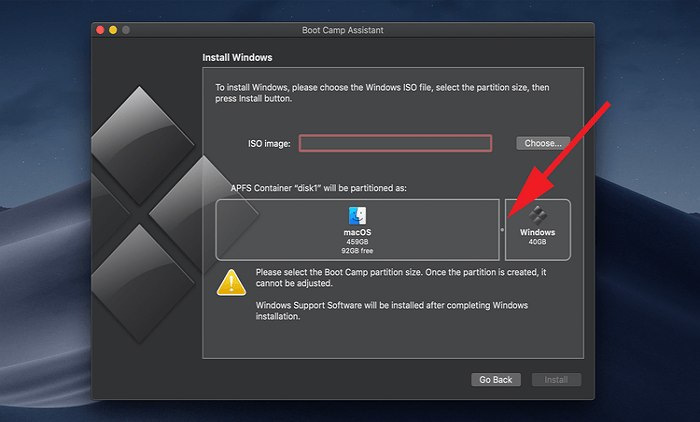
Step 2. Create Windows Partition on Boot Camp
To set up Boot Camp for the first time, launch Boot Camp Assistant from the Utilities folder under the Application folder, where you'll need to specify settings such as setting the partition size and others.
Step 3. Format the partitions
Once Boot Camp Assistant finishes, Mac will restart to the Windows installer. The installer will ask where to install Windows, and you should choose the Boot Camp partition and then click on the Format option, which will automatically select the Boot Camp partition.
Step 4. Install Windows
To prepare your Mac for a Windows installation, simply unplug any external devices that are not needed, then click on the "Next" button to proceed with the installation. Follow the on-screen instructions to complete the process.
Step 5. Install Windows Drivers
After completing the installation, your Mac will start up in Windows and automatically download the necessary Windows drivers. If this process doesn't initiate automatically, you can visit Apple's website to manually download the suitable Windows drivers.
Step 6. Dual Boot to Windows
To resolve the issue, restart your Mac and press the Alt or Option key while booting up, then select the Windows partition. Additionally, connect your Windows To Go USB drive to your Windows environment on Mac.
Step 7. Connect WTG USB to Mac
Once the Windows To Go USB drive is connected to your Mac, use the Boot Camp drivers on the USB drive and copy them to the Windows OS on the USB drive.
Step 8. Install Boot Camp Drivers
Download and install the Boot Camp drivers for all Mac hardware, and your work is done here.
Is There Any Easy Way to Create a Windows To Go USB Drive for Mac?
Using Windows To Go on a Mac can be done using Boot Camp Assistant, but it requires technical expertise and is a time-consuming process, making it not feasible for everyone.
If you're having trouble creating a Windows To Go USB drive on your Mac, don't worry - you can use the easy alternative way Qiling OS2GO to create one instead.
Qiling OS2GO is a third-A party tool allows you to create Windows To Go USB drives, making it easy to install Windows 11/10/8 or even Windows 7 on a USB drive, which can then be connected to a MacBook to run Windows programs on a macOS system.
There's no need to go through the long Boot Camp process or just stick to Windows Enterprise and Education editions in WTG. The program can quickly and cost-effectively create WTG USB for Mac by following a simple process.
Step 1. To use Qiling OS2Go, first install it on your Windows computer, which will display the used space on your system drive. Then, plug in a USB drive that is larger than the system drive's used space. Next, select the target USB drive and click Next to continue.
Step 2. Qiling OS2Go will notify you that the following operation would delete all data on your drive. Make sure to back up all important data before proceeding, and then click the Continue button to proceed.
Step 3. To adjust the disk layout, the default configuration on the target drive will be identical to the resource drive. You can also customize the layout as needed. If you're using a Solid State Drive as the Windows bootable drive, select the option to do so. Then, click Proceed.
Step 4. Qiling OS2Go will start to create the portable USB drive, a process that may take a while depending on your OS and network condition. Once the progress reaches 100%, the USB drive should be bootable.
Step 5. To boot from a portable Windows USB, insert the USB into your computer and restart it. Press the specific key (usually F2, DEL, or F10) to enter the BIOS settings, then select the option to boot from the USB drive. This will initiate the Windows installation process.
Note: To ensure a smooth boot process, it's essential to match the boot mode of the portable USB drive and the target computer. If they differ, you might encounter issues with booting.
Parting Remarks
Windows To Go can't be directly used on Mac, but Boot Camp Assistant can be used as an alternative to run Windows on Mac without consuming space on the hard drive.
Unfortunately, Boot Camp Assistant can be too technical and complicated for some users, making it a less ideal option. A more user-friendly alternative is Qiling OS2GO, a third-party tool that allows running Windows To Go on a Mac.
The software is compatible with all the latest Windows and Mac devices, allowing Windows programs to run on Mac without any issues. You can try the Qiling OS2GO free trial to create a WTG USB for your Mac.
Related Articles
- 2 Ways - How to Run Windows Apps on Mac
- Windows 10 Bootable USB Tool: Auto-Download Windows 10 ISO to USB
- Can I Install Windows from Windows To Go USB?
- Best Rufus Alternative For Windows Compatible with Windows 11/10
- How to Transfer Games to an External Hard Drive | Game Moving Tool
You can now transfer games to an external hard drive using Qiling Pctrans, which makes it easy to free up space and resolve low disk space issues. Alternatively, you can also manually transfer games to an external hard drive. Windows 11 support is also available, and you can try Qiling Disk Master now. - 4 Free Ways to Transfer Google Drive to Another Account
Transferring Google Drive to another account can be done manually or with the help of an auto software.