iPhone Files App | How to Use Files App and How to Recover Files on iPhone and iPad
Summary
The Files app on your iPhone or iPad can be found and used as a guide is provided in this post, which also covers how to recover recently deleted documents and permanently deleted files using a professional iOS data recovery tool.
| Workable Solutions | Step-by-step Troubleshooting |
|---|---|
| Where Is Files App | Accessing the Files app on iPhone or iPad is as straightforward as it gets. Once you're on the home screen of your handheld device...Full steps |
| How to Use Files App | Open the iPhone Files app > tap the drop-down menu on the top-right corner of...Full steps |
| Recover Recently Deleted Documents in Files App | The Files app will keep your deleted files for thirty days before the system finally removes them. Open the Files app > in the bottom section...Full steps |
| Recover Permanently Deleted Files on iPhone | To recover permanently deleted photos, contacts, call histories, and more on iPhone, use Qiling iOS data recovery software...Full steps |
The Files app on Apple devices allows users to manage and recover files across their devices, providing a convenient and organized way to access and store files. This app enables users to easily locate and access files on their iPhone, iPad, or Mac, and also allows for file sharing and collaboration. Additionally, the Files app provides a feature to recover deleted files, giving users a chance to retrieve accidentally deleted files. This feature is particularly useful for users who work with sensitive or important files, and want to ensure that they can recover them in case of accidental deletion. Overall, the Files app is a powerful tool for managing and recovering files on Apple devices.
This application has many impressive yet simple features, yet many users struggle to utilize them effectively, particularly those unfamiliar with Apple devices. Furthermore, when files are lost, recovering them can be a challenging and frustrating experience.
To use the iPhone's Files app, start by tapping the Files app icon on your home screen. Once opened, you'll see a list of folders, including iCloud Drive, On My iPhone, and Recent Files. Tap on a folder to view its contents, and you can also create a new folder by tapping the "+" icon. To recover files on the iPhone's Files app, you can try restoring from a backup, using the "Recently Deleted" folder, or using a third-party recovery app.
iPhone Files App Overview
The Files app on iPhones is an Apple-made application designed for iOS devices, allowing users to access and manage the files stored on their phone. Additionally, it enables syncing with various online storage services.
- Apple's iCloud or iTunes
- Google Drive
- Microsoft Drive
With the Files app, you can access your files from your device, regardless of where they are stored. Apple regularly updates its primary applications, including Files, so it's essential to keep your app up-to-date by checking for updates.
Step 1. Head to "Settings".
Step 2. Tap "General".
Step 3. Find and tap "Software Update".
Step 4. Wait for updates to download and install.
The latest edition of this application will ensure you have access to all its exciting new features and functionalities. This will also guarantee that you have the most up-to-date version of the application, ensuring a seamless and efficient user experience.
Where Is the Files App on iPhone and iPad
You can access the Files app on your iPhone or iPad by navigating to the home screen and finding the blue folder-like icon, which is the Files app. If you can't find it, you can look for it in the Utilities folder on the home screen. Alternatively, you can use Spotlight search by swiping down from the top of the screen and typing "Files" to locate it. Once you've found it, tap on the icon to open the Files app.
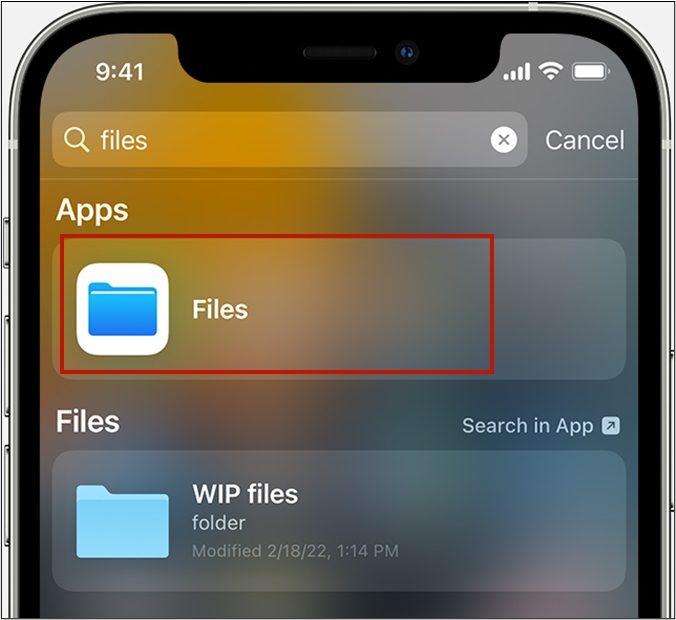
Step 1. Swipe down your home screen from the top.
Step 2. Tap on the search bar.
Step 3. Type Files in the search box.
Step 4. Files app should appear as the top result.
Step 5. Tap the Files app icon to run it.
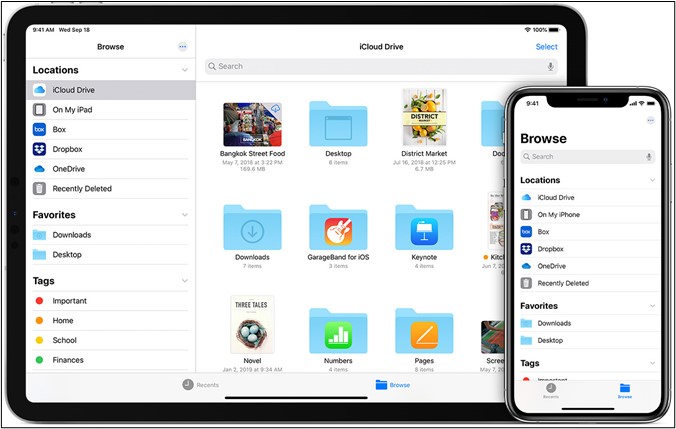
The application's basic UI allows for effective navigation of your phone, but also offers additional options such as the details below.
- Locations, i.e., iCloud or the storage of your phone
- Favorites - the most commonly used folders
- Tags - files you've tagged, i.e., important or work
To find the Files app on your iPad or iPhone, you can swipe right on your screen until you see it on your home screen, or simply look for the bright blue icon, which is hard to miss.
How to Use Files App on iPhone or iPad
The Files app on iPhone is easy to use - simply find the app and tap on it to access various features. One of the main purposes of the Files app is to connect to online storage services like Google Drive or OneDrive, allowing you to access and manage your cloud-based files directly from your iPhone.
Here's how to do that:
Step 1. Open the iPhone Files app.
Step 2. The drop-down menu on the top-right corner of your screen contains a series of options, including the ability to sign out of your account, view your profile, and access various settings.
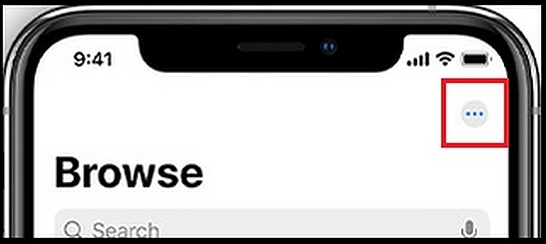
Step 3. Navigate to the third option, i.e., "Edit".
Step 4. Navigate the list and find "Google Drive & OneDrive".
Step 5. Toggle "On" every online server/cloud server you wish to turn on.
Step 6. Sign in to the service to make it work effectively.
To search across cloud storage on your iPhone, go to the Files app, tap the "Browse" tab, and select a cloud storage provider from the list. You can then search for a file by tapping the search icon and typing in what you're looking for. The search results will include files from your connected cloud storage accounts.
Step 1. Tap the "Search" bar.
Step 2. Type the file or folder you wish to find.
To access frequently used files on your iPhone, open the Files app and add your most-used files to your favorites. This way, you can quickly find them without having to search through the app's folders. You can also add specific files as favorites, making them easily accessible from your home screen.
You can follow the same steps on iPads as well. Additionally, you can perform various actions on your files, such as moving, copying, renaming, and deleting them.
Step 1. Navigate to the file you wish to make changes to.
Step 2. Tap and press on the file.
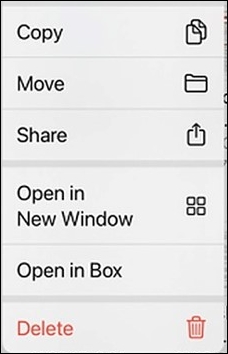
Step 3. From this pop-up menu, you can conduct various actions.
You can compress files, move or copy them, rename, share, or open in a new window on both iPhones and iPads.
How to Recover Recently Deleted Documents in Files App
The Files app on iPhone has an automatic recovery option for your files, keeping them for thirty days before they are permanently removed.
The Files app on iPhone allows you to recover deleted documents and files with ease, providing a convenient feature for users who accidentally delete important files, without requiring any extra steps.
Here's how to do it:
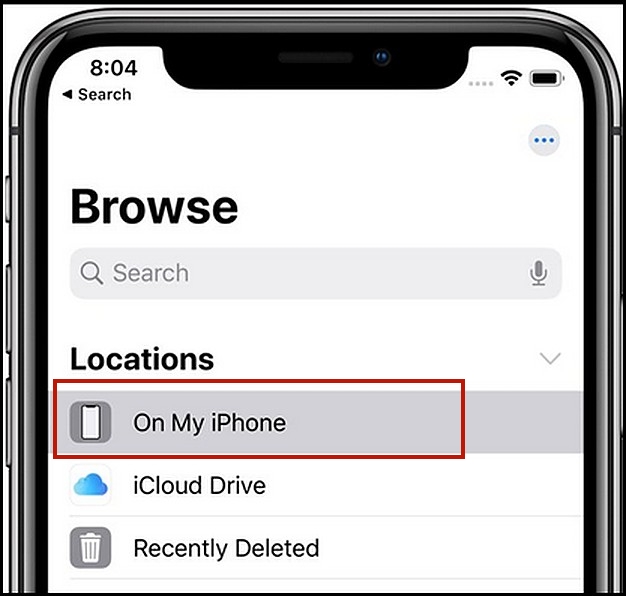
Step 1. Open the Files app once more.
Step 2. In the bottom section, tap on "Browse".
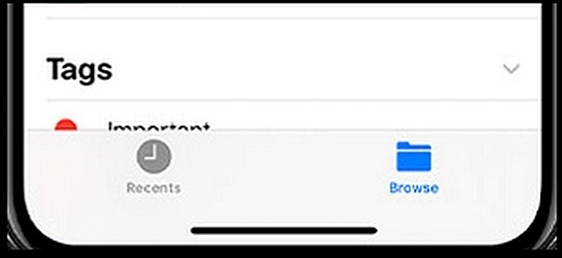
Step 3. Once you enter this section, look for "Recently Deleted".
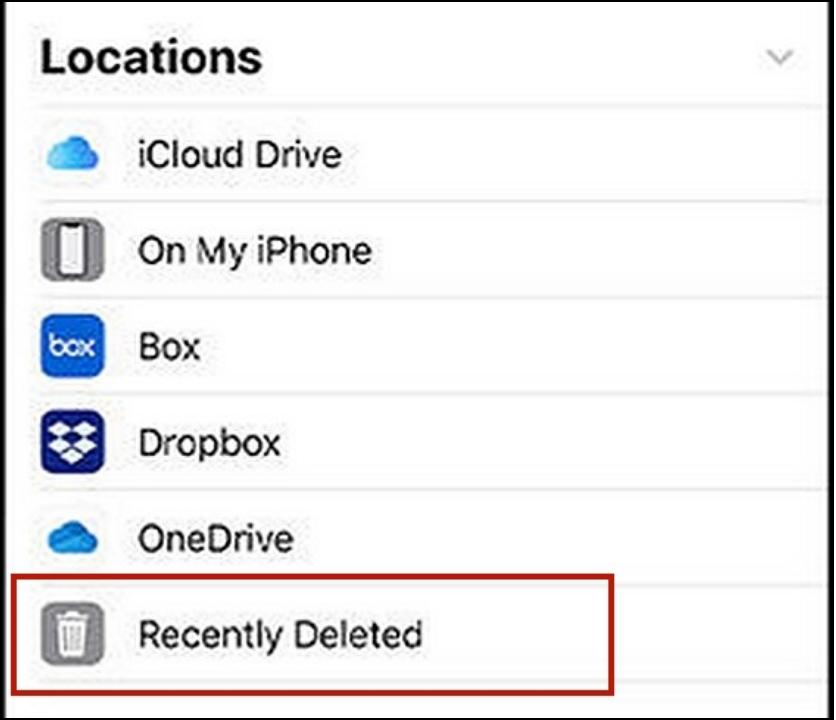
Step 4. Here you will find all the recently deleted files.
Once you're in, you can pick one or more files that you wish to recover, which are only recently deleted files, so anything deleted before 30 days won't be here.
To recover a file, select and hold the file you wish to recover, then the File app will prompt you to either "Recover" or "Delete" the file.
Picking the Delete option will permanently remove files, while tapping on Recover will restore them to their original location. It's essential to recall the original location of files before attempting to recover them.
How to Recover Permanently Deleted Files on iPhone or iPad
If you've permanently deleted files, don't worry. You can use a reliable iOS data recovery tool like Qiling MobiSaver to restore deleted data from your phone, including files you have no backup for.
Qiling iPhone data recovery software can recover deleted files, including photos, documents, text messages, contacts, chat histories, and application data, even if they were deleted from the Files app. This is possible due to the software's ability to perform a deep scan of an iPhone.
Step 1. Connect iPhone to Your PC
Launch Qiling MobiSaver. Click "Recover from iOS device" on the left and click "Start".
Step 2. Scan for Lost iPhone Data
Qiling MobiSaver will automatically scan your iPhone/iPad/iPod, finding both present and potentially lost data, and the process will complete once the scan is finished.
Step 3. Click the "Recover" Button
You can select the specific data you want to recover, such as photos, videos, contacts, SMS, notes, voice mails, and other files, and save them to a new location.
This tool allows you to recover deleted files without needing a backup or restorable file, and it can handle a large number of cases.
Including:
- Recover accidentally deleted files.
- Recover files removed in locked or disabled iPhones.
- Restore files in case of Jailbreak failure or factory reset.
- To recover data from an iPhone with a damaged or broken screen, you can use a third-party data recovery software or service that doesn't require the screen to be functional. One option is to use a tool like PhoneRescue or Deep Data Recovery, which can connect to the iPhone via USB and recover data without needing to access the screen.
Qiling MobiSaver's prowess is evident in how much hassle it can save you. To utilize this tool, simply download and install it on your computer, then connect your iPhone and let it scan for it.
Conclusion
Using the Files app on an iPhone is straightforward, but for those who struggle with it, especially new iPhone users or those switching from Android, this article provides guidance. Additionally, users can easily recover lost files on their iPhone or iPad using Qiling MobiSaver.
Related Articles
- [9 Solutions] Fix Kik not Working on iPhone
- How to Unhide Chat in Viber on iPhone and Android
- Undelete Instagram: See and Restore Deleted Instagram Photos/Messages
- [Fixed] iCloud Backup Failed, There Was a Problem Enabling iCloud Backup
- How to Use Deep Data Recovery
It is a tutorial for how to make use of Deep Data Recovery to recover lost and deleted files from computer and external hard drives. - How to Delete Files on Flash Drive Permanently
Do not know how to delete files on flash drive permanently since you know there are ways to recover deleted files? Check out the details for how to permanently delete files from a thumb drive.