Missing Photos After macOS Ventura Update, Restore Pictures Now!
| Workable Solutions | Step-by-step Troubleshooting |
|---|---|
| 1. Run Data Recovery Software | Select the location where your valuable photos were lost and click Scan...Full steps |
| 2. Check Your Photos Application | Use Touch ID or your login password to unlock the Recently Deleted album...Full steps |
| 3. Turn to iCloud on Mac | Go to "Photos > Settings". Click the "iCloud" tab. Select iCloud...Full steps |
| 4. Use Time Machine | Open Time Machine on macOS Ventura. Browse through the backups...Full steps |
| 5. Get Back Photos from Trash | To find missing photos, open the Trash Bin icon on your desktop, and search for the images within it.Full steps |
Photos Disappeared After Update to macOS Ventura
"Sorry to hear that your photos are missing after the macOS update. Don't worry, it's not uncommon for files to go missing after an update. Try checking the Photos app's 'Albums' tab, 'Media Types' section, and 'Moments' section. You can also try searching for the photos using Spotlight. If you still can't find them, try using a third-party data recovery software like Disk Drill or Deep Data Recovery Wizard. If none of these methods work, it's possible that the photos were deleted permanently. In that case, you can try contacting Apple Support for further assistance. "

Users have reported that their photos have disappeared after updating to Ventura, a problem affecting various devices and operating systems. This issue may be due to various reasons, including a glitch in the update process, a problem with the Photos app, or a conflict with other software or hardware. To resolve this issue, users may need to try reinstalling the Photos app, resetting the app, or restoring their device from a backup. In some cases, users may need to contact Apple support for further assistance.
- A glitch occurred during the update process, resulting in the unintended deletion of photos.
- The photos are moved to the new app after the update.
If you're experiencing missing photos on your macOS Ventura, check if they're stored in a different location on your device. If not, try restarting your device, checking the Photos app's settings, and ensuring that the Photos library is not corrupted. You can also try resetting the Photos library, rebuilding the Photos library, or using the Photos app's built-in recovery feature. If none of these solutions work, you may need to reinstall the Photos app or seek further assistance from Apple support.
Tip 1. Run Data Recovery Software to Scan and Find Missing Photos
If you've recently updated your Mac to macOS Ventura and can't find your photos, don't panic - Deep Data Recovery for Mac can help. This powerful data recovery software can scan and recover lost photos, so you can retrieve your cherished memories.
- The best macOS Ventura recovery software for everyone
- Recover deleted files on macOS Ventura
- Recover missing/lost files after macOS Ventura update
- Be compatible with all major file types
Follow the steps below to recover missing photos after the macOS Ventura update.
Step 1. Select file types and click "Next" to start
To recover data from your USB flash drive on a Mac, connect the drive to your computer, then launch Deep Data Recovery for Mac. Select the file types you want to recover and click "Next" to begin the process.

Step 2. Scan for lost photos
To recover your lost photos, select the location where they were lost and click the "Search for lost files" button. This will initiate a search for the missing files, allowing you to potentially recover them.

Step 3. Select wanted photos
Deep Data Recovery for Mac scans the selected disk volume, presenting scanning results in the left pane, which can be filtered by Path and Type to quickly locate lost photos.

Step 4. Recover lost photos
Select the target photos and click the "Recover" button to get them back quickly.
Tip 2. Check Your Photos App on Mac to Restore Disappeared Photos
macOS Photos, a free app installed on every Mac, allows you to easily organize, edit, and share your photos. Additionally, you can use the Photos app to find and recover missing photos after the macOS Ventura update. Follow the steps below to recover missing photos.
Step 1. To access the Recently Deleted album on your device, you can use either Touch ID or enter your login password as the authentication method to unlock it. This ensures that only authorized users can view or access the deleted content.
Step 2. Select the photos or videos that you want.
Step 3. Click the "Recover" button.

The Recently Deleted album stores files for 30 days, after which they are permanently deleted and cannot be recovered.
Tip 3. Recover Missing Photos After Ventura Update with iCloud
iCloud is a cloud-iCloud is a cloud-based service that allows users to store and access data across all their devices. It offers 5 GB of free storage, with the option to purchase additional storage as needed. If you've enabled iCloud, you can also use it to find a missing photo in iCloud Photos.
Step 1. Go to "Photos > Settings".
Step 2. Click the "iCloud" tab.
Step 3. Select iCloud Photos.

Then, connect to Wi-Fi and wait a few minutes. You can recheck your photos.
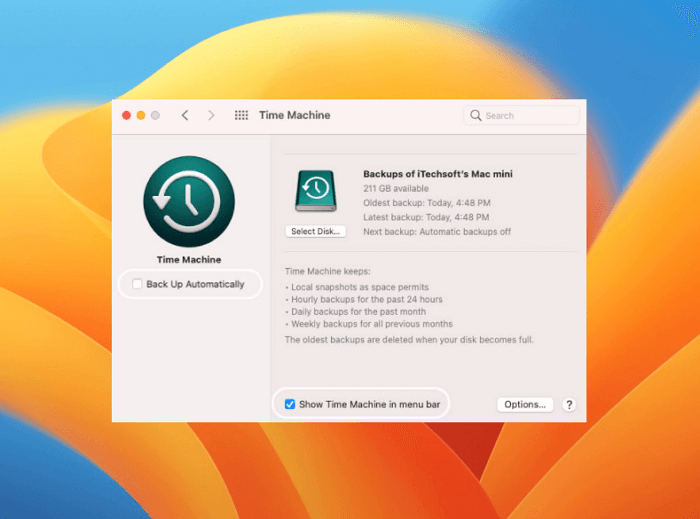
Tip 4. Fix Photos Disappeared After Update with Time Machine
Losing a file can be frustrating, but if you're using Time Machine, recovering missing photos is a breeze. With Time Machine, your files are automatically backed up regularly, so you can simply find the backup file that contains the image you're looking for.
Step 1. Open Time Machine on macOS Ventura.
Step 2. Browse through the backups to find the photos.
Step 3. Select the photo and restore it to its original location.
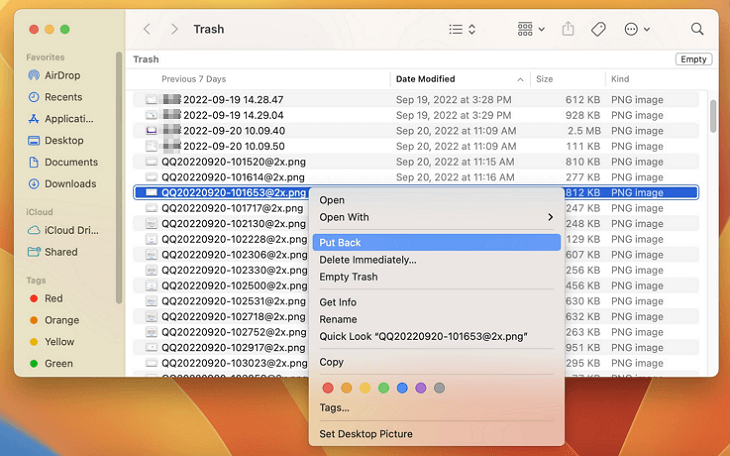
Tip 5. Restore Missing Photos After macOS Update from Trash
To recover missing photos from the Trash, first, go to the Trash Can on your Mac, then click on the "Edit" menu and select "Empty Trash" is not the correct action, instead, click on the "Put Back" option to restore the photos to their original location. Alternatively, you can right-click on the photo in the Trash and select "Put Back" to recover the photo. This way, you can easily retrieve your missing photos from the Trash.
Step 1. Open the Trash Bin icon on your desktop.
Step 2. To recover deleted photos, start by checking the Recycle Bin or Trash on your computer. If the photos are not there, try looking in the folder where you usually store your photos.
Conclusion
Photos are irreplaceable and losing them can be devastating. To prevent this, it's essential to regularly back up files to an external hard drive or cloud storage service, ensuring that even if a laptop is lost or stolen, the images will still be safe.
If you lose your photos, videos, or files, consider using iCloud or Mac data recovery software to restore them, especially if they're gone forever.
Missing Photos After macOS Ventura Update
If you're still experiencing issues with macOS Ventura, you can refer to the frequently asked questions for additional assistance.
1. How to Install the macOS 13 Ventura?
To upgrade to macOS 13 Ventura:
- Find System Preferences from the Apple menu.
- Click Software Update.
- Available macOS will show up, and wait until macOS Ventura appears.
- Click Upgrade Now to start upgrading.
2. Why did my Pictures disappear from my Mac?
Here are the reasons:
- Mac crashes when updating to the latest macOS.
- macOS is causing conflicts with apps on your Mac, resulting in data loss.
- Not enough space for macOS updates and data is overwritten.
3. Where did my Photos go?
Permanently deleted photos go to the Recycle Bin, which is a temporary storage area for deleted files, where they remain until they are manually emptied or automatically purged by the operating system.
Related Articles
- [Free] Deep Data Recovery for Mac 11.8 Torrent/Serial Key
- Format Your Mac For Sale without Difficulty
- What Is the Other in My Mac Storage and How to Clear It
- Mac USB Recovery: Recover Deleted Files from USB Flash Drive
- [Stepwise Guide]: How to Recover Deleted Files on Windows
The article offers four methods to recover deleted files on Windows 10 or 11, providing users with options to choose the method that suits them best. - How to Recover Deleted Partition in Windows 11, 10, 8, 7?
Follow this step-by-step guide on how to recover deleted partition in Windows 11/10. Some tested solutions are provided here, including repairing damaged/corrupted partitions.