iPhone Photos Gray Box | How to Fix Grey Boxes Photos on iPhone/Android
Summary
If your pictures are appearing gray on your iPhone or Android, you're not alone. A gray box covering either pictures or contacts on both iPhone and Android can be frustrating. Fortunately, fixing this issue is relatively easy.
User Query: Pictures Showing Up as Grey Boxes
Many mobile phone users have experienced the same grey photos problem as the following users:
Case 1. iPhone Photos Show Gray Box
On your iPhone 6s, a gray box covering photos and videos might be due to the "Live Photos" feature, which is enabled by default. To resolve the issue, go to Settings > Camera, and toggle off the switch next to "Live Photos". This should prevent the gray box from appearing. If the problem persists, try restarting your iPhone or updating to the latest version of iOS if you haven't already.
Case 2. Gray Box Over Camera/Gallery Photos on Android
"The gray box issue on Samsung Galaxy S8 camera photos is likely due to a software glitch or a setting issue. To resolve this, try resetting the camera app to its default settings by going to Settings > Apps > Camera > Storage > Clear Data and Clear Cache. Alternatively, check if the 'Grid' feature is enabled, which might be causing the gray box to appear. You can also try disabling the 'Grid' feature by going to Settings > Advanced features > Grid. If the issue persists, consider updating your phone's software to the latest version.
Why Are My Photos Gray on iPhone/Android
If you're seeing a gray box over photos, including those taken by your phone's camera or downloaded from online sources, it's likely that something is corrupting the multimedia files. This issue could be caused by various factors, including file system corruption, software glitches, or even malware. The gray box may also appear if the image file has been damaged or is not compatible with your device's operating system.
- The storage device that includes photos is corrupted or damaged.
- The pictures are corrupted.
- Photos did not transfer completely.
- A data recovery software that wasn't secure caused the photo to become corrupted.
How to Fix Grey Photos on iPhone and Android
In this part, we are going to show you five practical solutions to help you fix photos shown as gray boxes when opened. Let's begin!
Fix 1. Restart Your iPhone or Android
If you're experiencing glitches on your iPhone, try rebooting it by holding the top or side power/sleep button and the home button at the same time until the Apple logo appears, then release. This simple step can often resolve many small issues.
Fix 2. Open greyed-Out Files in Image Editor and Save Pictures
If your iPhone photos appear gray, try opening them with an image editor like Photoshop or Paint. If they display correctly in the editor, save them to the same location to overwrite the original file, which may resolve the issue. If this doesn't work, there are additional solutions to try.
Fix 3. Repair Corrupted Storage Device
If the storage device that saves photos is damaged, the pictures may show up as grey boxes. To repair the corrupted device, first, check if the device is still under warranty. If it is, contact the manufacturer for assistance.
Step 1. Insert your SD card or other storage devices into your computer with a card reader.
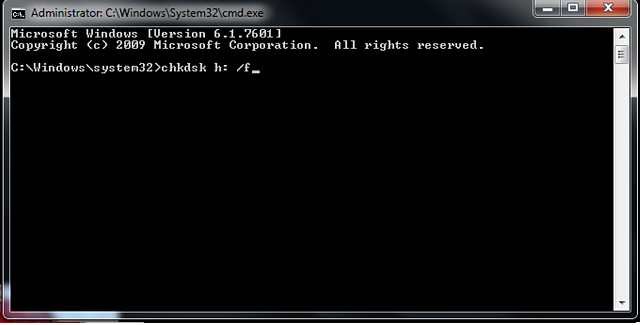
Step 2. To run the Command Prompt as an administrator, go to the Start menu, type "cmd" in the search bar, and press Enter. Then, right-click on the Command Prompt icon that appears and select "Run as Administrator".
Step 3. To fix a corrupted SD card without formatting, type the command "chkdsk /X /f sd card letter:" or "chkdsk sd card letter: /f" in the Command Prompt. For example, you can type "chkdsk /X /f G:" or "chkdsk H: /f".
Fix 4. Fix Corrupted Photos with a Free Photo Repair Tool
When pictures are corrupted or damaged, they appear as grey boxes. You can try to repair them using a free file recovery and repair tool, which can fix various broken files, including documents, photos, and videos.
Step 1. Launch Qiling data recovery software, select the file types you want to recover and uncheck the unwanted ones, then click "Next".

Step 2. You can scan a hard drive containing broken photo files by selecting it and clicking the "Scan" button. This will initiate the scanning process, allowing the photo recovery software to search for and recover any recoverable photo files.

Step 3. You can find corrupted photos in a variety of formats, such as JPEG, JPG, PNG, BMP, and others, by selecting the "Pictures" option, or you can search for files by clicking the search icon in the upper right corner.

Step 4. Right-click on a damaged picture to repair and preview the file. Then, click "Recover" to save the repaired images to a different location.
Fix 5. Restore Photos on iPhone from iTunes or iCloud Backup
If the above fixes don't work and your photos are still greyed-out, you can try restoring them using a backup, which can be done using Qiling MobiSaver, a software that allows you to recover iPhone data from the device, iTunes, or iCloud backup.
To recover pictures on an Android device, you can use Qiling MobiSaver for Android, which is a software designed specifically for this purpose.
Restore Photos from iTunes Backup
Step 1. Run Qiling MobiSaver
To recover data from an iPhone or iPad, download Qiling MobiSaver, connect your device to your computer, start the software, select "Recover from iTunes Backup", and choose an iTunes backup file to retrieve your lost data.
Step 2. Unlock iTunes
If the iTunes backup is encrypted, enter the password to unlock it. After entering the password, click "Continue" and Qiling MobiSaver will automatically scan the backup file to find the lost data.
Step 3. Preview and Recover Data from iTunes
After scanning, preview the contents of your lost files, including photos, videos, contacts, messages, notes, and SNS data. Select the desired file and click "Recover" to save it on your computer.
Restore Pictures from iCloud Backup
Step 1. Choose "Recover from iCloud"
Connect your iPhone to your PC, launch Qiling MobiSaver, choose "Recover from iCloud", and click "Start".
Step 2. Turn Off "Find My iPhone"
Turn off "Find My iPhone" on your iPhone/iPad/iPod to continue.
Step 3. Type Code in the Confirmation Box
To confirm, you need to type "123456" in the confirmation box and then click the "Continue" button.
Note: This step will permanently delete all data and reset all settings, so make sure to back up any important information beforehand.
Step 4. Reset iPhone
To reset your iPhone, move through the setup process until you reach the reset screen, then select "Restore from iCloud Backup" and enter the Apple ID and password for the account you want to restore the backup from, followed by clicking "Next" on your PC.
Step 5. Select the Files
To recover data, select the type of data you want to recover, or click "Select All" to restore all files at once.
Step 6. Analyze the iPhone
The software will analyze your phone, which may take a few minutes, and please refrain from disconnecting or using your device during this time.
Step 7. Scan Lost Data and Recover
Qiling MobiSaver will automatically scan your iCloud backup file to find the lost data, which may take a few minutes, and then you can select the data you want to recover and click the "Recover" button.
Conclusion
The issue of grayed-out pictures on iPhone and Android can be frustrating. Fortunately, there are five ways to troubleshoot this problem. Simply restarting your phone, opening greyed-out files in the image editor, repairing a corrupted storage device, using a free photo repair tool to fix corrupted photos, or restoring photos from a backup can resolve the issue.
To recover pictures from iPhone and Android backups, consider using Qiling MobiSaver, a tool that allows you to easily restore lost or permanently deleted files on both iPhone and Android devices.
Related Articles
- LINE not Receiving/Sending Messages on iPhone/Android
- 2 Solutions to Wipe iPhone Data Permanently
- What Is the Latest Version of iTunes 2022
- How to Extract Photos from iPhone Backup
- M.2 Drive Not Showing up in BIOS or Disk Management? Fixed!
M.2 drive not showing up in BIOS or Disk Management? Get corresponding fixes to fix them and get your data back from M.2 SSD quickly. - Partition Is Missing in Windows 10? Easily Recover It! (Video)
Are you experiencing a missing partition issue in Windows 10? Don't worry, this article provides an easy solution to recover your partition and data.