AOMEI Partition Assistant Clone Disk: Free Windows Method
AOMEI Partition Assistant is a well known free partition manager, and many users expect its Clone Disk wizard to move Windows to a new SSD at no cost. The wizard is present in the free edition, but it is limited, so a system disk clone often stops before the copy starts or ends with a disk that will not boot.
This article explains why the free clone is restricted, what to check before you begin, and how to finish the migration with Qiling Disk Master when Partition Assistant refuses to do it.
PAGE CONTENT
- Why the Free Edition Limits the Clone
- Check the Disks Before You Start
- The Free Clone Path and Its Limits
- Clone with Qiling Disk Master
- Verify the Cloned Disk Boots
- FAQs About Partition Assistant
- Back Up Before You Clone
Why the Free Edition Limits the Clone
- The wizard is shared. Clone Disk belongs to the paid toolset, so the free build may hide or block it.
- System disks are protected. Cloning the volume Windows runs from needs a reboot and a licence.
- Version matters. Older builds clone freely while newer releases move the feature behind an upgrade.
- No boot repair. The wizard copies data but does not rebuild the boot records for the target.
- Prompts look like errors. A greyed button is a licence limit, not a faulty disk.
Check which edition is installed on the machine, because the same wizard appears under different names in different builds.
Check the Disks Before You Start
- Back up first. A failed system clone can leave both drives unbootable.
- Free up space. The target must hold every used byte on the source.
- Keep the old drive. Leave it intact until the new disk boots on its own.
- Check the disk style. Match MBR or GPT, or convert during the clone.
- Quiet the machine. Pause Windows Update and antivirus scans during the copy.
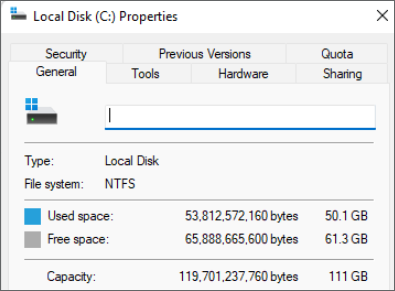
A quick check of free space and disk style prevents most clone failures before they happen, and it also shows whether the destination is ready.
The Free Clone Path and Its Limits
- Open Clone Disk. Pick the source, then the destination, then confirm the overwrite.
- Choose a mode. Fit the layout to the new size or keep the original partitions.
- Expect a reboot. The system clone runs outside Windows on most builds.
- Trial copies are capped. A test copy can be made, but the finished disk may be locked.
- No rescue media. If the target will not start, the free edition cannot repair it.
Run this wizard only on a machine you can recover, and keep a full image of the old disk on a separate drive. The free path copies files well, but it stops short of the boot work that a system migration needs.
Clone with Qiling Disk Master
When the free wizard is blocked or the cloned disk will not start, switch to a tool that prepares the boot records as part of the clone.
Watch the video tutorial below to clone the drive step by step with Qiling Disk Master.
Step 1. Open Qiling Disk Master, choose Clone, and then select Disk Clone.

Step 2. Select the source disk and click Next.

Step 3. Select the destination SSD and confirm that its data will be replaced.

Step 4. Choose the clone mode and confirm the system partition gets the C letter on the target.

Step 5. Click Proceed, wait for the copy to finish, then shut the machine down before you remove any cable.

Verify the Cloned Disk Boots
- Disconnect the old disk. Boot with only the new SSD attached.
- Check the capacity. The full size should appear in Disk Management.
- Confirm the boot style. UEFI systems need a GPT disk with an EFI partition.
- Restart twice. A second clean start proves the boot files are stable.
- Reconnect the old disk last. Keep it as a fallback until the clone proves reliable.
If the new disk appears but will not boot, the system reserved partition was left on the old drive. Re-clone the whole disk rather than a single partition.
FAQs About Partition Assistant
Why is Clone Disk greyed out in the free edition?
The wizard is part of the paid toolset. The free build displays it but blocks the system disk clone until you upgrade.
Can I clone a disk with AOMEI for free?
A data disk sometimes clones, while a system disk usually requires the paid edition and a reboot.
Does Partition Assistant clone the boot partition?
Only when you clone the whole disk. Copying a single partition leaves the EFI or reserved partition behind.
Why did the clone finish but the SSD will not boot?
The boot records still point at the old disk. Rebuild the BCD or re-clone the whole disk with Qiling Disk Master.
Is Partition Assistant safe for a failing drive?
No. It stops on read errors and reports a failure, so image the failing drive before you attempt a clone.
Back Up Before You Clone
A clone replaces the destination disk completely, and a failed system clone can leave the machine without a working boot. Create a system image on a separate drive before you start.
Watch the video tutorial below to back up Windows and restore it if the clone fails.
Step 1. Open Qiling Disk Master and select System Backup to include the boot partitions.

Step 2. Save the image to a drive other than the target disk and start the backup.

Step 3. Click Proceed to start the system backup and wait patiently until it finishes. You can also tick Shut down the computer when the operation is completed to power off automatically.

Step 4. If the clone or the boot repair fails, restore the image and then reassign drive letters or rebuild the boot records from Windows Recovery.

Conclusion
Partition Assistant can clone a data disk, but its free build restricts the system disk clone and leaves the boot configuration to you. Back up first, check free space and disk style, and use Qiling Disk Master when the free wizard refuses to finish the job.
For more on cloning tools, see AOMEI Cloner Review, Clone a Drive with AOMEI Backupper, Clone a Disk with MiniTool Partition Wizard, and EaseUS Partition Master Clone Review.
Related Articles
- Best Free Disk Cloning Software
Compare the free tools that still work. - A Windows Alternative to Clonezilla
Move to a graphical clone tool. - Migrate the OS to an SSD
Move Windows without reinstalling. - Clone an SSD to a Larger SSD
Expand the usable space after the copy. - Hasleo Disk Clone Review
Another free option worth checking.
Products
Articles & Tutorials
- Data Recovery
- Data Backup
- File Recovery
- File Backup
- System Backup and Restore
- Disk and Partition Clone
- Technical articles
- Mobile articles
- Disk Master Help
- Windows Data Recovery Tutorials
- Windows Secure Delete Tutorials
- Windows Partition Management Tutorials
- Windows File Backup and Restore Tutorials
- Windows System Backup and Restore Tutorials
- Windows Disk Backup and Restore Tutorials
- Windows Clone Tutorials