Clone to a PCIe 5.0 SSD - Windows Migration Guide
PCIe 5.0 SSDs double the bandwidth of PCIe 4.0 drives, but they only reach that speed on motherboards and CPUs that support PCIe 5.0. A clone that works on older hardware can fail here because the boot driver and the storage mode must match the new controller.
This guide covers what a PCIe 5.0 SSD needs, how to check compatibility, and how to clone Windows to it without a boot failure.
PAGE CONTENT
- PCIe 5.0 SSD Requirements
- Check Compatibility Before You Buy
- Prepare the Source System
- Clone Windows to the PCIe 5.0 SSD
- Boot and Tune the PCIe 5.0 SSD
- FAQs About PCIe 5.0 Clone
- Back Up Before the Clone
PCIe 5.0 SSD Requirements
- A PCIe 5.0 M.2 slot. The slot and CPU must both support PCIe 5.0.
- UEFI with NVMe boot. Most 2023 and later motherboards support this.
- An updated BIOS. Older BIOS builds may not recognize the drive.
- Active cooling. PCIe 5.0 SSDs run hot and throttle without a heatsink.
- Updated drivers. The chipset driver must support PCIe 5.0 lanes.
Even if the slot is PCIe 5.0, a PCIe 4.0 CPU will run the drive at PCIe 4.0 speed. Check both the slot and the CPU lanes before expecting top performance.
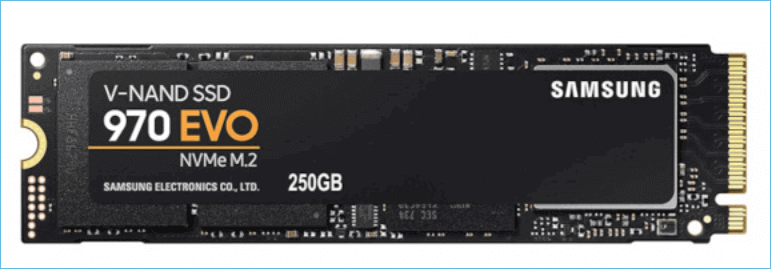
Check Compatibility Before You Buy
- Read the motherboard manual. It lists which M.2 slot is PCIe 5.0.
- Update the BIOS. Flash the latest version so the drive is recognized.
- Check the CPU. Intel 12th gen and AMD Ryzen 7000 and newer support PCIe 5.0.
- Verify the form factor. PCIe 5.0 SSDs are usually M.2 2280 with an M key.
- Check the warranty sticker. Some laptops void warranty if you remove the heatsink.
Some motherboards share PCIe 5.0 lanes between the M.2 slot and the GPU. Installing the SSD may drop the GPU to PCIe 4.0, which is fine for most games but worth knowing.
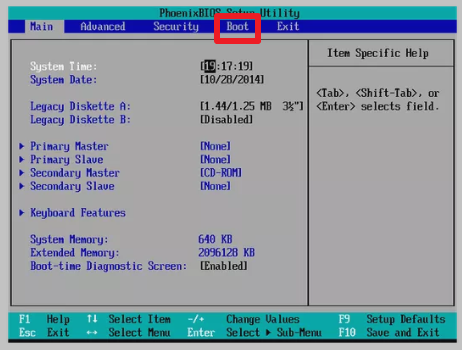
Prepare the Source System
- Set the storage mode to AHCI. RAID mode can hide the drive from the clone tool.
- Update the chipset driver. The PCIe 5.0 controller needs a current driver.
- Install the NVMe driver. Windows has one built in, but a vendor driver may be faster.
- Run chkdsk. Repair the source before cloning.
- Back up the source. A failed clone on new hardware is easier to restore from an image.
If the source boots in RAID mode, switch to AHCI in Windows Safe Mode before cloning so the new SSD inherits the correct driver.
Clone Windows to the PCIe 5.0 SSD
Qiling Disk Master supports PCIe 5.0 NVMe SSDs and aligns the partitions automatically. Install the SSD in the PCIe 5.0 M.2 slot and clone the system disk onto it.
Watch the video tutorial below to clone the drive step by step with Qiling Disk Master.
Step 1. Open Qiling Disk Master, choose Clone, and then select Disk Clone.

Step 2. Select the source disk and click Next.

Step 3. Select the PCIe 5.0 SSD as the destination and confirm that its data will be replaced.

Step 4. Choose the clone mode and fit the partitions to the PCIe 5.0 SSD.

Step 5. Click Proceed, wait for the copy to finish, then shut the machine down before you remove any cable.

Boot and Tune the PCIe 5.0 SSD
- Set the SSD first. Put the PCIe 5.0 SSD at the top of the boot order.
- Enable PCIe 5.0 in BIOS. Some boards default to PCIe 4.0 for compatibility.
- Install the heatsink. PCIe 5.0 drives throttle hard without cooling.
- Run a benchmark. CrystalDiskMark should show 10 GB/s or more on a PCIe 5.0 drive.
- Enable TRIM. Run Optimize Drives weekly.
If the benchmark shows half the expected speed, the slot or CPU is running at PCIe 4.0. Check the BIOS lane settings and the CPU compatibility list.
FAQs About PCIe 5.0 Clone
Can I clone a PCIe 4.0 SSD to a PCIe 5.0 SSD?
Yes. The clone process is the same; the speed difference comes from the hardware after you boot from the new drive.
Why is my PCIe 5.0 SSD running at PCIe 4.0 speed?
The CPU or M.2 slot only supports PCIe 4.0, or the BIOS is set to PCIe 4.0 for compatibility.
Do I need a special driver for PCIe 5.0?
Windows includes a generic NVMe driver. A vendor driver may improve stability or speed.
Will the PCIe 5.0 SSD get too hot?
Yes, during long writes. Install the motherboard heatsink or an aftermarket cooler to avoid throttling.
Can I boot from a PCIe 5.0 SSD on an old motherboard?
Only if the BIOS supports NVMe boot. The drive will run at the board's PCIe speed, not 5.0.
Back Up Before the Clone
Cloning to a new PCIe 5.0 drive changes the boot hardware. Back up first so you can restore if the BIOS does not recognize the drive.
Watch the video tutorial below to back up Windows and restore it if the clone fails.
Step 1. Open Qiling Disk Master and select System Backup to include the boot partitions.

Step 2. Save the image to a drive other than the target disk and start the backup.

Step 3. Click Proceed to start the system backup and wait patiently until it finishes. You can also tick Shut down the computer when the operation is completed to power off automatically.

Step 4. If the PCIe 5.0 SSD will not boot, restore the image to the original drive and check the BIOS lane settings.

Conclusion
PCIe 5.0 SSDs deliver the fastest consumer storage, but only on hardware that supports PCIe 5.0. Verify the slot and CPU, update the BIOS, use AHCI mode, and clone with a tool that aligns the partitions. After the clone, set the drive first in the boot order, add cooling, and benchmark to confirm you get the full speed.
For more on NVMe cloning, see Clone Windows to a PCIe 4.0 SSD, Clone HDD to NVMe SSD on Windows 11, Clone an M.2 SSD With Only One Slot, and Clone a SATA SSD to an NVMe SSD.
Related Articles
- Clone Windows to a PCIe 4.0 SSD
Move the system to a PCIe 4.0 NVMe drive. - Clone HDD to NVMe SSD on Windows 11
Move the system to a faster NVMe drive. - Clone an M.2 SSD With Only One Slot
Upgrade with just one M.2 socket. - Clone a SATA SSD to an NVMe SSD
Move from SATA to NVMe storage. - 4K Alignment When Cloning an SSD
Keep the SSD at full speed after the copy.
Products
Articles & Tutorials
- Data Recovery
- Data Backup
- File Recovery
- File Backup
- System Backup and Restore
- Disk and Partition Clone
- Technical articles
- Mobile articles
- Disk Master Help
- Windows Data Recovery Tutorials
- Windows Secure Delete Tutorials
- Windows Partition Management Tutorials
- Windows File Backup and Restore Tutorials
- Windows System Backup and Restore Tutorials
- Windows Disk Backup and Restore Tutorials
- Windows Clone Tutorials