Clone Verification Failed After Copy: What to Check
Quick Navigation:
- Copy and Verify Are Two Phases
- Source Read Error or Destination Write Error
- Bad Sectors, the Cache, and the Old Disk
- Recheck and Clone Again with Qiling Disk Master
- Frequently Asked Questions
Verification is a second pass that reads the destination back and compares it with the source. When that pass reports a mismatch, the copy is finished but not trustworthy, and the difference between a clean copy and a failed check decides what you do next.
Copy and Verify Are Two Phases
The copy phase writes the bytes of every partition to the destination. The verify phase reads those bytes back, compares them block by block, and reports the first difference or a count of differences at the end.
A job can reach 100 percent in the copy phase and still fail the check, which is why the progress bar proves nothing on its own. Some tools verify automatically and stop at the first mismatch, while others finish the pass and summarize the errors afterwards.
A clone that is never verified is not automatically bad, but nothing in the job shows that the data arrived intact. For a system disk, that evidence is worth the extra pass before the old drive is retired.
Source Read Error or Destination Write Error
The tool reads one disk and writes the other in the same pass, so the message names a device but not always the guilty one. A source read error means the bytes never left the old disk, and the destination then reports a mismatch it did not cause.
Compare the offsets. A mismatch that moves between runs, or follows the drive letter instead of the disk, points at the source, the cable, or the adapter. A mismatch pinned to one range of sectors and repeated on every attempt points at the destination surface or its controller.
A short test separates the two. Copy a small partition to the same destination and check it: if that copy verifies, the destination accepts writes and the fault sits on the source, and if it fails, the destination should not be used for this job.
Bad Sectors, the Cache, and the Old Disk
Bad sectors produce a specific pattern. The clone skips the sectors the source cannot read, the image still looks complete, and verification fails at exactly those offsets. That result is expected, and running the same job again will reproduce it.
For a source with read errors, read the failing areas with a tool built for unstable drives first, or accept a partial copy and plan the recovery around the files that remain readable. The trade-offs are the same as in cloning an SSD with bad sectors.
A write cache that never reached the platters produces the opposite symptom: the tool reports success and the last written region reads back as stale or empty. USB bridges are the usual cause, because the drive confirms the write before the bridge has forwarded the data.
Leave the old disk untouched until the new one boots and the files open. A failed verification means the only complete copy is still the source, and wiping it removes the fallback you will want if the second attempt also fails.
Recheck and Clone Again with Qiling Disk Master
Qiling Disk Master runs the copy as a single task and reports the phase that stopped, so a failure during the copy is easy to separate from a failure at the end. If the previous attempt stopped in the closing stage instead, see clone fails at finalizing. The steps below run the job again after the checks above.
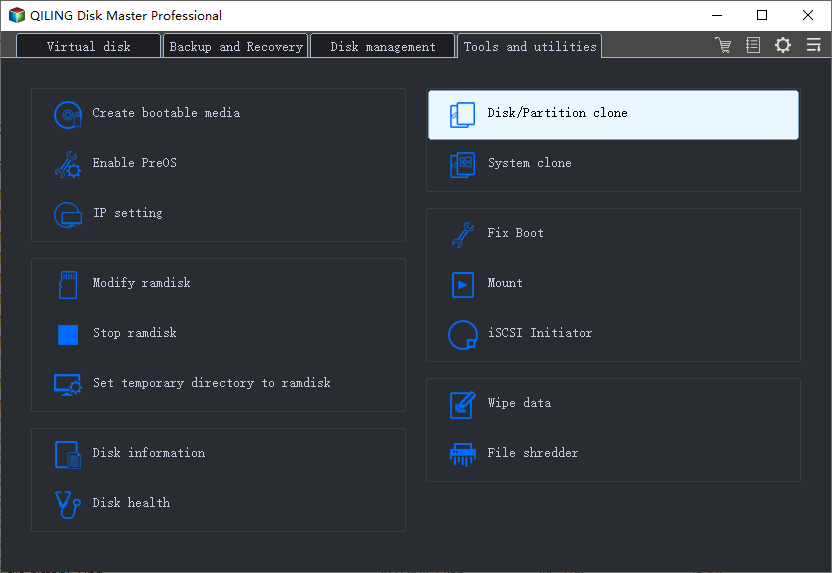
Step 1. Open Disk/Partition Clone
On the Tools and utilities tab, click Disk/Partition clone. Choose System clone only when the destination already has a boot partition, because System clone copies the Windows volume alone.
Step 2. Select the Source and the Destination
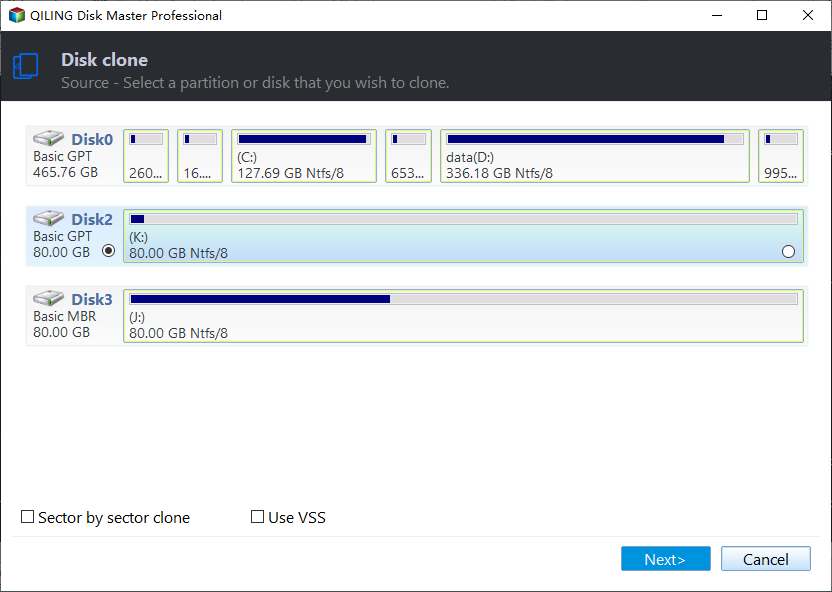
Select the source disk and click Next. Tick Sector by sector clone only when the source returns read errors or you need an exact duplicate, since the default copy is faster and verifies just as strictly.
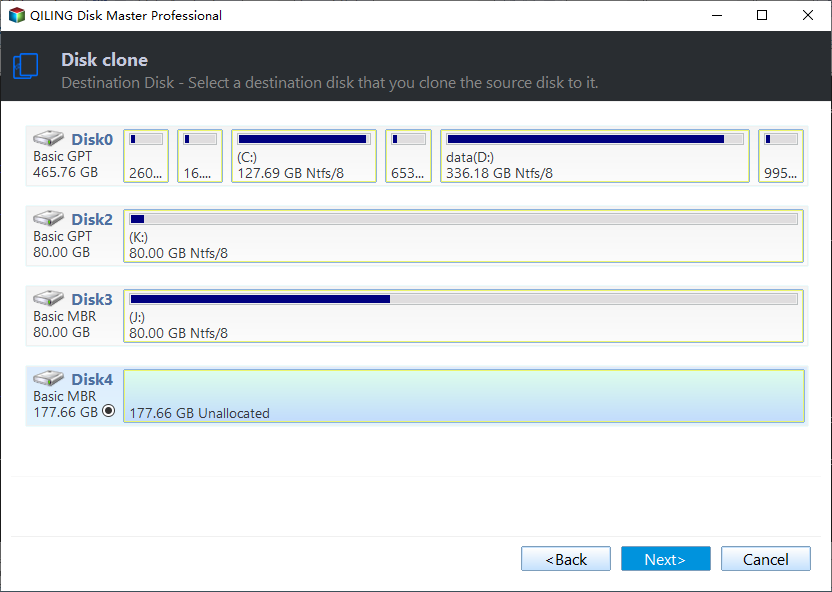
On the next page pick the destination. The list shows capacity, model, and the partitions that will be replaced, so confirm the disk by its size and model rather than by its drive letter.
Step 3. Read the Preview and Click Proceed
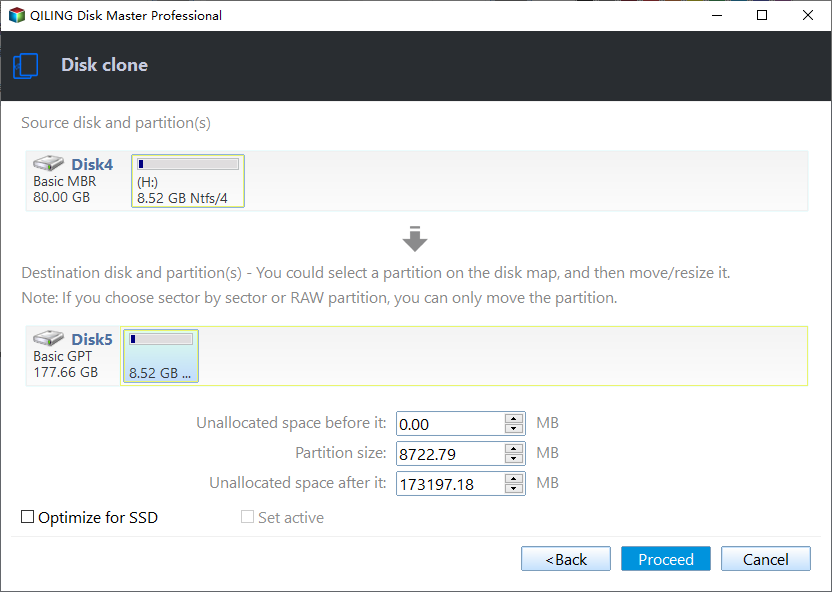
The preview page puts both layouts side by side. Autofit the disk resizes partitions to the new capacity, Copy as the source keeps the original sizes, and Edit disk layout lets you change a boundary by hand.
Check that the system and boot partitions appear on the destination side and that nothing is missing, then click Proceed and accept the overwrite warning. Everything after that point runs without further prompts, so a wrong choice here is expensive.
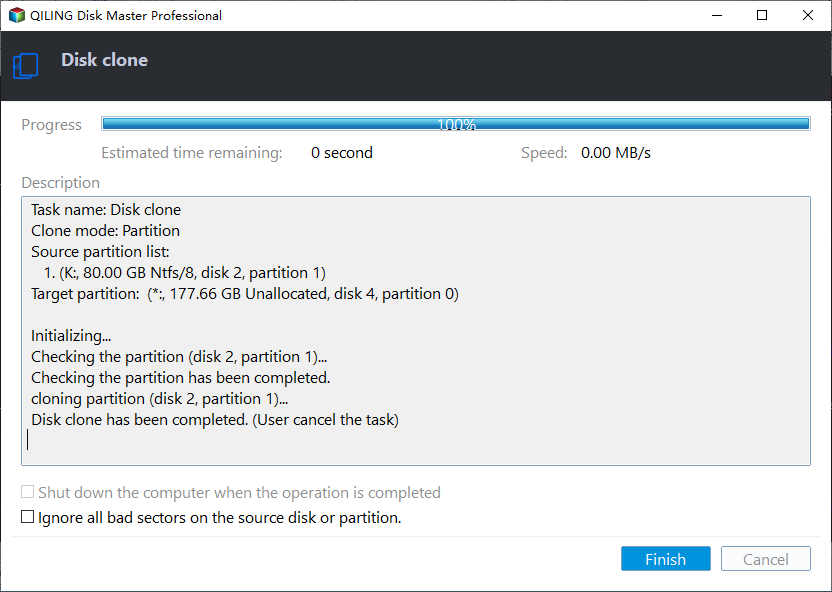
Step 4. Check the Finish Message
The finish window repeats the task name, the source partition, and the target disk, and its description lists the last step that ran. A run that ends with an error still opens this window, so copy the description before closing it.
Frequently Asked Questions
Why does verification fail only near the end?
A GPT disk keeps a backup copy of its partition table in the final sectors. A weak or remapped area there fails the comparison at the end while every earlier block passes.
Can I verify a clone without the tool?
Partly. Compare folder counts, open a few large files, then boot from the new disk once with the old disk disconnected. Those checks catch common failures but do not replace a block comparison.
Is the old disk safe to wipe after a failed check?
No. Until the new disk boots and opens your files, the source is the only verified copy. Keep it disconnected but intact until that test passes.
Related Articles
- Clone Fails at Finalizing: Causes and Fixes
- How to Clone an SSD with Bad Sectors
- Sector-by-Sector Clone vs Intelligent Clone: Which to Use
- Disk Clone Stuck at 0% or 99%: Causes and Fixes
- Recover Files After a Failed Disk Clone
Products
Articles & Tutorials
- Data Recovery
- Data Backup
- File Recovery
- File Backup
- System Backup and Restore
- Disk and Partition Clone
- Technical articles
- Mobile articles
- Disk Master Help
- Windows Data Recovery Tutorials
- Windows Secure Delete Tutorials
- Windows Partition Management Tutorials
- Windows File Backup and Restore Tutorials
- Windows System Backup and Restore Tutorials
- Windows Disk Backup and Restore Tutorials
- Windows Clone Tutorials