All Proven Ways to Transfer Photos from iPad to Mac
Applies to: iMac, Macbook Air, and Macbook Pro
Although iPhone is the device you use most frequently to take pictures, there are still times when you use your iPad to take photos and save images from the Internet. Given the rich collection of photos on your iPad, it's necessary to transfer photos from iPad to Mac so that you can back up these precious photos elsewhere to avoid complete data loss.
But how can you download pictures from iPad to Mac? For you who both own iPad and Mac, it's quite easy to share photos between the iPadOS device and the computer: since both of the devices are from Apple, there are many built-in features and utilities that allow you to import photos from iPad to Mac directly. Read on to get the detail.
Besides, all of the ways below also work well to transfer photos from iPhone to Mac. If you need to import photos from iPhone to Mac someday, you can also let this guide help.
How to Transfer Photos from iPad to Mac with Photos
Just as there is a Photos app on Windows that allows you to transfer photos from iPad to PC, there is also a Photos app on macOS that enables you to import photos from iPhone to Mac effortlessly.
The Photos app on Mac not only helps you to manage and organize your pictures and videos but also works to import photos from your iPhone, iPad, or iPod touch.
Prepare an official USB cable and then follow the steps below to transfer pictures from iPad to Mac:
Step 1. Connect the iPad to Mac via a USB cable.
Step 2. Unlock the iPad and click "Trust" in the popup.
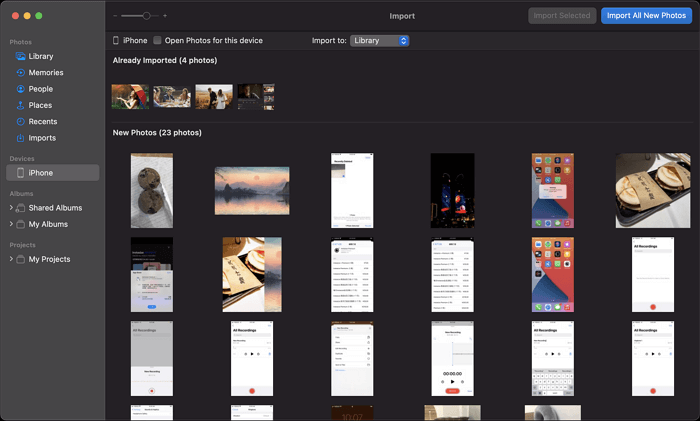
Step 3. Launch Photos on Mac and select your iPadOS device under the "Devices" section.
Step 4. Click "Import All New Photos" or select the items and choose "Import [number] Selected" to transfer photos from iPad to Mac.
How to Import Photos from iPad to Mac with Image Capture
Photos is not the only pre-installed app on Mac that is used to transfer pictures from iPad to Mac. Other than Photos, Image Capture is also a workable solution. This app can import photos from a camera connected to your Mac or from a device that has a camera. Thus, it's clear that you can use it to add photos from iPad to Mac.
To import photos from iPad to Mac with Image Capture:
Step 1. Connect the iPad and the Mac and make sure the iPadOS device is recognized by the computer.
Step 2. Unlock the iPad and trust the computer.
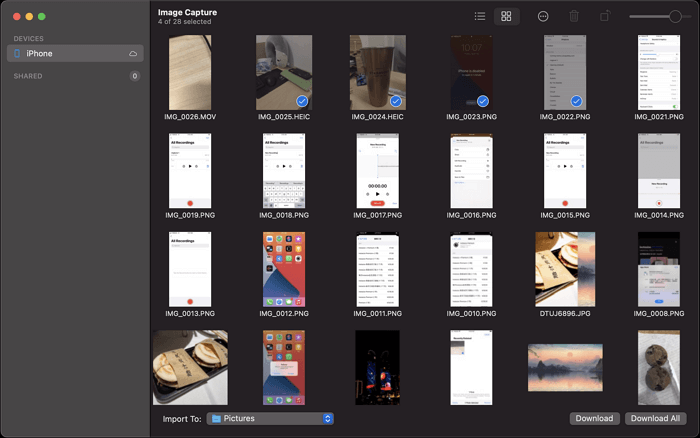
Step 3. Open Image Capture and select the iPad from the left panel.
Step 4. Choose the pictures you want to transfer and click "Download" to save them to a folder on your Mac.
As you can see, you can choose the destination folder before the photo transfer starts. Thus, Photos and Image Capture are also workable solutions to transfer photos from iPhone to flash drive on Mac.
How to Download Pictures from iPad to Mac with Qiling MobiMover
Have you ever wanted to send photos from iPad to Mac in a well-organized way? If you do, don't hesitate to try the iOS/iPadOS content manager - Qiling MobiMover.
As an iPhone data transfer tool, it performs well to transfer files between an iPhone, iPad, or iPod touch and a computer or between two iDevices. In addition to photos, Qiling MobiMover also transfers videos, music, ringtones, audiobooks, contacts, and more. When you want to transfer files between iPhone and Mac, you can also use it to get things done. (Although Photos and Image Capture are good choices to transfer photos from iPad to Mac, if you need to put photos on iPad from Mac, they won't help.)
Step 1. Connect your iPad to Mac with a USB cable > Run Qiling MobiMover > Choose "Phone to Mac" > Click the "Next" button to go on.
Step 2. If you want to transfer photos, make sure that the "Pictures" is selected. Apart from photos, you can also choose to move all the supported files from your iPad to Mac at once. Besides, MobiMover enables you to customize the storage path for the exported data as you need.
Step 3. Click the "Transfer" button to start transferring photos from your iPad to Mac. Except for exporting files from iPad to Mac, you can also use MobiMover to import data from Mac to iPad with "Mac to Phone" mode.
Apart from data transfer, Qiling MobiMover can also do device backups and file conversions. When you want to back up your iPhone to a computer, back up WhatsApp messages to PC, or convert videos to audio, it will also be a good helper.
How to Send Photos from iPad to Mac via AirDrop
Photo transfer between two AirDrop-supported devices could be easy. You don't even need a USB cable - you can send photos from iPad to Mac wirelessly. However, since AirDrop needs Wi-Fi and Bluetooth to work, you need to make sure both features function properly on these devices and they are within the Wi-Fi and Bluetooth range.
Step 1. Turn on AirDrop, Bluetooth, and Wi-Fi on both your iPad and Mac.
Step 2. Make sure your devices can find each other by setting your devices to be discovered by "Contacts Only" or "Everyone."
Step 3. Go to Photos on your iPad, select the pictures you want to transfer, and tap the "Share" button.
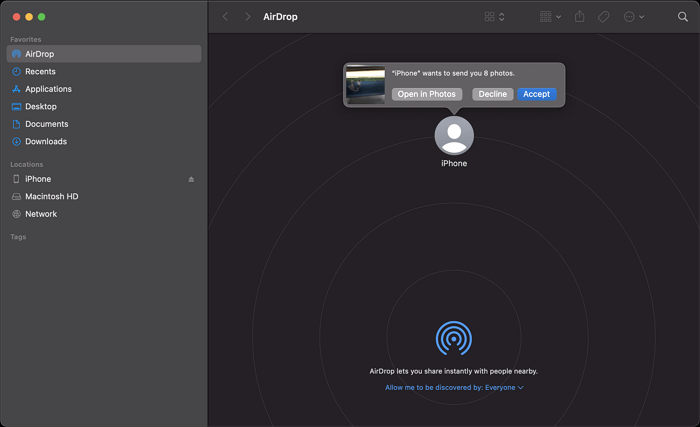
Step 4. Choose "AirDrop" and tap the name of the Mac.
Step 5. In the AirDrop window on your Mac, click "Accept" to receive these pictures.
Step 6. Afterward, go to the "Downloads" folder to check the photos from your iPad.
AirDrop not working? Check the possible causes and corresponding solutions to tackle the issue.
Frequently Asked Questions
If you have the same questions to ask, don't hesitate to check the answers below.
How do I transfer my photos from iPad to computer?
Transferring photos and videos from your iPad to a computer can be done with the built-in apps on your computer like Photos or a professional data transfer tool like Qiling MobiMover.
How do you transfer photos from iPad to Mac without syncing?
If you want to transfer photos from iPad to Mac without syncing, you should avoid using iCloud. Other workable ways like Photos, Image Capture, and AirDrop won't sync data or cause data loss on your device.
How do I transfer photos from iPad to Mac without iPhoto?
iPhoto is an app available on earlier macOS and has been replaced by other photo management apps for a long time. To transfer photos from iPad to Mac without iPhoto, you can use iCloud, AirDrop, Photos, Image Capture, or the powerful data transfer tool - Qiling MobiMover.
The Bottom Line
Both Qiling MobiMover and AirDrop are proven ways to transfer photos from Mac to iPad. Even when you are looking to transfer photos from iPhone or iPod touch to Mac, these solutions are the same.
Besides, iCloud or other cloud-based services are also helpful to transfer files like photos and videos between an iPhone/iPad/iPod and a computer. But given that photos always take large storage, it's not recommended here.
Related Articles
- How to Delete All Photos from iPhone in 3 Ways
- 2022 Review on the Best iPod Transfer Software
- The Ultimate Guide to Back Up WhatsApp on iPhone & Android
- How to Transfer Files from Mac to iPhone/iPad via USB