Target Disk Mode | How to Use Target Disk Mode on Mac
Target Disk Mode on Mac Overview
Mac computers have a feature called Target Disk Mode that allows you to boot another Mac from your Mac's startup disk, essentially turning your Mac into a bootable external hard drive. This can be useful for troubleshooting or transferring files between computers.
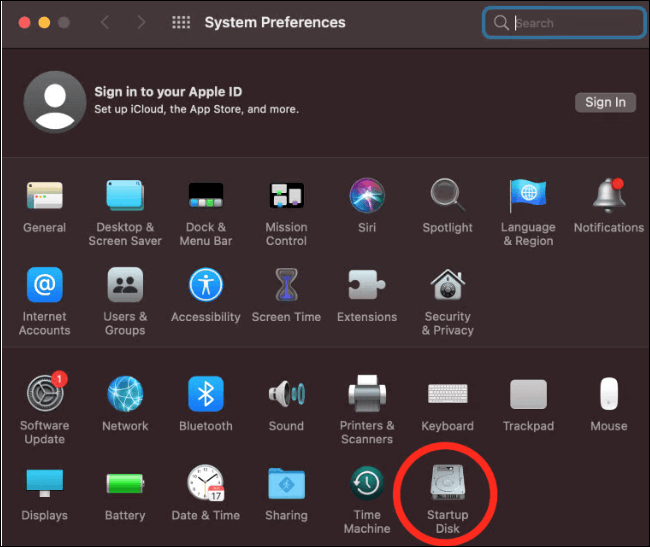
To access Target Disk Mode, press the power button on your Mac while holding down the 'T' key, or go to System Preferences > Startup Disk and select 'Target Disk Mode' from the dropdown menu. Once in Target Disk Mode, the other Mac will see your Mac as an external hard drive, and you can transfer files or boot from it.
What Is Target Disk Mode
Target Disk Mode (TDM) on Mac, also known as Target Mode, is a boot mode that allows a Mac to boot in a way that makes its internal hard drive accessible as an external drive on another Mac, typically for data transfer or disk cloning purposes. This mode bypasses the operating system and boots the Mac into a low-level mode, making the internal drive visible to the other Mac, which can then access and transfer files as if the internal drive were an external drive.
A Mac in Target Disk Mode can be connected to any other computer, Mac or PC, and will appear as an external device, allowing the host computer to access and interact with the target Mac's internal drives and peripherals as if they were external devices. This allows for precise formatting, partitioning, and utilization of the target Mac's internal storage and hardware.
When formatting or partitioning your target Mac, make sure to back up your data to prevent loss during the formatting process. If your Mac is unbootable, you can use Deep Data Recovery for Mac to recover your lost data.
![]()
Target Disk Mode is a helpful feature when a Mac can't load its operating system, allowing access to its contents. It's also used by Apple's Migration Assistant for transferring data between computers, supporting Ethernet and Wi-Fi connections, but not USB.
However, adapters can be used to connect via Thunderbolt-to-Firewire, Thunderbolt-to-Ethernet, or USB-3.0-to-Ethernet.
Mac Target Disk Mode Functions
Mac Target Disk Mode allows a Mac to be mounted as an external drive on another Mac, enabling file viewing, moving, editing, and copying. It also provides a way to troubleshoot and repair the target Mac by accessing its system files and making changes. This mode is useful for transferring files, reinstalling the operating system, and performing other maintenance tasks on the target Mac.
- The mode can transfer a large number of files between two Macs.
- It can migrate data from an old Mac to a new Mac. The process involves connecting the old Mac to the new one via a cable, and then running the migration assistant software on both devices.
- You can run Mac First Aid to repair the disk of an unbootable Mac by booting from Recovery Mode. This mode allows you to access Disk Utility and run First Aid to fix any disk-related issues, potentially resolving the unbootable state of your Mac.
- You can boot one Mac from another Mac using Target Disk Mode.
- You can delete files when MacBook doesn't turn on.
Mac Target Disk Mode Supported Devices
The target computer should be booted into TDM, with a compatible operating system and hardware requirements.
- FireWire or Thunderbolt Port
- An ATA device at ATA bus 0
The target Mac can be any version except the following:
|
Models |
Further description |
|
iMac |
Tray-Loading |
|
Power Macintosh G3 |
Blue & White |
|
iBook G3 models |
without FireWire |
|
Power Macintosh G4 |
PCI Graphics |
|
MacBook Air |
2008-2010 |
|
MacBook |
Unibody |
How to Use Target Disk Mode on Mac
To boot a Mac into Target Disk Mode, methods vary depending on the processor type. For Intel-based Macs, the process differs from those with Apple silicon processors. However, before attempting to boot your Mac into Target Disk Mode, it's essential to be aware of the specific steps required for your device.
Preparations to Use
Before entering Mac Target Disk Mode, you need some preparations:
- Two Mac computers. If the target Mac is formatted as APFS, the host Mac should run a version of macOS that is 10.13 or newer, such as macOS 13 Ventura, macOS 12 Monterey, or macOS 11 Big Sur.
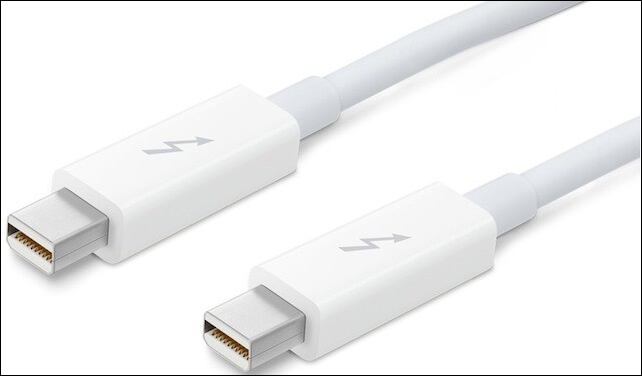
- An appropriate cable to connect. For Intel Macs, use a Firewire or Thunderbolt cable, while for Apple silicon Macs, use a USB, USB-C cable, Thunderbolt 3, or Thunderbolt 4. If ports don't match, an adapter can be used.
- An AC Power charger. Running a notebook Mac off its battery while in Target Disk Mode is possible, but it's recommended to keep an eye on the battery power levels to avoid unexpected shutdowns when the power runs out. It's generally best to power portable Macs from an AC source when using Target Disk Mode.
Boot Intel Mac Into Target Disk Mode
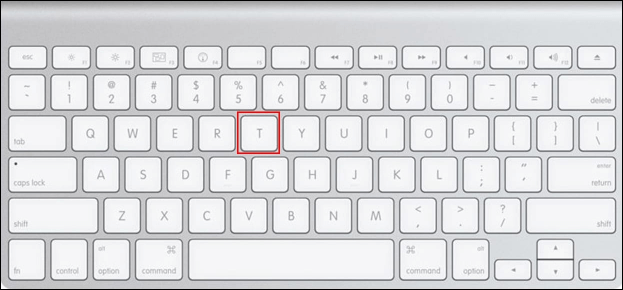
If you are using an Intel-based Mac, to boot your Mac into Target Disk Mode, press the power button while holding down the 'T' key. This will boot your Mac into a mode where it can be used as an external drive, allowing you to access its files and data from another Mac.
Step 1. Connect two Macs using a Firewire or Thunderbolt cable.
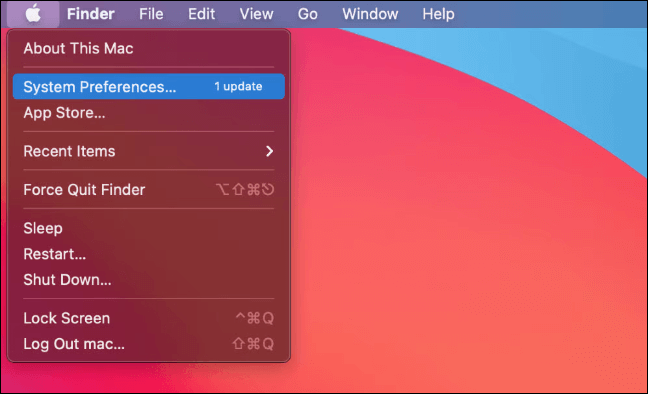
Step 2. When your Mac turns on, click the Apple logo, go to System Preferences, then Startup Disk, and finally click Target Disk Mode. Restart your Mac and it will enter macOS Target Disk Mode.
If your Mac won't turn on, try forcing it to shut down by holding the power button, then reboot by pressing the power button again or pressing the keyboard's T key.
Step 3. If you see a Thunderbolt or FireWire icon on the screen, it means the Mac is in Target Disk Mode, allowing you to access its disk as an external drive.
Boot M1 Mac Into Target Disk Mode
There is no Target Disk Mode on Apple silicon Mac. Instead, it is replaced by Mac Sharing Mode, which offers a way to access the startup disk of your Mac from another connected Mac.
Step 1. Connect the Apple silicon Mac to the second Mac using a suitable cable, such as a USB, USB-C, Thunderbolt 3, or Thunderbolt 4 cable.
Step 2. Hold the power button on your Mac until you see the Loading startup options, then release it. This will allow you to access the Startup Disk and select a different boot disk or boot from an external drive.
Step 3. Click "Options" and "Continue" with the administrator account password.
Step 4. To share a disk or volume, go to the "Utilities" section and select "Share Disk". Choose the disk or volume you want to share, then click the "Start Sharing" option.
Step 5. On the second Mac, click "Finder", then go to "Locations" and finally click on "Network".

Step 6. On the second Mac, open the Network window, double-click the M1 Mac's shared Disk or volume, select "Connect As" and choose "Guest", then click "Connect".
How to Transfer Files Using Target Disk Mode on Mac
When you enter Target Disk Mode on a Mac, you can quickly transfer data between two Macs, taking advantage of faster transfer speeds than traditional external drive transfers.
To move files from an external drive to the desktop on an Intel Mac, simply drag and drop the files as you would with any other external drive. This is a straightforward process that doesn't require any specific software or settings.
To transfer files between an Apple silicon Mac and another Mac, open Finder on the host Mac, go to Network, find the target Mac, double-click to open it, transfer files as usual, and then eject the disk when finished.
How to Get Out of Target Disk Mode on Mac
To stop Target Disk Mode on an Intel Mac, simply shut down the computer and disconnect the cable. This will immediately end the Target Disk Mode session.
On an Apple silicon Mac, you need to eject the target Mac drive from the host Mac. This is because the target Mac drive is being shared over the network and the host Mac needs to release its connection to it.
If Target Disk Mode is malfunctioning and throwing off random errors, shut down your Mac with the power button and disconnect the cable.
Quick Fixes for Target Disk Mode Not Working
There are some situations when your Target Disk Mode will not work:
- Your drive is non-operational or faulty
- Your hard drive is not in the correct format
- A faulty or buggy Thunderbolt cable or FireWire cable is used, which can cause data corruption or loss when transferring files between devices.
- There are some probable hard drive issues
You can read the following passage to learn how to fix Target Disk Mode not working.
[Fixed] Target Disk Mode Not Working on macOS Ventura/Monterey
Sometimes Target Disk Mode not working issue will occur on your Mac, and before finding its solutions, it's essential to understand the possible reasons behind this problem, which can include various technical issues.
Or you can do a few quick checks.
To begin, ensure both Macs are running the latest version of macOS by going to "System Preferences" and selecting the "Software Update" option.
To troubleshoot the issue, ensure you're using the correct cable, as both Macs support it, and also check if the cable is properly connected to both devices.
If you're unable to access Target Disk Mode, check if a firmware password is set up. If so, boot your Mac in Recovery Mode, go to Utilities, and choose Startup Security Utility or Firmware Password Utility. Turn off the firmware password by entering the required password, then restart your Mac. This should resolve the issue.
Conclusion
Target Disk Mode on Mac allows you to boot an Intel Mac into TDM and an Apple Silicon Mac into Mac Sharing Mode, essentially turning your Mac into an external hard drive. To achieve this, you can hold the 'T' key while booting up, or use the 'Target Disk Mode' option in the Startup Disk preferences.
If the Mac Target Disk Mode does not work, you can try restarting your Mac in Recovery Mode, resetting the System Management Controller (SMC), or checking for any hardware issues. By following these steps, you can successfully boot your Mac into Target Disk Mode and use it as an external drive.
Related Articles
- 2020 Top 5 Free Online PDF Service
- CPU OPT vs. CPU FAN: How Do They Differ? [Distinct Comparison]
- What Is MSTSC and How to Enable Remote Desktop with It?
- Dual Boot vs. Virtual Machine: Which One Is Better for You?
- How to Fix Raw SD Card Won't Format Error [3 Efficient Solutions]
If your SD card appears as “Raw” and won't format to NTFS, FAT32, exFAT, or other compatible file systems, don't worry. This article provides efficient solutions to fix the “Raw SD card won't format” error and introduces a professional tool to help remove this issue. - How to Recover Overwritten Word Document No Previous Version [Full Ways]
If you've accidentally replaced a Word document, don't worry, you can recover the overwritten file with these practical solutions. Whether it's a Word document or any other type of file, you can easily recover it by following this guide. Just try out these steps to get your document back.