How to Back Up Photos from iPhone with Ease
Quick Navigation:
- When Do You Need to Back Up iPhone Photos
- Part 1. How to Back Up iPhone Photos to PC (or Mac) in 3 Ways
- Method 1. Back up iPhone Photos to Computer with iPhone Transfer Software
- Method 2. Back Up iPhone to PC via File Explorer
- Method 3. Back Up Photos from iPhone to Mac using the Photos App
- Part 2. How to Back Up Photos from iPhone to Cloud Storage in 2 Ways
- Method 1. Back Up Photos from iPhone to iCloud
- Method 2. Back Up iPhone Photos to Google Photos
- The Bottom Line
Five common ways for you to back up iPhone photos.
When Do You Need to Back Up iPhone Photos
It's essential to back up your iPhone photos to prevent losing them and to free up storage space. Photos take up a significant amount of space on your iPhone, and deleting them can help reclaim storage, but only if you've backed them up first. By backing up your photos, you can ensure they're safe and accessible, and also make room for other important files and data.
Whether you want to back up iPhone photos to your PC, Mac, or cloud-based services, there's a solution for you. No matter the reason, you can follow one of the tips below to get your iPhone photos backed up. Whether it's to a computer or to a cloud service, you'll be able to find the right way to do it.
Part 1. How to Back Up iPhone Photos to PC (or Mac) in 3 Ways
Transferring photos from your iPhone to a computer, whether a PC or Mac, is a great way to back up your iPhone photos. This allows you to make a copy of your photos on the computer, freeing up storage space on your iPhone and giving you easy access to view and access your photos from the computer whenever you need to.
Here are 3 ways to back up your iPhone photos to your PC:
Method 1. Back up iPhone Photos to Computer with iPhone Transfer Software
With the iPhone transfer software Qiling MobiMover, you can easily transfer photos from your iPhone to your computer, either by item or by album, and also back up other types of content such as videos, music, contacts, messages, and more, regardless of whether you're using a PC or Mac.
Besides being an iOS data transfer tool, it also enables the transfer of files from PC to iPhone or sharing data from one iPhone, iPad, or iPod to another.
To back up pictures on iPhone:
Step 1. Connect your iPhone to your PC or Mac, run Qiling MobiMover, choose "Phone to PC", and transfer all iPhone photos to your computer with a single click.
Step 2. Select "Pictures" from the supported data types. MobiMover will save the exported files by default on your desktop, but you can customize the storage path by clicking "Custom Path".
Step 3. To transfer your iPhone photos to a computer, click the "Transfer" button. The process may take a few seconds or longer depending on the size of the files, so be patient. Once it's complete, check the destination to confirm that the photos have been successfully backed up.
Qiling MobiMover is a versatile tool that not only serves as an iPhone transfer software but also works as a video downloader, allowing you to download online videos from various video sites or social networking sites. Whether you want to download YouTube videos to your iPhone or save Facebook videos to your computer, you can save the video you like for offline watching with the help of Qiling MobiMover.
Method 2. Back Up iPhone to PC via File Explorer
To transfer photos from your iPhone to a PC, simply connect your iPhone to the computer using a USB cable, and then access your iPhone's files through File Explorer on your computer.
To transfer photos from iPhone to PC:
Step 1. Connect your iOS device to computer with a USB cable.
Step 2. Unlock your device and trust the computer.
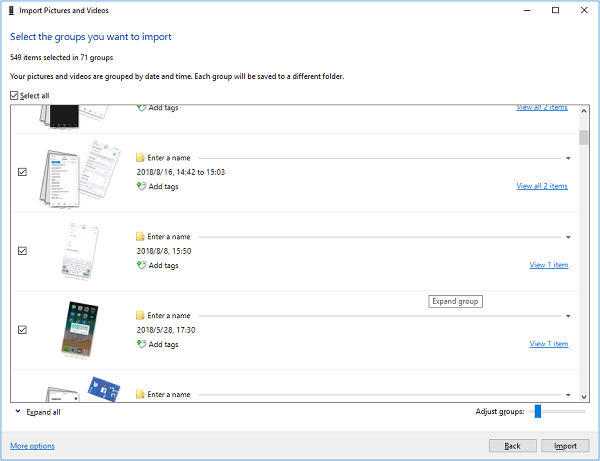
Step 3. If you're prompted on your PC about what to do with the device, select "Import photos and videos" followed by "Review, organize and group items to import" or "Import all new items now". Alternatively, go to "This PC" > [your iPhone's name] > "Internal Storage" > "DCIM" > "100APPLE" to manually copy and paste pictures from your iPhone to your PC.
To back up iPhone photos to PC, connect your iPhone to the computer using a USB cable. Open iTunes on your PC and select the iPhone icon.
Method 3. Back Up Photos from iPhone to Mac using the Photos App
If you're using a Mac, you can use the Photos app to import photos from your iPhone and make a backup. The Photos app not only allows you to manage your photos on your Mac but also enables you to transfer photos from an external storage device to your Mac, making it a workable option for backing up your iPhone photos to your Mac.
To back up photos from iPhone to Mac:
Step 1. Connect your iPhone to your Mac using a cable, and then unlock your iPhone. You may need to go through a verifying process, depending on your iPhone settings. This will allow you to access your iPhone's contents from your Mac.
Step 2. To sync photos from your device to Photos for Mac, go to the "Devices" section in Photos for Mac, select your device, and follow the on-screen instructions.
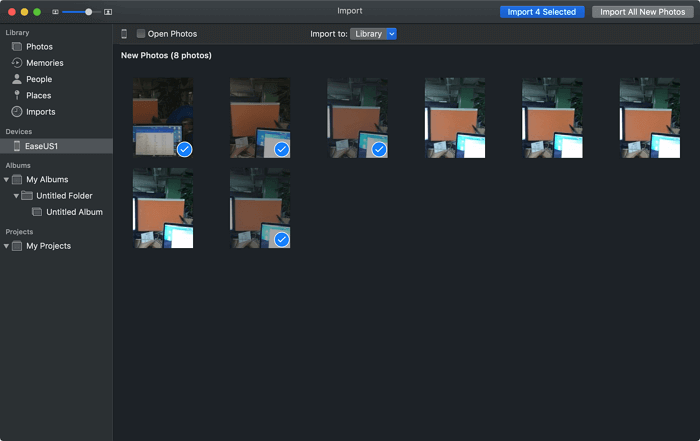
Step 3. Select the photos you want to transfer to the Mac and then click "Import Selected" or click "Import All New Photos" to import all new photos.
There are also other tips to get iPhone photos to Mac. Check the guide on how to transfer photos from iPhone to Mac if necessary.
Part 2. How to Back Up Photos from iPhone to Cloud Storage in 2 Ways
You can back up iPhone photos to another device or cloud storage, such as iCloud or Google Photos, in addition to backing them up to another device.
Cloud-Based storage services allow you to wirelessly back up your iPhone photos to the cloud whenever you're connected to a network, making it a convenient option for keeping your photos safe.
Method 1. Back Up Photos from iPhone to iCloud
Using iCloud will allow you to sync your iPhone photos to iCloud, creating a backup and enabling sharing with other devices using the same Apple ID, making it a suitable alternative to third-party services.
Deleting a photo from your iPhone will also remove it from iCloud, so using iCloud for backing up photos and then deleting them from your device to free up space is not a good idea.
To save photos from iPhone to iCloud:
Step 1. Go to "Settings" > [your name] > "iCloud".
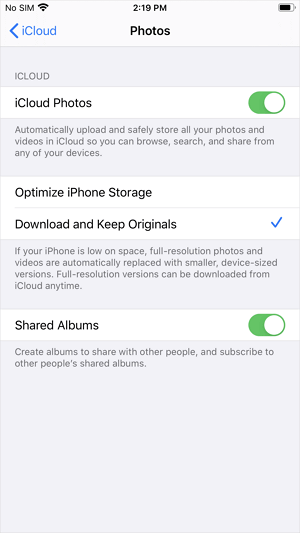
Step 2. Tap "Photos" and toggle on "iCloud Photos".
After syncing, you can access your iPhone photos from iCloud.com.
Method 2. Back Up iPhone Photos to Google Photos
Google Photos doesn't sync changes made on an iPhone, meaning that deleting photos on the phone won't delete them from the cloud.
To back up photos on iPhone via Google Photos:
Step 1. Download and install Google Photos for iOS on your iPhone.
Step 2. To sign in to the Google Photos app, open the app on your device and tap on the "Sign in" button. If you have a Google account, enter your email address and password to log in.
Step 3. Tap your photo at the top right and select "Photos".
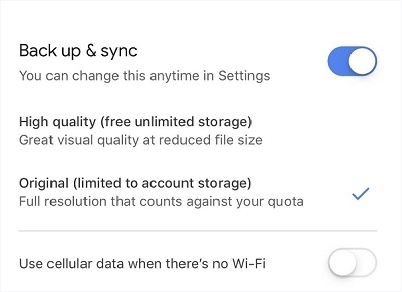
Step 4. To activate the "Back up & sync" feature, tap on the option and toggle the switch to the right, ensuring that it is turned on. This will initiate the backup and synchronization process.
The Bottom Line
Backing up iPhone photos is a straightforward process. If you prefer a wired connection, simply use a USB cable to transfer your photos to a PC or Mac. Alternatively, if you prefer a wireless solution, ensure you have sufficient storage space to save your iPhone photos. By specifying your needs, you can choose the most suitable method to apply.
Related Articles
- How to Connect iPhone to Windows 11
- How to Transfer Playlists from iTunes to iPhone 8/8 Plus/X in 2 Quick Ways
- How to Back Up iPhone Before Upgrading
- How to Delete Photos from iPhone but Not iCloud