Setup Was Unable To Create a New System Partition or Locate an Existing System Partition Windows 7
Page Content
The "Setup Was Unable to Create A New System Partition" error in Windows 7 occurs when the Windows Setup process fails to create a new system partition, which is necessary for the installation of Windows. This can be caused by a variety of factors, including a faulty hard drive, a corrupted system partition, or a problem with the Windows Setup process itself.
To resolve the issue where Windows Setup was unable to create a new partition, try running the Windows Setup process in Safe Mode. If that doesn't work, you can attempt to manually create a new partition using the Disk Management tool.
"Fail to Create A New Partition" FAQs
Cause of "Setup Was Unable to Create A New System Partition Windows 7"
The error "Setup was unable to create a new system partition or locate an existing system partition" occurs during Windows 7, 8.1, or 10 installation due to Windows failing to identify the device to install the operating system on.
Workable Solutions for Setup Was Unable to Create A New Partition
The undesirable warning that often accompanies a USB flash drive can be frustrating. However, there is a method that allows Windows to identify the correct location for installing the operating system. This approach puts effective solutions at the forefront, providing users with options to try.
Method 1. Create System Partition in Manual Way
Method 2. Change SATA Controller to IDE Mode
Method 3. Install Windows with Another Partition Manager Tool
Method 4. Eject and Reconnect the USB
Method 1. Create System Partition in Manual Way
Leave this USB plugged in.
1. Press "Shift + F10" to open the Command Prompt window.
2. Type "diskpart" and press Enter. (Remove quotes.)
3. To list all available hard drives, type the command "list disk" and press Enter. This will display a list of all hard drives connected to the system, allowing you to select the correct one for the next step.
4. To install an operating system, type "select disk X" and press Enter, where X is the number of the partition you want to install the OS on.
5. Type "clean" and hit Enter.
6. Enter "create partition primary size=5000" and press Enter key.
7. Continue to type: format fs=ntfs quick and press Enter.
8. When formatting completes, type the following command lines and press Enter for each command line: 1. `sudo parted -l` 2.
- assign
- active
- list volume
- exit
9. Then, change the directory location where your Windows installation file is located. Please enter the command to copy the installation files from the CD to the C drive. For example, you can use the following command: `copy d:\i386\*.
- To install a program, you need to navigate to the directory where the installation files are located. This is done by typing "cd" followed by the letter of the drive where the files are stored, for example "cd e:". The colon at the end of the drive letter is important, as it indicates that you are changing to that drive. Once you are in the correct directory, you can proceed with the installation process.
- xcopy e: c:/e/h/k
- Hit Enter.
Type "exit" to quit the command prompt window and eject your USB if it is done. Turn off the "Install Windows" window afterwards.
10. Reboot the computer, and the installation process starts.
- Follow the installation process:
- Click "Next" and then click "Install Now".
- Check "I accept the license terms" and click "Next".
- Select "Custom" and then choose the installation location. Click "Next".
- Final step - Click "Restart now".
Video Guide - How to Fix Installation Error with CMD
- 0:42 Use CMD to solve "Setup was unable to create a new system partition or locate an existing system partition".
Method 2. Change SATA Controller to IDE Mode
If method 1 is not feasible, try changing the SATA controller mode to IDE mode instead. This method may allow you to access the hard drive. The SATA controller mode serves as a bridge connecting the hard drive and motherboard, and it also manages data. Changing it to IDE mode might enable you to access the hard drive.
Step 1. To access the BIOS settings, reboot your computer and press the F2 key to enter the BIOS setup. This is typically done by pressing the F2 key as soon as the computer starts booting up, and before the operating system loads. The exact key to press may vary depending on the computer model, but F2 is a common key used to enter the BIOS settings.
Step 2. To configure SATA as IDE, follow these steps: Choose "Storage Configuration" from the Advanced menu, click "Configure SATA as" and press Enter, then select "IDE" from the options and hit Enter.
Step 3. Press F10 to save changes and exit from BIOS.
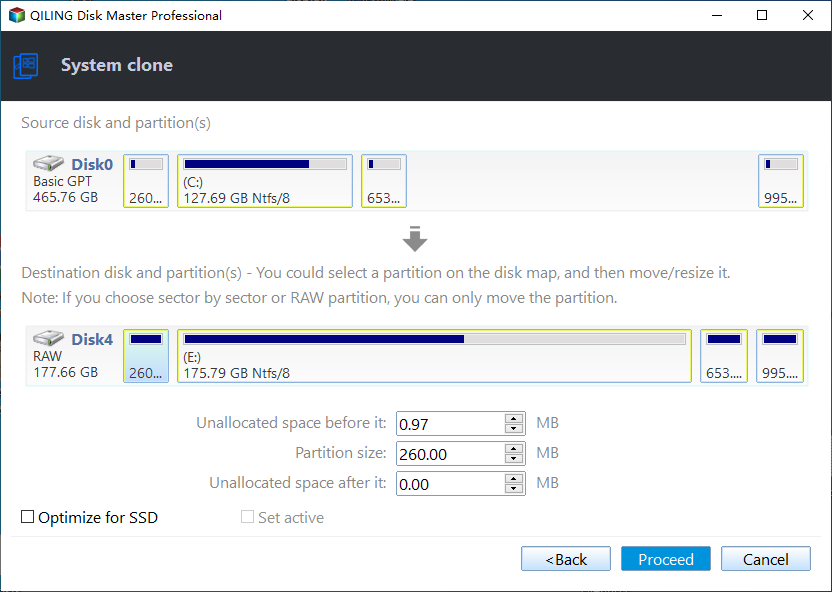
Method 3. Install Windows with Another Partition Manager Tool (Qiling Disk Master)
To avoid issues with a USB drive, consider migrating your Windows system to another drive instead. You can use a professional tool like Qiling Disk Master to easily install Windows OS on another drive, such as an SSD. This approach allows you to skip the potential problems associated with using a USB drive.
Steps to migrate OS to HDD/SSD:
- Run Qiling Disk Master, and select "Clone" from the Tools tab.
- Check "System Clone" and click "Next".
- Select the SSD or HDD as the destination disk and click "Next".
- Be aware that the target disk's data and partitions will be completely erased. Make sure to back up any important data before proceeding. If you haven't already, do it now to avoid any potential loss.
- Then click "Yes".
- First, preview the layout of your target disk. Then, click "Start" to initiate the migration of your operating system to the new disk. This process will allow you to transfer your OS to the new disk, effectively replacing the old one.
- After you've completed the steps, click "Reboot Now" or "Done" to decide whether to restart your computer from the new disk right away.
"Reboot Now" means to keep the changes instantly, whereas "Done" requires a manual restart later.
Note: When migrating an operating system to an SSD or HDD, be aware that the process will delete and remove existing partitions and data on the target disk if there's not enough unallocated space. It's essential to back up any important data on the target disk to an external hard drive beforehand to avoid losing valuable information.
Method 4. Eject and Reconnect the USB
To resolve the "setup was unable to create a new system partition" error when installing Windows 7 from USB, try ejecting and reconnecting the USB drive, as this may resolve issues with the setup program accessing the files on the USB.
"Fail to Create A New Partition" FAQs
1. How do you fix error "we couldn't create a new partition or locate an existing one"?
The error occurs when installing Windows on a computer with an existing operating system, and it's often caused by the BIOS not being configured to boot from the correct drive. To resolve this issue, you need to change the boot order in the BIOS so that the correct drive is listed first. This should allow the installation to proceed normally.
2. How do I create a partition in Windows 7?
Windows 7 includes a built-in utility for creating and managing disk partitions.
- To create a new partition, open the Disk Management tool by hitting Start and typing in "diskmgmt.msc" and follow the on-screen instructions to create a new partition.
- Once the tool opens, right-To create a new partition on your unallocated hard drive space, click on the unallocated space and select "New Simple Volume." This will initiate the New Simple Volume Wizard, guiding you through the process of creating a new partition, where you can specify the size, drive letter, and file system.
Once you've created your new partition, it will appear in Windows Explorer, just like any other drive on your computer.
3. How do I fix Windows Cannot be installed in this partition?
To resolve the issue, simply delete the problematic partition and then recreate it.
You need to boot from your Windows installation media, delete the partition, and then proceed with the Windows installation. If the error persists, continue reading.
Related Articles
- Three Simple Ways to Format a Bootable SD Card (Useful Tips)
- MBR2GPT Disk Layout Validation Failed | 3 Proven Fixes
- How Do I Clear My Laptop Before Selling It on Windows 10
- How to Format M.2 SSD in Windows 10 [Detailed Instruction]
- How to Resize Windows Server 2008 Partition Without Data Loss
Qiling partition manager can help resize computer partitions with ease, allowing users to shrink and extend Windows Server 2008 volumes without losing data, making it a useful tool for managing disk space. - How to Set Up Computer to Work from Home Productively
To access your work computer data from home, set up your computer with professional data and program transfer software like Qiling Disk Master. This allows you to easily access work computers and transfer data.