How to Resize Partition on SSD without Losing Data [Windows11/10]
SSD is a solid-When running out of space on your SSD, you may need to resize the partition to free up some room. SSDs are often used as a storage device that offers better performance than traditional HDDs, making them a popular choice for many users. Some users may choose to migrate their data to SSDs, while others may have both SSDs and HDDs coexisting on their computers. Resizing the partition on your SSD can help you make the most of your storage space.
To efficiently use the space on an SSD and manage the disk better, you can resize partitions on SSD. This can be done by extending or shrinking the partition to increase the size of other drives, and there are three ways to complete this task: using the built-in Disk Management tool, a third-party partition manager software, or a command prompt. The correct method to choose depends on the specific SSD partition you are working with.
How to Resize Partition on SSD without Losing Data – Three Methods
Resizing partitions on an SSD on Windows 11/10 is a manageable task, and you can use either the built-in tools of Windows, such as Disk Management and Diskpart, or a reliable third-party tool like Qiling Disk Master Free, to easily extend or shrink partitions on your SSD.
To resize a partition on an SSD, compare and choose the proper method from the table below, which provides a side-by-side comparison of different methods to help you select the most suitable one for your needs.
| Comparison | |||
|---|---|---|---|
| Supported SSD Format | Both NTFS and FAT32 | Only NTFS | Only NTFS |
| Resize Partition | From head to the end of the partition | Only one side supported | Only one side supported |
| Operation difficulty | Easy, three steps | Medium, six steps | Difficult, commands required |
| Suitable Users | For all users | For experienced users | For experts |
Qiling Disk Master offers more features for resizing partitions on SSDs, including support for FAT32 partitions, which is not supported by Windows' built-in tools. This makes it a convenient option even for novice users, allowing them to easily resize partitions on SSDs.
To resize partitions on an SSD, we can use three methods: shrinking, expanding, and deleting and re-creating. The easiest way to start is by shrinking an existing partition to free up space, which can be done using the built-in disk management tool in Windows or the Disk Utility app on a Mac.
Method 1. Resize Partition on SSD via Qiling Disk Master
Qiling Disk Master can support all Windows users, including Windows 11/10/8/7 and Windows XP, making it easy to manage disk space for different uses, even for those not skilled in computers. To resize a partition on an SSD, follow the steps below to use the "Resize/Move" function to extend or shrink the partition.
Step 1: Locate and select the target drive/partition
Launch Qiling Disk Master, go to Partition Manager, select the target drive/partition, right-click and choose "Resize/Move" to adjust its size.

Step 2: Resize or move the partition
1. To shrink the partition, simply drag one of its ends to free up unallocated space. Once done.
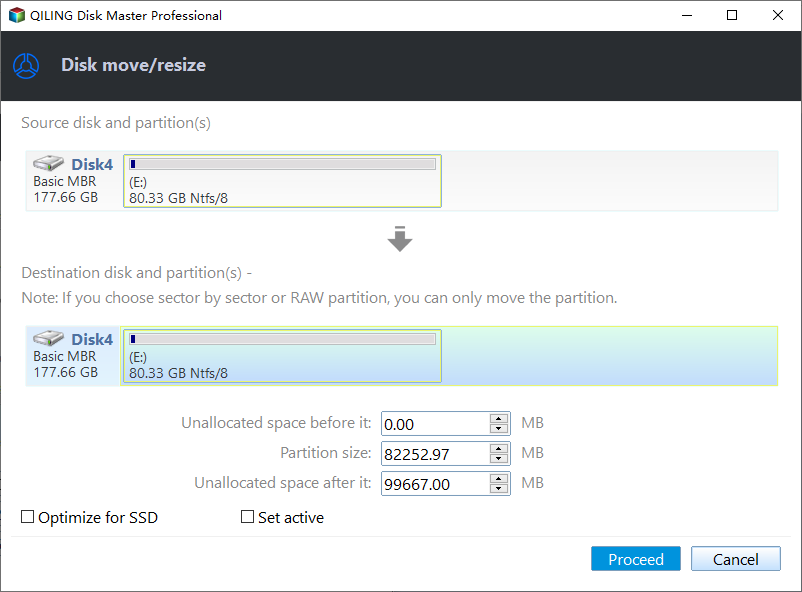
2. To extend the partition, ensure there is unallocated space available. If not, create some by following the previous steps. Then, drag your mouse into the unallocated space to extend the partition.
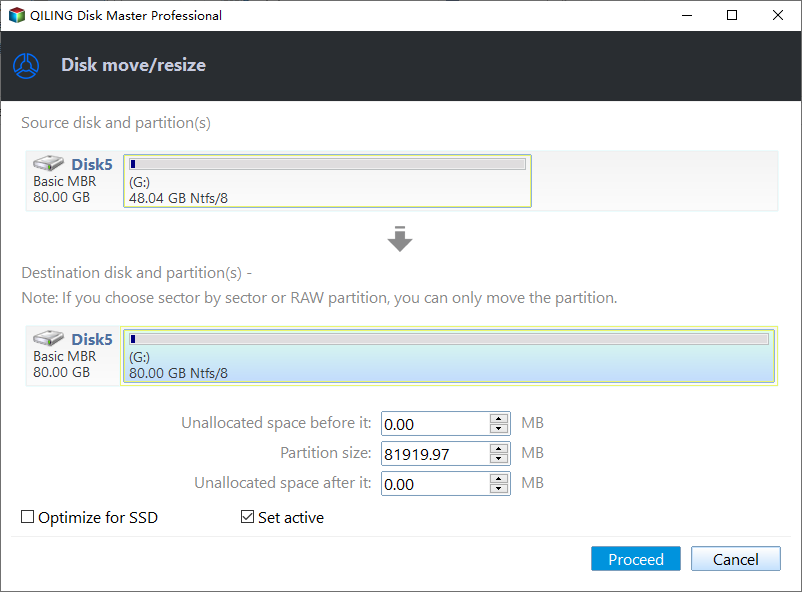
3. To move a partition's position, you need to have unallocated space adjacent to the target partition. If there isn't any, free up some space first.
Right-To resize and move a partition, click on the target partition, select "Resize/Move" from the context menu, and then drag the partition left or right to adjust its position.
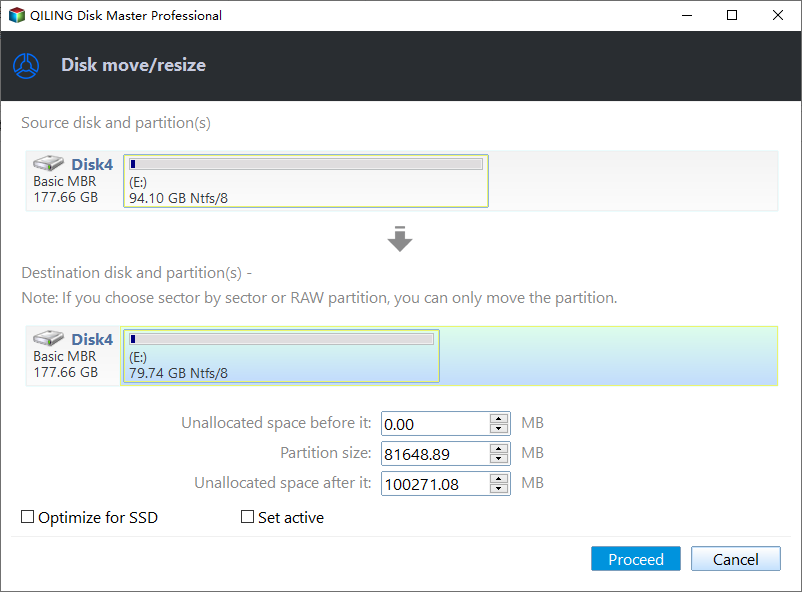
Step 3: Confirm the result and apply changes
You will now see the new disk partition information and diagram, displaying the updated configuration.
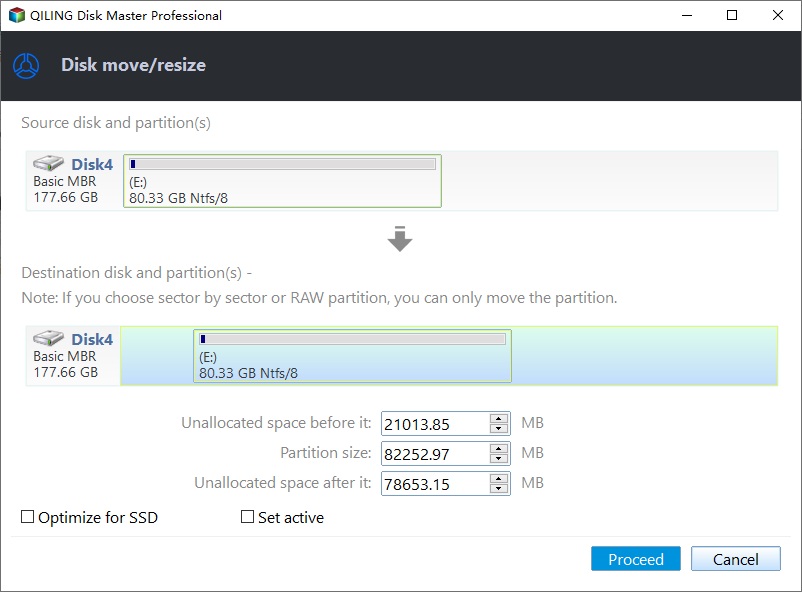
Click the "Proceed" button to save changes.
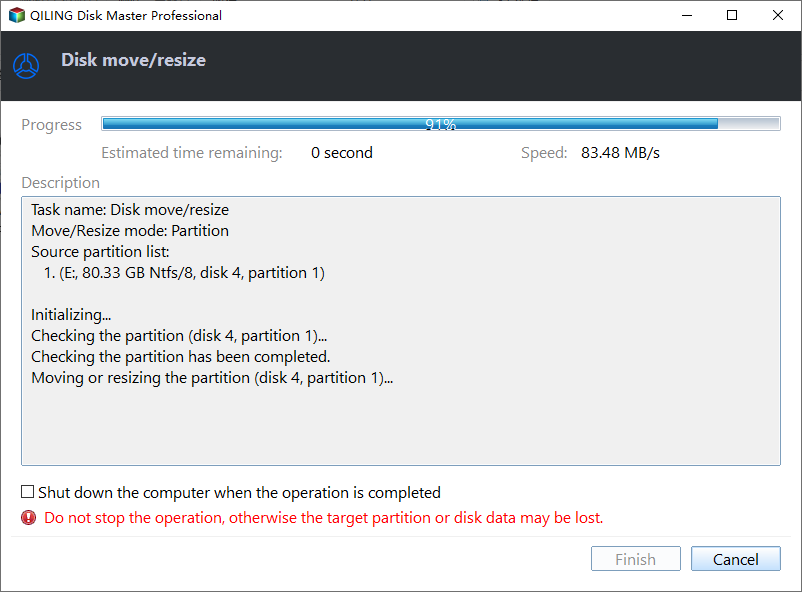
Qiling Disk Master simplifies partition resizing on SSDs and serves as a useful disk partition helper, and can be downloaded for further benefits.
Method 2. Resize Partition on SSD via Disk Management
Disk Management is a manual method in Windows 11/10 that allows users to extend, shrink, and adjust the size of a partition on an SSD (solid-state drive). Using the "Extend Volume" or "Shrink Volume" feature, users can modify the partition size to suit their needs.
- Tip
- To extend a partition on an SSD using Disk Management, you need to make sure there is unallocated space to the right of the target partition. However, you cannot merge non-adjacent partitions in Windows 10.
Now, follow the steps below to resize partition on SSD.
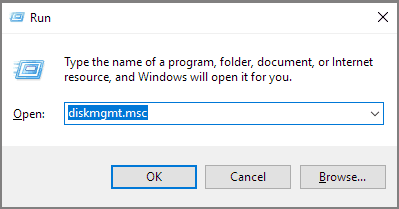
Step 1. Press the Windows key + R to open the Run dialog, then type "diskmgmt.msc" and press Enter to open the Disk Management console.
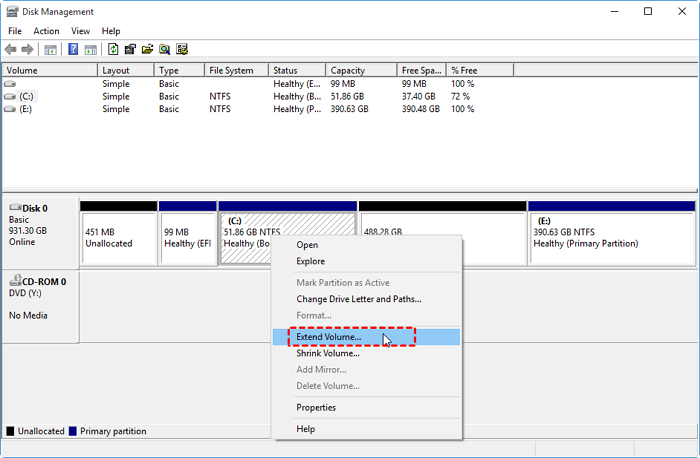
Step 2. Choose the partition on SSD and right-click it.
Step 3. To expand or reduce the space of a partition on an SSD, select "Extend Volume" to increase the space or "Shrink Volume" to decrease it.
Step 4. Click "Next" in the Extend Volume Wizard windows.
Step 5. Set the amount of space for the partition on the SSD, and click "Next".
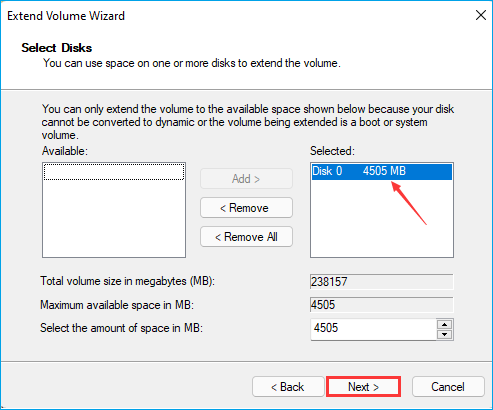
Step 6. Once you've completed the resizing process, click "Finish" to finalize the changes and complete the task of resizing the partition on your SSD.

- Notice:
- If the "extend volume" option is greyed out or you're unable to shrink a volume, it's likely due to the volume being formatted with the FAT32 file system. You can resolve this issue using Qiling Disk Master.
Method 3. Resize Partition on SSD via Diskpart Command
Diskpart is a command-line interface for experts that offers more functions than Disk Management. It allows for creating, deleting, and resizing partitions on SSDs, but requires careful inputting of commands to avoid errors. If you're comfortable with using Diskpart, you can use it to resize partitions on your SSD.
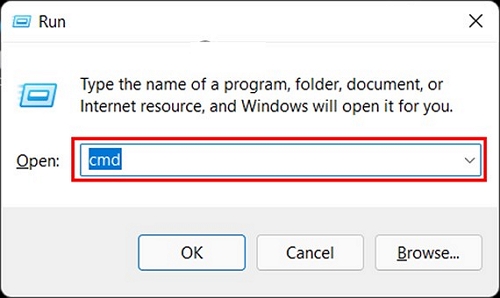
Step 1. Open the run window by pressing "Window+R."
Step 2. Type "cmd" in the run window and hit "Enter."
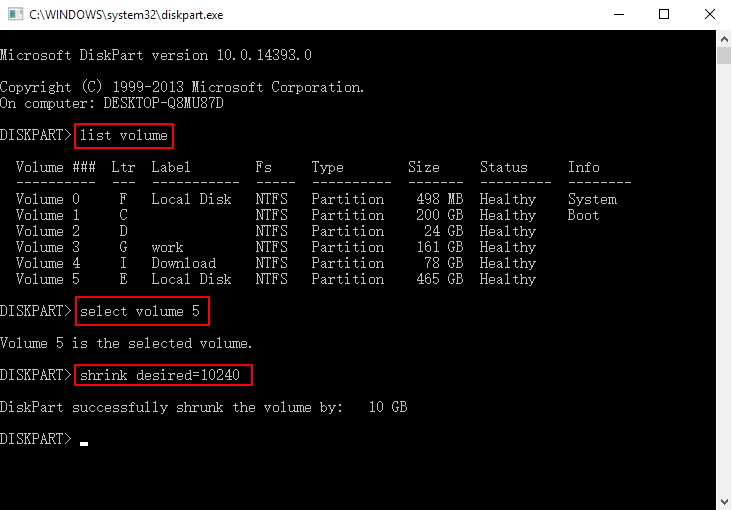
Step 3. To open the command window, type "diskpart" and press the "Enter" key.
Step 4. Input the following command and hit "Enter" after each command.
list volume (To see all volumes on the computer)
select volume 5 (5 refers to the target volume number on SSD)
shrink desired=10240 To shrink or extend a partition
Step 5. To close the window and finish resizing partitions on your SSD, type "exit" in the command line.
The Diskpart command, although a bit complicated, is a powerful tool that can also be used to extend a partition on Windows, in addition to its other functions.
If you don't frequently use partition management tools, it would be better to get a portable one so that you don't have to install it on your computer, allowing you to choose the most suitable portable partition resizer from the following page.

Top 4 Best Partition Resizer Portable Review: Pros and Cons
This article compares 4 portable partition resizers from multiple aspects, providing a helpful guide to find the best one for your needs.
Conclusion
You can resize a partition on an SSD using three methods: Disk Management and Diskpart commands, which require some computer knowledge.
Qiling Disk Master is a highly recommended tool that saves time when adjusting partition sizes on SSDs. It's user-friendly yet packed with powerful features, allowing for tasks that Windows' built-in tools can't handle, such as resizing FAT32 partitions and merging non-adjacent partitions.
FAQs About How to Resize Partitions on SSD
To resize a partition on an SSD, you'll need to use a tool like Disk Management (built into Windows) or a third-party app like Qiling Partition Master. First, back up any important data on the drive, as resizing will erase everything.
1. Can you change the partition size without losing it?
You can change the partition size by extending or shrinking the partition space without losing data.
2. How do I shrink my C drive on my SSD?
You can shrink your C drive on SSD with several methods. Follow the steps below to shrink the C drive on SSD via Disk Management on Windows.
Step 1. Right-click "Computer" and choose "Manage."
Step 2. Double-click "Disk Management" and select the C drive on SSD.
Step 3. Right-click C drive and choose "Shrink Volume."
Step 4. Set the amount of space you want to shrink.
3. How do I increase C drive space on my SSD?
Increasing C drive space on an SSD is a straightforward process. You can use the "Extend Volume" function in Disk Management or the Diskpart command in CMD to expand the C drive space. To do this using CMD, follow the steps below.
Step 1. Open the run windows and type "diskpart.exe."
Step 2. Type the following commands and hit "Enter" each time.
- list volume
- select volume x
- extend size
Step 3. Type "exit" to close the window.
Related Articles
- Hard Drive Failure: How to Check & What to Do
- How to Clone Windows to External Hard Drive [100% Working Solution]
- What Is Command Prompt, How Do I Open and Use It [2024 Guide]
- How to Format SD Card to NTFS on Android and PC [2024 Step-by-Step Guide]
- Solved: Lenovo Laptop Running Slow Windows 10
If your Lenovo laptop running slow, you need to read this article for why Lenovo laptop running slow on Windows 11/10/8/7 and how to speed up Lenovo laptop. - Easily Merge C and D drive in Windows 10 without Losing Data
You can learn how to merge C and D drive in Windows 11/10/8/7 with several clicks by using the partition manager Qiling Disk Master.