How to Create A Partition Windows 11? [Solved]
| Workable Solutions | Step-by-step Troubleshooting |
|---|---|
| #1. Qiling Partition Master | Step 1: Locate the drive/partition; Step 2: Resize or move the partition; Step 3: Apply changes...Full steps |
| #2. Disk Management | Step 1. Click on "Manage"; Step 2. You have to navigate the sidebar until you reach "Storage" right below...Full steps |
Creating a partition in Windows Operating System isn't difficult. But how do you go about doing it?
Many people today face challenges with storage space, prompting them to add supplementary devices to their computers to create a more spacious storage system. These devices, commonly used on computers, include.
- Hard Disk Drives
- Solid State Drives
- NVME SSDs
- Portable HDDs, SSDs & NVMEs
- USB Pen Drives, SD Cards, and other forms of flash drives are small, portable storage devices that allow users to store and transfer digital files between devices. They are commonly used for storing and transferring data, music, and videos, and are often used as a backup for important files.
Physical storage can be convenient, but using it to its full potential can be challenging due to the difficulty of utilizing hundreds of gigabytes of storage.
So, if you're one of the people who just bought one of this hardware, then you must be wondering how do I create a new partition? The process isn't difficult, but it is a little complicated. Moreover, there is more than one way of doing it.
The three main concepts to be analyzed are the importance of understanding the context of a situation, the need for a clear and concise communication, and the value of being adaptable in a rapidly changing environment. These concepts are interconnected and essential for effective decision-making, problem-solving, and collaboration.
Why Create Partition on Windows 11?
To create a partition in Windows 11 without formatting, you can use the built-in Disk Management tool. This tool allows you to create, delete, and manage partitions on your computer's storage devices. To access Disk Management, press the Windows key + R to open the Run dialog box, type "diskmgmt.msc," and press Enter.
Here's what our computer's partition looks like:

The Local Disk, with the drive letter "C:", is the primary partition where our operating system is installed, and personal files and important data are stored in "Sanctuary II".
The "F:" partition is running out of space, which is a concern as it's likely used for storing gaming and entertainment-related files. This means that the partition where data from previous drives is kept, is not the issue, but rather the partition used for gaming and entertainment files.
Creating a partition on Windows 11 or any other OS allows for even data distribution and separation, keeping it secure and easily accessible. This is particularly useful for large storage drives, enabling efficient management of data.
- Keep The Performance Optimal - Speed Up PC Performance
Keeping critical files and programs on a separate drive can improve their performance, while storing bulk files on a separate partition can prevent them from affecting your computer's performance.
- Easily Install Multiple Operating Systems
You can install multiple operating systems on a single computer by creating separate partitions for each one, allowing you to use different OS for work and personal space, or use different OS like Windows and Linux.
- Manage Your Data Easily
To optimize your computer's performance, you can create separate partitions for different purposes, such as games, entertainment, and work, keeping them separate from each other to maintain efficiency.
#1. Use Free Partition Creator on Windows 11
To create a partition in Windows 11, you'll need a reliable tool like Qiling Partition Master, which can help you achieve the benefits of partitioning, such as improved disk management and organization. With this program, you can create partitions and make the most of your disk space.
You can use a free disk manager to partition your C Drive in Windows 11 without formatting or affecting other Microsoft operating systems.
Step 1: Locate the drive/partition
To adjust the size of a drive or partition, select the drive/partition you want to modify and click on it to choose the option "Resize/Move".

Step 2: Resize or move the partition
1.To shrink the partition, simply drag one of its ends to free up unallocated space. Once done, click "Proceed".

2. To extend the partition, ensure there is unallocated space available. If not, create some by following the previous steps. Then, drag the mouse into the unallocated space and click "Proceed".
3. To move a partition, you need to have unallocated space next to the target partition. If there's no unallocated space, free up some space first.
Right-click the target partition, select "Reize/Move". Then drag the whole partition left or right to adjust its position. Click "Proceed" to confirm.
Step 3: Apply changes
At this step, you will see the new disk partition information and diagram, which shows the updated partition layout on your disk.
#2. Create Partition in Windows 11 with Disk Management
To create a partition in Windows 11 using Disk Management, open the Start menu and type "Disk Management" in the search bar. Click on the result to open the Disk Management tool. In the Disk Management window, select the disk where you want to create a partition and right-click on it.
Step 1. Click on "Manage".
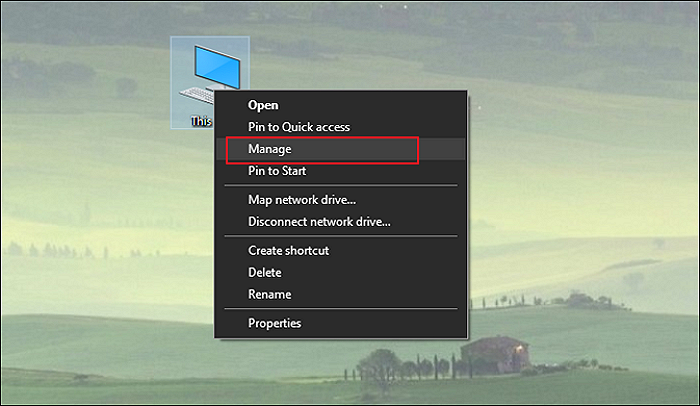
Step 2. To access the Disk Management window, navigate to the sidebar, scroll down to "Storage" (just below "System Tools"), and click on it. This will open the Disk Management window.
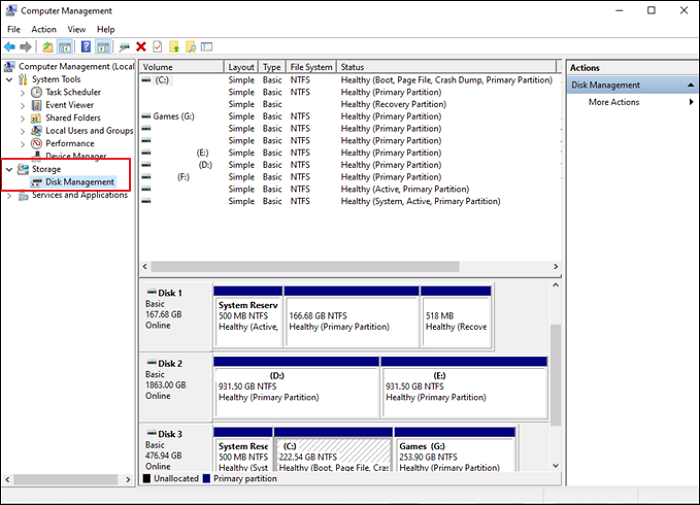
Option 1. Create Partition without Unallocated Space
The partitions shown in the image are either taken or have their drive letters, but some cases may display Unallocated Space, which refers to physical drive space not yet formatted or partitioned.
If you don't have unallocated space, then select any of the partitions you wish to shrink.
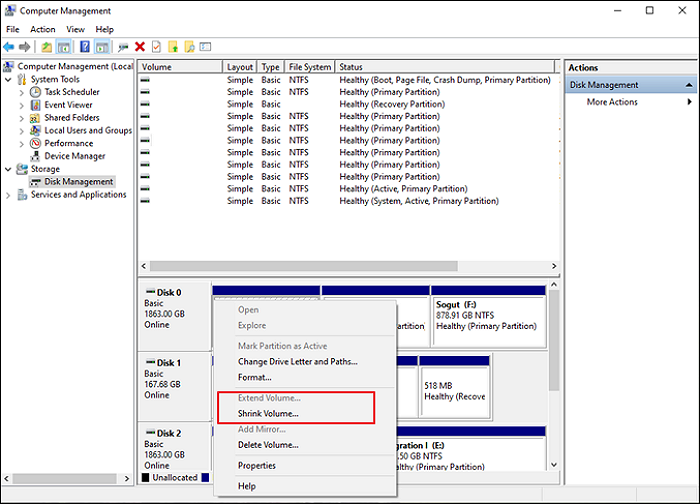
Click on "Shrink Volume Option" in the drop-down menu.
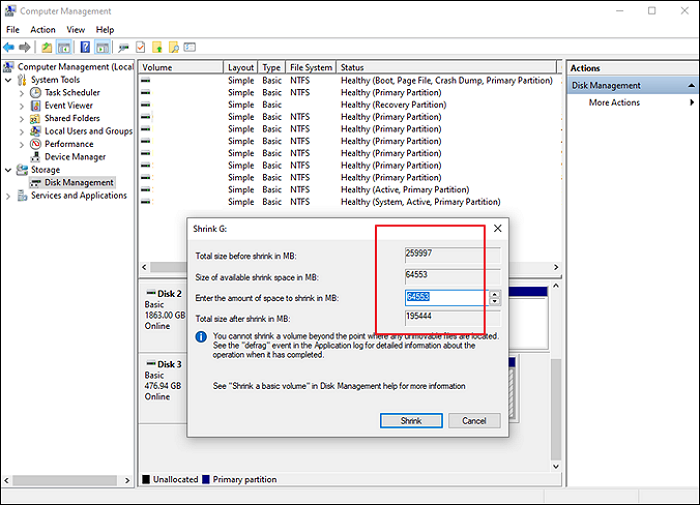
You can choose the amount of space to shrink from here, prompting the windows to remove allocated space from this partition.
Option 2. Use Unallocated Space
To enable 2-Step Verification on your Google account, go to your account settings, select the account you want to use, and click on the "Security" tab. Scroll down to the "Signing in to Google" section, click on the "2-Step Verification" tab, and then click on the "Get started" button.

Then, you can right-click on this and create "New Simple Volume".
Option 3. Delete Volume to Get Unallocated Space
To free up space on your computer, you can delete one of the partitions you don't need, but be sure to only delete a volume with non-essential data or data that's already been backed up.
Final Thought
You can get unallocated space through either The Disk Management or Qiling Partition Master. However, using Qiling Partition Master is recommended as it can save you from the hassle of using Disk Management.
To avoid risks associated with using disk management, use the built-in tool in Windows 11 to create a partition easily and safely.
Related Articles
- How Do I Partition SSD on Windows 11? 5 Things You Need to Know
- Check This Guide to Learn How to Check RAM Speed Windows 10
- How to Corrupt A Flash Drive on Purpose
- NTFS or exFAT, Which is Better for HDD, SSD, M.2, or NVMe? Find Your Answer Here
- How to Repartition a Hard Drive on Windows 10/11 [Step-by-Step]
Learn how to repartition your computer's hard drive with this comprehensive guide. - How to Reset Windows Password When Locked Out🔥
Don't be panic, this post will assist you in solving the complicated problem of being locked out of your Windows account due to a forgotten password. You can reset your Windows password when locked out using the built-in administrator account, a password reset disk, or a third-party password recovery tool, as outlined in this guide.