Top 8 Ways to Fix Attempted Write to Readonly Memory BSOD Error in Windows 11/10
Top 8 Ways to Fix Windows 11/10 Attempted Write to Readonly Memory BSOD Error
Windows 11/10 BSOD error, specifically the "Attempted Write to Readonly Memory" issue, can be frustrating for many users. Fortunately, there are reliable solutions available to resolve this problem. You can try any of the following methods to fix the Windows 11/10 Attempted_Write_to_Readonly_Memory BSOD error.
The Attempted Write to Readonly Memory (BSOD) error can be caused by various factors, and four troubleshooting methods have been proposed to resolve the issue. Firstly, checking for malware and viruses is essential, as they can corrupt system files and cause the BSOD.
| Workable Solutions | Step-by-step Troubleshooting |
|---|---|
| Fix 1. Rebuild MBR | Download and launch Qiling Partition Master on a new PC which runs the same system as yours...Full steps |
| Fix 2. Enter Safe Mode | Restart your PC by pressing the Power button. Once the related options show up, hold the "Shift" key...Full steps |
| Fix 3. Check RAM | Press Win + R To open the Run dialog box, press the Windows key + R on your keyboard, then type mdsched.exe in the blank area and press Enter. This will open the Windows Memory Diagnostic tool, which can help identify and troubleshoot memory-related issues on your system.Full steps |
| Fix 4. Run CHKDSK | Press the Windows key and type cmd. Right-click "Command Prompt"...Full steps |
| Other Useful Fixes | Update Device Driver > Uninstall Recent Software > Check for Windows 10 Update > Restore System...Full steps |
Attempted_Write_to_Readonly_Memory BSOD Windows 11/10 (Overview)
The error message "Attempted Write to Readonly Memory" on a Windows 10 PC indicates a serious system issue. To resolve this, try restarting your PC in Safe Mode and then running a System File Checker (SFC) scan to check for corrupted system files. If the issue persists, boot into Advanced Boot Options, select "Troubleshoot," and then "Reset this PC" to restore Windows 10 to its original settings. This should resolve the BSOD error. If you're still facing issues, consider running a full system scan with an antivirus software to rule out malware. If none of these steps work, you may need to reinstall Windows 10.
The 0x000000BE error occurs when a driver attempts to write to a read-only segment of memory, and the system identifies the problematic driver, which is mentioned near the STOP message on the Blue Screen of Death screen.
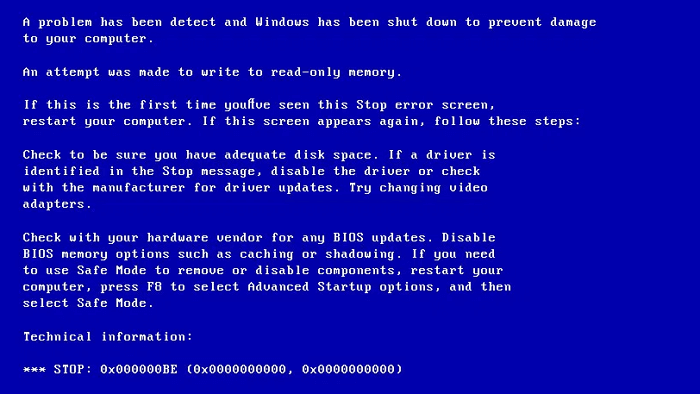
The following things could cause 0x000000BE error:
- Faulty or corrupt device driver
- Incompatible firmware software
- Corrupt system services
Let's get your Windows 10 computer back to work normally again. To fix the BSOD issue, you can try various troubleshooting steps. First, ensure your computer is running the latest Windows updates, as outdated drivers or software can cause BSODs.
Fix 1. Rebuild MBR to Fix Windows 11/10 Attempted Write to Readonly Memory BSOD
Let the best partition manager software - Qiling Partition Master, to help you boot PC and follow the below tips to solve this BSOD issue in Windows 11/10 now. This disk management tool enables you to create a WinPE bootable disk and enter your computer to make it bootable, and has many other highlights.
- Combine partitions to enrich partition space
- Replace an old hard drive with a new one
- To convert a basic disk to a dynamic disk or vice versa, follow these steps: Open Disk Management by pressing the Windows key + R, typing 'diskmgmt.msc' and pressing Enter.
- Resize, format, create or delete a partition
Steps to rebuild MBR in Windows 11/10:
- Qiling Partition Master -
Your Smart Windows 11 Update Disk Manager
- MBR to GPT Converter, Make Disk Ready for Windows 11.
- Migrate Windows 11 to New SSD in 1-Click.
- Handy to Extend or Combine Partitions in Windows 11.
- Clone and Upgrade Disks without Data Loss.
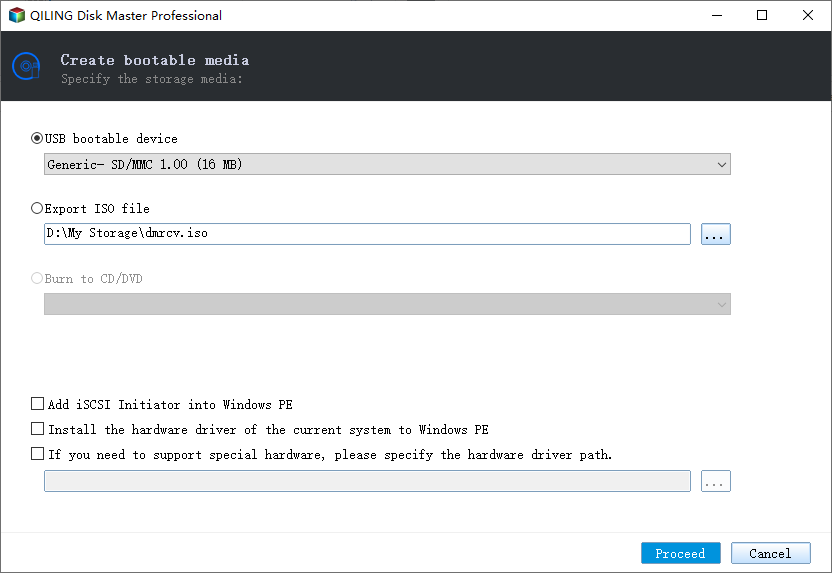
Step 1. Create a WinPE bootable disk
- Launch Qiling Partition Master, then click "Create bootable media" on the tools page. You can choose to create the bootable disk on a USB drive or, if your computer has a CD/DVD drive, on a CD/DVD.
- Click "Proceed" to finish the process.
Step 2. Boot Qiling Partition Master Bootable USB
- Connect the bootable USB or CD/DVD to your PC.
- To access the BIOS screen and set your computer to boot from a CD or USB drive, press F2 or Del when restarting the computer. This will take you to the BIOS settings. From there, navigate to the "Removable Devices" or "CD-ROM Drive" option and select it as the boot device. Once set, save the changes and restart the computer.
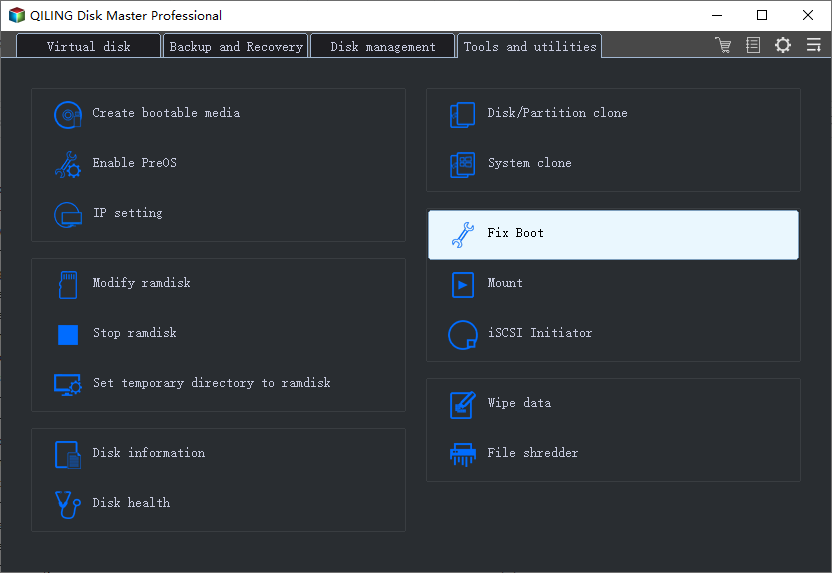
Step 3. Rebuild MBR
- Right-To resolve a damaged Master Boot Record (MBR), click on the disk containing the damaged MBR. Then, select the option to "Fix boot" to proceed with the repair process.
- The current operating system is Windows 10. The MBR type is GPT (GUID Partition Table).
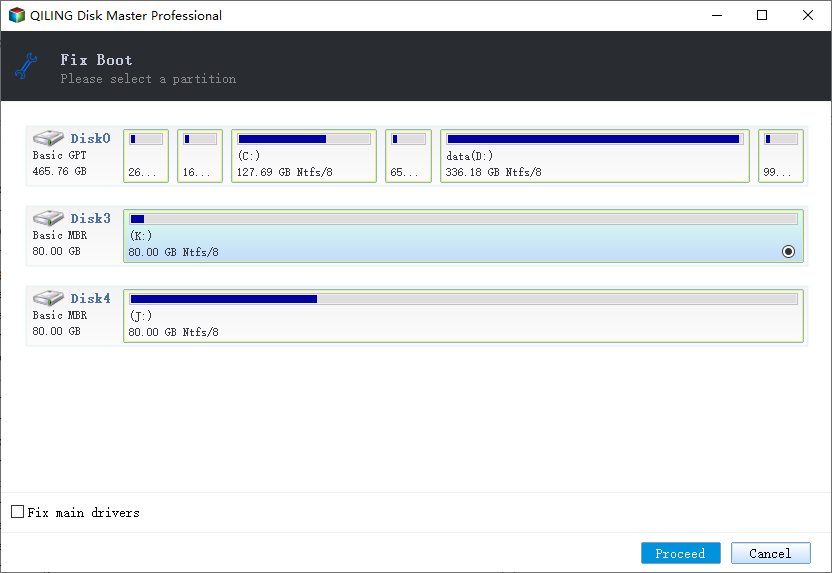
- Click the "Proceed" to build the Master Boot Record (MBR) and then your computer can boot normally again.
Fix 2. Enter Safe Mode to Fix Attempted Write to Readonly Memory error
To fix the "Attempted Write to Readonly Memory" BSOD error in Windows 11/10, try entering safe mode to resolve the 0x000000BE error. If you're unable to enter Windows, you can try booting in safe mode by restarting your computer and pressing the F8 key before Windows starts. This will allow you to access the system and potentially resolve the issue.
Step 1. Restart your PC by pressing the Power button.
Step 2. To restart your Windows 10 computer, press the Windows key + X, select the Power icon, and hold the Shift key while clicking "Restart".
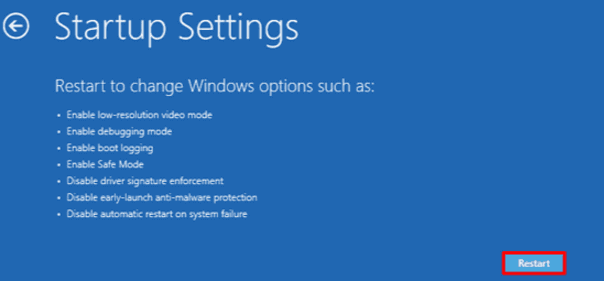
Step 3. To start your PC in Safe Mode, go to "Troubleshoot > Advanced options > Startup Settings > Restart" and then press 4 or F4 on the keyboard after restarting your computer.
Fix 3. Check Computer's Memory (RAM) to Fix Windows 11/10 BSOD Error
The error - Attempted write to readonly memory is related to the computer's memory. The lack of storage space on your computer leads to the BSOD. This solution is of vital importance. Follow the steps below to identify whether your PC's memory is working properly or not. The error occurs when a program tries to write data to a memory location that is not writable, and it can be caused by a faulty program or a hardware issue.
Step 1. Press Win + R to open the Run dialog box.
Step 2. To schedule a meeting, type `mdsched.exe` in the blank area and click OK.
Step 3. The system will automatically restart and check for any issues with the memory, allowing you to identify the problem quickly.
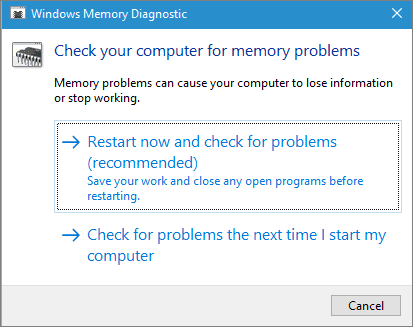
The Memory Diagnostic Tool will automatically scan your PC. If errors are detected, replace the current device with a new one to resolve the BSOD with ATTEMPTED_WRITE_TO_READONLY_MEMORY.
Fix 4. Remove Attempted Write to Readonly Memory BSOD with CHKDSK
System file errors and bad sector errors can cause the ATTEMPTED_WRITE_TO_READONLY_MEMORY issue. If the suggested solutions don't resolve the problem, try running SFC and CHKDSK in Safe Mode to repair system files and bad sectors. Safe Mode can be accessed by following the steps in Fix 1.
Step 1. Press the Windows key and type cmd.
Step 2. Right-click "Command Prompt" and choose "Run as administrator".
Step 3. Enter the following command:
sfc /scannow
Step 4. Once the scan gets over, run this command
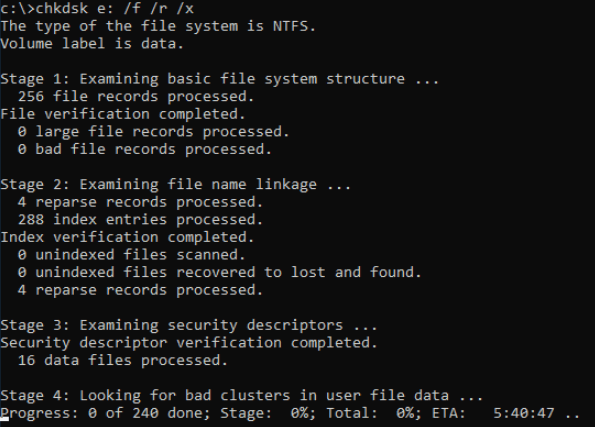
chkdsk E: /f /r /x
The command to run the disk check is `chkdsk E:`. This command will initiate a disk check on the partition with the drive letter E, scanning for errors and potentially fixing them.
Also read: Fix SFC/SCANNOW Cannot Repair Error.
Use CHKDSK Alternative Tool
Download and install Qiling CleanGenius on your computer to start checking and fixing file system errors on your device.
Step 1. Click "File Showing" to enter the next step.
Step 2. Choose the target device and tick the box of "Check and fix file system error". Click "Execute" to start fixing the problematic device.
Step 3. When the fixing process finishes, click "here" to access and start using your device.
Fix 5. Update Device Driver to Fix Attempted Write to Readonly Memory
Entering safe mode and updating the driver can resolve the ATTEMPTED_WRITE_TO_READONLY_MEMORY error. A faulty or corrupt device driver may cause this issue, and updating it can resolve the problem.
Steps to update the device driver:
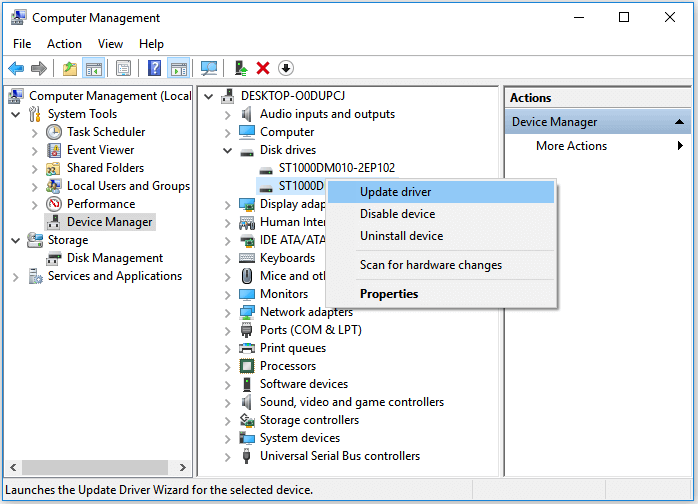
Step 1. To access the Device Manager, right-click on the Windows icon at the left corner of the screen and select "Device Manager".
Step 2. Check the Device Manager for the problematic driver, which will likely display a yellow triangle next to it.
Step 3. Right-click on the driver and click "update driver".
Step 4. Select "Search automatically for updated driver software".
- If Windows can't find a new driver, try downloading one from the device manufacturer's website.
- If the update step doesn't work, right-click each device driver and select "Uninstall" to remove them, then restart your computer and reinstall the drivers.
Reboot the PC and Windows 10 will automatically update or reinstall the drive drivers.
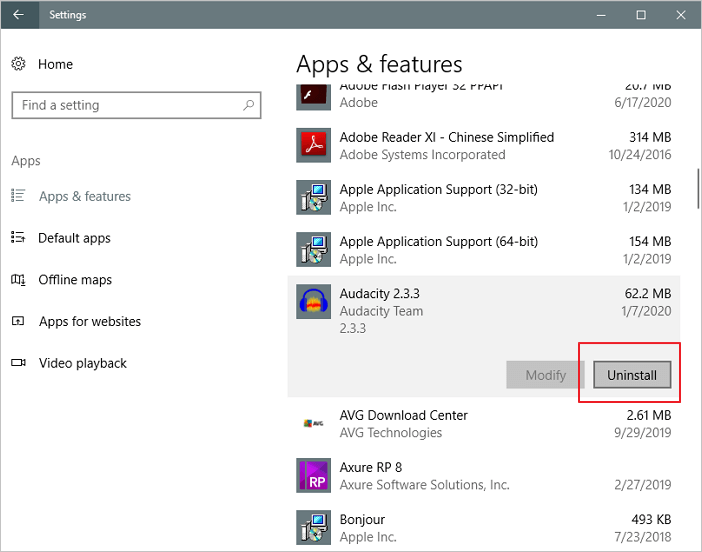
Fix 6. Uninstall Recent Software to Resolve the BSOD Error
Attempted write to readonly memory on Windows 10 may occur due to the installation of new software, which can be resolved by uninstalling the recently installed software.
Step 1. Open "Settings > Apps > Apps & features".
Step 2. To remove an app or game, select it from the list and click the "Uninstall" button.
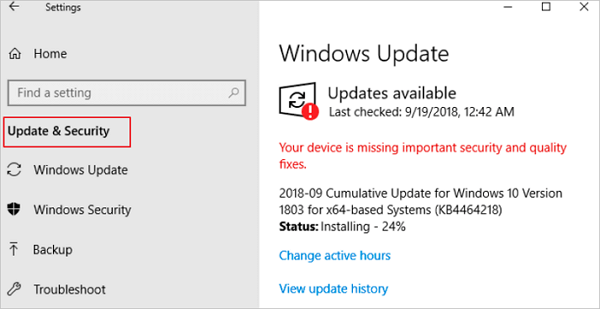
Fix 7. Check for Windows 11/10 Update to Fix 0x000000BE
Another way to fix the Windows 10 attempted to write to readonly memory error is by updating Windows. To do this, follow the steps to get the latest Windows update.
Step 1. Click the "Start" icon.
Step 2. To check for updates, go to the "Settings" app, then click on "Update & Security settings", and select "Windows Update".
Fix 8. Remove Attempted Write to Readonly Memory BSOD by System Restore
If you're experiencing the "Attempted Write to Readonly Memory" BSOD, one potential solution is to perform a System Restore, which can help revert your system to a previous point when the issue wasn't present, potentially resolving the problem.
Also read: How to back up system
Step 1. To fix the issue, turn on your Windows computer and immediately press the F8 key while holding down the Shift key. This will bring up the "Advanced Boot Options" menu, where you can click on "Repair Your Computer" to initiate the repair process.
Step 2. When Windows repair mode is ready, click OK if it asks you to choose a keyboard, then select your account and click OK if prompted, and if you have a password, enter it.
Step 3. In System Recovery Options, choose "System Restore" to view all available Windows restore points.
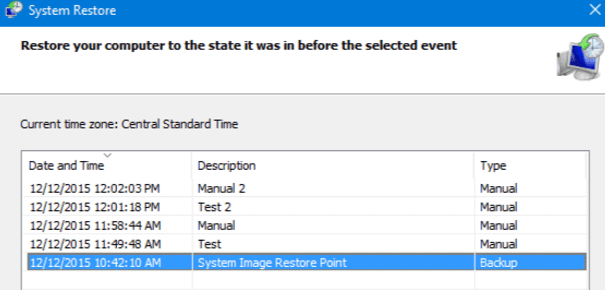
Step 4. To restore your computer, select a restore point that was created when your computer was in a safe and stable state, and if necessary, check the box to show more restore points to view all available restore points.
Step 5. After selecting the desired restore point, click "Next" and wait patiently for the system to restore your Windows to that particular point.
Conclusion
If you're experiencing the "attempted write to readonly memory" error, there are several solutions you can try to resolve the issue. These include disabling the driver verifier, running the System File Checker, checking for malware, running a virus scan, updating drivers, running the Windows Update troubleshooter, running the System Update Readiness Tool, resetting the Windows Update components, and using the built-in System Restore feature to restore your system to a previous point when it was working properly. You can try any one of these solutions to get help. If you still have a problem, you can contact us to get additional help.
Related Articles
- How Do You Create Partitions in Windows with Infographics 2022
- Does SSD Get Slower When Full? Easy Tricks to Fix SSD Slowing Down
- [Fixed] Windows Media Creation Tool Can't Find USB Error: We Can't Find a USB Flash Drive
- Can Windows 11 Run MBR? Your Guide to Install Windows 11 on MBR in 2022
- How Do I Run SSD Speed Test Online? Your Guide Is Here [Easy & Efficient]
To test your SSD speed, you can use free programs that allow you to check your SSD's performance online. These programs can help you determine how fast your SSD is and may provide additional information that can be useful for you. - Your Best Guide for SSD Speed Test on Windows 10 | Step-by-Step Guide 2024
The performance of the operating system mainly depends on the speed of the disk drive that is installed in the computer. In this short tutorial, we will show you how to check the speed of SSD and HDD drives on Windows 10 through your laptop or computer.