How to Use Driver Easy | Is It Safe to Use Driver Easy
Some tutorials may suggest updating your driver if you're experiencing computer problems, such as a non-starting PC or a malfunctioning graphics card. This is because drivers act as a bridge between hardware and the operating system, making it difficult to get the computer to work without them. However, using a tool like Driver Easy to update drivers can raise concerns about safety.
This article provides an overview of Driver Easy, a software that helps users update their drivers, and guides on how to use it. By weighing the pros and cons, readers can decide if the software is safe to use.
Main Content:
What is Driver Easy
How to Use Driver Easy for Free
How to Manually Install Drivers in Windows 10/7
Is It Safe or Needed to Use Driver Easy
Bonus Tip: Clone Your Partition to Avoid Data Loss
What is Driver Easy
Driver Easy is a driver update tool that automatically identifies the drivers you need to update by clicking a button, and allows direct downloading of drivers from software, saving time and effort compared to searching and downloading from manufacturer's website.
| Pros | Cons |
|---|---|
|
|
If you're trying the Driver Easy free version, you can check the in-depth tutorial in the next part for more information.
How to Use Driver Easy for Free
If you're using the free version of Driver Easy, the software can automatically download driver updates, but you'll need to manually install the drivers. To do this, follow the step-by-step instructions.
Step 1. Open Driver Easy. Click the "Scan Now" button.
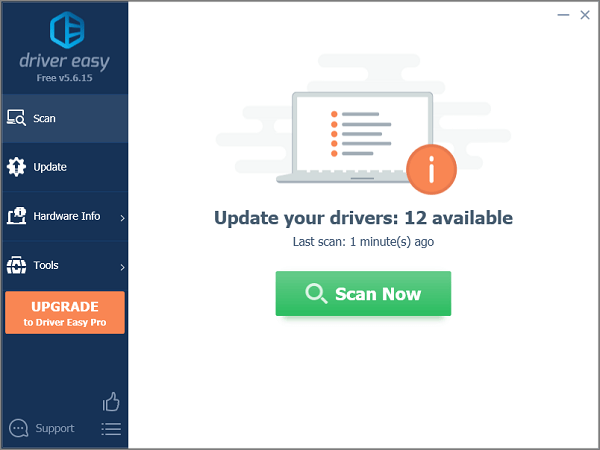
Step 2. Wait for the scanning process completes.
Step 3. In the Update screen, Driver Easy will show you the drivers that are available to update, allowing you to choose the drivers that meet your needs.
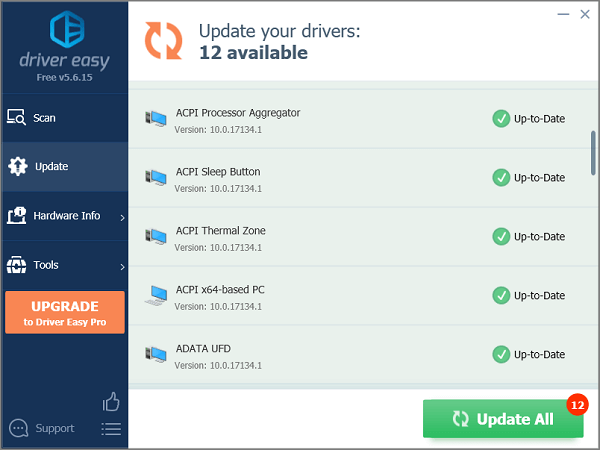
Step 4. Click "Manually Create", and wait to download drivers.

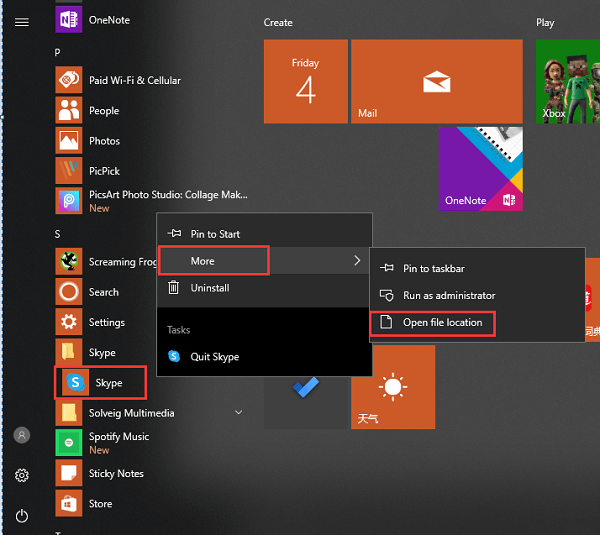
Step 5. To open the location where the Windows Update files are stored, click the downward triangle next to the "Update" button and choose "Open File Location".
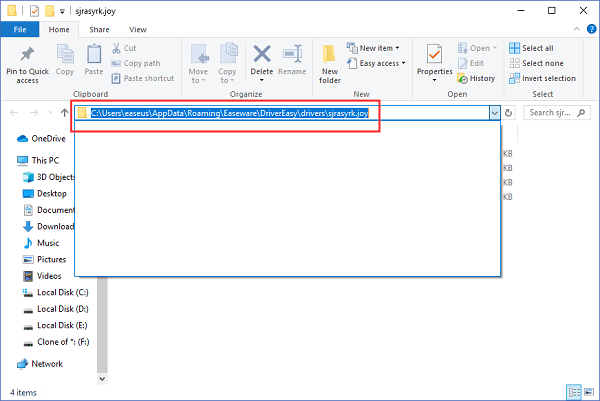
Step 6. If the file is an executable (.exe), double-click it to run. Otherwise, copy the file's address by pressing Ctrl + C.
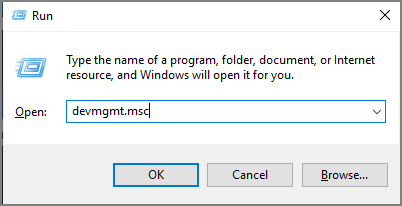
Step 7. To open Device Manager, press "Windows + R" to open the Run window, then type "devmgmt.msc" and press Enter. Alternatively, press "Windows + X" to open the Quick Link menu and click on Device Manager.
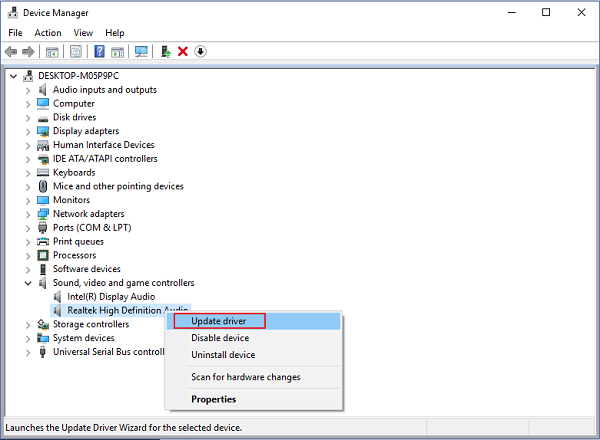
Step 8. Expand the categories and choose the device you want to update for.
Step 9. Right-click the device and choose "Update Driver".
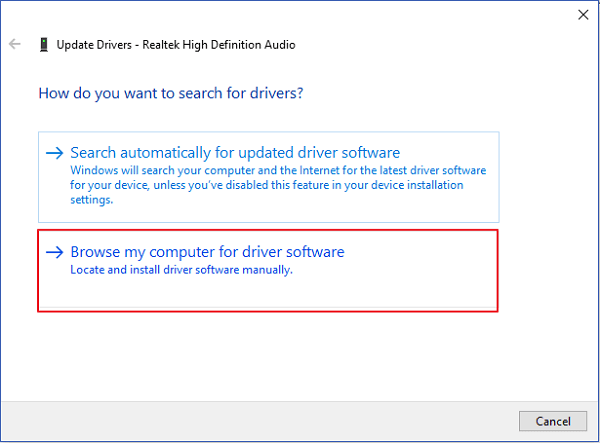
Step 10. On the Update Driver window, click "Browse my computer for driver software".
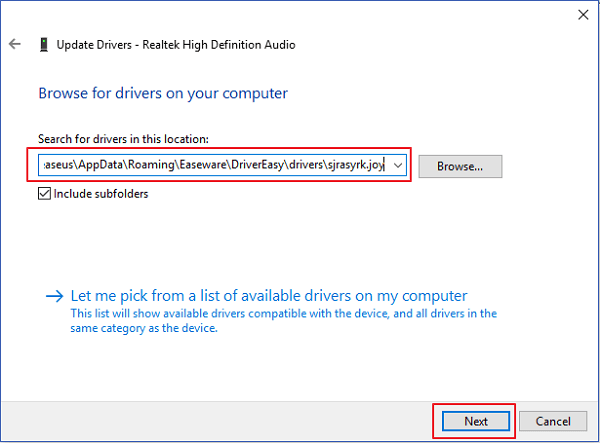
Step 11. Under the "Search for drivers in this location" section, paste the address you copied in Step 5 and wait for the install process to complete.
If your driver is successfully installed, you can see info about "Windows has successfully updated your drivers".
How to Manually Install Drivers in Windows 10/7
Step 1. Find and download Drivers from the Manufacturer website.
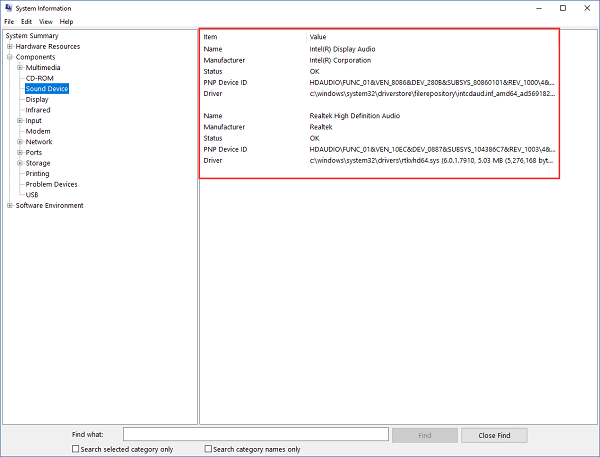
- To identify the make and model of specific hardware, navigate to the "System Information" section by typing it in the search box. Once there, check the details provided, such as the sound devices, which can be identified by their make and model as shown in the picture. This information can be used to troubleshoot issues or upgrade hardware components.
- To get the driver, go to the hardware manufacturer's support website, download the driver, and follow the instructions on the support page for installation. If you can't find the download link, contact the website's support team for assistance.
- Save and unzip the .inf file to your computer. Save it to a location such as the Desktop for easy access.
Step 2. Update Drivers via Device Manager
- Press "Windows + X" to open Device Manager.
- Expand the categories you want to update for.
- Right-To update the driver for your device, click on the device and select the "Update Driver" button, and then choose "Browse my computer for driver software".
- Choose the location of the device driver.
- Click Open > Next.
Is It Safe or Needed to Use Driver Easy
"A friend of mine told me to try it out, and when used it tells me 14 of my drivers are out of date and that I should update them. But, I'm sure if it's safe or needed." Do you have the same problem as this user?
Users who want free software to automatically install drivers may be disappointed as the software's features are paid. Additionally, the product's offline feature is a highlight, but the driver installation process requires online operation, which has led to complaints about data loss or the PC getting stuck on Reddit.
But is Driver Easy useless? Of course not.
If you're unsure which driver is outdated, you can easily find the corresponding driver. This method saves time compared to manually identifying the hardware information, allowing you to update drivers promptly and avoid getting stuck.
Bonus Tip: Clone Your Partition to Avoid Data Loss
The user downloaded Driver Easy, which resulted in the loss of their audio on their HP laptop, and they're unable to recover it. The assistant recommends using Qiling Partition Master for partition copy before using Driver Easy, allowing for one-to-one copies of the source disk as the destination. This can help prevent data loss.
Step 1. Select the source disk.
Right-To clone a disk, click on the disk you want to copy and then select the "Clone" option.
Step 2. Select the target disk.
Choose the desired HDD or SSD as the destination and click "Next" to proceed.
Step 3. To view the disk layout and edit the target disk partition size, you can use the Disk Management tool in Windows. This tool allows you to see the current disk layout, including the size and type of each partition, and make changes as needed. You can resize partitions, create new ones, or delete existing ones, all while ensuring that the changes are made safely without losing any data.
To erase all data on a target disk, click on the "Erase" button, then select the target disk. The program will warn that it will wipe out all data on the target disk, so click "Continue" only if you're sure you want to erase everything. If you have valuable data on the target disk, back it up in advance to avoid losing it.
To customize your disk layout, you can choose from three options: "Autofit the disk", "Clone as the source", or "Edit disk layout". If you want to maximize space for your C drive, select "Edit disk layout".
Step 4. Click "Proceed" to start the disk cloning process.
Related Articles
- Boot Device Not Found in Windows 11? Here Are The Fixes
- 5 Ways to Hide Drives in Windows 10 | Check Your In-depth Tutorial
- Fixes for (External) Hard Drive Shows Wrong Capacity
- How to Merge C and D Drive in Windows 11/10 Without Losing Data - Qiling
- Newest Partition Magic Server Software Review and Download in 2022
Are you looking for a partition magic Server software that can help you successfully partition hard drives? This page provides you a complete partition magic Server software review, and you can directly download this software to fully manage and make use of unallocated space and free space on Windows Server computers. - 6 Fixes for Not Enough Space for Windows 10 Update
Does your computer tell you that it doesn't have enough space for Windows 10 update? Does the 'indows needs more space' message pop up while you are trying to installing the latest Windows 10 update? We've gathered some efficient fixes here for you to follow and fix 'not enough space for Windows update' error in a few simple steps.