INACCESSIBLE_BOOT_DEVICE After KB5132061 on Windows 11 24H2
Quick Navigation:
- Why the Stop Code Appears
- Check the Storage Mode
- Confirm the Disk Is Readable
- Save Data Before Repair
- Frequently Asked Questions
KB5132061 moves Windows 11 24H2 to build 26100.9974 and stages a fresh set of boot-critical drivers before the restart that commits them. On some machines the commit completes and the next start still stops at INACCESSIBLE_BOOT_DEVICE with code 0x7B. The stop code is specific: the kernel loaded, but the driver that owns the controller holding the system volume did not, so Windows could not mount the partition it was told to boot from.
Why 24H2 Stops at INACCESSIBLE_BOOT_DEVICE
Code 0x7B is raised during the boot-driver pass, long before the desktop appears. Windows loads storage drivers first, and each one must claim the device instance it was written for; a driver that fails to initialise leaves the volume holding \Windows invisible to the kernel.
The update replaces entries in the driver store rather than the files on the disk. An OEM filter left behind by an older Intel RST package, a vendor disk filter, or a disk encryption driver can stay bound to the old package and reject the replacement at load time, which produces the same stop code as a controller with no driver at all.
The build number shapes the repair. 26100.9974 belongs to the 24H2 servicing branch, so the recovery media and any repair source must match that branch; a 23H2 image supplies drivers the installation refuses. A machine that instead stops at 0xc0000098 with \BCD on screen has a different fault, covered in the KB5132061 boot error article.
Check the Storage Mode Before Anything Else
Firmware storage mode is the cheapest thing to verify and the most common cause. A board that runs with Intel RST or VMD enabled installs a driver for that mode; if the setting is later changed to AHCI, or a firmware update restores defaults, the installation can no longer see the disk even though every file is intact.
Open firmware setup and compare the current SATA or NVMe mode with the mode used when Windows was installed. The mismatch is not always obvious, because RAID, Intel RST Premium, VMD, and AHCI are four values that describe the same hardware in different ways.
Three observations separate a mode problem from a failing disk. The drive is listed in firmware with its full capacity, the stop code stays 0x7B on every restart, and the machine had been running that mode before the update. A drive that vanishes from firmware, or a code that changes between restarts, points at hardware instead. AHCI and RAID mode explains how the settings differ in practice.
Confirm the System Disk Is Readable
Start from Windows installation media, choose Repair your computer, and open the file browser the recovery environment provides. The purpose is not to repair anything yet; it is to learn whether the volume can be read at all.
Find the volume that holds Windows and check three values: its size, its file system, and whether the folders open. A volume with the original size on NTFS means the partition table, the file system, and the controller path all work. Only the boot path is broken, and nothing on the disk has to be recovered.
A volume shown as RAW, missing, or refusing to open changes the plan. Stop writing to the disk and copy the user folders to an external drive first, because each later attempt adds writes to a layout that already misbehaves. The same order applies to an INACCESSIBLE_BOOT_DEVICE after a clone.
Save the Data, Then Repair the Boot Path
Qiling Disk Master runs from bootable media and reads the partition map and file systems without a running Windows, so a machine stuck at 0x7B can still be inspected and copied. The backup is what makes every later repair optional, so run it before you touch the boot files.
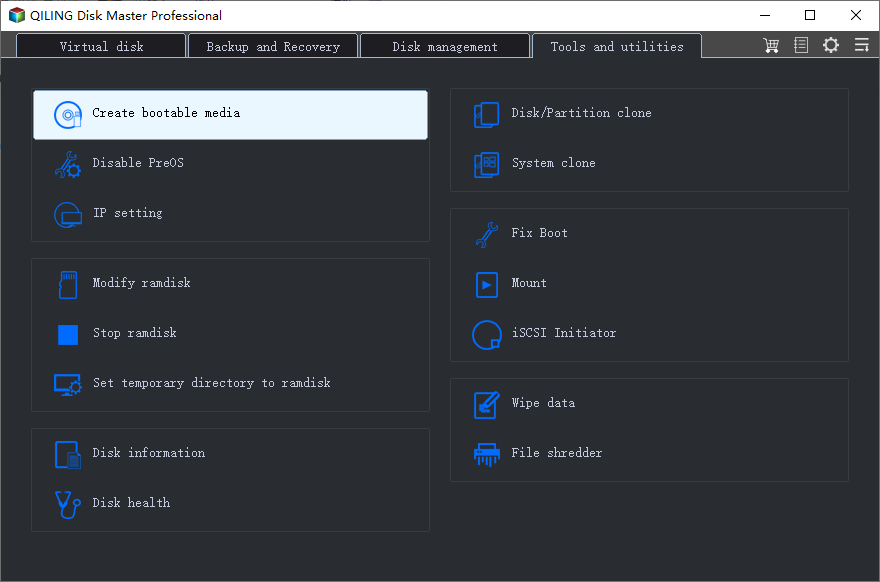
Step 1. Create the Bootable Media
On a working PC, open the bootable media tool and select a USB drive with at least 8 GB free. The wizard writes a small pre-installation environment that starts the program on a machine whose own installation cannot boot.
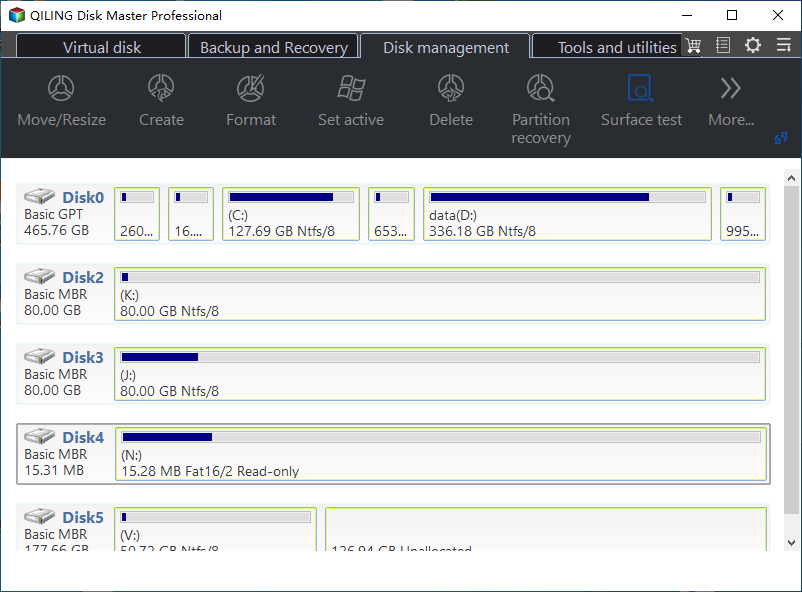
Step 2. Read the Disk Map From the Media
Start the failed machine from the USB drive and wait for the disk map to load. Match the system disk by capacity, then read the entries in order: EFI, MSR, Windows, and recovery. The Windows volume should carry its original size and a file system the program can open.
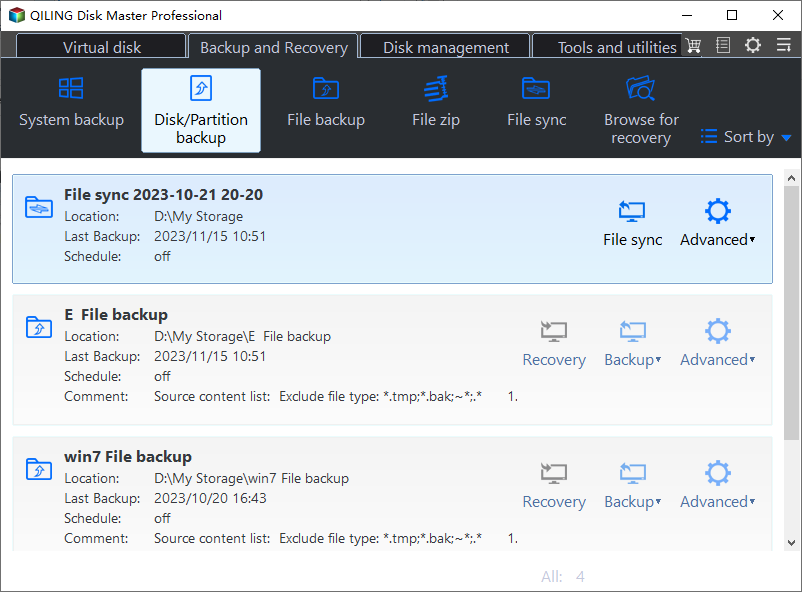
Step 3. Back Up the Whole System Disk
Open Disk backup, choose the system disk as the source, and set an external drive as the destination. Verify the task summary, then click Proceed and let the copy finish before you close the program.
With the image on the external drive, the machine can be repaired without risk to the data. Restore or repair the installation afterwards, and remember that the backup also protects the case where a repair install leaves the old installation in a folder that is hard to reach.
Windows also ships its own repair tools: Startup Repair, bootrec, and bcdboot. They are built into Windows and are not part of Qiling Disk Master, and they belong to the recovery environment rather than to the steps above. Run them only after the backup and after the controller mode has been confirmed.
Frequently Asked Questions
Did KB5132061 delete my files?
No. The package replaced driver packages and boot files and left the Windows volume in place. The system only looks empty because the kernel cannot mount it, so avoid a reset or a clean install until the data has been copied out.
Can I return to the old controller mode instead of repairing?
Yes, if the machine was installed in that mode. Switch the firmware back, start Windows normally, and change the driver from inside the operating system before you touch the firmware again. A mode change made while Windows is running without the matching driver will stop at the same code.
Will a repair install keep my programs?
Yes. An in-place repair install keeps programs, settings, and user folders, and it replaces the system files that the update damaged. It still writes to the system volume, so keep the disk image until the machine has started successfully twice.
Related Articles
- KB5132061 Update Won't Boot: Fix the BCD Error
- Dell Inaccessible Boot Device: Fix Windows Boot Error
- Fix Inaccessible Boot Device After Clone
- AHCI vs RAID Mode: Which Should You Use?
- Automatic Repair Couldn't Repair Your PC: Windows Recovery Steps
Products
Articles & Tutorials
- Data Recovery
- Data Backup
- File Recovery
- File Backup
- System Backup and Restore
- Disk and Partition Clone
- Technical articles
- Mobile articles
- Disk Master Help
- Windows Data Recovery Tutorials
- Windows Secure Delete Tutorials
- Windows Partition Management Tutorials
- Windows File Backup and Restore Tutorials
- Windows System Backup and Restore Tutorials
- Windows Disk Backup and Restore Tutorials
- Windows Clone Tutorials