How to Perform an SSD Health Check on Windows 11: Tips and Tricks for Maximizing
| Workable Solutions | Step-by-step Troubleshooting |
|---|---|
| 1. Command Prompt | Step 1. Press Windows Key + R and type "cmd" then press "Enter". The command prompt will appear...Full steps |
| 2. Qiling Partition Master | Step 1. Open Qiling Partition Master on your computer. Then, locate the disk, right-click the partition...Full steps |
| 3. Defragment and Optimize Drives | Step 1. Press the Windows Key; Step 2. Search "defrag"; Step 3. Select Defragment and Optimize Drives...Full steps |
| 4. SeaTools | Step 1. Click on "Start > Select Programs > Select Seagate"; Step 2. Select "SeaTools for Windows"...Full steps |

As technology advances, understanding SSD health check on Windows 11 is becoming increasingly important for PC and data protection. With the growing reliance on solid-state drives, it's essential to monitor their health to prevent potential data loss and ensure optimal system performance.
Solid State Drives (SSDs) are increasingly replacing traditional hard disk drives due to their superior speed and reliability, with technology advancing rapidly. However, despite their benefits, SSDs are not invulnerable to corruption or damage, highlighting the need for continued innovation and improvement in this field.
To check the health of your Solid State Drive (SSD) on Windows 11, follow these steps. You'll also learn tips to improve your SSDs' health and performance.
You can also learn how to check the health of your hard drive on Windows in this article, in addition to learning how to do a hard disk health check.
What Is an SSD Health Check?
Windows 11's SSD health check is a feature designed to monitor the status of a solid-state drive and identify any potential issues that need attention, allowing users to take proactive steps in maintaining the health and performance of their SSD.
Solid-state drives (SSDs) are known for their speed, but their performance can degrade over time. When an SSD is new, it's at its peak performance, but as it fills up with data, its speed begins to slow down. Typically, this decline becomes noticeable when the SSD is around 70% full, after which its performance will continue to decrease as it approaches its maximum capacity.
Regularly checking the health of your PC's SSD is crucial, as it contains the operating system and vital data. Performing an SSD Health Check can help identify any potential issues and prevent data loss.
Why Is It Important to Keep Your SSD Healthy?
Performing an SSD health check in Windows 11 helps identify potential issues, such as wear and tear, bad sectors, and firmware problems, allowing you to take proactive steps to maintain your SSD's performance and extend its lifespan. This can be done through built-in tools like the Command Prompt or third-party software, and can also help you monitor your SSD's temperature, power consumption, and other vital statistics.
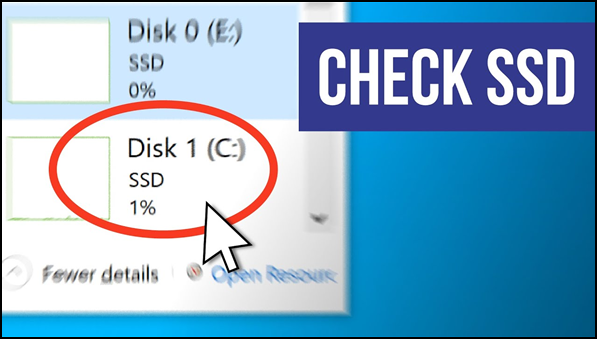
Check the SSDs Health status
An SSD health check can help determine the health status of your solid-state drive, detecting bad sectors and providing an overall assessment of its condition. This can indicate whether the SSD is functioning properly or if there are any issues that need to be addressed.
Prevent SSD failure
SSD failures can be caused by similar issues to HDD failures, including physical damage from impact or water exposure, data corruption, short circuits, faulty firmware updates, and poor construction.
When an SSD fails, it may display symptoms such as sudden shutdowns, system crashes, and data corruption, as well as slower-than-expected performance, error messages, and difficulty booting up.
- The drive cannot write but can be read-only.
- You can't write or read files on the drive at all. It's possible that the drive is not properly connected, or the file system is corrupted.
- The PC experiences regular and inexplicable crashes.
- Frequent bad block errors.
- File system failure and the Blue screen of death errors.
Performing an SSD health check on Windows 11 can help identify the source of your SSD's failure, allowing you to take corrective action and potentially fix the issue.
Optimize SSD performance
In Windows 11, running an SSD health check allows you to perform 'garbage collection' and other tasks to improve the drive's performance. This can also help optimize or tune the SSD for different demands.
Test SSD speed (transfer speed)
The SSD health check Windows 11 process often reveals the SSD/Disk transfer speed, allowing you to verify the manufacturer-given transfer speed and also learn how to do a hard drive speed test.
You can also get a rough understanding of your SSD's performance by looking at the drive's capacity, interface, and controller type. The capacity of the drive provides an idea of how much data it can store, while the interface (such as SATA or PCIe) will affect the drive's speed.
How Can You Perform SSD Check in Windows 11?
There are different methods for SSD health check Windows 11:
- Windows 11 Built-in Tools
- Check SSD Health Software
Most methods that check SSD health also work on HDDs in Windows 11.
To check SSD health in Windows 11, there are four methods you can use. Firstly, you can use the built-in tool called "Disk Health" in the Settings app, which provides a quick overview of your SSD's health.
1. Windows Built-in Tool - Command Prompt
The Command Prompt, abbreviated as CMD, is a Windows built-in tool that can help you perform an SSD health check on Windows 11 using the WMIC command line.
WMIC is used to check SSD health and perform other S.M.A.R.T. functions.
The Self-The S.M.A.R.T. feature in SSDs enables automatic monitoring and reporting of the SSD's state, allowing users to check for read-write errors, percent, temperature, wear leveling, and other important details using the Command Prompt.
It will warn you before the SSD suffers significant data loss.
To use the WMIC tool, follow these steps:
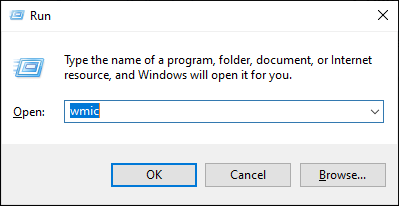
Step 1. To open the Command Prompt, press the Windows key + R, type "cmd", and press Enter. This will open the Command Prompt window.
Step 2. In the command prompt window, type "wmic" then press "Enter".
Step 3. When the wmic interface is ready, type "diskdrive get status" and press Enter.
Step 4. The command prompt will display each drive, along with one of two statuses: "Ready" or "Not Ready".
- OK - which means that your SSD has a healthy performance.
- Pred Fail - which means your drive may crash anytime soon.
If the status is Pred Fail, back up your data right away, as failing to do so may result in data loss when the disk ultimately fails.
2. Use Qiling Partition Master to Fix Disk Error
Qiling Partition Master is a tool that helps manage and prepare HDD/SSD partitions for Windows 11, allowing for disk error fixing and data preservation.
Step 1. Open Qiling Partition Master on your computer, locate the disk, right-click the partition you want to check, and choose "Advanced" > "Check File System".
Step 2. In the Check File System window, select the "Fix the error on the disk" option and click "Proceed".
Step 3. The software will start checking your partition file system on your disk. Once it's done, click "Finish".
To perform an SSD health check on Windows 11, open the Command Prompt as an administrator and type the command "chkdsk /f" to scan the SSD for errors and fix any issues. You can also use the built-in Windows utility "Check Disk" (chkdsk) with the /r option to scan for bad sectors and recover readable information. Alternatively, you can use third-party software like CrystalDiskInfo or HDTune to run a more detailed SSD health check and monitor your SSD's health, temperature, usage, and other metrics.
3. Run "Defragment and Optimize Drives" on Windows 11
Defragmenting and optimizing your Windows 11 drives can improve your PC's performance by organizing data on your SSD drive, making it read and write files faster, run smoother, and boot up faster.
To improve the performance of your Windows 11 SSD drive, defragmenting and optimizing it can be helpful. This process reorganizes the data on the drive to make it run more efficiently, which can result in improved overall system performance.
To defrag/optimize SSD drives in Windows 11, the Standard method is to use the Defragment and Optimize Drives program, which is a built-in feature that helps maintain the performance of solid-state drives.
To defrag/optimize the drive follow these steps:
Step 1. Press the Windows Key.
Step 2. Search "defragment".
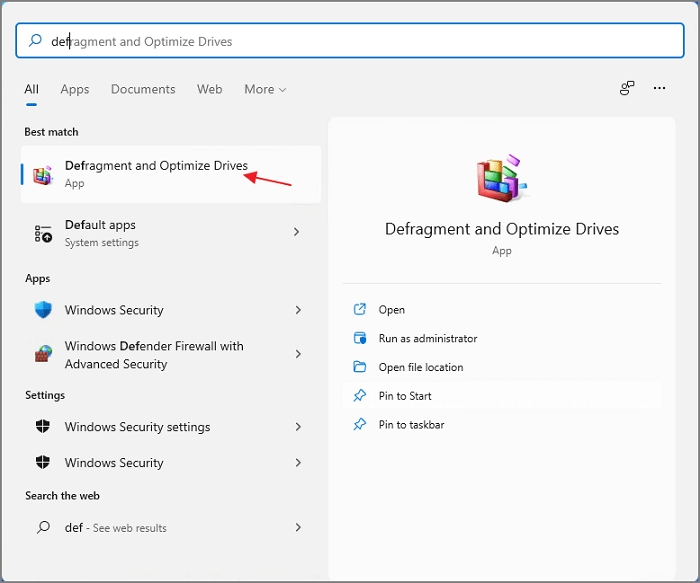
Step 3. Select Defragment and Optimize Drives.
Step 4. Select the disk drive you want to optimize.
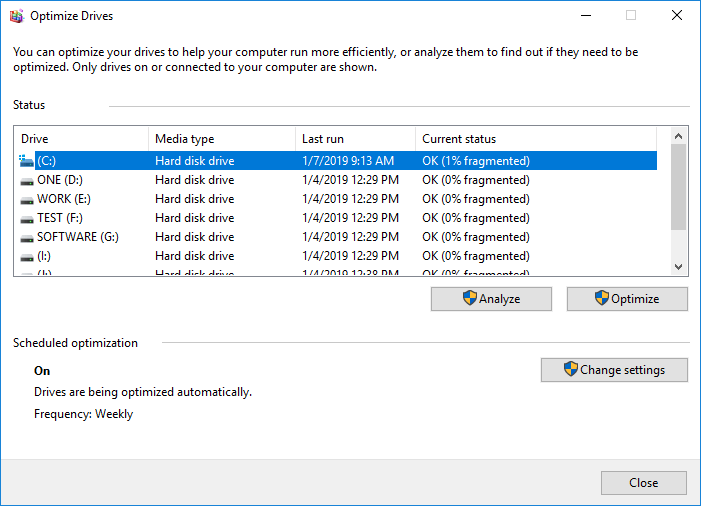
Step 5. Click the "Optimize" button.
4. Launch SeaTools to Monitor SSD (Seagate)
Before you use the SeaTools, download and install the application.
Once it's installed, launch SeaTools by following these steps:
If you have a SeaTools shortcut for Windows on the desktop, simply launch the program from there. If not, follow these steps.
Note: Make the PC ready for SeaTools diagnostics.
- To run a hard disk diagnostic, close all other applications on your computer. This ensures that the diagnostic process can run without any interference or background processes competing for resources.
- Keep the PC fully powered or connected to power, and ensure that both Standby and Hibernate modes are disabled, as the diagnostic process may take a long time and could cause the PC to enter these modes.
- Click on the Start or Windows icon button.
- Type "Control Panel".
- In the control panel, select "Power Options".
- The setting "Turn off hard disks" should be set to "Never" to prevent data loss and ensure optimal system performance.
To run the SeaTools diagnostics, ensure your PC is ready and follow these steps:
Step 1. Click on "Start > Select Programs > Select Seagate".
Step 2. Select "SeaTools for Windows".
Step 3. Once SeaTools opens, select the Drives tab to test the different storage devices in your system. This will also display other information about the drives, such as Model Number and Serial Number, allowing you to select and test multiple drives at once.
Step 5. The diagnostic tests are a series of data-safe, read-only tests that can be run to verify the integrity of the system. To run a diagnostic test, select it from the menu of possible diagnostic tests, which includes all Basic Tests. These tests are designed to be data-safe, meaning they will not modify or delete any data, and are read-only, meaning they will not write any new data. The tests are designed to verify the system's integrity and can be used to troubleshoot issues.
- Fix All
- Short Drive Self Test
- Drive Information
- Short Generic
- Long Generic
Step 6. Once you've selected the tests to run, the process will initiate promptly, with no further action required from you.
The "Short Drive Self Test" (DST) is a thorough diagnostic routine built into the SSD's firmware, capable of running a comprehensive diagnostic test and is adequate for most situations.
If you need a more comprehensive test, you can consider running the "Long Generic" test, which reads each sector on the drive, but be aware it will take a long time to complete.
Step 7. Upon completing the diagnostic test, you will see a summary of the results, which can be found in the log created for each drive and saved to the program's installation folder.
Results summary
To read the rules summary log,
Step 1. Click "Help > View Log File".
Step 2. You can view the test results log by clicking on a specific link. This will display a log of the test results, allowing you to see the outcome of the tests that have been run.
- The system displays "Pass Info" or "Fail Info" in the menu next to the "Help" option based on the outcome of the test.
- Here, you'll see three tabs: "Pass Info", "Warranty Checker", and "View Log File".
Step 3. The following are the possible test results:
- Passed
- Failed
- Aborted
SeaTools, a diagnostic tool, typically reports a PASS status when testing a solid-state drive (SSD), indicating that the drive is functioning properly and is not the cause of system problems. This helps rule out the SSD as a potential source of issues.
A drive can be considered healthy but still have corrupted data, which can be fixed by running a chkdsk operation to repair corrupted data and bad sectors.
How Can I Improve My SSD Health?

Now that you know how to perform an SSD health check in Windows 11, it's time to protect and improve the SSD's health. By taking a few simple steps, you can ensure your SSD continues to run smoothly and efficiently.
Damaging your PC's SSD or shortening its lifespan can be caused by a few issues and situations. To keep the SSD healthy or extend its lifespan, it's essential to avoid these problems, which can help maintain the overall performance and longevity of your computer's solid-state drive.
Here are a few ways to keep your SSD healthy:
- Avoid extreme temperatures, as even SSDs can be damaged by prolonged exposure to very hot or cold conditions, similar to HDDs.
- Avoid power shocks/outages to prevent damage to computer equipment, including SSDs.
- To avoid filling your SSD to completion, don't store data to its full capacity. Instead, keep the drive open by deleting unused files on your PC or moving them to external storage. This will help maintain the drive's performance and extend its lifespan.
- Physical damage to an SSD can occur when it is subjected to shocks, such as being dropped, which can cause the storage cells to become dislodged, leading to data loss and potentially even physical destruction of the drive.
- Regularly update your SSD firmware to ensure optimal performance and maintain its lifespan.
- Enable AHCI (Advanced Host Controller Interface) to provide a high-speed platform for data transfer between the SSD and motherboard.
- Disabling hibernation can help extend the life of an SSD by reducing power consumption and minimizing the need for the drive to load data when the PC is restarted. This is because hibernation uses more power than a full shutdown and requires the SSD to reload everything when the PC is turned back on. By shutting down the PC instead, you can reduce the wear and tear on the SSD.
Conclusion
In this article, you've learned about SSD health checks in Windows 11, including how to keep your SSD healthy, improve its performance, speed, and lifespan, ultimately preventing failure and loss of irreplaceable data.
Related Articles
- How to Fix Broken Registry Items on Windows 11 (5 Quick Ways)
- Free Download Windows 11 Check Tool for Windows 11 Compatibility Check
- How to Format Laptop or PC Windows 7 Without CD (Full Guides)
- exFAT VS NTFS: What Are the Differences Between Them
- Best 3 DBAN Alternatives to Wipe Hard Drive - 2024 New
If you're looking for a better alternative to DBAN disk eraser, consider Qiling Disk Master. This tool offers a secure way to erase hard drives, SSDs, SD cards, and USB drives, providing a reliable alternative to DBAN. - How to Delete Partitions on SSD in Windows 11/10 [Step-by-Step Guide]
This article will focus on deleting partitions on SSD in Windows 11/10, providing a guide on how to do so using both the built-in Windows tools and reliable third-party software.