Windows 11 Download Without TPM 2.0 & Run Windows 11 Without TPM
PAGE CONTENT
What Is TPM 2.0
Should You Bypass TPM 2.0? Any Risk?
To configure your PC to be eligible for other requirements except TPM 2.0, you'll need to ensure it meets the necessary specifications. This includes a 64-bit processor, 4 GB of RAM, and a 64-bit version of Windows 10.
How to Download TPM 2.0 for Windows 11
How to Install/Run Windows 11 without TPM 2.0
- 1 gigahertz (GHz) or faster with 2 or more cores on a compatible 64-bit processor or System on a Chip (SoC).
- Memory: 4 GB RAM
- Storage: 64 GB or larger storage device
- System firmware: UEFI, Secure Boot capable
- TPM: Trusted Platform Module (TPM) version 2.0
- Graphics card: DirectX 12 compatible graphics / WDDM 2.x
- Display: >9" with HD Resolution (720p)
- Windows 11 Home requires a Microsoft account and internet connectivity to set up, but it can be used offline once installed.
The minimum system requirements for Windows 11 include UEFI secure boot firmware settings and a TPM 2.0 chip, which can be a challenge for older devices. Although some devices may have UEFI firmware, their TPM version is still at 1.0, which is not compatible with Windows 11. However, there is a possible solution to bypass the TPM 2.0 requirement and still get the Windows 11 update.
What Is TPM 2.0
TPM 2.0, or Trust Platform Module 2.0 technology, is a successor to TPM 1.2 developed by Microsoft in 2011. It was widely implemented starting from July 28, 2006, and since then, all new device models, lines, or series, as well as upgrades to existing ones, have been required to include and enable this technology.
What Does TPM 2.0 Actually Do?
The TPM 2.0 is a successor to the Trusted Platform Module (TPM) and performs similar functions, including (source from Wikipedia):
- Ensure Integrity of Platform: TPM 2.0 is a hardware module that ensures the boot process starts from a trusted combination of hardware and software, and continues until the operating system has fully booted and applications are running.
- Encrypt Storage Devices: TPM 2.0 functions as a full disk encryption utility, protecting keys for encrypting computer storage devices and providing integrity authentication for a trusted boot pathway that encompasses firmware and boot sector.
- Device Integrity Verification: A TPM 2.0 can be used in various applications such as digital rights management, Windows Defender, Windows Domain logon, software license enforcement, and preventing cheating in online games.
You May Also Be Interested In:
If you're interested in learning about the differences between TPM 1.2 and TPM 2.0, you can find all the information you need by following this page, which covers everything about TPM.
Do I Have TPM and Is TPM 2.0 Enabled on My Computer?
To check if your computer has TPM or if TPM 2.0 is enabled, follow these steps. First, check your computer's specifications or documentation to see if it has a Trusted Platform Module (TPM) or TPM 2.0.
Step 1. To open the Trusted Platform Module (TPM) Management Console, press the Windows + R keys to open the Run dialog, then type "tpm.msc" and click "OK".
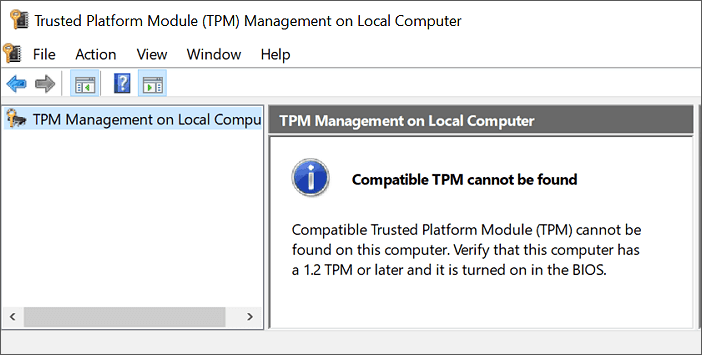
Step 2. The Run dialog box opens, displaying the Trusted Platform Module Management on Local Computer.
The on-screen message will inform you if your computer has a Trusted Platform Module (TPM) and if the TPM 2.0 is enabled on your computer. This information will be displayed on the screen, allowing you to verify the presence and status of the TPM on your device.
- Compatible TPM cannot be found: The computer's TPM cannot be found, possibly due to a TPM version less than 1.2 or it being turned off in the BIOS.
This means that your current computer doesn't support a TPM chip, which is required for Windows 11.
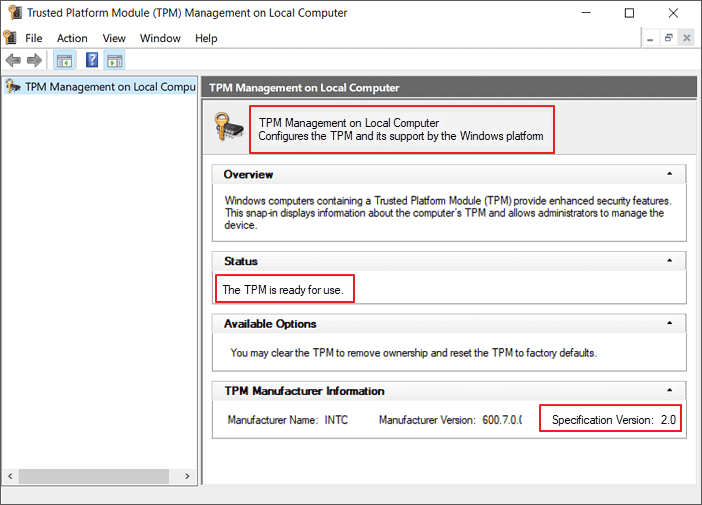
- TPM Management on Local Computer Configure the TPM and its support by the Windows platform. Status: The TPM is ready for use.
The computer has a TPM chip and you need to confirm if the Specification Version is 2.0.
If yes, it means that your computer has TPM 2.0.
Do I Need TPM for Windows 11?
Windows 11 requires a Trusted Platform Module (TPM) version 2.0 for the update.
To get a smooth Windows update on your computer, it's recommended that you prepare your PC for Windows 11 by enabling TPM 2.0.
To resolve the "TPM 2.0 is a requirement for running Windows 11" error on your PC, you can either enable TPM 2.0 or disable the Secure Boot feature in your BIOS settings. If your PC doesn't support TPM 2.0, you can also try creating a bootable USB drive with Windows 11 and installing it in legacy mode. Additionally, you can disable the Secure Boot feature in your BIOS settings, which will allow you to install Windows 11 without TPM 2.
Should You Bypass TPM 2.0? Any Risk?
If your computer works fine but can't be upgraded to Windows 11 due to TPM limitations, you can install Windows 11 without TPM 2.0, but it's not recommended.
Microsoft has noted that your unsupported PC will not receive any updates.
To install Windows 11 without TPM 2.0, you can bypass the requirement, but your PC may not receive any security updates or keys, putting your data at risk and potentially causing the PC to crash. Despite this, some users may still choose to do so, and a step-by-step guide is available for those who insist on bypassing the chip. However, it is not recommended due to the potential risks involved.
How to Configure Your PC to Be Eligible for Other Requirements Except TPM 2.0
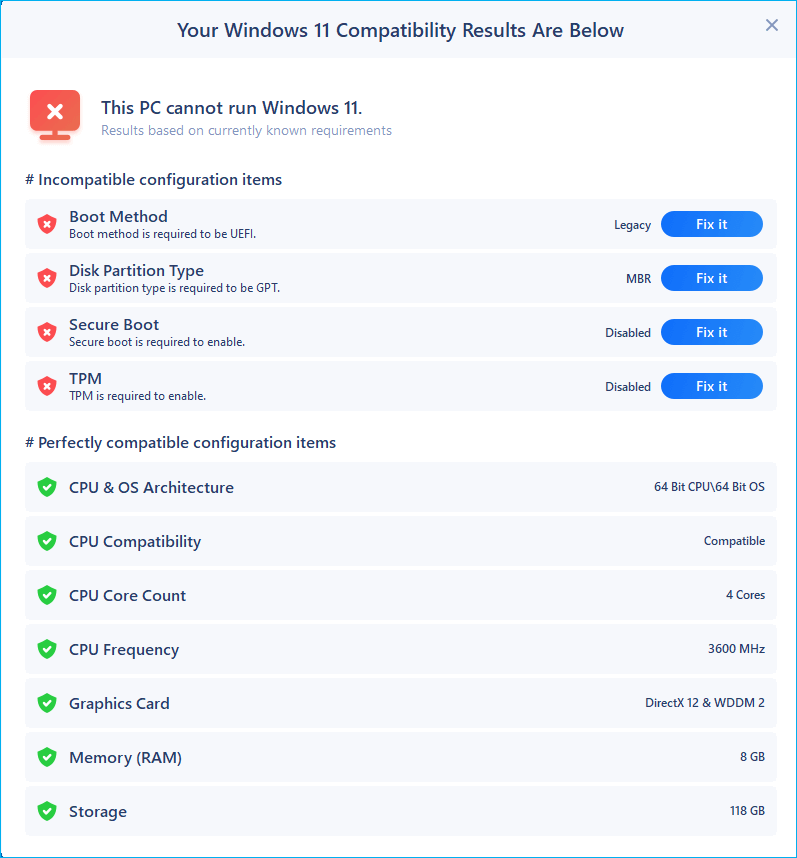
Before proceeding, your device must meet seven additional requirements, which can be checked using the Qiling Windows 11 Upgrade Checker. This tool will identify both compatible and incompatible items for your reference.
Step 1. Download Qiling Windows 11 Upgrade Checker.
Step 2. Click the Check Now button to start.
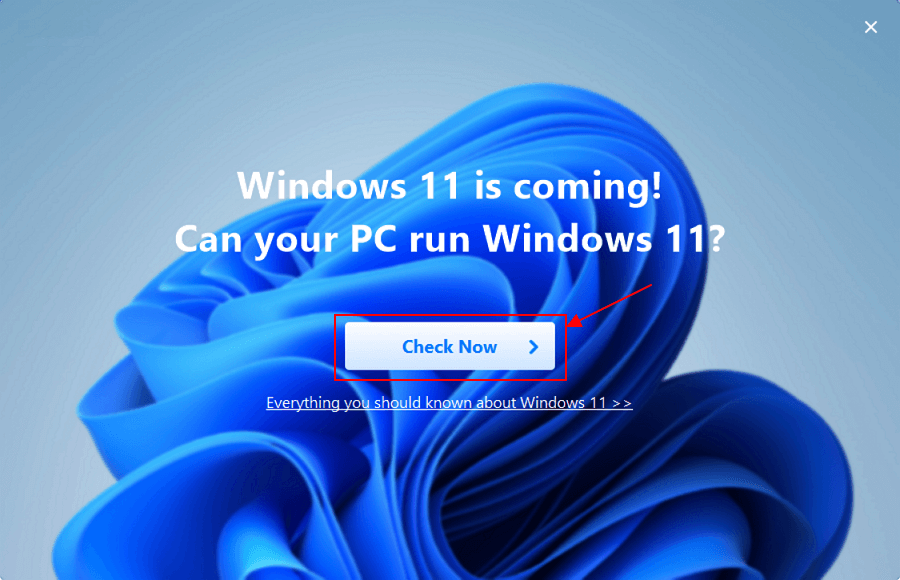
Step 3.The Windows 11 compatibility result window will soon appear, listing all the incompatible and compatible configuration items.
#1. Convert MBR to GPT for Enabling UEFI & Secure Boot
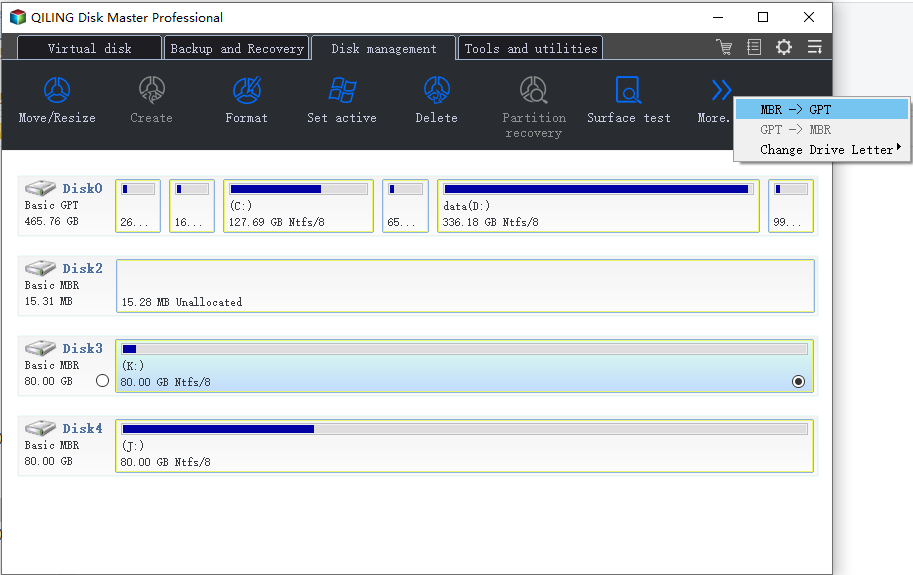
If the test results for the Boot method (Legacy BIOS), Disk partition type (MBR), and Secure Boot (disabled) are not eligible, you can use Qiling Partition Master, a top-recommended partition manager, to make some tweaks on your computer.
To make your computer UEFI compatible, you can convert the existing MBR disk to a GPT disk, which is the required format for UEFI firmware based on a GPT disk.
- Qiling Partition Master -
Your Smart Windows 11 Update Disk Manager
- MBR to GPT Converter, Make Disk Ready for Windows 11.
- Migrate Windows 11 to New SSD in 1-Click.
- Handy to Extend or Combine Partitions in Windows 11.
- Clone and Upgrade Disks without Data Loss.
Step 1. Download and launch Qiling Partition Master on your Windows computer.
Step 2. Right-click the MBR disk you want to convert, click the "More..." button, and select "MBR -> GPT".
Step 3. After that, the app start the conversion.
To change the BIOS setting from Legacy to UEFI, follow the correct paths, and then turn on Secure Boot. This is the next step in the process.
Qiling Partition Master is a reliable disk manager that supports Windows 10/8.1/8/7, and even older versions like Vista and XP.
- Important
- To bypass Windows 11 Secure Boot requirement, create a new DWORD Value named BypassSecureBootCheck and assign it a value of 00000001.
How to Download TPM 2.0 for Windows 11
#1. How to Download TPM 2.0 for Windows 11
To download and enable TPM 2.0 for Windows 11, you'll need to access the UEFI firmware settings on your PC. This can usually be done by pressing a specific key during boot-up, such as F2, F12, or Del. Once in the UEFI settings, navigate to the "Security" or "TPM" section and enable TPM 2.
1. Install Applicable Firmware Updates for TPM 2.0
If your device is not from Microsoft, locate the device manufacturer of your device and select the corresponding link to apply the firmware update that is available.
TPM manufacturer: https://www.infineon.com/TPM-update
Fujitsu: https://www.fujitsu.com/global/support/products/software/security/products-f/ifsa-201701e.html
HP Customer Support: https://support.hp.com/document/c05792935
HP Enterprise Support: https://support.hpe.com/hpsc/doc/public/display?docId=emr_na-hpesbhf03789en_us
Lenovo: https://support.lenovo.com/product_security/LEN-15552
Panasonic: https://pc-dl.panasonic.co.jp/itn/info/osinfo20171026.html
Toshiba: http://go.toshiba.com/tpmsecuritynotice
Source from Microsoft: Update Your Security Processor (TPM) Firmware
2. Enable TPM2.0 on your PC
There are two options to enable TPM 2.0 on your PC, with option 1 being recommended by Microsoft.
Option 1. Enable TPM 2.0 in Settings
To restart your computer in Windows 10, go to Settings, click on "Update & Security", select "Recovery", and from the "Advanced startup" section, click on "Restart now".
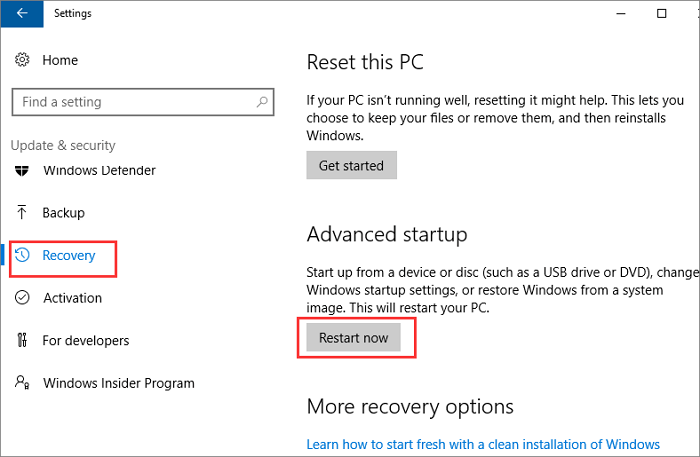
To troubleshoot, go to Advanced options, select UEFI Firmware Settings, and then click Restart.
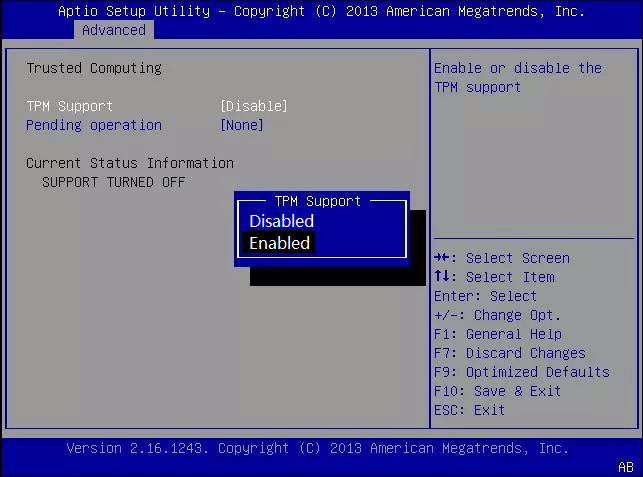
Go to the BIOS settings, and enter Security Device Support.
Check the TPM state, if it's disabled, switch its state to enabled.
You can also try to enable TPM 2.0 in the AMD fTPM switch, AMD SPS fTPM, Intel PTT, or Intel Platform Trust Technology sections.
Option 2. Enable TPM 2.0 via Boot Maintenance Manager
Restart the computer and press F2/F10/F12 or Del keys to enter the BIOS settings.
Hotkeys to enter BIOS settings on different brands of computers:
1. Dell: F2 or F12
2. HP: ESC or F10
3. Acer: F2 or Del
4. Lenovo: F1 or F2
5. ASUS: F2 or Del
6. MSI: Del
7. Samsung: F2
8. Toshiba: F2
Go to the Security Settings tab, and enter the Boot Maintenance Manager.
To switch the TPM settings configuration option from "Disabled" to "Enabled", you need to locate the option and select it, effectively changing its state.
After enabling TPM 2.0 on your PC, you can proceed to the next step, which is to download and install Windows 11.
#2. How to Download and Install Windows 11
You can install the latest version of Windows 11 on a computer from a bootable USB using the Qiling Win11 Builder. This tool automatically detects and finds the latest genuine Windows 11 update from Microsoft, allowing you to create a bootable USB drive for a successful installation.
Let's see the details:
Step 1. Connect an empty USB drive to a Windows PC and download the Qiling Win11 Builder.
Step 2. Run Qiling Win11 Builder, and select to create a Windows 11 installation media to the USB drive.
Step 3. Once you've completed the steps, restart your PC and set it to boot from the Windows 11 installation USB.
Once the computer boots on the USB disk, follow the onscreen instructions to install the new OS.
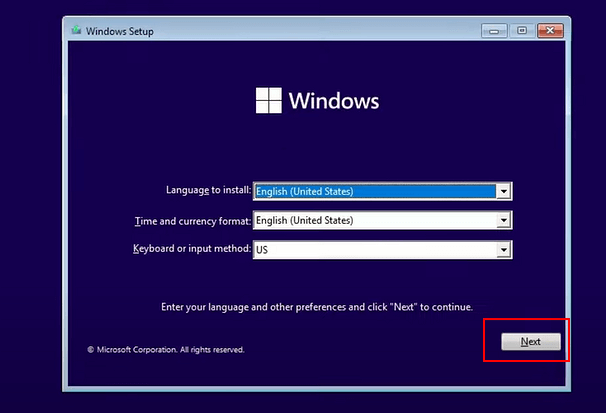
Step 4. Set the language, time and currency format, keyboard or input method, and click "Next" to continue.
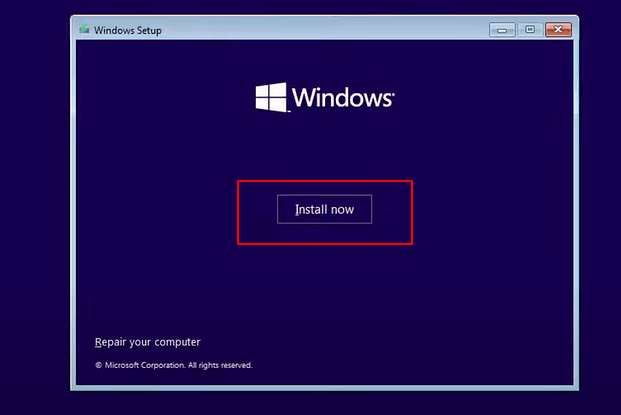
Step 5. Click Install Now to enter the next step.
Step 6. Click I don't have a product key to continue.
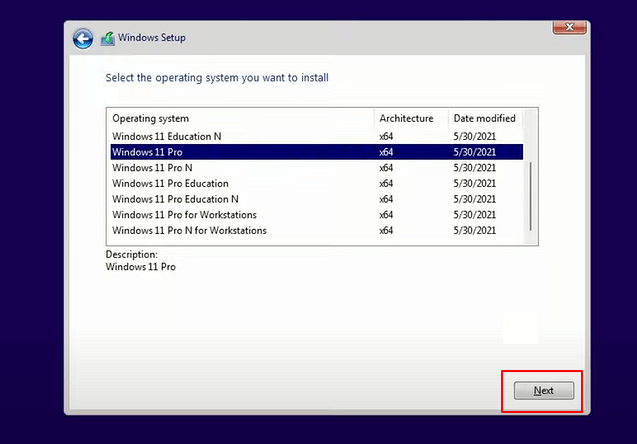
Step 7. Select the Windows 11 edition you want to install and click "Next" to proceed.
Step 8. Click to accept the Microsoft License Term and click Next.
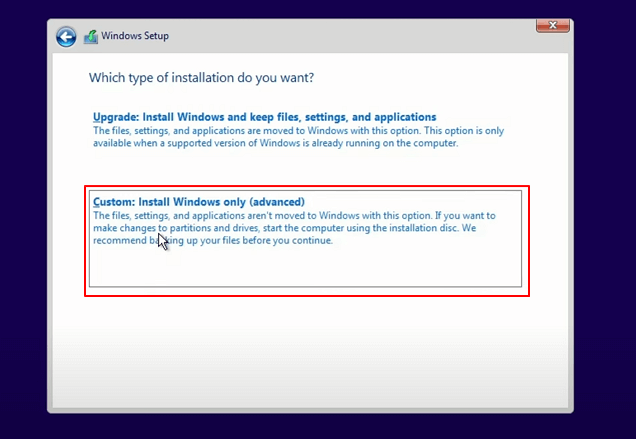
Step 9. Click Custome: Install Windows only on the new disk.
Step 10. Select the OS disk and click Next to continue.
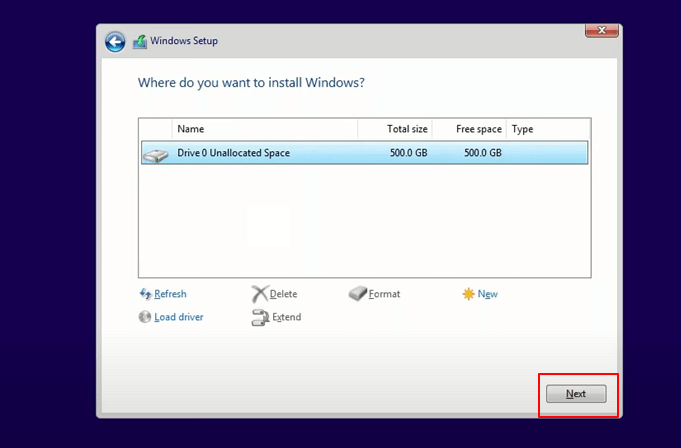
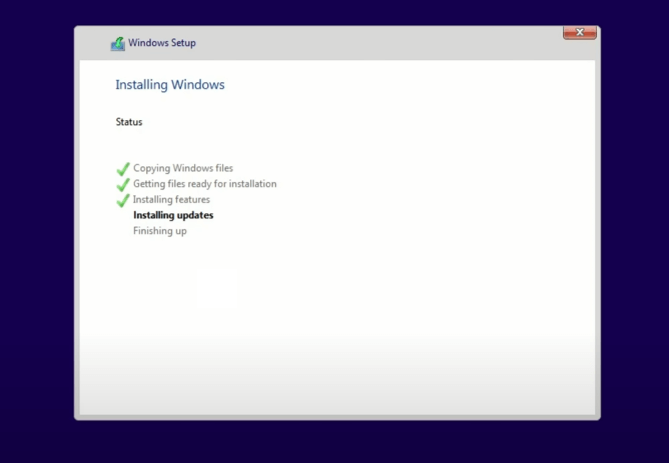
Step 11. Wait for the installing process to complete, then the computer will automatically restart.
Then follow the on-To set up your computer, follow these steps: connect the new drive to your computer, boot from the installation media, and follow the on-screen guide to install the operating system on the new drive. If your computer doesn't boot on the new drive, follow the next guide to enable it and set it to boot from the target disk.
How to Install/Run Windows 11 without TPM 2.0
To run Windows 11 without TPM, you can either modify the Registry Editor or create a bootable USB drive using Rufus.
#1. Bypass TPM 2.0 When Installing Windows 11 Using Registry
#2. Bypass TPM Restrictions with Rufus for In-Place Upgrade
#1. Bypass TPM 2.0 When Installing Windows 11 Using Registry
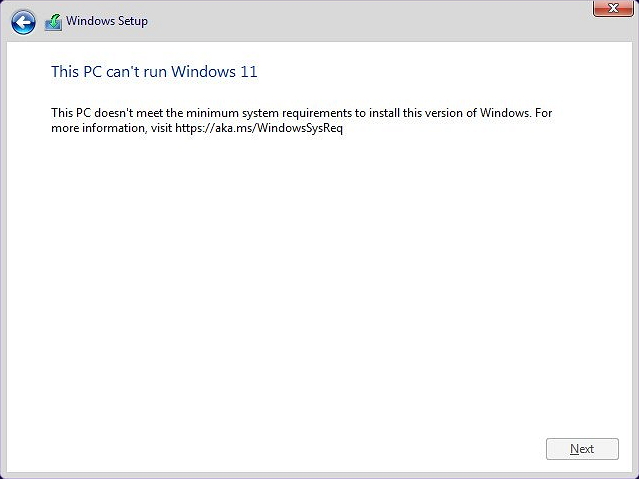
If you try to install Windows 11 from a USB installation media on a PC that's not compatible, you'll get the error "This PC can't run Windows 11" during installation, likely due to UEFI secure boot and TPM 2.0 not being enabled.
With Qiling Partition Master, you can now enable UEFI secure boot, and the next step will allow you to bypass TMP 2.0, making your computer ready for a Windows 11 installation.
Step 1. When the installation error "This PC can't run Windows 11" appears, click on the Back button in the Windows Setup dialog.
Step 2. Press Shift+F10 to open Command Prompt.
Step 3.To open the Windows registry window, type "regedit" and press Enter in the Command Prompt window.
Step 3. Navigate to the path HKEY_LOCAL_MACHINE\SYSTEM\Setup, click on Edit > New > Key to create a new key named LabConfig.
Step 4. In the LabConfig registry, right-click in a blank space and select "New" > "DWORD (32-bit) Value".
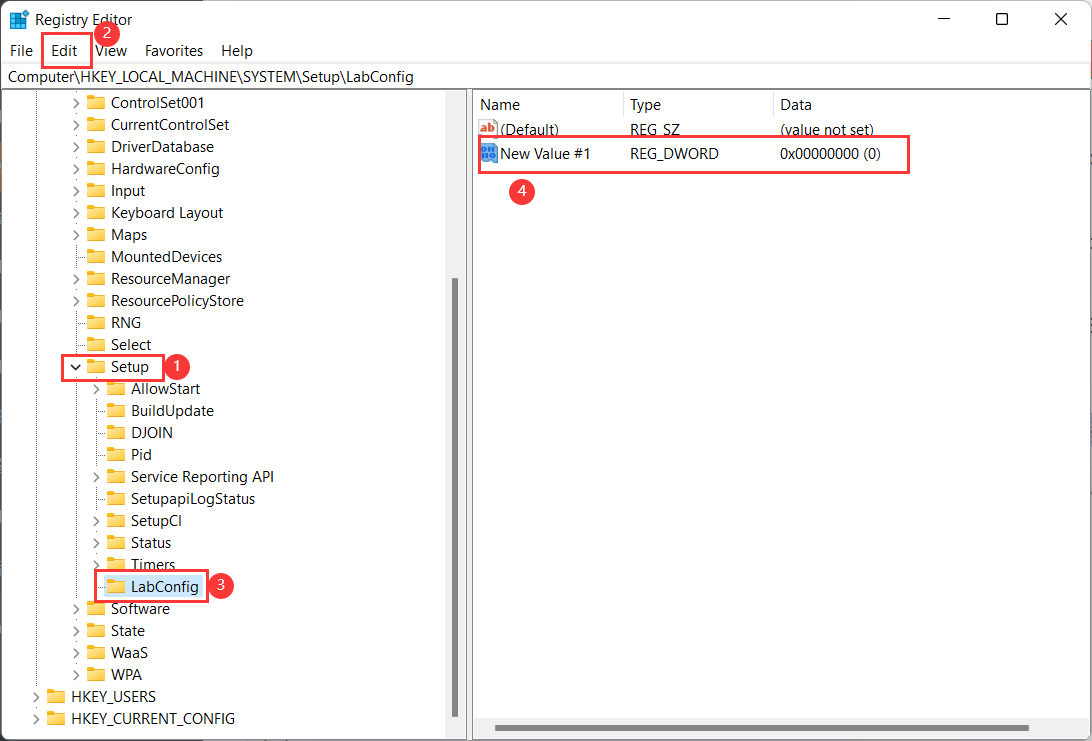
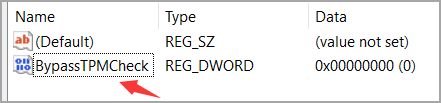
Step 5. Then name it BypassTPMCheck.
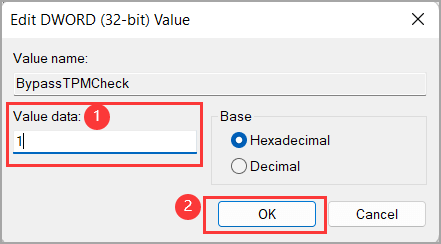
Step 6. To edit the DWORD Value, right-click on it and select the "Modify" option.
Step 7. Now set value data as 1 and click OK.
Step 8. You have successfully added two DWORD values, "MaxConnections" and "MaxThreads", to the LabConfig key in the registry. The screenshot shows the updated registry key with the new values. This is a good starting point for further configuration and testing.
Step 9. Now, close both the registry and command prompt windows and go back to the installation procedure to finish installing Windows 11 on your PC.
#2. Bypass TPM Restrictions with Rufus for In-Place Upgrade
For those who want to bypass the restrictions, a workaround using Rufus, a bootable media creation tool, can be used to provide a solution.
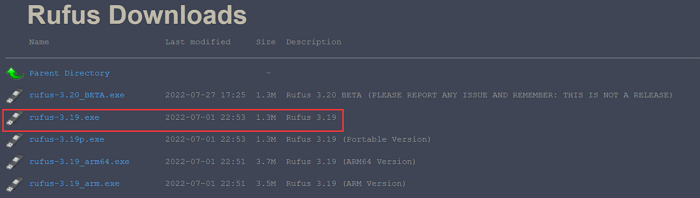
Step 1.Download the latest stable version of Rufus, which is 3.19, from the official website. Note that version 3.20 is still in beta and not recommended for use. If you do choose to download it, be aware of the potential implications.
Step 2. Connect USB to computer and open Rufus file.

Step 3. Click Select to choose Windows 11 ISO image. And click Download.
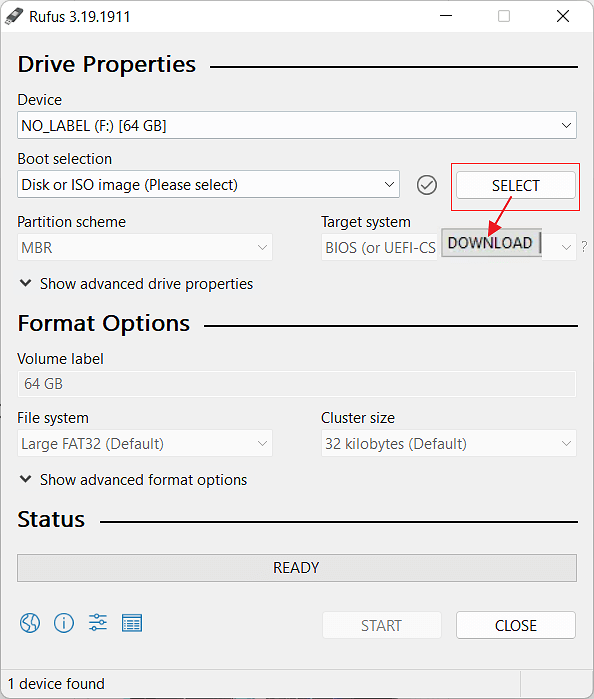
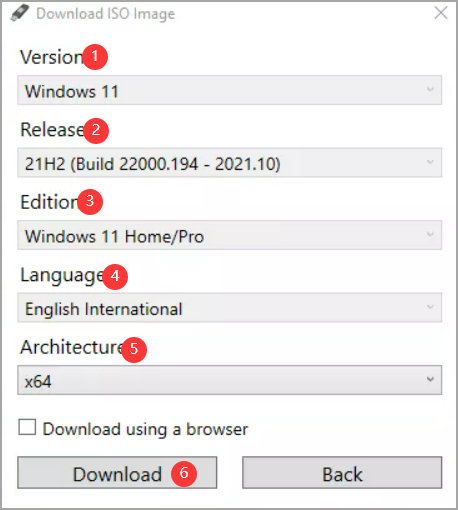
Step 4. Start Windows 11 download.
- Click Windows 11 version and prefer Continue.
- Select the release version and click Continue.
- Pick the Windows 11 edition and click Continue.
- Select language and click Continue.
- Select Architecture and click .Download.
- Click to select where to save the Windows ISO image.
Step 5. Wait for downloading.

To select the Extended Windows 11 Installation, click on the dropdown menu under Image Options.

Step 6. Click Start.
Related Articles
- Resize Partition Under Windows 7 (32 Bit and 64 Bit)
- (3 Free Methods) How to Remove or Delete Partition Windows 11/10
- Extend C Drive or Increase Partition Size on Windows Server 2008
- Windows Convert to GPT Grayed Out? Solve it Easily!
If you're unable to convert a disk to GPT in Disk Management, ! There are ways to successfully convert a disk to GPT. You can try using other tools or methods to achieve this. - Portable Partition Manager Download Free | With Guide
A portable partition manager is a software tool that allows users to manage and manipulate disk partitions on a computer without the need for installation, making it easy to use on any device. - How to Fix PS4 Can't Read USB [Quick & Easy]
If your PS4 can't read your external USB drive, ! We've got solutions for you to try and fix the issue.