How to Share Files Between Two Laptops with or Without WiFi in Windows 10 or Windows 11
Yes, you can quickly transfer files between two laptops wirelessly using the "Quick Transfer" feature, which allows you to connect the two laptops and transfer files without the need for cables. To do this, go to Settings > Devices > Bluetooth & other devices, and select "Quick Pair" on the new laptop. Then, on the old laptop, go to Settings > Devices > Bluetooth & other devices, and select "Quick Transfer" and follow the prompts to complete the transfer. This method is quick, easy, and doesn't require any cables or adapters. Alternatively, you can also use cloud storage services like Google Drive, Dropbox, or OneDrive to transfer files between laptops.
To transfer large files between two laptops or other devices, things can become difficult, but there are 8 solutions provided to make it easier. These solutions allow you to transfer files between two laptops in Windows 11/10/8/7, either with or without WiFi, making it convenient to share files between devices.
For time-saving, we recommend the first option for data transfer. Ultimately, the choice between the two options depends on your personal preference.
| Workable Solutions | Step-by-step Troubleshooting |
|---|---|
| Option 1. (Easiest and fastest) third-party software |
Transfer Files Between Two Laptops Using File Transfer Software |
| Option 2. Windows Built-in Tool | 1. Transfer Data Between Two Laptops with a Shared Folder 2. Using Nearby Sharing in Windows 10/11 3. Transferring Data Via HomeGroup |
| Option 3. Online Transfer | 1. Laptop to Laptop Data Transfer Via the Cloud 2. Transfer Files by Email |
| Option 4. Offline Transfer | 1. Use a USB Cable to Transfer Data 2. Try an External Hard Drive |
Solution 1. Transfer Files Between Two Laptops Using File Transfer Software (Windows 11 Available)
This software can help transfer files between devices. It's a simple and fast method for sharing files between laptops. You may want to try Qiling Disk Master for this purpose.
This software facilitates the transfer of personal files, software, programs, and games from one PC to another with ease, requiring only simple steps. To use it, simply download the software and follow the steps provided, saving you time and energy in the process.
Get a Free Download to complete a fast file transfer:
- Qiling Disk Master -
Your Smart Windows 11 File Transfer
- To transfer files, apps, and settings from your old OS to your new Windows 11, follow these steps: 1) Connect the old device to the new one using a USB cable or cloud storage. 2) Use the Windows 11 Settings app to transfer files, apps, and settings from the old device.
- 1-Click Product Key Finder for Windows, Office, Adobe apps.
- C Drive Cleaner & Windows 11 Performance Optimizer.
- Rescue Data When Windows 11 Corrupts or Dies.
Step 1.Install and launch Qiling Disk Master on both laptops. On the source laptop, select "File Sync" to continue.
Step 2. Verify the transfer direction. (New PC or Old PC).
"New" - Transfer files from old laptop to current new one.
"Old" - Transfer files from current laptop to remote new one.
Step 3. Then pick options to connect laptops.
One is to enter the destination laptop's password account, and the other is to input the verification code (which you can click and check on the right top of the "PC to PC" mainscreen on the destination laptop, turn on button behind Connection Verification).
Step 4. Now, choose "Files" to select files for transfer.
Select the necessary files to transfer to another laptop, and use the "Edit" icon to redirect them to a different location on the target PC by changing the target path.
Step 5. After selecting the files to transfer, click the "Transfer" button to initiate the file transfer process from one laptop to another.
Qiling Disk Master can transfer data, installed software, and everything to a new laptop.
[You Must Read]
Solution 2. Transfer Data Between Two Laptops with a Shared Folder
Setting up a LAN shared folder on Windows 10/11 can be more challenging than solution 1, and is recommended for those familiar with their PC. For enterprise users who rely on LAN, shared folders allow users to share data, making it an essential feature. To set up a LAN shared folder, follow the steps to enable this feature, which is crucial for users who need to share files across the network.
Step 1. Find the file you want to share.
Right-To give access to specific people, click or press the relevant option, and then select "Give access to" followed by "Specific people".
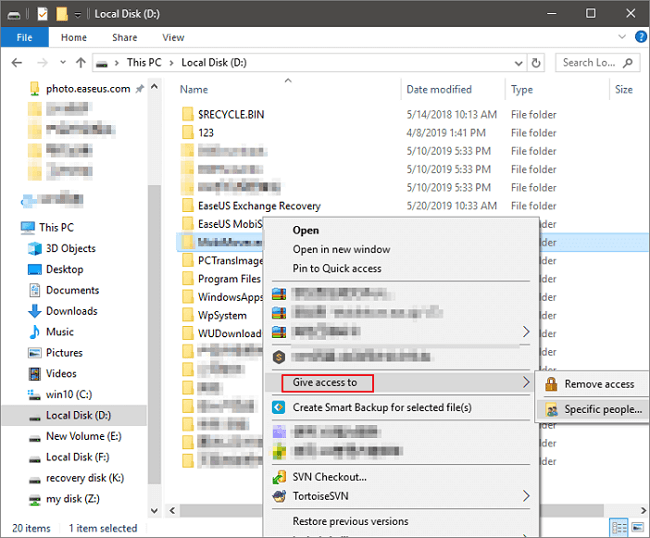
Step 2. Select a user or group to add. Click "Add".
To share this note with others, add the username "Everyone" to the user field, allowing all users to access it, or specify a particular username to share it with them, adjusting the privilege level as needed.
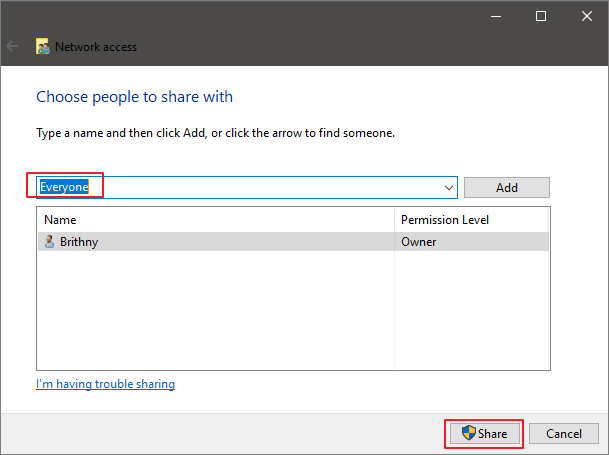
Step 3. To enable network discovery and sharing, click the "Share" button in the dialog.
Step 4. To access shared files on a network, you can type the IP address in the Windows Run dialog box. Press the "Win+R" keys to open the Run dialog box, type "\\IP address" (replacing "IP address" with the actual IP address of the computer sharing the files), and press Enter. This will display all the shared folders on the computer with the specified IP address.
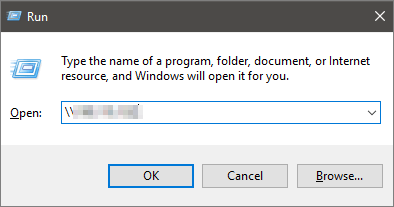
If you don't know your IP address, press "Win+R", type cmd, then input "ipconfig". Press "Enter" and you'll see your IP address. You can also select multiple files or folders to share them all at once.
You can map a shared folder or network drive from File Explorer in Windows without having to search for it or type its network address each time.
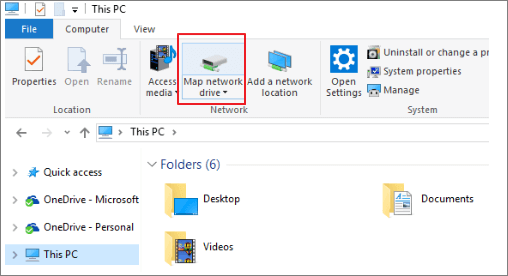
Step 1. Open File Explorer from the taskbar or the Start menu.
Step 2. To map a network drive, select "This PC" from the left pane, then click on the "Computer" tab and choose "Map network drive" from the options.
Step 3. Select a drive letter in the Drive list, type the path of the folder or computer, or select "Browse" to find the folder or computer, and then select "Finish".
Solution 3. Transfer Files Using Nearby Sharing in Windows 10/11
Windows 10 (version 1803) introduces a new feature called "Nearby sharing" that enables wireless file and link transfers to nearby devices using Bluetooth and Wi-Fi. If your Windows 10 is Version 1803 or later, you can try this solution.
Step 1. Enable nearby sharing. (Enable both of the laptops)
To enable Nearby Sharing, go to "Settings > System > Shared experiences > Nearby sharing" and turn it on.
Step 2. Under "Nearby sharing," select "Everyone nearby".
Your PC will be able to share and receive content with all nearby devices, including those you don't own.
Your PC will only share and receive content with devices that use the same Microsoft account.
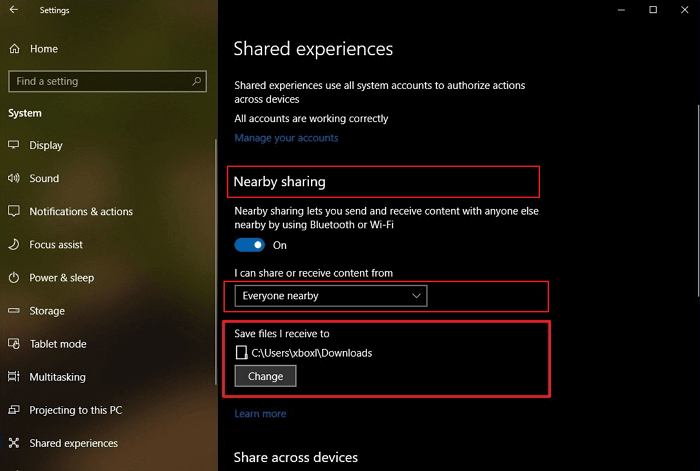
The "Save files I receive to" option under "Nearby sharing" allows you to specify where transfers are stored, defaulting to the Downloads folder. You can easily change this to a different folder or drive by clicking the "Change" button and selecting the desired location.
Step 3. Start file sharing between the two laptops.
Open "File Explorer". Right-To share a file, click on the file you want to share, then click the "Share" option, and finally select the device from the list.
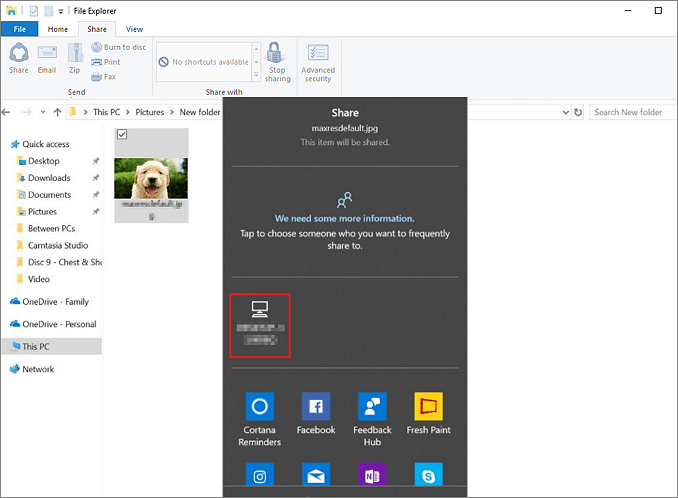
Once you've completed the steps, if the destination device is within Bluetooth range and running Windows 10 version 1803 or later, the user will receive a notification to accept or decline the file transfer. The file will be stored in the Downloads folder, or in the folder location configured in the "Shared experiences" settings page.
Solution 4. Transferring Data Via HomeGroup
To share files and printers between Windows 7 and Windows 8 computers, go to the Control Panel on the Windows 7 computer, click on HomeGroup, then select File and printer sharing, and finally click on "Turn on HomeGroup" to enable the feature. On the Windows 8 computer, go to the Control Panel, click on HomeGroup, and select File and printer sharing. Then, on the Windows 7 computer, go to the Network and Sharing Center, click on HomeGroup, and select the Windows 8 computer from the list to share files and printers. On the Windows 8 computer, go to the Network and Sharing Center, click on HomeGroup, and select the Windows 7 computer from the list to access shared files and printers. This method allows you to share files and printers between Windows 7 and Windows 8 computers.
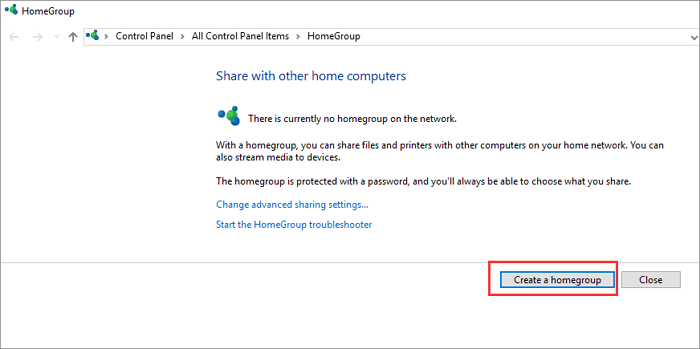
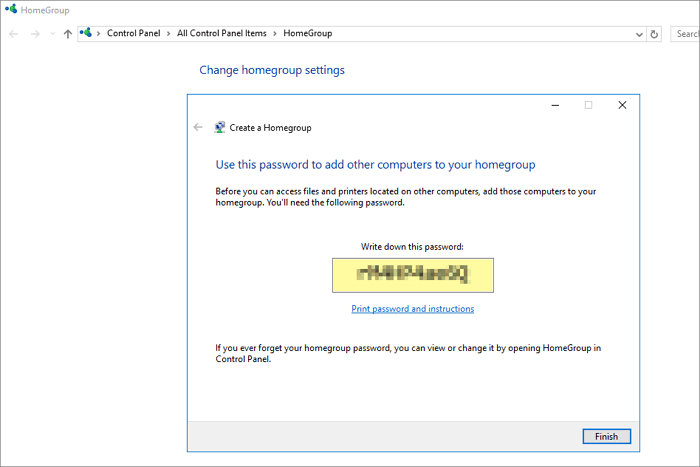
Step 1. On your Windows 7 computer, type homegroup in the Search box and open it. Then, choose "Create a homegroup" and follow the instructions to set up your home network.
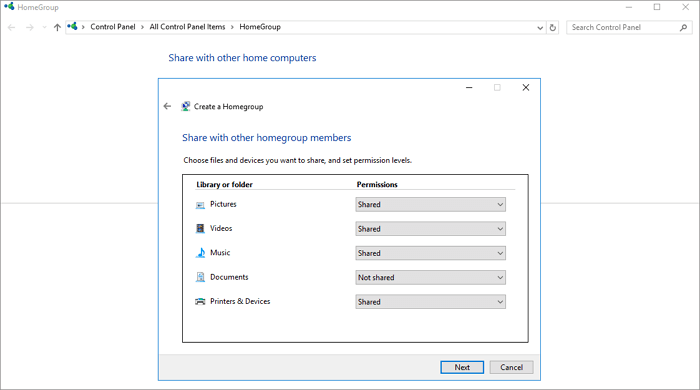
Step 2. Select what you want to share, and click "Next".
Step 3. Go to another Windows 7 or 8 PC, which connects to the same WiFi or network, open "HomeGroup", join in an existing HomeGroup, enter the password and click "Next" to join.
Once you've completed the setup, you can access shared files and folders from other PCs in the HomeGroup by opening File Explorer, clicking the Homegroup icon in the navigation pane, and browsing the shared content.
Solution 5. Laptop to Laptop Data Transfer Via the Cloud
You can also transfer files between Windows 10/11 laptops using a cloud drive, such as OneDrive or Google Drive, by sharing the file to any Windows app that supports these services. This method doesn't have Windows version limitations, making it accessible to everyone. However, it comes with limitations such as storage space, upload time, and potential cost, making it more suitable for transferring smaller files on a more frequent basis.
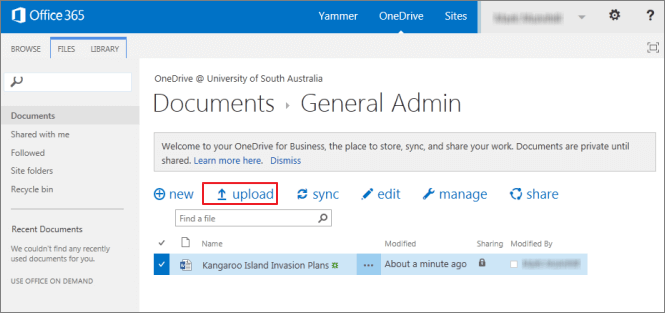
Step 1. Upload files to OneDrive.
To add a file to OneDrive, simply open the OneDrive app, click the "Add" button, and the file will upload to your cloud account.
Step 2. Download wanted files.
On the other laptop, open the OneDrive app, right-click on the file and select "Download" from the menu.
To transfer files to another laptop or computer on your network, you can use the built-in file transfer feature in Windows. Simply open File Explorer, select the files you want to transfer, right-click on them, and choose "Share" or "Send
Solution 6. Transfer Files by Email
You can email a file from one laptop, then log in to the same email account on another laptop to access the file. This method is suitable for small file sizes.
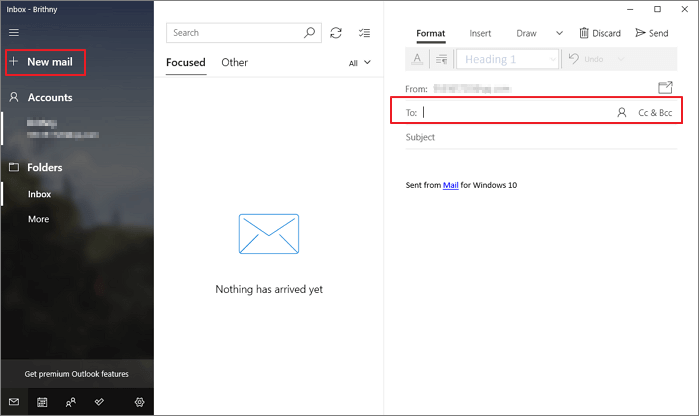
Step 1. Set the receiver of the email as your own email address.
Step 2. To transfer small-size files, you can attach them to an email. However, keep in mind that different email clients have different attachment size limitations, so this method is best for small files.
Step 3. To log in to your email on the other laptop, start by opening the laptop and navigating to the email application. Enter your email address and password to access your account. Once logged in, navigate to the "Downloads" folder and click on it.
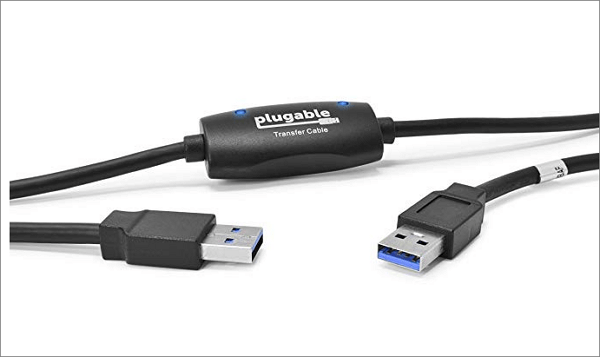
Solution 7. Use a USB Cable to Transfer Data
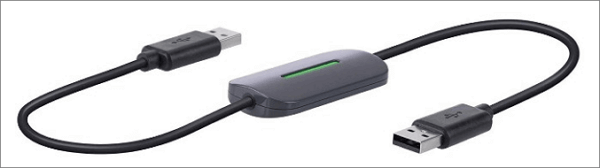
The Plugable USB data transfer cable is a $40 option that allows users to transfer data between two computers via USB ports, providing a simple and cable-based alternative to wireless, Ethernet, or internet-based connections.
Step 1. Start both computers. Ensure the operating system is running smoothly on each device.
Step 2. Attach a USB cable to one laptop, and the operating system will recognize it. Then, attach the same cable to the other laptop.
Step 3. To share files between your Windows computer and another device, click the Windows "Start" button, type "windows easy transfer" in the Search field, and press "Enter." Follow the prompts of the Easy Transfer wizard to share files.
Solutions 8. Try an External Hard Drive
Using an external disk is a good option if you want to expand your storage capacity without being limited by network speed, Windows version number, or transfer capacity.
Step 1. Connect your external hard drive to one laptop.
Step 2. Copy wanted files to the device.
Step 3. Eject the drive and connect it to another laptop. Then copy the files to the other laptop.
To transfer files from PC to PC using a USB cable, first, ensure both PCs have a USB port. Next, insert one end of the USB cable into the first PC and the other end into the second PC.
This article will cover four ways to transfer files from one PC to another, including transferring via a USB cable, Nearby Sharing, Cloud Storage, and PC transfer software.
To Sum Up
To transfer data from a laptop to another laptop, you can use various methods. You can use a USB cable to connect the two laptops and transfer files, or use cloud services like Google Drive or Dropbox to transfer data wirelessly. You can also use a USB drive to transfer data, or use a software like AnyTrans or Shareit to transfer data.
I completely agree with you. If you have any problems or have a better solution, please let us know. We will respond as soon as possible.
Related Articles
- Simple & Quick | Share Files Between Computers on Different Networks
- What to Do When A Program Won't Open on a Windows 10 PC
- How to Transfer Files from Computer to Original Xbox
- Transfer Unlimited Files with 2022 Best LAN File Sharing Software
- How to Fix SSD Shows Up in BIOS But Not Windows Issue 💡
A situation where an SSD is recognized in the BIOS but not in Windows is a frustrating issue. Fortunately, this problem can be attributed to a few possible reasons, including loose connections, incorrect drive configuration, or a corrupted drive. To resolve this issue, users can try checking the drive's connections, ensuring it's properly seated in the motherboard, and running a disk check to identify any potential issues. Additionally, updating the BIOS and drivers, or reinstalling the operating system, may also resolve the problem. By addressing these potential causes, users can successfully get their SSD recognized in Windows. - How to Run SSD SMART Test Safely [SMART Attributes Explained]
Do you know what an SSD SMART test is? How can you check the SSD health condition? This article guides you step by step on this topic.