Windows 11 26H2 Upgrade Needs 20 GB Free
Quick Navigation:
- How Much Space the Upgrade Really Needs
- Free Space Without Deleting Data
- Extend the System Volume When Space Exists
- Resize the Volume With Qiling Disk Master
- Frequently Asked Questions
A feature upgrade stages a complete new installation beside the current one, which is why it needs far more free space than an ordinary monthly update. When the system volume has less room than the upgrade expects, setup stops early or fails part way, and sometimes leaves the previous installation removed without completing the new one.
How Much Space the Upgrade Really Needs
Microsoft states a minimum for the download and staging area, and the practical figure is higher once the previous installation is retained. The upgrade needs room for the new image, for migration data, and for the rollback copy.
A 128 GB SSD with 4 GB free will not upgrade, even though the machine is otherwise eligible. A 256 GB SSD with 25 GB free usually will, but leaves very little working space afterwards.
Check the free space on the system volume itself, not across all disks. Space on another drive cannot be used by setup.
Free Space Without Deleting Data
Move large personal folders to another disk, uninstall programs you no longer use, and clear the temporary files that Storage settings reports. Empty the Recycle Bin separately.
Do not delete the Windows.old folder until the upgrade is complete. It is the rollback path, and removing it during a failed upgrade removes the option to go back.
Disconnect secondary drives that hold backups before starting setup. A setup that writes to the wrong disk is the most common cause of data loss during upgrades.
Extend the System Volume When Space Exists
If unallocated space sits directly after the Windows volume on the same disk, extending it is straightforward. If another partition sits between them, the space has to be moved first, which is a larger change.
A recovery partition at the end of the disk often blocks the only free space on the disk. Moving it is safe with a partition tool that plans the whole operation before writing.
Take an image of the system before resizing. A resize is reversible in theory, but not after a failed upgrade has begun.
Resize the Volume With Qiling Disk Master
Qiling Disk Master can extend the system volume into free space, move a blocking partition, and show the resulting layout before anything is written.
Step 1. Select the System Disk
Open the program and confirm the disk number against Disk Management. Note where the unallocated space sits relative to the Windows volume.
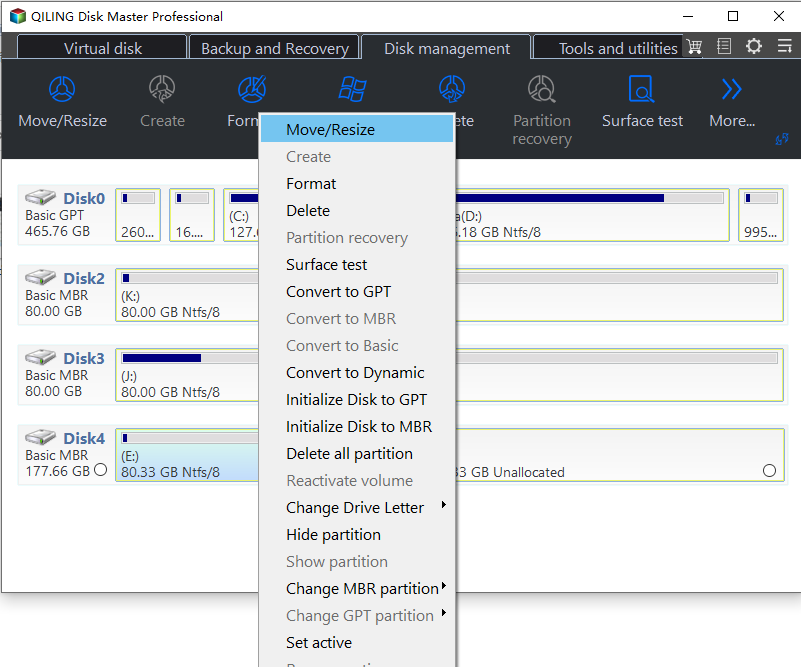
Step 2. Extend or Move
If the free space is adjacent, extend the Windows volume directly. If a partition blocks it, move that partition toward the end of the disk first, then extend.
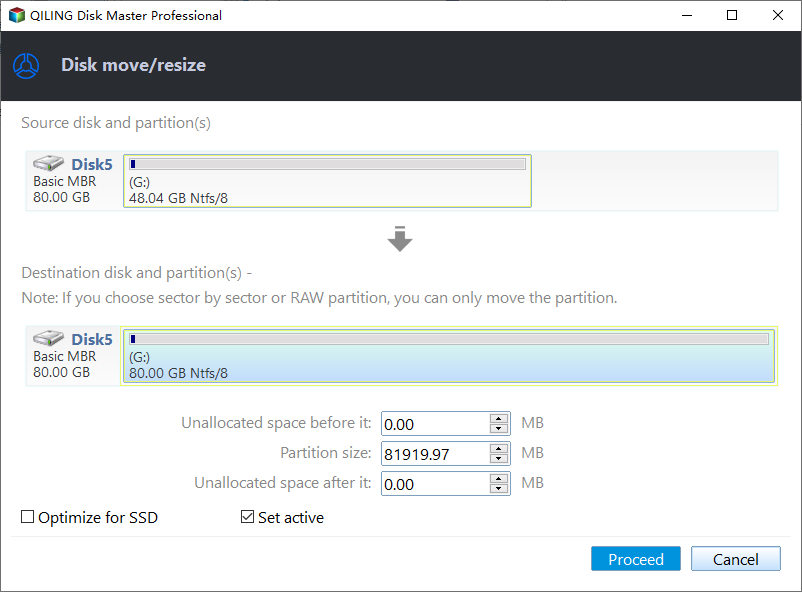
Step 3. Preview and Proceed
Review the pending operations list, then apply. A system volume change is completed at restart, so plan the reboot.
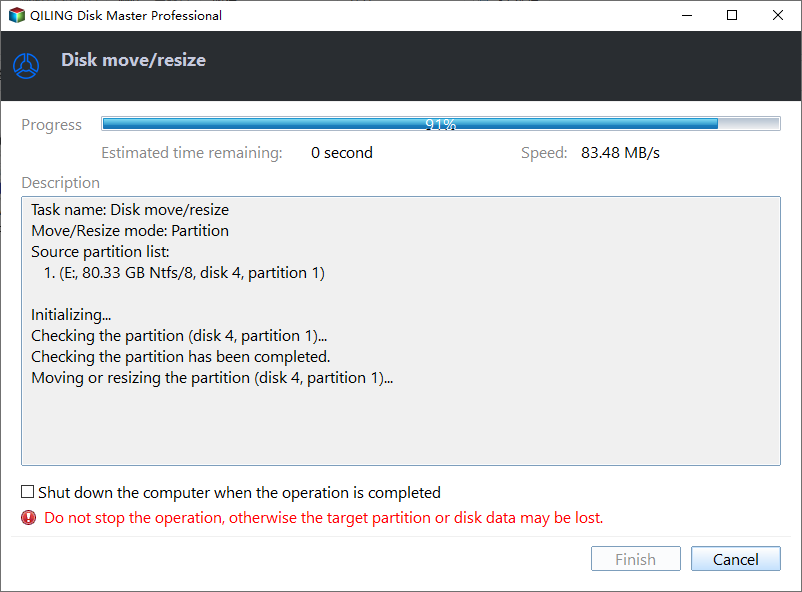
Step 4. Verify and Start the Upgrade
Confirm the new size in File Explorer, aim for at least 30 GB free, then start the upgrade and keep the machine powered throughout.
Frequently Asked Questions
Can I use space on another disk for the upgrade?
No. Setup stages the new installation on the system volume, and unallocated space on a different disk cannot be used.
Is 20 GB enough?
It is the documented minimum. Practical headroom of 30 GB or more avoids a failure near the end of the process.
Will the upgrade delete the recovery partition?
It can resize or replace it. A blocked partition at the end of the disk is a common reason an upgrade cannot proceed.
What if the upgrade fails part way?
Roll back within the retention window if Windows.old is intact, and copy any new files out before attempting the upgrade again.
For a failed upgrade with a specific error code, see 26H2 upgrade failed with 0x800F0922.
Related Articles
- 26H2 Upgrade Failed 0x800F0922
- Back Up Before the 26H2 Update
- System Reserved Partition Too Small for Updates
- Recover Files After a Failed 26H2 Upgrade
- Can I Extend the C Drive From Another Disk
Products
Articles & Tutorials
- Data Recovery
- Data Backup
- File Recovery
- File Backup
- System Backup and Restore
- Disk and Partition Clone
- Technical articles
- Mobile articles
- Disk Master Help
- Windows Data Recovery Tutorials
- Windows Secure Delete Tutorials
- Windows Partition Management Tutorials
- Windows File Backup and Restore Tutorials
- Windows System Backup and Restore Tutorials
- Windows Disk Backup and Restore Tutorials
- Windows Clone Tutorials