Fix 0xC1900208: Incompatible App Blocks Windows Upgrade
Quick Navigation:
- What 0xC1900208 and 0x4000C Report
- Find the App That Fails the Check
- Uninstall the Blocker Cleanly
- Image the System, Then Retry
- Frequently Asked Questions
The upgrade stops before the download finishes and Windows reports 0xC1900208, usually shown together with the result code 0x4000C, along with a note that an app or driver is not compatible with the new version. The current build is untouched, nothing was installed, and the same message returns every time the attempt is repeated. The pair of codes is not a failure of the download or of the disk, it is the result of the compatibility assessment telling setup that something on the machine cannot travel to the new build. This guide shows how to name that program, remove it without leaving traces, and protect the installation before another attempt.
What 0xC1900208 and 0x4000C Report
Windows evaluates a machine before it upgrades it. The assessment collects the applications registered for startup, the services and filter drivers that load with the system, and the device drivers in the driver store, then compares that list with the compatibility data Microsoft and the vendors publish for the new release. When an entry is known to break the upgrade, or when the entry cannot be carried across at all, setup stops and returns 0xC1900208 together with a result code. The 0x4000C part is the assessment result itself, which is how the same error can appear with a slightly different decimal value on different machines.
The stop is deliberate. A program that only runs in the user session can be reinstalled afterward with no harm, but a program that installs a kernel filter has to be present during the upgrade and may not survive it. Setup cannot unload such a component later, so it refuses to start rather than risk a system that cannot boot or cannot be repaired from within Windows.
Old versions of security suites are the most common blocker, followed by applications that install their own disk or file system filters: backup tools with snapshot drivers, encryption clients, virtual disk and container drivers, and some VPN clients with virtual adapters. Legacy driver packages from hardware that has been replaced, and vendor utilities that hook the setup process, appear on the same list. The age of the program matters less than what it installs; a small utility with a signed kernel driver can block an upgrade that a large application without one passes.
0xC1900208 also appears when the blocking item is a driver that the system no longer uses but still keeps. Windows keeps a copy of every driver package it has ever installed, and the assessment reads that store. A printer, a capture card, or a Wi-Fi adapter that was removed two years ago can therefore stop an upgrade today.
Find the App That Fails the Check
Begin with the text in the error window. The Windows Update page and the Installation Assistant usually show a compatibility message that names the application, sometimes several of them, before the numeric code. Copy the names exactly, including the version in brackets, because a vendor may ship a fixed build under the same product name.
If the window lists nothing, read the assessment results that setup writes to disk. In File Explorer, show hidden items and open C:\$WINDOWS.~BT\Sources\Panther; the XML report in that folder records each app and driver that was examined, and setupact.log records the same pass in plain text. Search for the words block, incompatible, and appraiser to jump to the relevant lines. Windows Update, Event Viewer, and these setup logs are Microsoft tools built into Windows, not features of Qiling Disk Master, and here they are used only to read what the assessment found.
Add the startup and driver views. Task Manager shows the programs that launch at sign-in on the Startup tab, and Device Manager with Show hidden devices enabled reveals drivers whose hardware is gone. Both lists are short, and an entry that is flagged in the report almost always has a matching entry in one of them.
Write the result down before changing anything. You will need the exact product name to confirm that the block is gone after removal, and you will need the same name to reinstall the correct version once the new build is running.
Uninstall the Blocker Cleanly
Uninstall, do not disable. Turning a program off in the startup tab, or pausing real-time protection in a security suite, leaves its driver and its service registered, and the assessment reads the registration rather than the running state. Use Settings and then Apps to remove ordinary programs, and use the vendor removal tool for security suites and encryption clients, because those tools also delete the filter drivers and the shell extensions that a normal uninstall leaves behind.
Restart after the removal, even when the installer does not ask for it. A file system filter is unloaded only at boot, so an attempt made in the same session can still see the component and return the same code. If the product was a security suite, restart twice and check Services for any entry that still carries the vendor name.
Then clear the leftovers. Remove the startup entries that relaunch a program you no longer use, and uninstall the driver package of a device that is gone: open Device Manager, show hidden devices, right-click the greyed entry, choose Uninstall device, and tick the box that deletes the driver software. Old virtual network adapters and virtual disk drivers deserve the same treatment, because they behave like hardware to the assessment even though nothing is plugged in.
Keep the uninstallers and the licence keys on another device. Removing a program is not the same as losing it, and every item you take out to pass the check is an item you will want back after the upgrade. When the list from the previous section is empty, reopen Windows Update and confirm that the compatibility message no longer appears before you continue.
Image the System, Then Retry
An upgrade rewrites the boot configuration and keeps a rollback copy that Windows deletes after a set period, which is why a file backup is not enough and a full system image is. Qiling Disk Master writes the system, boot, and recovery partitions into one image on a second disk, and that image can be restored from bootable media even if the machine never reaches the desktop again. Make the image after the blockers are removed and immediately before the next attempt.
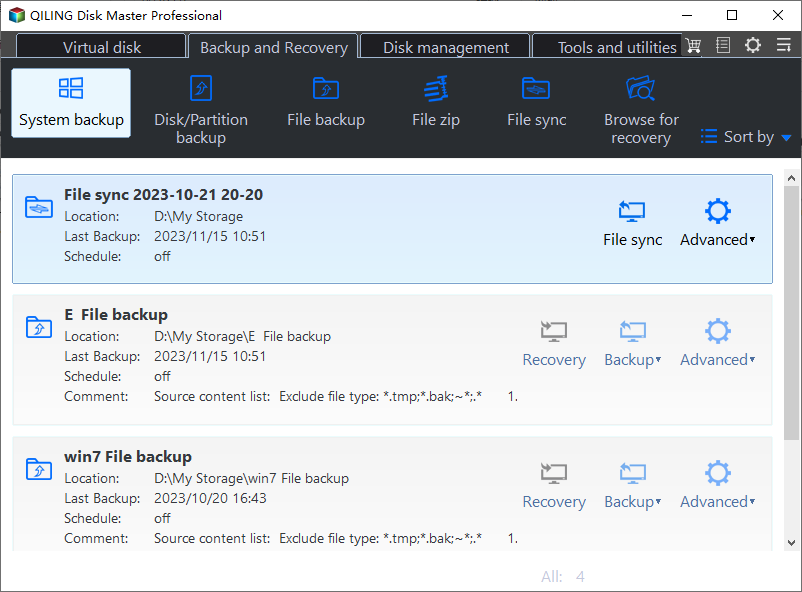
Step 1. Open System Backup and check the source. Choose System Backup on the Backup and Recovery tab. The system partition and the boot partition are selected together, and the recovery partition is listed as well; confirm that every entry carries a tick, because a missing boot partition produces an image that cannot start the machine after a restore.
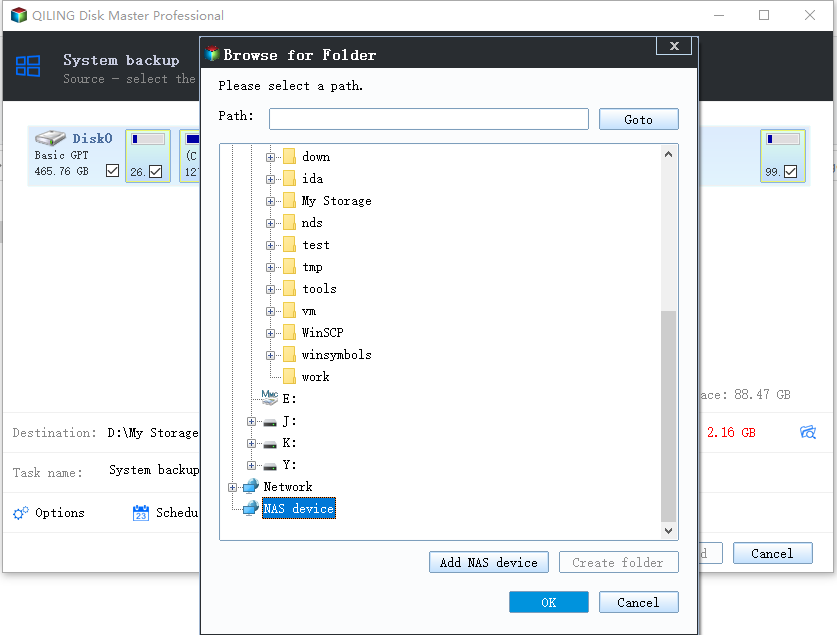
Step 2. Set a destination on a different disk. Use the folder icon beside Destination, choose a folder on a disk the upgrade will not write to, and read the free space under the path. Leave room for a second image, because the next run needs space before the older image is replaced.
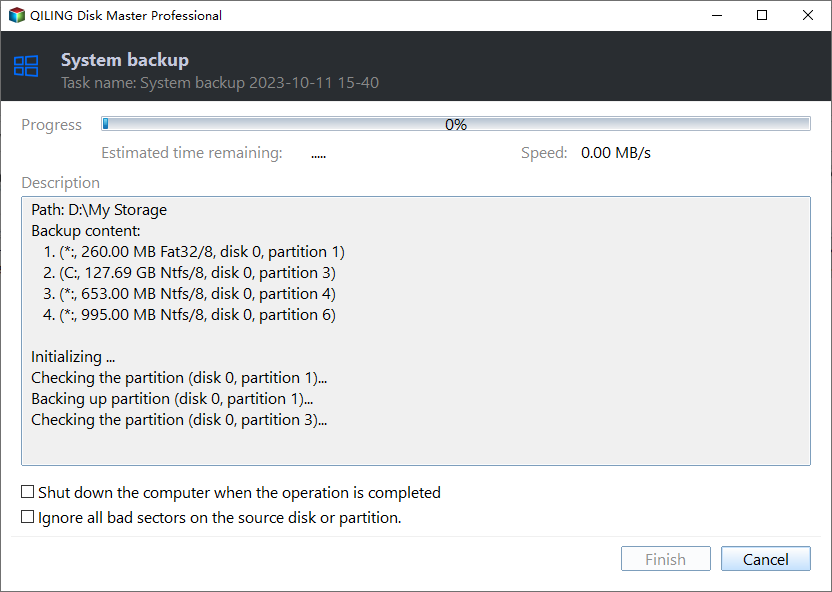
Step 3. Preview the task and click Proceed. Check the source, the destination, and the compression level in the preview, start the job, and leave the machine alone until the window reports that the backup has completed. Note the date of the image, because that timestamp is what you will look for if a restore is ever needed.
Run the upgrade again once the image exists. If it fails in a different place, or if the restart ends on a recovery screen, boot the Qiling media and use System Image Recovery to return to the build that worked. After the new build is running and has installed its first round of updates, reinstall the programs you removed, using versions the vendor lists as supported for the new release.
Frequently Asked Questions
Does 0xC1900208 damage the current installation?
No. Setup stops at the assessment stage, before it writes to the system partition, so the current build keeps working. The risk appears only when an upgrade is forced past the check or interrupted during the copy phase, which is why the diagnosis comes first and the image comes second.
Can I keep the app and still upgrade?
Only if the vendor ships a build that passes the check. Install the newest release from the vendor, restart, and retry; if the same name still appears in the report, that version is not certified for the new release and has to be removed for the duration of the upgrade.
Why does an app I uninstalled still appear in the report?
Because something of it remains, usually a startup entry, an orphaned service, or a driver package in the store. Check the Startup tab, Services, and Device Manager with hidden devices shown, then rerun the assessment and confirm the name is gone.
Related Articles
- Windows 11 26H2 Upgrade Error 0x8007001F: Device Failure
- Windows 11 24H2 Install Error 0x800F0991: Missing Package
- Windows 11 26H2 Setup Error 0x8007000D: Install Files Damaged
- Fix Windows Update Errors in Windows 11
- Windows 10 Will Not Update: Causes and Fixes
Products
Articles & Tutorials
- Data Recovery
- Data Backup
- File Recovery
- File Backup
- System Backup and Restore
- Disk and Partition Clone
- Technical articles
- Mobile articles
- Disk Master Help
- Windows Data Recovery Tutorials
- Windows Secure Delete Tutorials
- Windows Partition Management Tutorials
- Windows File Backup and Restore Tutorials
- Windows System Backup and Restore Tutorials
- Windows Disk Backup and Restore Tutorials
- Windows Clone Tutorials