Write Protected USB Format Tool for Windows 11 Free Download
When a USB drive becomes write-protected, Windows 11 may stop you from copying, deleting, or formatting files. You may see a message saying the disk is write-protected, even when the drive worked before.
Before formatting, copy important files if the drive is still readable. Formatting can erase data, and removing write protection does not repair every damaged USB drive.
Why Is the USB Drive Write-Protected?
- The USB drive has a physical lock switch.
- Windows registry or disk attributes mark the drive as read-only.
- The file system is corrupted.
- The USB drive is failing and has switched to read-only mode.
Use Qiling USB Format Tool After Removing Write Protection
Qiling Partition Manager can help format a USB drive after the write protection is removed. It is useful when Windows File Explorer or Disk Management cannot complete the format.
Step 1. Connect the USB drive to your Windows 11 PC. Check whether the drive has a physical lock switch, and clear read-only status with Windows tools first if the USB is still protected.
Step 2. Open Qiling Partition Manager and identify the USB drive by brand name, capacity, and partition size. Make sure you do not select an internal Windows disk.
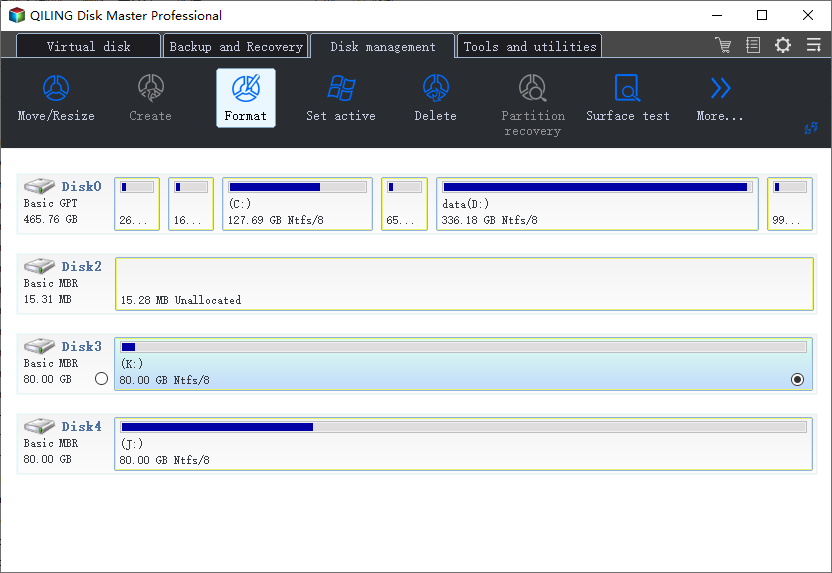
Step 3. Choose Format. Enter a partition label if needed, then select a file system: FAT32 for broad compatibility, exFAT for large files and modern devices, or NTFS for Windows-only use.
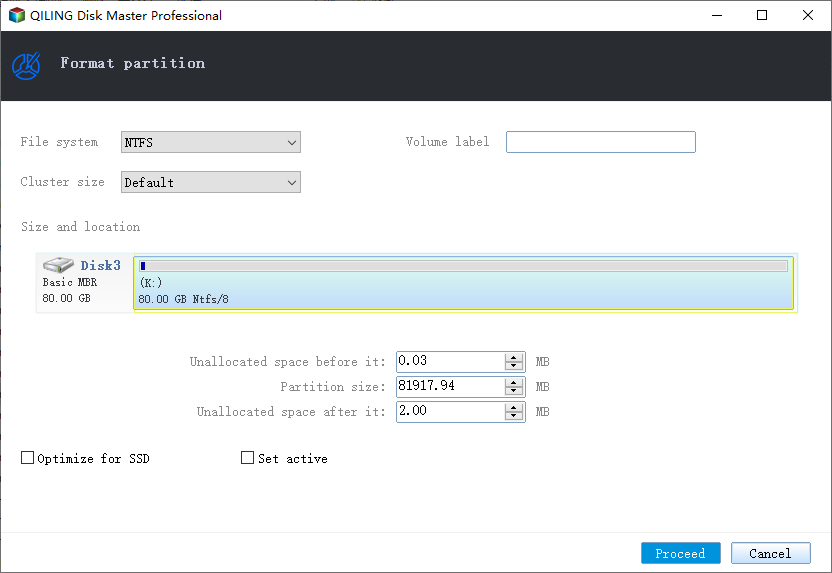
Step 4. Confirm the warning after you have copied or recovered important files. Formatting erases the selected partition.
Step 5. Click Proceed to execute the pending operation. When it finishes, reconnect the USB drive and test whether you can copy a small file to it.
Manual Ways to Remove USB Write Protection
Check the lock switch first. If there is no switch, you can try DiskPart with the command attributes disk clear readonly. Advanced users can also check the Windows registry, but wrong registry changes may cause system problems.
For an SD card version of this guide, see SD card write-protected format software.
Conclusion
A write-protected USB drive can often be fixed by clearing the read-only status and formatting the drive. If the drive still returns to read-only mode, back up or recover data first and consider replacing the device.
For the separate Remove disk readonly and format controls, see the step-by-step USB read-only and format guide.
Related Articles
- Write Protected SD Card Format Software Free Download
- Write Protected USB Format Tool / Removal Software Free Download
- RAW USB Drive Recovery
Products
Articles & Tutorials
- Data Recovery
- Data Backup
- File Recovery
- File Backup
- System Backup and Restore
- Disk and Partition Clone
- Technical articles
- Mobile articles
- Disk Master Help
- Windows Data Recovery Tutorials
- Windows Secure Delete Tutorials
- Windows Partition Management Tutorials
- Windows File Backup and Restore Tutorials
- Windows System Backup and Restore Tutorials
- Windows Disk Backup and Restore Tutorials
- Windows Clone Tutorials