Recover Files After a Failed Windows 11 26H2 Upgrade
Quick Navigation:
- What a Failed 26H2 Upgrade Leaves Behind
- Read the Old Installation From Another System
- Restore Folders From a Backup Image
- Scan the Unbootable Volume
- Frequently Asked Questions
A 26H2 upgrade that stops halfway leaves three possible states: the machine rolls back to the previous version, it restarts in a loop without reaching the desktop, or it stays on a black screen because the boot files no longer match the installation. In all three cases the drive still holds the documents, photos, and mail that were there before the upgrade started. The old installation is usually kept in a folder named Windows.old, and even when that folder is missing or incomplete, the user profiles remain on the volume. The mistake to avoid is letting Windows clean up, reset, or reinstall before the data has been copied. This guide covers where the files are, how to reach them from another system, and how to recover them to a separate disk.
What a Failed 26H2 Upgrade Leaves Behind
Setup does not edit the old installation in place. It copies the existing Windows folder into Windows.old, builds the new system beside it, and only removes the old copy after the new one has proved that it can start. When the process fails at a driver stage or during the migration of settings, the rollback uses that same copy to return to the previous build. A rollback that completes is the good outcome, and it usually restores the desktop as it was.
The trouble starts when the rollback cannot finish. Setup may stop between undoing changes and restarting, the machine may alternate between the logo and a recovery screen, or the boot configuration may end up pointing at a volume that no longer starts. The old folder can then be left half written, marked hidden and read-only, or stripped of the permissions that let your account open it. Windows.old also carries an expiry date, and Storage Sense or Disk Cleanup will delete it about ten days after the upgrade unless those tools are turned off first.
Your files live outside that folder as well. Profiles sit under Users on the system volume, with Desktop, Documents, Downloads, Pictures, and the application data that holds mail, browser sessions, and chat history. Those paths survive a failed upgrade because setup does not move them; it only changes the system files around them. A volume that shows as RAW after the failure is a different problem, and it needs a scan rather than a folder copy.
There is no benefit in repeating the upgrade. Each attempt writes to the system volume, extends the time Windows keeps the old folder, and gives the rollback another chance to fail in a new place. Power the machine down and treat the drive as evidence until the files are out.
Read the Old Installation From Another System
Remove the drive and connect it to a working desktop with a spare data cable, or place a laptop drive in a USB enclosure. The volume then appears as ordinary storage, and you can browse it without starting the broken installation. If removing the drive is not practical, boot the machine from a Windows installation media or a rescue environment and use its file browser, but never choose the repair or install option from that menu.
Open the root of the system volume and look for Windows.old. Show hidden items and protected operating system files, because the folder carries both attributes after a failed upgrade. Inside it, Users holds the profiles that existed before 26H2, and Desktop, Documents, and Downloads are usually complete. Mail stored in Outlook data files and browser profiles sit deeper, under AppData in each profile.
Copy the folders to another disk instead of moving them. A move deletes the source as soon as the transfer reports success, and a drive that has just survived a failed upgrade is not a device to trust with that kind of shortcut. When access is denied, take ownership of a copy, not of the original folder, so the permissions on the source stay as they were.
Two things must not happen at this stage. Do not run Disk Cleanup, Storage Sense, or the cleanup option in Settings, because they remove Windows.old and with it the easiest copy of your profile. Do not let Windows boot far enough to finish the upgrade, since the next stage may delete the folder before you have read it.
Restore Folders From a Backup Image
If a system image or a file backup was taken before the upgrade, that copy is the safest source of all. It holds the files in the state they had when the backup ran, it is not affected by the failed upgrade, and it can be read without touching the machine that will not boot. Qiling Disk Master can open such an image and restore selected folders instead of the whole system.
Use File Restore, choose the backup task and the time point you want, then tick the folders to bring back. Restore them to a new location on a working disk, such as a folder named after the date of the backup, so nothing on the failing drive is overwritten. Keeping the image intact matters: if a restored file turns out to be an older revision, you can mount the image again and pick a different point without repeating the backup.
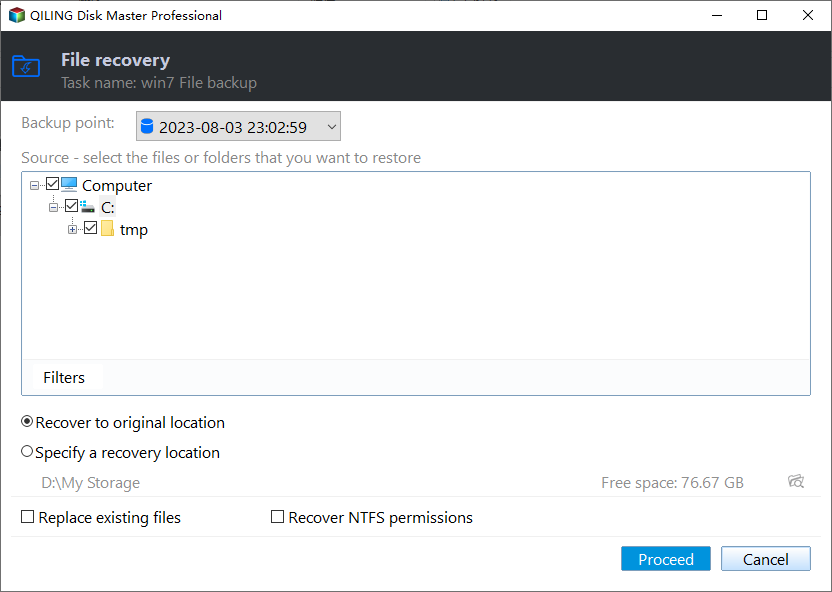
A backup also answers the question of whether a file existed before the upgrade. Compare the restored folder with what you remember, and note the items that are missing, because those are the ones a scan of the old volume has to find. Do not delete the image after the restore; it is the fallback if the boot repair writes over something useful.
Scan the Unbootable Volume
When there is no backup, or the backup is older than the files you need, scan the volume that holds the failed installation. Qiling Disk Master can read a physical disk or an image taken from it, list the folders it finds, and restore the selection to a different drive. The wizard writes nothing to the source, which is why it works on a disk that Windows refuses to start.
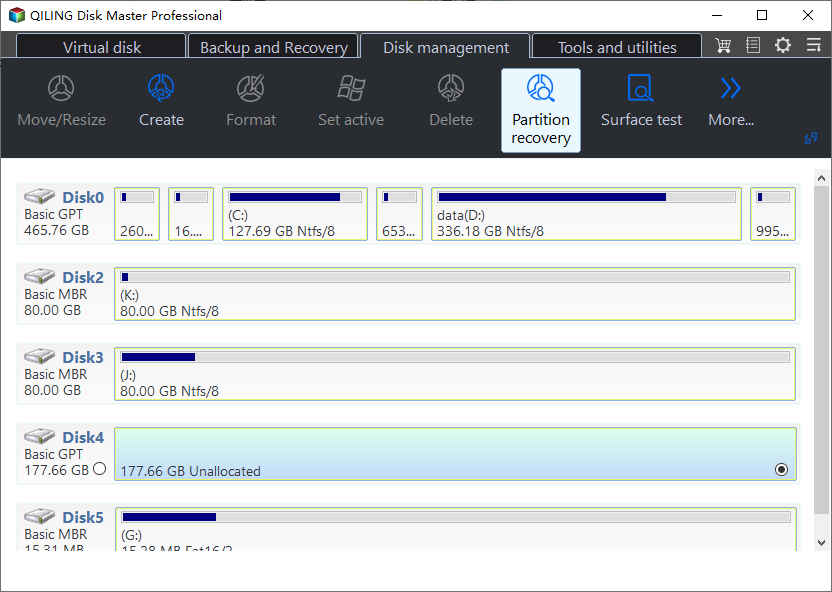
Step 1. Select the disk or the image that holds the old installation. Attach the drive to a working computer and open the recovery wizard. Pick the physical disk by model and capacity, or choose the image file if you cloned the drive before the upgrade. If the volume still has a letter and opens in Explorer, select that partition to save time; a disk that shows as RAW or unallocated has to be scanned at disk level.
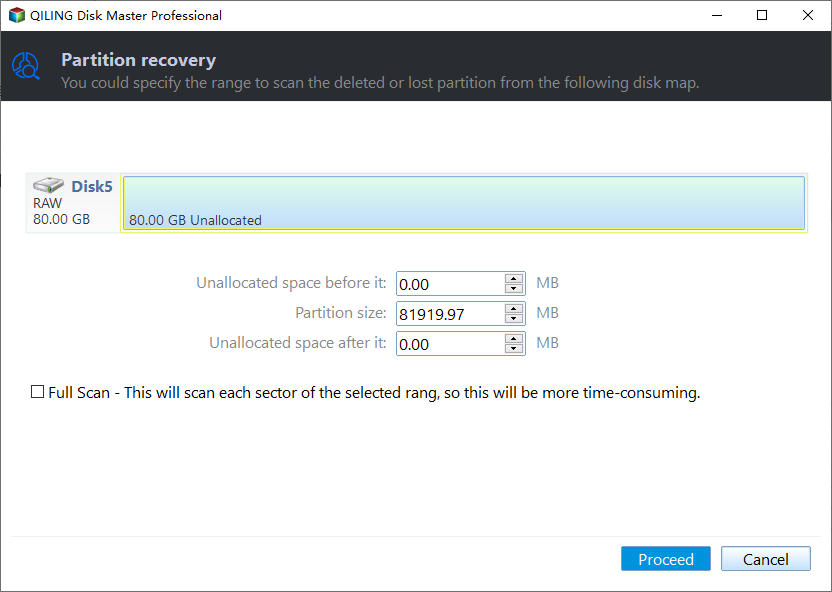
Step 2. Scan the volume and the space around it. Run the scan across the whole partition, and enable the deep scan when the file system is damaged or the volume reports as RAW. The deeper pass rebuilds directory entries from the records it finds, which is what brings back the folder names that a failed rollback left unreachable. Let it finish before you judge the result.
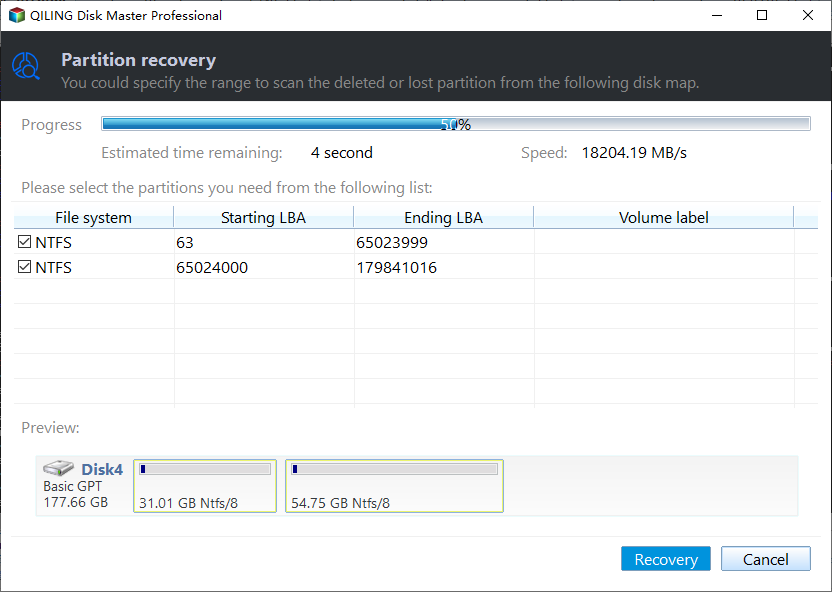
Step 3. Preview the files and restore them to another disk. Sort the results by path to find Users first, then check a few documents, photos, and mail files by opening their previews. Select the folders you need and save them to an external drive or a second internal disk. Never restore them to the volume being scanned, and keep the old installation untouched until every copied file opens.
With the data safe, the machine itself is a separate decision. A startup repair or a rebuild of the boot files is worth trying when the volume is healthy, and a clean install is the reliable choice when the upgrade left the system in an unknown state. Both write to the drive, so neither should start before the folders you care about have been copied and opened.
Frequently Asked Questions
Are my files gone if the upgrade rolled back?
No. A rollback returns the machine to the previous build and leaves the user profiles where they were. Check the profile folders after the machine starts, and if some documents are missing, look in Windows.old before it expires and before any cleanup tool runs.
The PC restarts at the same percentage every time. Can I still recover?
Yes, and the sooner the better. Each restart writes to the system volume and may move the upgrade further along. Power the machine off, take the drive out, and read it from another computer instead of letting the loop continue.
Will a repair install keep my programs and files?
A repair install keeps files, settings, and most applications, but it still rewrites the system volume. Copy the data you cannot lose to another disk first, so a repair that fails halfway cannot take the only copy with it.
Related Articles
- Recover Files After a Failed Windows 10 ESU Upgrade
- Recover Files After KB5132061 Leaves Windows Unbootable
- Windows 11 26H2 Upgrade Error 0x8007001F: Device Failure
- Recover Files After a Windows Reset Deleted Everything
- System Image Recovery in Windows 11/10
Products
Articles & Tutorials
- Data Recovery
- Data Backup
- File Recovery
- File Backup
- System Backup and Restore
- Disk and Partition Clone
- Technical articles
- Mobile articles
- Disk Master Help
- Windows Data Recovery Tutorials
- Windows Secure Delete Tutorials
- Windows Partition Management Tutorials
- Windows File Backup and Restore Tutorials
- Windows System Backup and Restore Tutorials
- Windows Disk Backup and Restore Tutorials
- Windows Clone Tutorials