Recycle Bin Empties Itself: How to Stop Recycle Bin Auto Deletion in Windows 7/8/10
PAGE CONTENT:
Part 1. How to Automatically Empty the Recycle Bin on Schedule
When you delete a file or folder, it's not actually erased from your computer. Instead, it's moved to the Recycle Bin, where it continues to take up space on your hard drive, until you manually empty it. This can lead to forgotten automatic steps.
In this Windows 10 guide, we'll show you how to automatically empty the Recycle Bin using the Task Scheduler, allowing you to optimize your hard drive space while still giving you enough time to recover deleted files.
1. To access the Task Scheduler, open the Start menu, type "Task Scheduler" in the search bar, and press Enter. This will open the Task Scheduler application, where you can manage and schedule tasks on your computer.
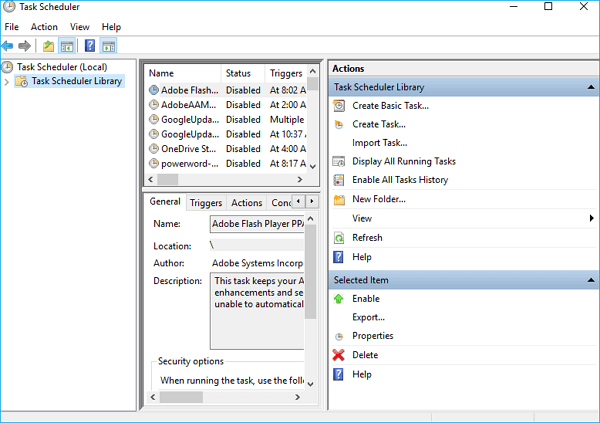
2. Right-click Task Scheduler Library and click New Folder.
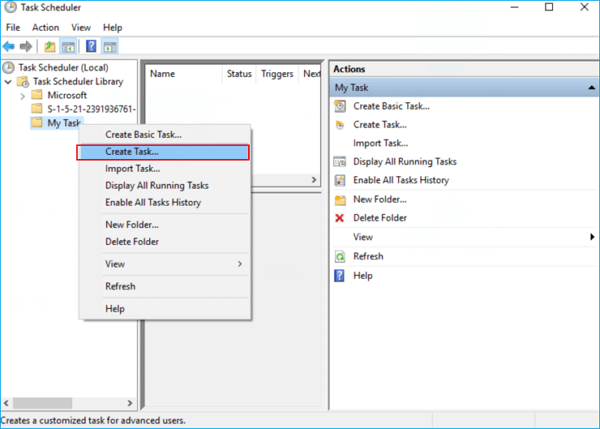
3. To keep tasks organized, create a folder named My Tasks or a similar descriptive name. Right-click this folder and select Create task to create a new task within it. This allows for easy separation from system tasks and keeps your tasks organized.
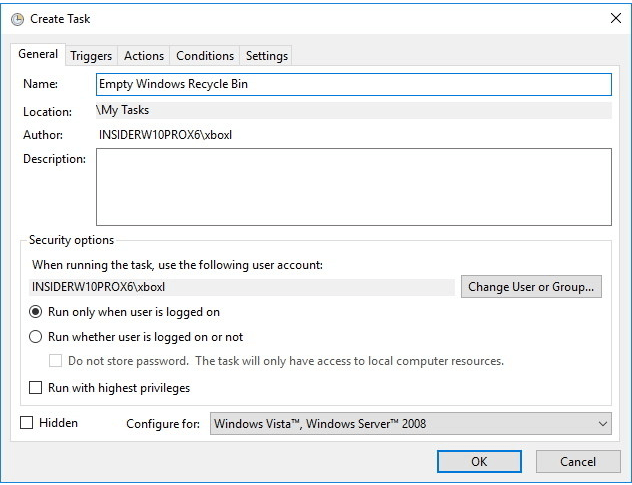
4. On the General tab, enter a name for the task, such as Empty Windows Recycle Bin, and then click Next.
5. To create a trigger for a task, navigate to the Triggers tab and click on the "New" button to initiate the process of setting up an action that will trigger the task.
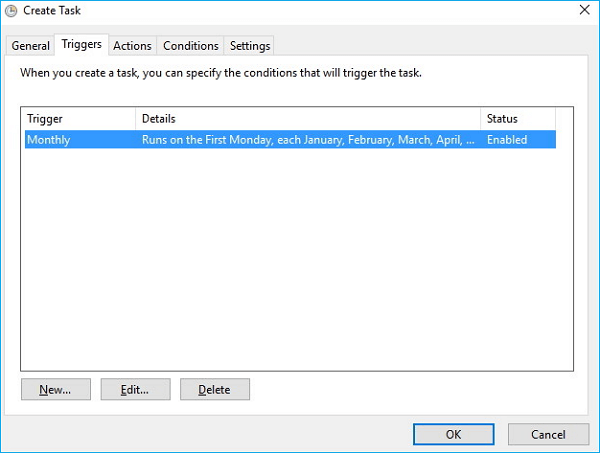
6. For the purpose of this guide, I'll select and configure On a schedule, but you can pick from a number of trigger actions, including At log on, At startup, On an event, and more.
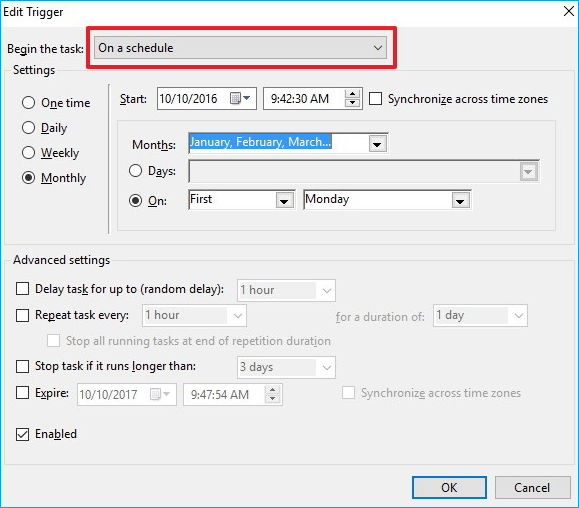
If you're using the schedule option as a trigger, consider using the Weekly or Monthly option instead, which provides you some time to recover deleted files.
7. On the Actions tab, click New.
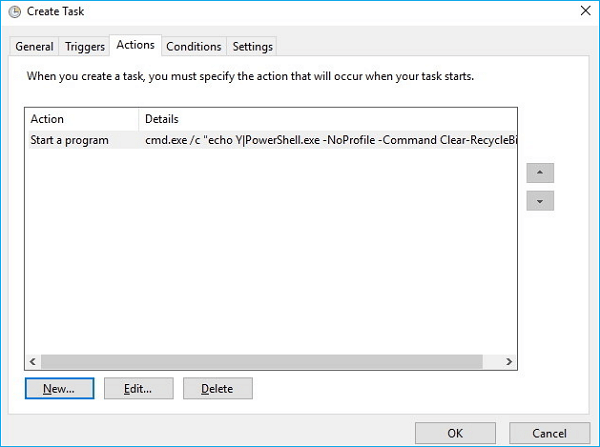
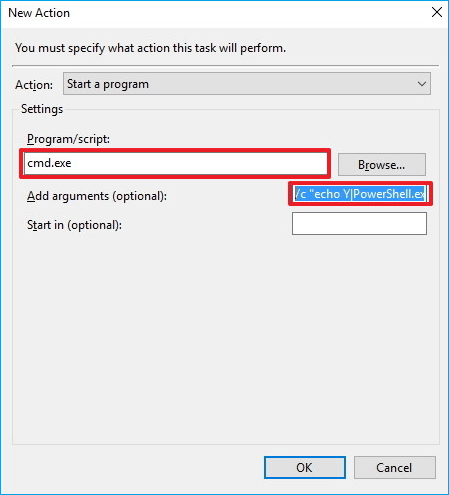
- Under Settings, on Programs/script enter cmd.exe.
- Under Settings, on Add arguments enter the following argument and click OK:
/c "echo Y|PowerShell.exe -NoProfile -Command Clear-RecycleBin" Then click OK to complete the task.
Once you've finished the steps, the task will run automatically at the specified trigger time, eliminating the need for manual intervention.
Part 2. Stop Recycle Bin Automatically Deletion Windows 10
Two methods are provided below to help you stop recycle bin automatically deleting files.
Method 1. Delete the Task Scheduler
If you've set up a task to automatically empty your Recycle Bin, you can stop this process by deleting the task, which will halt the auto-deletion immediately.
Method 2. Change Recycle Bin Settings
Step 1.Open Settings app. Navigate to System > Storage.
Step 2.To free up space, click on the "Change how we free up space" link, then uncheck the option to delete files that have been in the recycle bin for over 30 days.
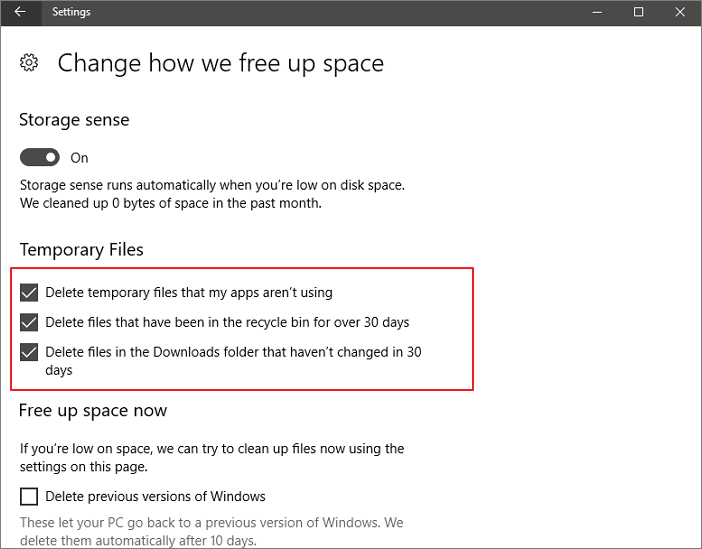
Then, your Recycle Bin will stop deleting files automatically.
Part 3. How to Recover Files from Recycle Bin
If you've lost important files from the Recycle Bin, you can still recover them using Deep data recovery, a user-friendly tool that helps restore permanently deleted files in all Windows versions. This recovery tool allows you to preview deleted files before purchasing, and it's especially helpful in recovering files from the emptied Recycle Bin in Windows 10/8/8.1/7/XP/Vista.
Step 1: Select file types that you want to recover

Step 2. To recover files from emptied Recycle Bin on Windows, hover the mouse pointer over the "Recycle Bin" option under the "Locations" section and click "Scan".

Step 3.Qiling data recovery software initiates a quick scan to recover all deleted files, followed by an automatic deep scan to uncover more lost files. Once the scanning process is complete, users can utilize the "Filter" feature to specifically select file types, such as Pictures, Word documents, or videos.
Step 4.Once you've located the files you want to restore, you can double-click them for a full preview. From there, select the target files and click "Recover." To avoid data overwriting, consider saving the recovered files to a different volume or an external USB drive.

Related Articles
- How Much Does It Cost to Recover Data from a Hard Drive (2022)
- [Solved] Cannot Connect to Camera Please Make Sure to Close Other Apps
- [Solved] Seagate External Hard Drive Beeping and Not Recognized? Get Complete Guide
- What Are Effective Ways to Solve Excel 2016 Not Saving Changes
- Can't Backup LINE Chat? Fix in 5 Ways [Guide Updated]
This article explains why you can't backup LINE chat and provides a solution to fix the issue of not being able to backup LINE chat on your phone. It also recommends Qiling MobiSaver to help recover LINE chat on iPhone/Android devices without a backup. - Can't See Files on External Hard Drive Mac? Find Missing Files Here
If you're unable to see files on an external hard drive on your Mac, follow the guide to resolve the issue.