How to Save Files Before Factory Reset Windows 11 [2024 Updated]
After using a computer for a while, it can start experiencing issues like slow performance, cluttered storage, and even system crashes.
Factory resetting a computer will restore it to its original state, improving performance and solving system problems, but it will also delete all files stored on the PC.
How to save files before factory reset Windows 11? Here are 4 solutions to solve this issue.
- Save Files Before Factory Reset Windows 11/10 with Backup Software
- Save Files Before Factory Reset Windows 11/10 with File History
- Save Files Before Factory Reset Windows 11/10 with OneDrive
- How to Reset Windows 11/10 without Losing Files
You can quickly navigate to the method you prefer by clicking on the quick navigation.
Save Files Before Factory Reset Windows 11/10 with Backup Software
To prevent data loss, the first and most recommended way is to use a third-party backup software, such as Qiling Disk Master Pro, to back up your Windows PC in advance.
Qiling Disk Master Pro is a popular auto-backup software for Windows 11/10/8/7 that allows for effortless creation of scheduled backup plans with its advanced functions.
Qiling provides a feature to back up specific files, app data, or even the entire disk, allowing users to save these copies on an external hard drive, a third-party platform, or in the 250GB free cloud space provided by Qiling, ensuring data security and accessibility.
After resetting Windows 11 or 10, Qiling Disk Master can restore all backed-up data quickly, in addition to its other features which include automatic backups, disk wiping, and data recovery from damaged or corrupted disks.
- Ability to migrate Windows to SSD.
- Create smart backup plans.
- Automatically clone a hard drive.
- Support for types of backup.
- Provide 24-hour customer service.
- Supports universal restore.
- Can create an ISO image from a hard drive.
Before factory resetting Windows 11/10, it's a good idea to save your files and data. Using Qiling Disk Master, you can create a backup of your system, transfer files to an external drive, or use a cloud storage service like OneDrive to keep your data safe.
Step 1. To start backup, click the backup tab page.
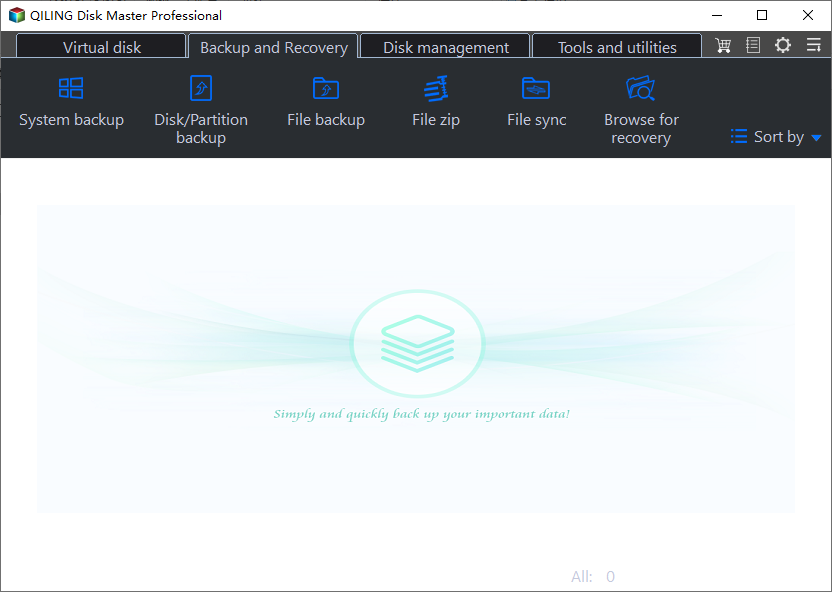
Step 2. There are four main categories of data backup: File, Disk, OS, and Mail, each serving a specific purpose in preserving and protecting important digital information.
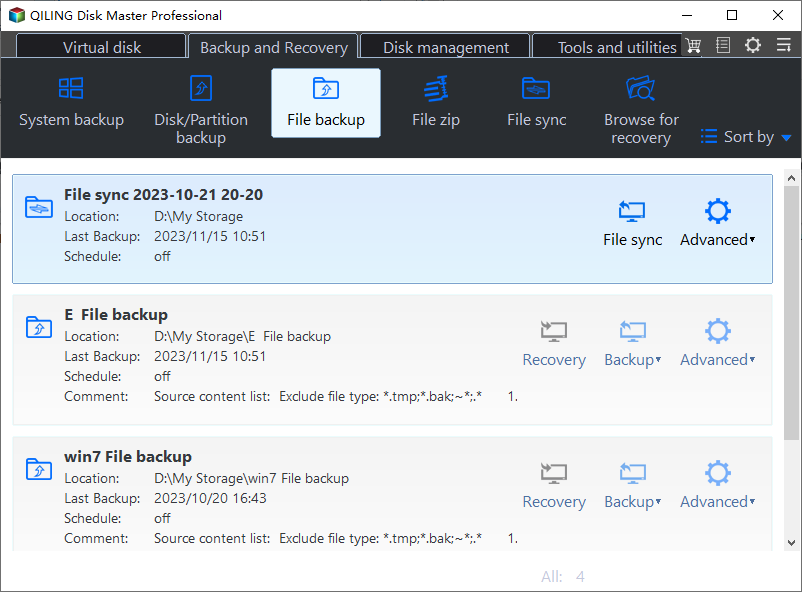
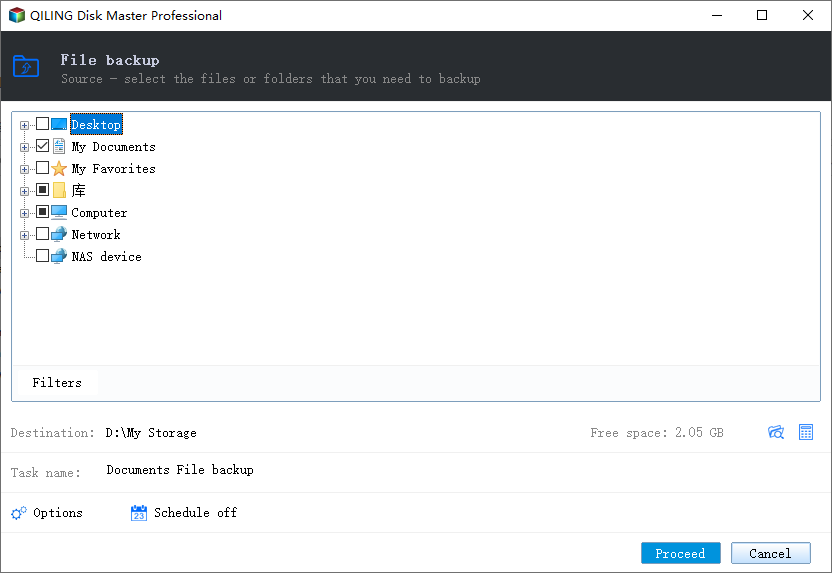
Step 3. Select the files to be backed up by expanding the directory on the left-hand side, which lists local and network files.
Step 4. Follow the instructions on the screen and select the location where you want to store the backup.
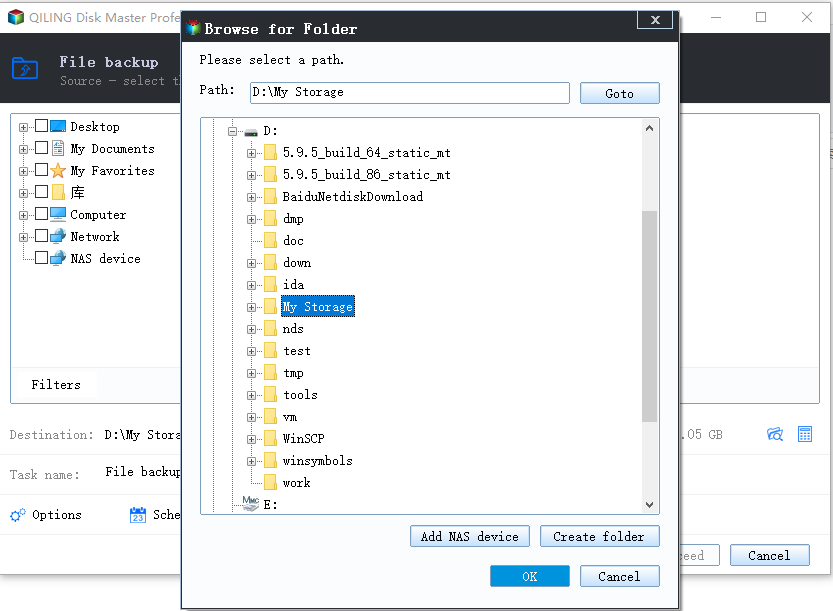
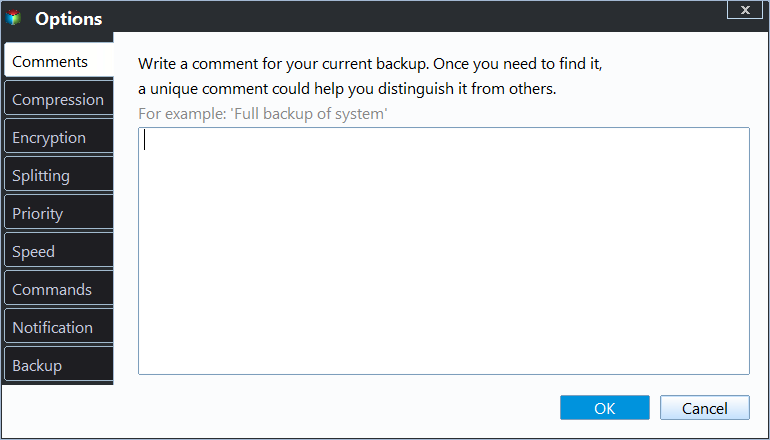
In the Backup Options section, you can encrypt the backup with a password, set a backup schedule, and choose to start the backup at a specific event in the Backup Scheme. This allows for customization of the backup operation to suit individual needs.
Step 5. Backups can be stored on a local disk, in Qiling's cloud service, or on a network attached storage device (NAS).
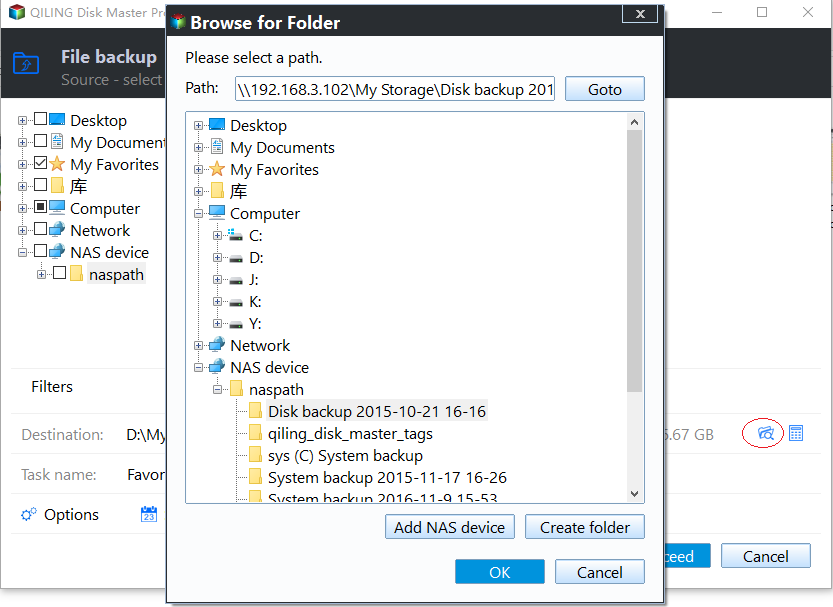
Step 6. Qiling Disk Master enables users to back up their data to a third-party cloud drive or the company's own cloud storage.
To back up your data to a third-party cloud drive, select Local Drive, scroll down to add Cloud Device and enter your account information.
Step 7. To start a backup, click on "Proceed" and the backup will be initiated. Once the backup process is complete, it will be displayed as a card on the left-hand panel. To manage the backup job in more detail, right-click on it.
Save Files Before Factory Reset Windows 11/10 with File History
Besides using third-party backup software, you can also back up your important files with the built-in feature provided by Windows -- File History.
The specific tutorial is as follows:
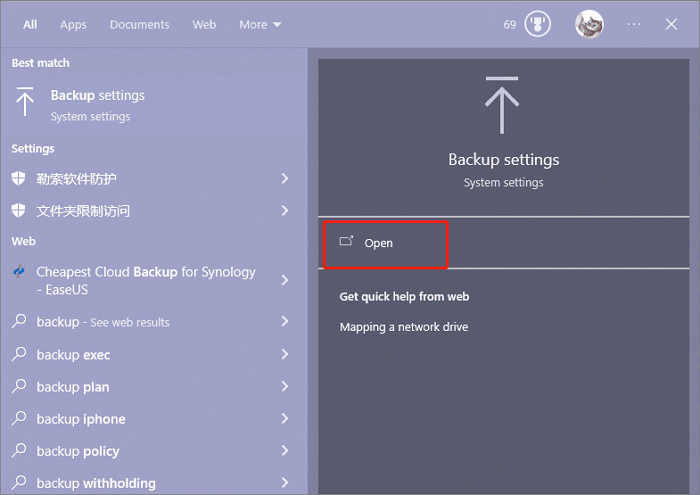
Step 1. To access the Backup Settings on Windows, open the search box and type in "Backup Settings," then select the Backup Settings program to open it.
Step 2. Plug an external hard drive into your Windows PC.
Step 3. To back up your computer using File History, navigate to the Back up using File History section, then click the "+" icon to add a drive to the backup process.
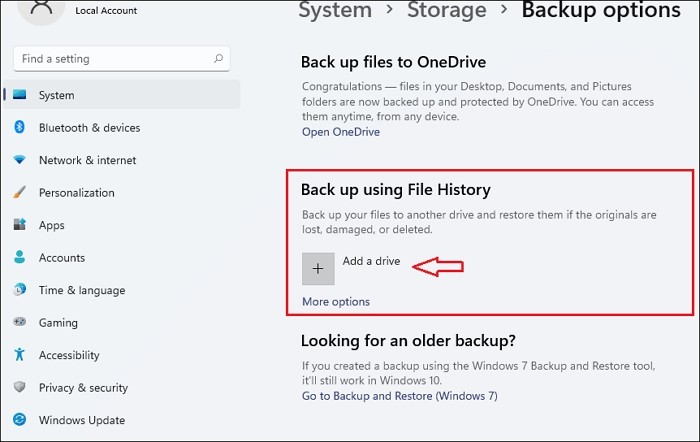
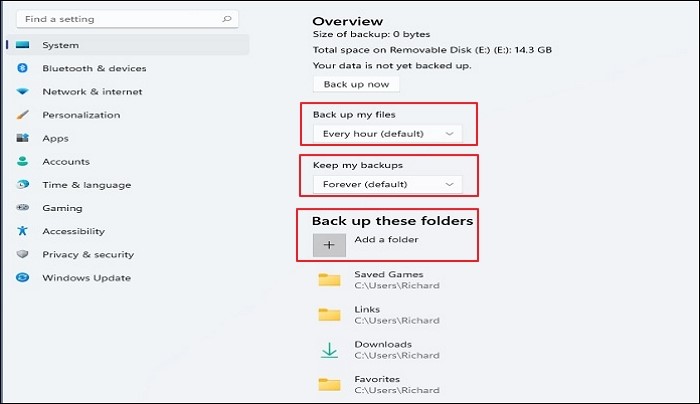
Step 4. You can select your HDD and Windows will automatically back up the data of your user folder every hour.
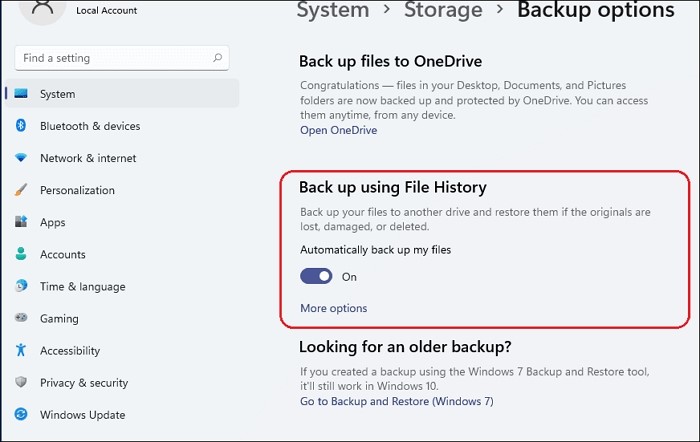
Step 5. To add more folders to back up, click on the "Add folder" button. This will allow you to select additional folders you want to include in your backup. You can also set more advanced backup settings by clicking on the "More options" button.
File History in Windows only backs up files in the libraries, desktop, and documents folders, as well as any files added to the "Save As" list in the default applications. It does not include system files, program files, personal settings, or app data. If you want to save other types of files, consider using Qiling Disk Master Pro for a more comprehensive backup.
Save Files Before Factory Reset Windows 11/10 with OneDrive
If you prefer cloud backup, you can also use OneDrive Backup in addition to Qiling Disk Master Pro.
Follow these steps to get your goal.
Step 1. To access the Backup Settings on Windows, simply type "Backup Settings" in the search box, and then open the Backup Settings program that appears in the search results.
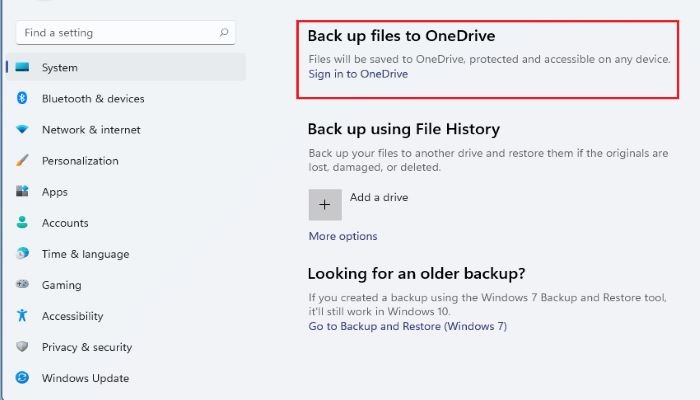
Step 2. To back up files to OneDrive, navigate to the "Back up files to OneDrive" section and click the "Sign in to OneDrive" button.
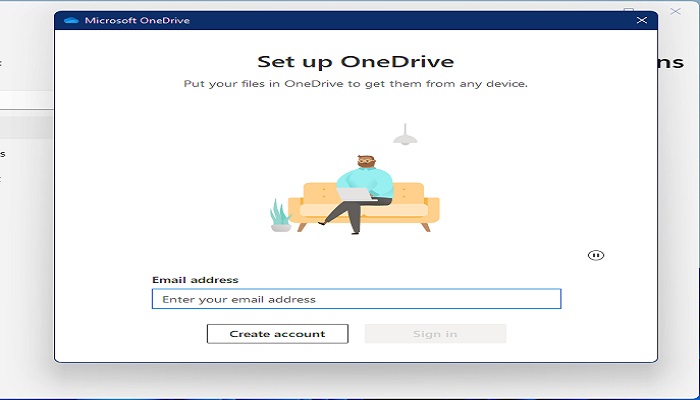
Step 3. A window will pop up, asking you to sign in to OneDrive with your Microsoft account.
Step 4. To save files to OneDrive, first, add the files you want to save to the OneDrive folder. The OneDrive folder is located under the local disk C, and you can access it by opening the Windows File Explorer and selecting the "OneDrive - personal" option on the left side of the window.
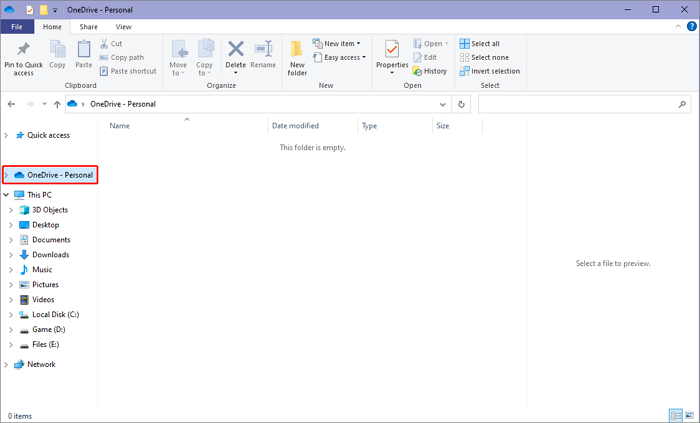
OneDrive, like Windows File History, primarily focuses on backing up common file types and does not offer the capability to create more complex backup solutions.
How to Reset Windows 11/10 without Losing Files
If you prefer not to back up your files separately, Windows 11 offers a "Keep my files" option during the factory reset process that preserves your personal files while removing apps and settings.
The steps below are offered for you to follow.
Step 1. To reset your Windows PC, open the Start menu, type "Reset" in the search box, and select the "Reset this PC" program from the results.
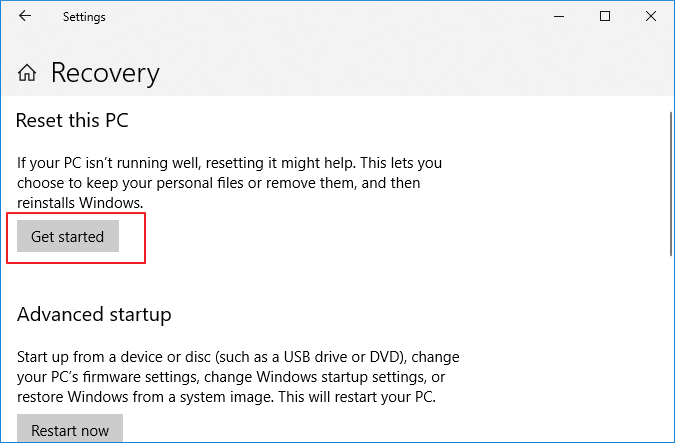
Step 2. On the pop-up windows, navigate to Recovery> Reset this PC> Get started.
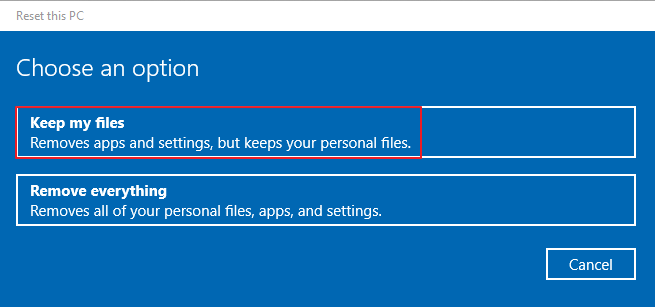
Step 3. Here are 2 options, select the "Keep my files" option. It will remove all apps and settings, but keep your personal files.
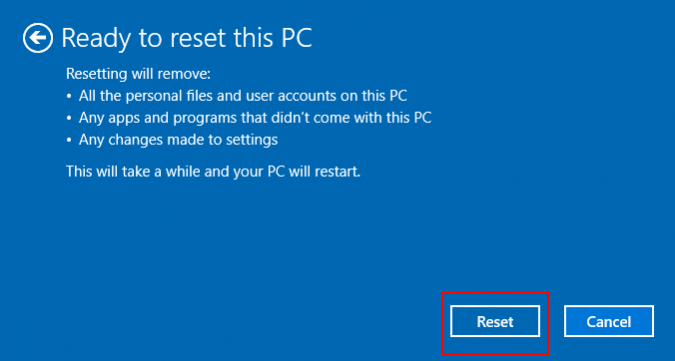
Step 4. To reset Windows 11, go to Settings > System > Recovery > Reset this PC. Then follow the prompts that Windows gives you and hit the Reset button to start the process.
Before attempting to reset your PC using the "Reset this PC" feature, be aware that it may not always be stable. To avoid potential problems, it's recommended to back up your files using one of the other methods described above before proceeding.
Conclusion
How to save files before factory reset Windows 11? You can achieve your goal in four ways, but I recommend using the offline backup software Qiling Disk Master Pro to create a comprehensive and smarter backup solution for your Windows 11. This software is not limited to file types and can support the backup and restoration of all computer data.
You can read these 2 posts to get more Windows backup tips.
FAQs
1. Will resetting Windows 11 delete files?
Resetting Windows 11 with the "Remove everything" option will delete all your files, restoring the computer to its original state and improving performance. However, you can choose the "Keep my files" option to preserve your personal files during the reset.
2. Where do I save files before a factory reset?
You can save files before a factory reset in Windows Backup settings by opening the settings and navigating to the Backup option, where you can either save your files with File History or back up your files to OneDrive Cloud.
Related Articles
- How to Repair Windows 7 Without CD in 3 Possible Ways
- How Do I Get 100GB Free Cloud Storage
- 3 Fixes to Completely Remove 0x0 0x0 Error for Windows 11/10/7
- Add Folder to OneDrive Backup Without Moving: 3 Working Ways
- [SOLVED] Laptop Keeps Freezing and Crashing
- Download the Lenovo OneKey Recovery Software
- How to Perform Windows Folder Backup [Step-by-step Guide]
This page covers Windows folder backup, elaborates on two ways to finish a Windows folder backup, and introduces a professional backup tool.
Products
Articles & Tutorials
- Data Recovery
- Data Backup
- File Recovery
- File Backup
- System Backup and Restore
- Disk and Partition Clone
- Technical articles
- Mobile articles
- Disk Master Help
- Windows Data Recovery Tutorials
- Windows Secure Delete Tutorials
- Windows Partition Management Tutorials
- Windows File Backup and Restore Tutorials
- Windows System Backup and Restore Tutorials
- Windows Disk Backup and Restore Tutorials
- Windows Clone Tutorials