How to Move Files to External Hard Drive Without Copying - 2 Alternative Ways
- 🙍♂️User case:
- You're looking for a way to copy files to an external hard drive without duplicating them on your computer, so you can back up your important graphic design files securely without wasting space.
Moving files to an external device can protect data from computer crashes, hard drive failure, or malware. It also helps free up local storage and keeps important files portable.
Copy and paste is simple, but it may be slow for large folders and can leave duplicate files behind. Users often look for faster ways to move files to an external hard drive without repeating manual copying.
3 Alternative Ways to Move Files to External Hard Drive Without Copying
To consider alternative methods, let's first compare their effectiveness and difficulty using the chart. This will give us a better understanding of the options before diving into each one individually.
| Methods | Effectiveness | Difficulty |
|---|---|---|
| 🥇Qiling Disk Master | Backing up files to external hard drives has never been smoother or easier, thanks to the simplicity of the process. With just a few clicks, you can securely transfer your important files to a separate storage device, ensuring they're safe and protected in case of any data loss or system failure. | ⭐ |
| File History | The process of automatically backing up files to an external hard drive requires setting up a complex system involving multiple software and hardware components. This typically involves configuring a backup software to periodically copy files from the computer to the external hard drive, as well as ensuring the external drive is properly connected and powered. | ⭐⭐⭐ |
| Backup and Restore | Auto backup files to an external hard drive, but it needs multiple steps. | ⭐⭐⭐ |
Way 1. Easily and Automatically Backup Files to External Drive With Freeware
If you need to transfer files or data from your computer to an external hard drive, Qiling Disk Master Free is a quick and easy solution. This program allows you to back up files, disks, partitions, and systems to any location, including external hard drives, USB, NAS, and cloud services, making it a convenient option for data transfer.
This software is compatible with various file types, allowing you to transfer photos, videos, Word, PowerPoint, Excel files, and more to an external hard drive for free, ensuring your files are safe and won't get lost.
Qiling Disk Master has a scheduled backup feature, which allows you to set automatic backups of specified files to a target location at regular intervals.
Qiling Disk Master offers differential and incremental backup options, allowing for efficient storage space usage and enabling users to save space for other information.
To move your important files to the external hard drive, download the tool and follow the steps to safely transfer your data.
Step 1. Click "Backup and recovery" tab page.

Step 2. There are four data backup categories: File, Disk, OS, and Mail. Clicking on File backup is the next step.
Step 3. Local and network files will be displayed on the left side, allowing you to browse and select the files you want to back up by extending the directory.
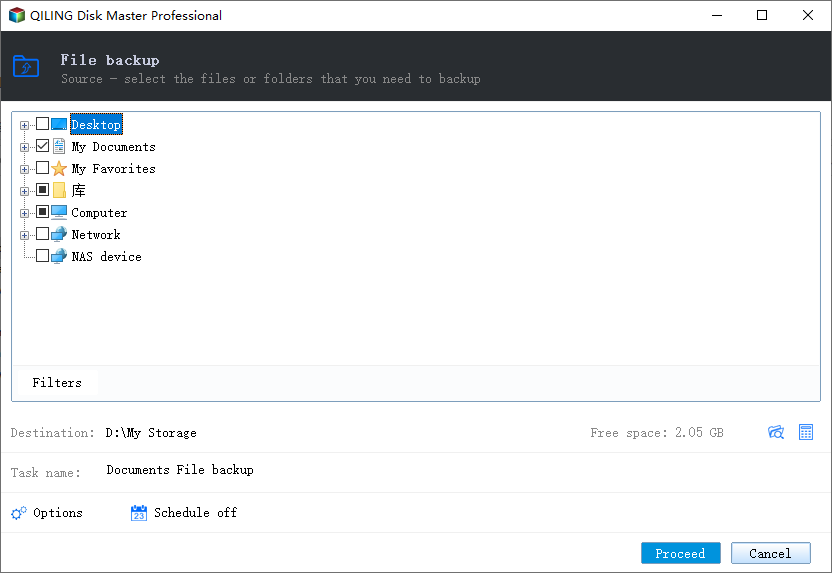
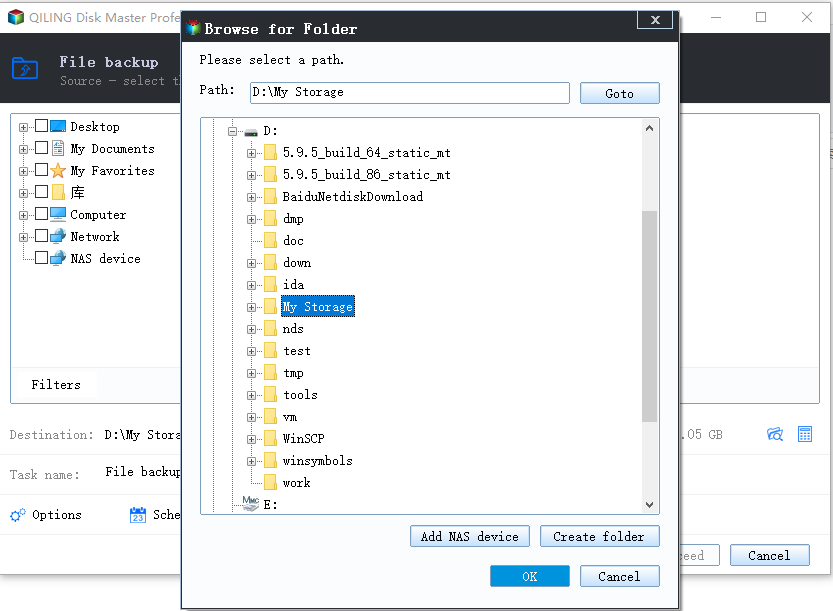
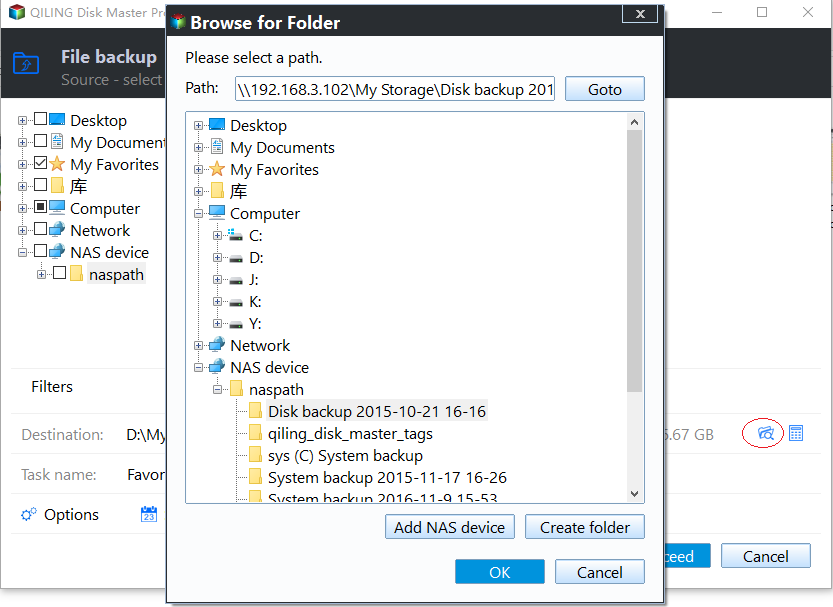
Step 4. Select the location where you want to store the backup by following the on-screen instructions.
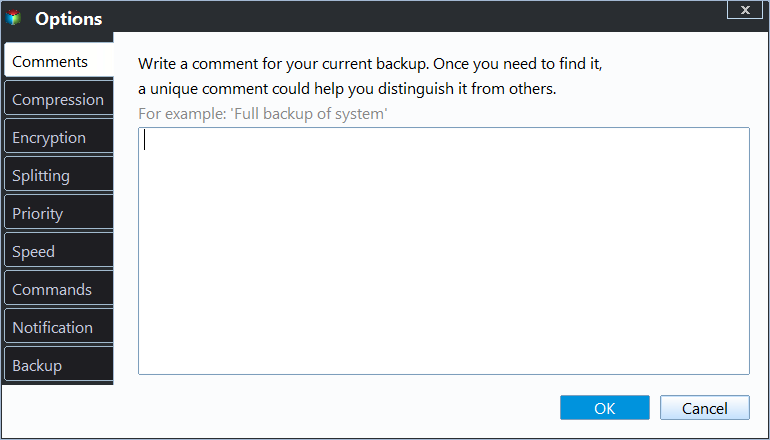
To encrypt the backup with a password, set up a backup schedule, and initiate a backup at a certain event, go to "Options" in "Backup Options" and "Backup Scheme" respectively. Other customization options for the backup process are also available.
Step 5. You can save the backup to a local disk, Qiling's online service, or a NAS.
Step 6. Qiling Disk Master allows customers to back up their data to both a third-party cloud drive and its own cloud drive.
To back up data to a third-party cloud drive, select Local Drive, scroll down to add Cloud Device, add your account, and then log in.
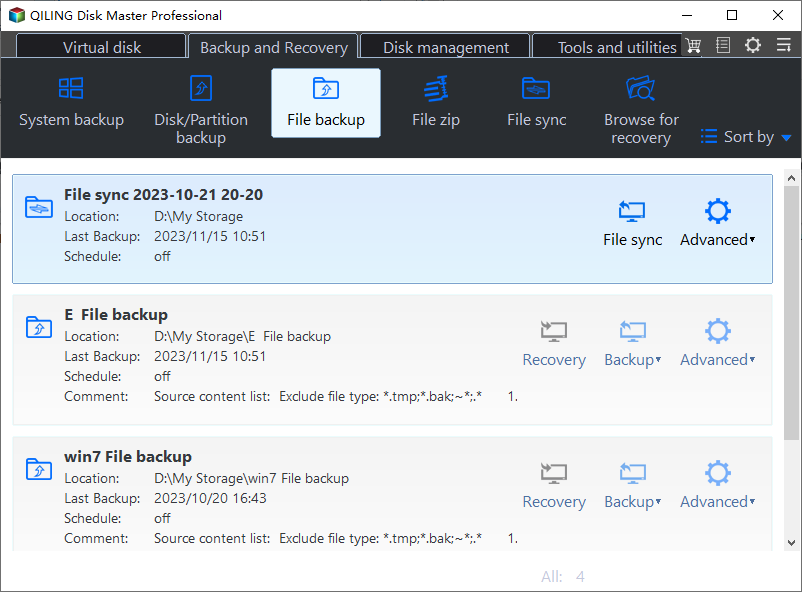
Step 7. To start a backup, click "Proceed" on the panel. Once the backup is complete, it will be displayed on the left side of the panel as a card. To manage the backup job further, right-click on it.
Further Reading: Clone External Hard Drive to Another External Hard Drive
Way 2. Move Files to External Hard Drive Using File History
If you don't want to use third-party software, Windows' built-in File History can back up Windows files to external hard drives or network destinations. It also supports automatic backup on a daily, weekly, monthly, or custom schedule.
File History backs up all files from Windows libraries by default, including desktop, documents, downloads, and more, requiring users to select specific files for backup and an external hard drive.
To transfer files to an external hard disk using File History, follow these steps. First, ensure that your external hard disk is properly connected and recognized by your computer. Next, go to the Control Panel and click on the File History icon.
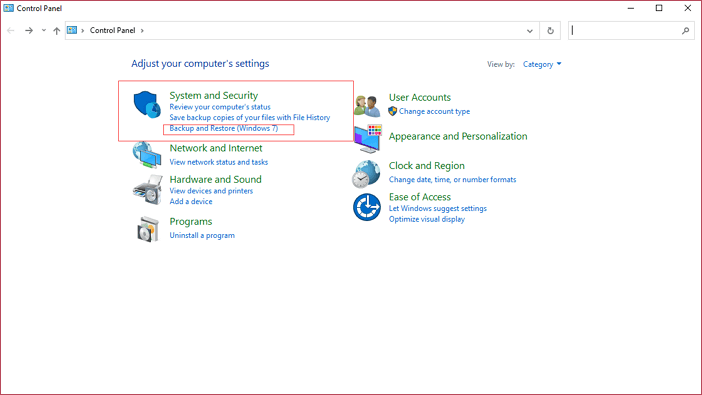
Step 1. To access the File History feature, go to the Control Panel, then click on System & Security, and finally select File History.
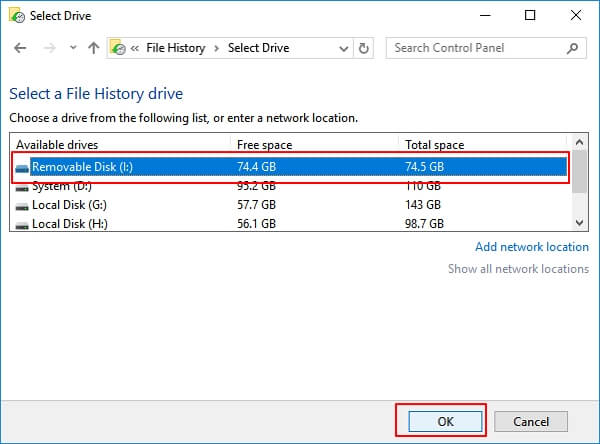
Step 2. Select the external hard drive as the target location to save backups by clicking on the "Select Drive" option on the left panel and setting it as the destination, then click "OK" to proceed.
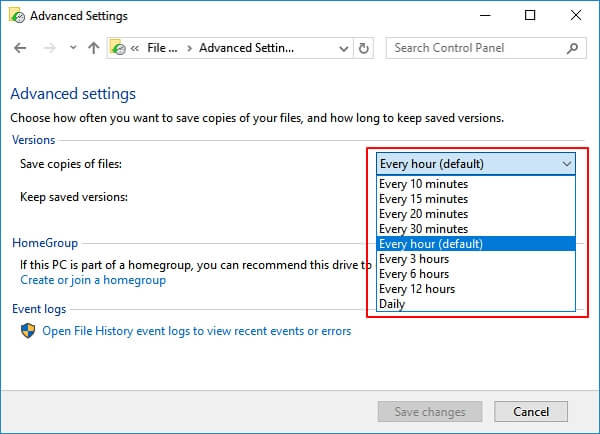
Step 3. To save copies of your files, click on Advanced Settings, where you can set the frequency of saving, choosing from options such as saving every few minutes, hours, or daily.
Step 4. To turn on File History, click on the Start button, then select Settings, followed by the Update & Security option. From there, click on Backup, then select the Turn on button.
Way 3. Move Files to External Hard Drive via Backup and Restore
Backup and Restore, a Windows built-in backup utility, allows saving files to an external hard drive, but its file backup feature requires multiple steps, making it less suitable for beginners.
Connect your external hard drive to your Windows computer. In the Control Panel, click on "System and Security", then "Backup and Restore (Windows Backup)".
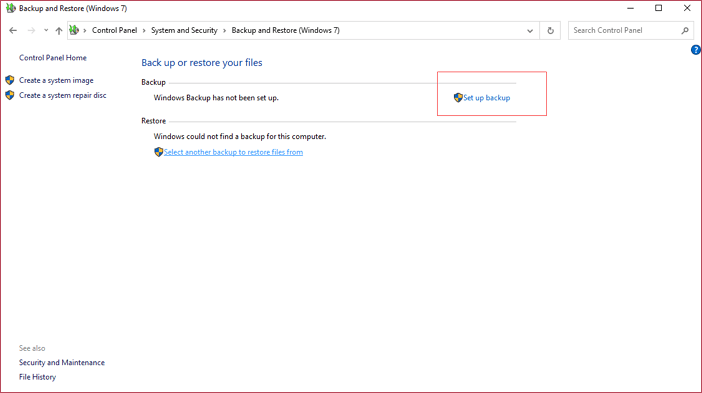
Step 1. To access the Backup and Restore feature, click on the Start menu and type "backup" into the search box, then select Backup and Restore from the list of results, or go to the Control Panel and find Backup and Restore.
Step 2. To set up a backup, tap the "Set up backup" option, and wait for the pop-up window to complete the process.
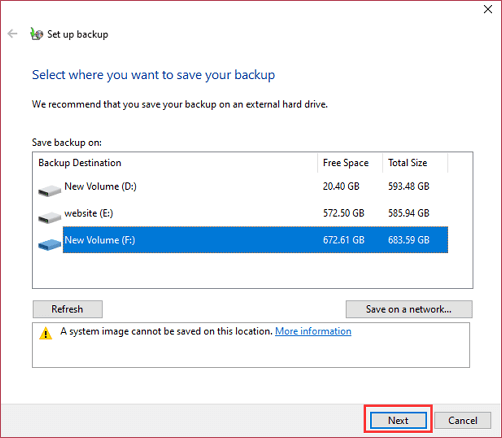
Step 3. Select the external hard drive as the destination disk.
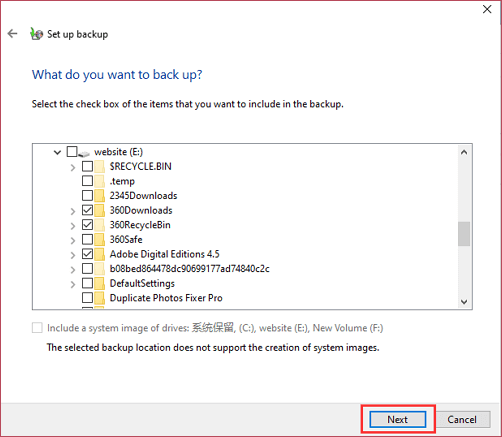
Step 4. To select which folder to back up, click on the "Let me choose" option and then proceed to the next step.

Step 5. Choose the specific folder or file you want to set backup, and then click Next.
Step 6. While reviewing your backup settings, you can click "Change schedule" to customize your schedule backup based on your needs.
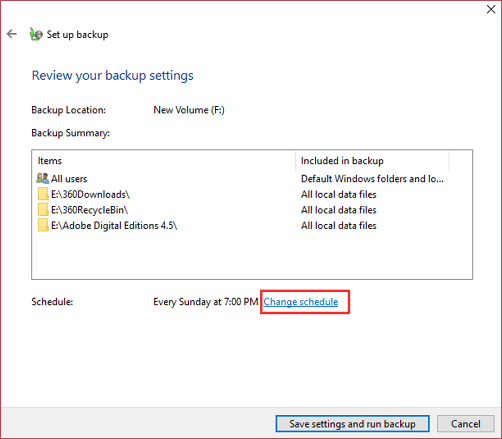
Step 7. After the first time, your PC will automatically back up files to an external hard drive at the scheduled frequency.
The Final Words
Finding a simple and efficient file transfer solution would greatly simplify the procedure and save time. Three ways to move files to an external hard drive without copying them include utilizing Qiling Disk Master, File History, and Backup and Restore, which can help streamline the process and save time.
All three methods provide an automatic backup of files to an external hard drive while keeping the original file intact. Qiling Disk Master is the most recommended due to its straightforward operation and clear user interface, making it a great option to download and try.
FAQs on How to Move Files to External Hard Drive Without Copying
Here are some of the frequently asked questions about this topic, refer to them if you have the same doubts.
1. How do I permanently move files to an external hard drive?
To permanently move files to an external hard drive, select the files to be moved, right-click, choose "Cut," and then right-click on the external hard drive, selecting "Paste." This method moves the files without creating additional copies on the computer, but ensure the transfer is complete before disconnecting the external hard drive to avoid data loss or corruption.
2. How do I transfer a lot of files at once?
To transfer a large number of files at once, you can use a file transfer program or compress files into a zipped folder. This can be done by selecting all the files to be sent, right-clicking, and choosing "Compressed (zipped) folder". Alternatively, file transfer software like FileZilla or SyncBack can be used to transfer many files and folders simultaneously via a network or USB connection. This simplifies the process, saving time and ensuring efficient transfer of a large number of files.
4. What is the simplest way to transfer files?
Transferring files can be done easily by using a USB flash drive or external hard drive. Simply connect the device to your computer, open the file explorer, and locate the files you want to transfer. Then, drag and drop the files into the USB drive, and once the transfer is complete, safely eject the device. The USB drive is now ready to be inserted into another computer to access the transferred files, making this method a simple, user-friendly, and software-free way to share files.
Related Articles
- 2024 Windows XP Backup Software & Backup Utility Free Download
- [All-in-One] Create Windows 11 Backup to NAS (Network Drive)
- How to Backup Hard Drive to Google Drive in 2 Ways - Full Guide
- Top 10 Offline Backup Software Recommended in 2024
- How to Backup Outlook Emails 2010 (2 Simple Ways)
- How to Backup Windows XP to USB Drive? 2 Ways Recommended
- How to Create Portable Drive when Rufus Windows To Go Option Missing
To create a portable USB drive when Rufus has no Windows to Go option, you can use the “Live” option instead. This allows you to create a bootable USB drive with a live version of Windows, which can be used as a portable operating system.