[Solved] How to Backup Laptop to External Hard Drive on Windows 10/11
How Do I Backup My Entire Computer to an External Hard Drive?
To avoid performance issues, factory reset your laptop, and prevent storage problems and screen freezes, create a backup of your files and media to an external hard drive, ensuring you can restore them whenever needed, and preventing loss if the backup is on the same drive.
To backup a laptop to an external hard drive on Windows 10/11, you can use the built-in Backup and Restore (Windows Backup) feature. To do this, go to Settings > Update & Security > Backup, then select the external hard drive as the backup location.
Reasons to Backup Laptop to External Hard Drive on Windows
Data crashes can occur due to electronic failures, Windows OS crashes, or hardware malfunctions, making it essential to have a backup in place.
The backup of your data should be stored in a different location than where your original data is stored, to prevent loss of data in case of a disaster or system failure. This is known as the 3-2-1 rule, where you have three copies of your data, two of which are on different storage types (such as hard drive and cloud storage), and one is offsite. This ensures that even if your primary data storage is compromised, you still have a backup in a different location.
- Hard Drive Failure: Hard drives, including SSDs, can be damaged or fail over time, making backups on them unreliable.
- Immediate availability: Backing up your data on an external drive provides instant access to your files. Unlike downloading or retrieving data from a remote location, an external drive allows you to simply connect it, use the right software, and restore your data immediately.
- Faster Restore: Local backups are faster to restore because they don't require a network connection, saving time on download and setup, and allowing for quick restoration.
Regularly backing up laptop data to an external drive is essential, as it protects against data loss due to various reasons such as hardware failure, software corruption, and human error. This ensures that important files and documents remain safe and can be easily recovered in case of an unexpected event.
How to Backup Laptop to External Hard Drive on Windows 10/11?
When backing up a laptop to an External Hard Drive on Windows 10/11, you have several options to choose from, each with its own advantages and disadvantages. You can use Qiling Backup, File History, or the Control Panel's Backup and Restore feature, depending on your specific needs and preferences.
Method 1. Backup Laptop to External Hard Drive with Qiling
The best method to backup a laptop to an External Hard Drive is with Qiling Backup, which is easy to use and automatic, making it ideal for those unfamiliar with its technology. This approach offers several benefits.
The main features of Qiling Backup are listed here:
- Good for Beginners
- User-friendly interface
- Automatic backup
- Lossless transmission
- Creates a system image
- Partitioned backup
Here we have listed three more features about Qiling Backup that you may be interested in. Just check the link page below:
Backing up your laptop to an external hard drive is a simple process that's worth the download. To get started, you'll need to download a backup software, but the process itself is straightforward. By following a few easy steps, you can ensure your important files and data are safely stored on an external hard drive, providing peace of mind and protection against potential loss.
Step 1. To initiate a backup, click the File backup button.

Step 2. On the left, both local and network files will be shown, allowing you to browse and select the desired backup files from the directory.

Step 3. Follow the on-screen instructions and select a location to store the backup.

Step 4. To encrypt the backup with a password, click on "Options" in the "Backup Options" section. This allows you to add an extra layer of security to your backup by requiring a password to access it. You can also explore other customization options in the "Backup Options" section to tailor the backup process to your specific needs.

To specify the backup schedule, click on the "Backup Scheme" button, which allows you to set the frequency and timing of backups, such as daily, weekly, or monthly, and also the event that triggers the backup. This ensures that your data is regularly backed up and safe.

Step 5. The backup may be stored on a local disk, Qiling's online service, or NAS.

Step 6. Qiling Backup allows customers to back up data to both a third-party cloud drive and its own cloud drive.
To back up data to a cloud drive, select Local Drive, scroll down to add Cloud Device, and add your account to log in.
Step 7. To initiate the backup process, click the "Proceed" button. Once the backup job is complete, it will be displayed as a card on the left side of the panel. You can then right-click on the backup job to manage it further.

Method 2. Backup Laptop to External Hard Drive with File History
To backup a laptop, Windows users can use File History provided by Microsoft, which allows them to save their files to an external hard drive. However, this method requires technical skills and is not automatic, making it less accessible to computer novices.
To create a laptop backup to an external drive with File History, follow these steps: First, connect your external drive to your laptop and make sure it's formatted to the NTFS file system. Next, go to Settings, then Update & Security, and click on Backup.
Step 1. Press the Windows key + S to open Windows Search, type "File History", and then click on the result to open it.
Step 2. Configure the backup location and select folders to backup, then run the backup.
Step 3. To configure the frequency of saving files and the duration of keeping them, click on "Advanced settings" and set your desired preferences.
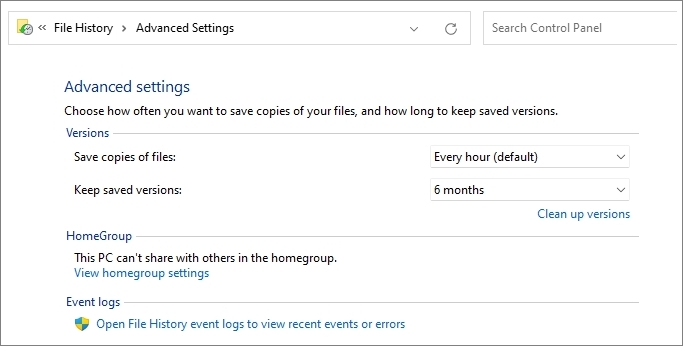
File History backup only saves your file and any modifications made to it, which can be useful in case you lose a file or need to restore it to a previous version where the data was correct.
Method 3. Backup Laptop to External Hard Drive with Control Panel
In addition to File History, Windows allows you to back up your laptop and files to an external drive using the Control Panel, which stores the backup on a secondary storage device connected to your laptop.
This method requires a bit of understanding, making it challenging for beginners who might find it difficult at first. A slow and methodical approach is recommended to grasp the concept.
You can create a complete backup of your laptop and system files using System Image, which will be saved to an external hard drive, and then use this image to recover your Windows OS, Settings, and files.
Follow the steps below to Backup Laptop using Control Panel:
Step 1. To open the Control Panel, press the Windows key + R to open the Run prompt, type control, and then press the Enter key. This will open the Control Panel window.
Step 2. Go to "Backup & Restore", and click to open it.
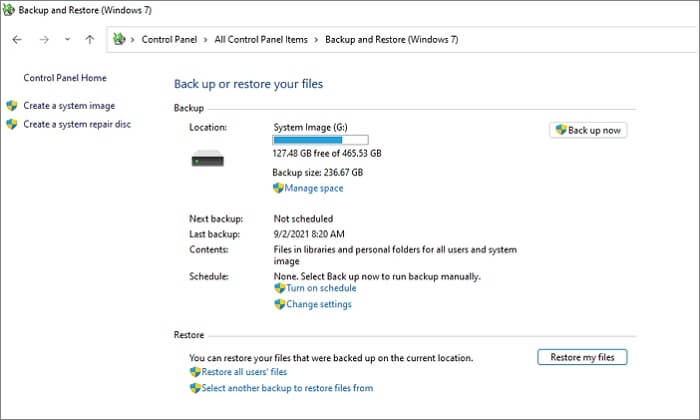
Step 3.To set up a backup on an external drive, follow the wizard to select the drive, schedule backup files, and create a system image of the drive.
The backup process takes variable time depending on the size of the data and your system's memory. Once it's complete, you can remove the external hard drive and store it wherever you want.
Choose the Best Method to Backup Laptop to External Hard Drive
When it comes to backing up and restoring data, there are three methods to consider. To determine which one is best for you, let's compare them. You can use a cloud service, an external hard drive, or a combination of both to store your data.
| Comparison | Backup with Qiling Backup | Backup with File History | Backup with Control Panel |
|---|---|---|---|
| 1. Backup speed | 53.33 Mbps | 30 Mbps | 5 Mbps |
| 2.Pros | This backup app allows for quick and easy backups of apps, programs, updates, and settings, providing safe and reliable storage. It also supports cloud-drive and offers offline software availability. | Saves previous versions. Completely free Specify a frequency to backup | Creates a system image Completely free |
| 3.Cons | To download the file, go to the website, click on the download button, and choose the correct file type. Once downloaded, locate the file on your computer and click on it to install it on your PC. | The system will only back up file history data, not create a system backup, meaning that it will only save changes made to files over time, but will not create a comprehensive backup of the entire system. | Difficult to access and restore |
| 4.Best for | Beginners, large backups | System files | Internal Disk |
| 5.User-friendliness | High | Low | Low |
Using Qiling to backup data on your External Hard Drive is recommended, as it outperforms Windows File History and System image backup in terms of speed and benefits. This third-party tool is user-friendly and can save all your portals, files, and configurations, making it a convenient and reliable option for data backup.
Pro Tip: Recover Laptop Backup on Windows
Recovering laptop backup on Windows can be a straightforward process if you know the right steps. To recover laptop backup on Windows, start by opening the Backup and Restore (Windows 7) utility, which can be found in the Control Panel. From there, select the backup you want to restore and follow the prompts to complete the recovery process. Alternatively, you can also use the Windows Backup and Restore tool, which is available in the Settings app, to restore your laptop backup. By following these steps, you can successfully recover your laptop backup on Windows and retrieve your important files and data.
Recover Laptop Backup with Qiling
If you've backed up your laptop with Qiling and your data gets corrupted, you can easily recover it. Qiling allows you to safely and securely restore your boot partitions, program files, and operating system, making the process quick and hassle-free. You can access your backup files with ease, thanks to Qiling's user-friendly interface.
Step 1. Launch Qiling Backup, click "Browse for Recovery".
Step 2. To recover your data, navigate to your backup destination and select the backup file you want to restore, which is typically a .fvd file created by Qiling Backup.

Step 3. Select a location to recover your data to, either a specific location or the original location where the data was stored.
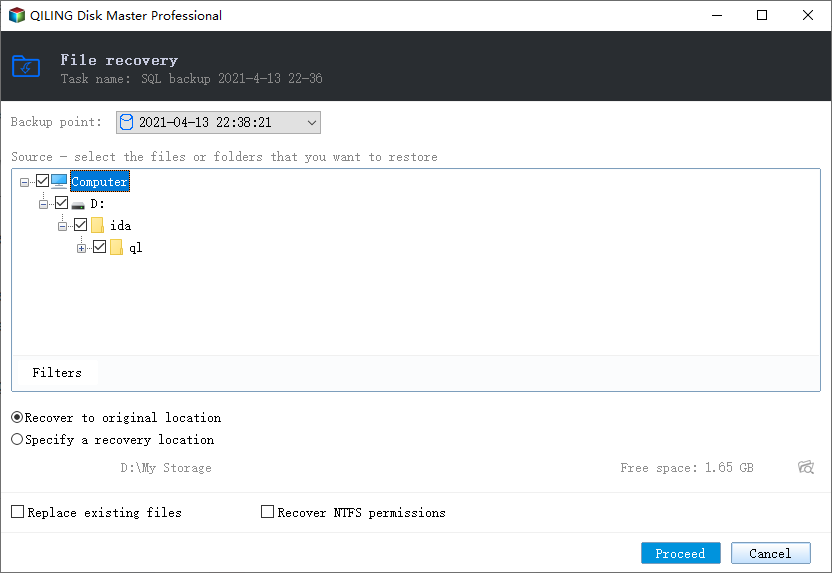
Step 4. Click "Proceed" and the recovery would start.
Recover Laptop Backup with File History
When you upgrade your system or find missing files, your backup data can be super helpful. You can connect your external hard drive to your PC and restore what you need, but it involves a longer process.
To recover your laptop backup with File History, follow these steps: First, ensure that your laptop is connected to the same network as the external drive where you've been backing up your files. Next, click on the Start button and search for "File History" in the search bar.
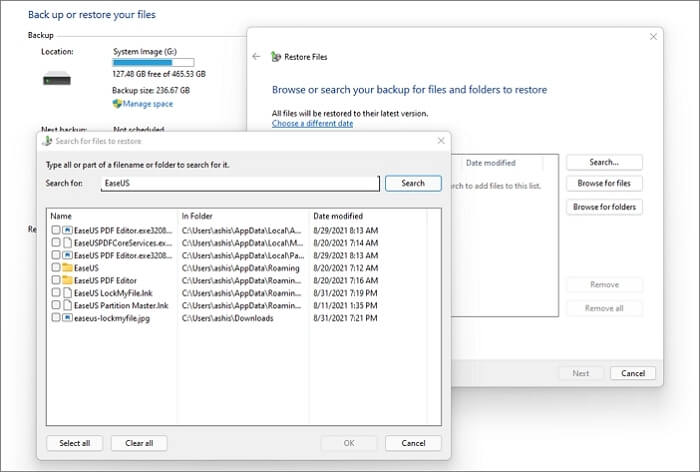
Step 1.To restore files, go to the Windows Taskbar, click on the "Restore File" option, and select the "Restore your Files with File History" option.
Step 2. Select the files you want to retrieve and if you want a specific version, click on the arrowhead and select a version you want to restore.
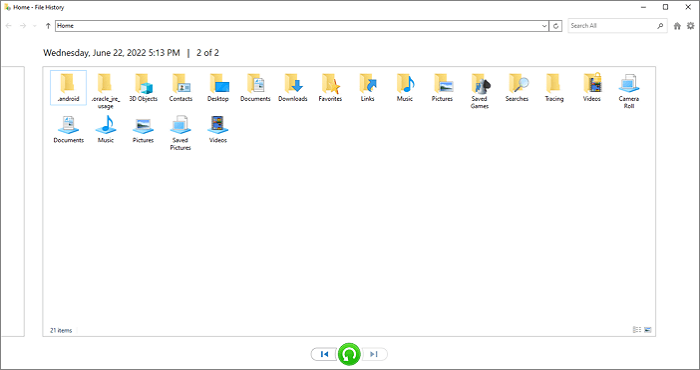
Step 3. Click "Restore" and select a location to save the backed-up file.
Recover Laptop Backup with Control Panel
If you backed up your data using the Control Panel feature, you can restore it, but it will only retrieve your files and not restore any apps, drivers, or updates.
To recover a laptop backup using the Control Panel, follow these steps: Open the Control Panel, click on "System and Security", then click on "Backup and Restore". From the new window that opens, click on "Restore my files" or "Restore all users' files" depending on your preference.
Step 1. To open the Control Panel, click on the Windows icon to open the Start Menu, then navigate to the Control Panel.
Step 2. In the search box, type "Control Panel" and navigate to it.
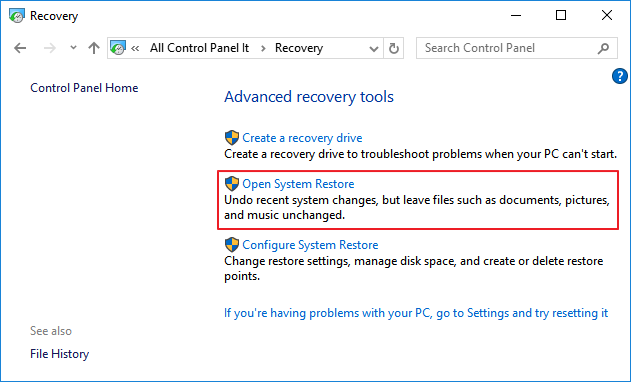
Step 3. To restore your PC to a previous state, go to the "Recovery" section and select the "Open System Restore" option. Click "Next" and follow the restore wizard to choose the desired restore date.
The process can recover lost files, but it will also result in missing new files. Make sure to have a copy of your new data on the PC.
Wrap Up
To back up your laptop to an external hard drive on Windows 10/11, you can utilize the File History feature, which allows you to automatically save your files to an external drive. Alternatively, you can create a system image using the Control Panel, which provides a full backup of your laptop. However, a more comprehensive and reliable option is to use Qiling, a legitimate backup software that can create a full backup of your laptop to the external hard drive.
Several queries would pop up in your mind!
1. How do I backup my computer?
To create a computer backup, go to the Start Menu, search for "Backup and Restore," and select "Open. Then, choose to backup your entire computer and follow the prompts to save it to an external drive or cloud server, which can be used to restore your computer later.
2. How do I backup Acer's laptop to an external hard drive?
To backup an Acer laptop, connect an external hard drive and copy all data to it via My Computer. However, this method won't create a system image. For a system image, use the Control Panel with technical skills and time, or opt for reliable backup software.
3. What is the best way to backup a laptop?
To backup a laptop, use the Qiling Backup Software, which allows you to save the backup to an external hard drive or cloud storage, providing fast and secure data protection.
4. How to automatically backup files to an external hard drive on Windows 10?
To automatically backup files on an external hard drive on Windows, enable the File History feature, which allows you to schedule backups of your files to an external drive.
- Step 1. Go to the "Settings" on your device and navigate to the "Update and Security" section.
- Step 2. Select "Backup and Restore" and enable the "backup" option.
The backup speed is slow, making the interface difficult to use. However, an alternative method, Qiling Backup, can automatically backup data without hassle, creating a system backup available for Windows OS laptops and computers.
Related Articles
- Windows Backup Encrypted: Run Encryption Backup Software
- 5 BestBackup Software for Synology NAS[Pros and Cons]
- Full Guide: How to Backup Hard Drive to Google Drive in 2 Ways
- How to Create and Restore (Windows 10) System Image to Different Computer
- QuickBooks Unable to Backup Company File - What to Do?
If you're experiencing the QuickBooks unable to backup company file error, this post will guide you on how to resolve the issue and provide a better way to back up your QuickBooks company file. - How to Restore System Image Without Repair Disc [Ultimate Guide]
If you're concerned about restoring your system image without a repair disc, rest assured it's possible. A professional backup tool like Qiling Disk Master can help create a system image on an external device, which can then be used to restore it on your device.