How to Backup Quick Access in Windows 10 [ 2022 Update]
If you're looking forward to having quick access to Windows 10 but don't know how to do it, this guide is here to help. You can easily access Windows 10 features and settings with just a few clicks, and we're here to walk you through the process. Whether you want to customize your desktop, access frequently used apps, or simply get to your favorite settings quickly,Our solutions cover this comprehensively. Just follow our step-by-step guide to get the most out of your Windows 10 experience.
What Is Quick Access in Windows 10
The Quick Access feature in Windows File Explorer allows users to quickly access recent and frequently visited files and folders, making it easier to find frequently used files without having to search. It is available as soon as the user opens Windows Explorer and can also be customized by manually pinning favorite folders to the location.
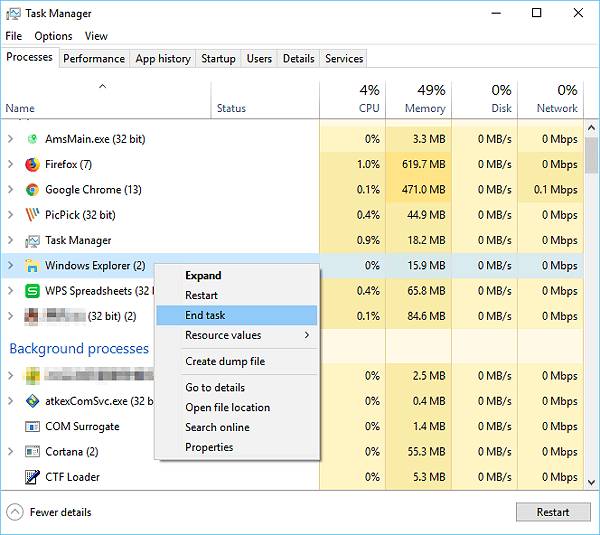
If File Explorer won't open in Windows 10 or Windows 11, try restarting the File Explorer process, resetting File Explorer, or using the Task Manager to end any conflicting processes. If the issue persists, check for corrupted system files, update Windows, or run a System File Checker scan.
Windows File Explorer provides conveniences, but sometimes it can be wrong. You can get help to solve issues with a simple click.
Quick Access in Windows 10 has added a new view to File Explorer, called Frequent folders, which can be accessed under the navigation pane on the left. This feature provides a shortcut to frequently used files and folders, essentially serving as the shortest route to access the files and folders you're currently working on.
Backup Quick Access in Windows 10 with Qiling Backup
If you reinstall Windows, your quick-access folders and files will be lost. However, you can use Qiling Backup to keep your data safe.
It is a free-This backup software offers users 250GB of cloud storage without hassle, allowing them to easily store and access their preferred data with just a few clicks. It provides a one-click backup solution that billions of customers use globally, as well as instant recovery to the data with higher efficiency. The tool also features a disk imaging system for cloning particular data anytime, making it a perfect backup solution that keeps your backup safe under different conditions.
The main features of Qiling Backup are listed here:
- Good for Beginners
- User-friendly interface
- Automatic backup
- Lossless transmission
- Creates a system image
- Partitioned backup
Steps to Backup Quick Access with Qiling Backup
Backing up Quick Access with Qiling Backup is a simple process that can be enabled in just a few clicks, providing users with a convenient way to access their data even in critical scenarios.
Step 1. To begin the backup process, click the File backup button.

Step 2. The screen displays lists of both local and network files on the left-hand side, allowing you to expand the directory and select the files to back up.

Step 3. To back up the data, follow the on-screen instructions and select the desired location for storing the backup.

Step 4. To ensure your backup is secure, encrypt it and set a backup schedule by clicking Options in Backup Options.

You can also choose to start the backup at a certain time in Backup Scheme by clicking Options, where many other customizable options are available.

Step 5. You can save the backup file on your computer, in Qiling's cloud service, or on a network-attached storage device (NAS).

Step 6. Qiling Backup allows customers to store backup copies of their files on either a third-party cloud drive or the company's own cloud storage.
To back up your data on a third-party cloud drive, select Local Drive and scroll down to add Cloud Device, then fill in your account information.
Step 7. To start a backup, click on the "Proceed" button. Once the backup process is complete, a card will appear on the left-hand side of the screen, providing more details about the backup job. Further information can be accessed by right-clicking on the card.

You may be interested in Looking for free Windows 11 backup software? You're in luck!
Another Solution to Backup And Restore Quick Access in Windows 10
Backing up data or Quick Access in Windows 10 is a straightforward process that requires minimal effort. By following a simple method, you can manually back up Quick Access in Windows 10. To do this, you need to take care of a few things, and with these steps, things will quickly happen. This method is easy to follow and will help you back up Quick Access in Windows 10 with ease.
Backup Quick Access Folder in Windows 11/10
Restore Quick Access Folder in Windows 11/10
Backup Quick Access Folder in Windows 11/10
To quickly backup the Quick Access on Windows 10, follow these easy steps: simply right-click on the Quick Access icon on your taskbar, select "Settings," and then toggle the "Quick access" switch to the "On" position. This will enable Quick Access, and any shortcuts you add will be backed up.
Step 1. To launch File Explorer on Windows 10, open it and tap the address bar option. Then, press Ctrl + L in the address bar section. This will select the entire path and allow you to edit it.
Step 2. Once done with the above process, you must type the following in the address bar:
%AppData%\Microsoft\Windows\Recent\AutomaticDestinations
Press the enter key.
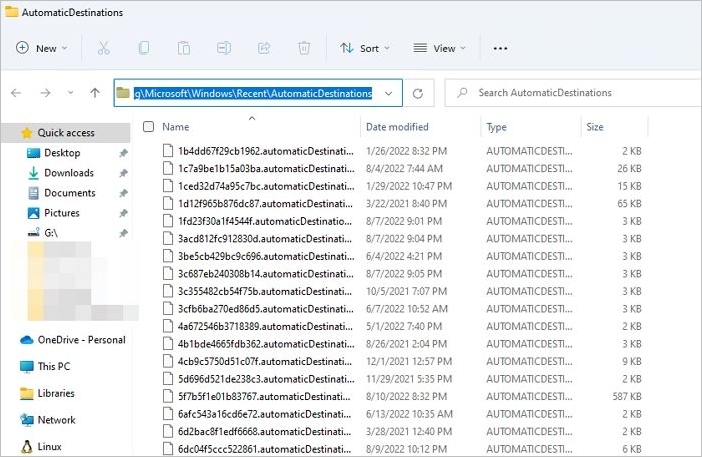
Step 3. To move all files to a new folder, copy them to a location where they won't be deleted, and close the File Explorer App on your device.
To backup Quick Access in Windows 10, you can use the built-in feature called "File History" or third-party software like Qiling Backup. To use File History, go to Settings > Update & Security > Backup > Add a drive, select a drive where you want to save your backups, and follow the prompts. Alternatively, you can use Qiling Backup to create a system image that includes Quick Access.
Restore Quick Access Folder in Windows 11/10
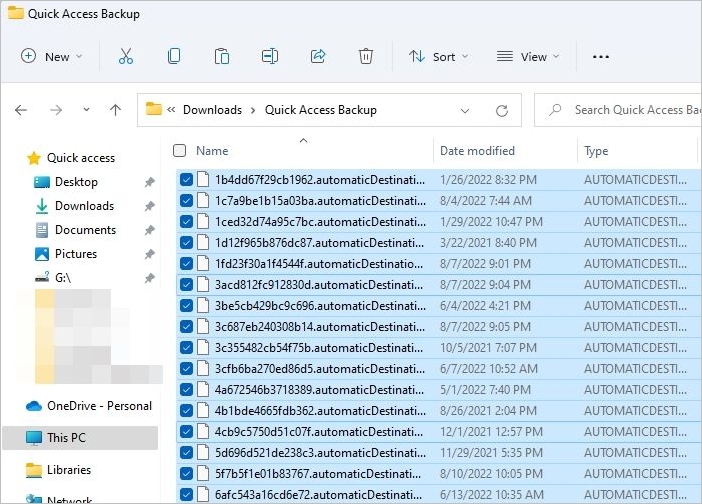
To restore the Quick Access folder, you can use the files you copied to another folder. File Explorer can read these files and automatically add them to the left column, effectively restoring the Quick Access folder.
Step 1. Launch File Explorer on your device, then navigate to the folder %AppData%\Microsoft\Windows\Recent\AutomaticDestinations, or simply paste this location into your search bar for easy access.
Step 2. Copy and paste the previously backed up files into the AutomaticDestinations folder.
Step 3. Once you complete the above process, close all the File Explorer windows.
Step 4. To verify if the recent settings changes are working correctly, simply launch the new Explorer Window on your device. This will allow you to check if the adjustments you made are having the desired effect.
You've successfully restored the Quick Access Folder in Windows 11/10!
Bonus Tip: How to Add a Folder to or Remove a Folder from Quick Access
To add or remove folders from Quick Access, right-click on the desired folder and select "Pin to Quick access" to add it, or "Unpin from Quick access" to remove it. This allows users to customize their Quick Access menu to suit their needs.
How to Add a Folder to Quick Access
How to Remove a Folder From Quick Access
How to Add a Folder to Quick Access
Step 1. Launch File Explorer on your device, search for the folder you want to pin to Quick Access, and then click on it to select it.
Step 2. Select the preferable folder and then make right-click on it.

Step 3. Select Pin to Quick Access from the given popup menu.
Once the process of selecting a folder is completed, the chosen folder will be added to Quick Access.
How to Remove a Folder From Quick Access
Step 1. To access Quick Access in Windows 11/10, open File Explorer and navigate to the Quick Access section, which is usually located on the left side of the window.
Step 2. Right-click on the preferable folder in Windows 11/10 Quick Access.
Step 3. Select Unpin from the Quick Access option.
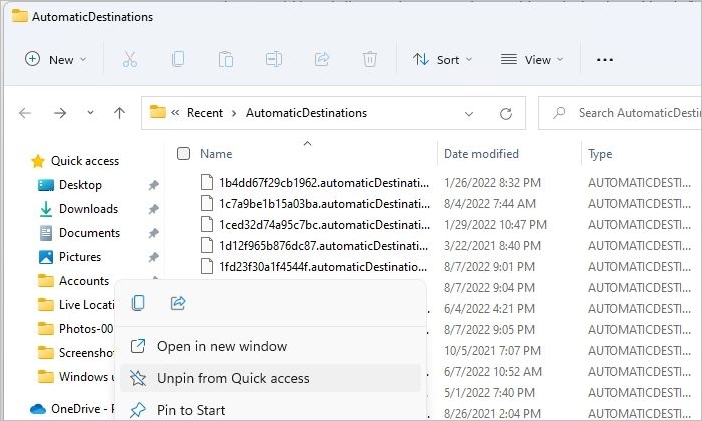
Once the preferable folder is deleted, it will be removed from the Quick Access menu.
Conclusion
You've learned how to back up Quick Access in Windows 10, which has made it easy to find recently used or frequently used files. The integration of Quick Access in Windows 10 has streamlined the process, and we've provided detailed steps to access it conveniently. Just be sure to follow these steps carefully.
Backup Quick Access FAQs
We've addressed your various queries about Backup Quick Access in this guide. If you still have some questions, hopefully, the provided FAQs will provide the answers you're looking .
How do I export quick access?
To transfer Quick Access files to another computer, copy the Recent folder and paste it into the C drive of the new system. You can use the command prompt to restore the Quick Access folder on your device.
Where is Quick Access data stored?
The Quick Access data is stored in the Recent folder of Windows, which is specific to the user, and one such location is C:\Users\[username]\AppData\Roaming\Microsoft\Windows\Recent.
C:\Users\AppData\Roaming\Microsoft\Windows\Recent\AutomaticDestinations
Does removing a file from Quick Access delete it?
To delete a file or folder from Quick Access, you can simply right-click on it and select "Remove from Quick Access". This will only remove it from the Quick Access list, but not delete the file or folder itself. To delete the file or folder, you must navigate to its location and open it from there.
Related Articles
- Top 5 Best Backup Software for External Hard Drive (2022 Rankings)
- How to Backup Windows 7 in Different Ways - Full Steps with Pictures
- How to Backup Google Drive to External Hard Drive [4 Easy Ways]
- How to Backup and Restore Microsoft Outlook 2016(Windows Tutorial)
- (Step-by-step Guide) How to Install Windows 10 on Hard Drive for Another Computer
If The tool can help you install Windows 10 on a hard drive for another computer, making it a convenient option for those who need to install the operating system on multiple devices. - Sync Files Between Desktop and Laptop | Easy!
If you're struggling to figure out the best way to sync files between your desktop and laptop, this article has got you covered. We'll provide a comprehensive guide on syncing files across computers, including a recommendation for a third-party tool that makes efficient file syncing from desktop to laptop a breeze.