Restore Windows 10 System Image to New Hard Drive with In-Depth Guide
You can restore the Windows 10 system image of your old drive to the new hard drive, which will copy all of your data and the OS to the new drive.
Here's an in-If you're looking to restore a Windows 10 system image from an old drive to a new hard drive, here's a brief guide. First, ensure that the new drive is connected and recognized by the system. Next, go to the Windows Recovery Environment (WinRE) by restarting your PC and pressing the F11 key during boot-up.
Why Would You Need to Restore System Image to A New Hard Drive
If your existing hard drive is facing issues or you're upgrading to a faster, bigger drive, you can create a system image of your old drive and restore it onto your new one to keep your data intact.
You need to restore the Windows 10 system image from the old hard drive to the new one to preserve your data and the operating system, ensuring a seamless transition.
Restoring a system image from an old drive to a new one allows users to transfer their data and start using the new drive immediately, saving time and effort.
How to Restore Windows 10 System Image to A New Hard Drive
Qiling Disk Master is a tool that allows you to create a backup of your system image, making it easier to install on another hard drive. It provides a simple and efficient way to create a full backup of your system, including the operating system, installed programs, and personal data.
To restore a Windows 10 system image to a new hard drive, you can use the built-in Windows feature called "Reset this PC" or use a third-party tool like Qiling Disk Master. The "Reset this PC" feature allows you to restore your system to a previous state, while Qiling Disk Master enables you to create a system image and restore it to a new hard drive. Both methods can be used to transfer your Windows 10 installation to a new hard drive, but the process may vary depending on the tool you choose.
Method 1. Restore using Backup and Restore (Windows 7)
1. Creating a System Image
Step 1. To access the Control Panel, click on the magnifying glass icon located in the bottom left corner of the screen, and then search for the "Control Panel" in the search bar that appears.
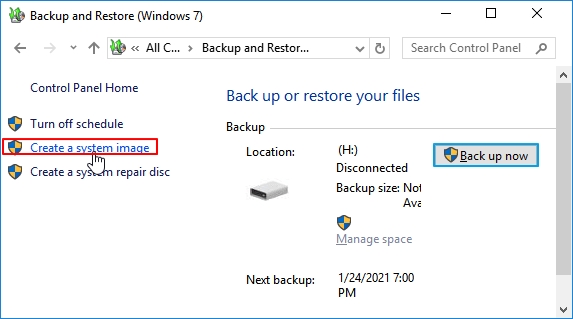
Step 2. To access the Backup and Restore section, open the Control Panel, click on "System and Security," and then select "Backup and Restore."
Step 3. On the left window pane, select "Create a system image."
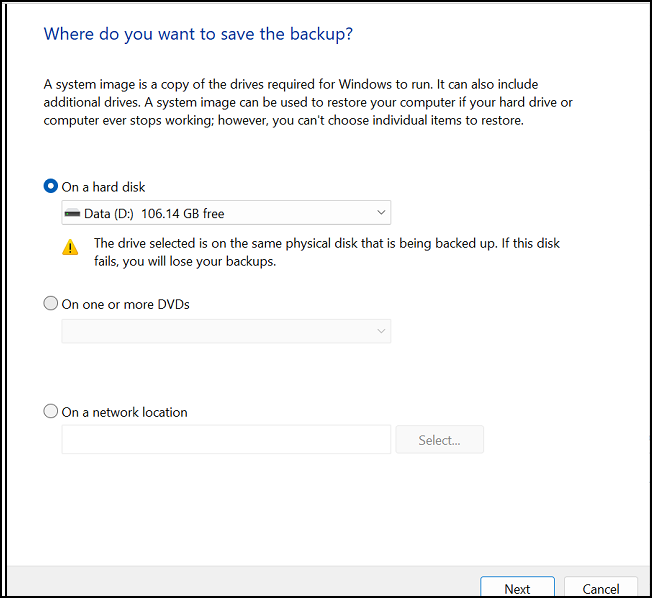
Step 4. To save your backup on an external USB flash drive, select the drive you want to use and click "Next".
Step 5. Now select "Start backup."
2. Restoring System Image
Step 1. To restore your Windows 10 system, turn off your computer, replace the old drive with the new drive, and connect the backup USB drive containing the Windows 10 system image to your computer.
Step 2. Turn on your PC.
Step 3. To enter the BIOS settings, press the key assigned by your PC manufacturer, which is usually indicated on the boot screen or in the user manual. This key is often F2, F12, Del, or Esc, depending on the specific computer model.
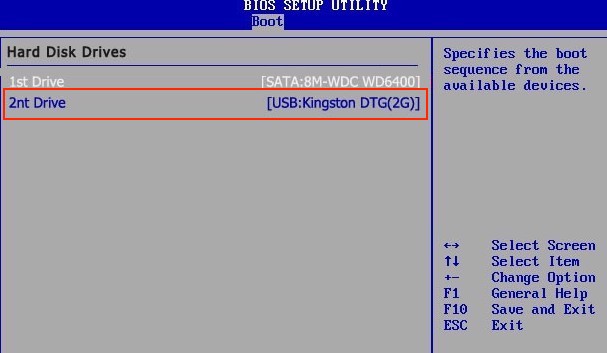
Step 4. To boot from the USB flash drive with the recovery image, go into the BIOS settings, set the USB flash drive as the primary boot device, and then save the settings and exit by pressing "F10".
Step 5. Restart your computer.
Step 6. When the system is booting, press "F8" to access the "Advanced Options" window.
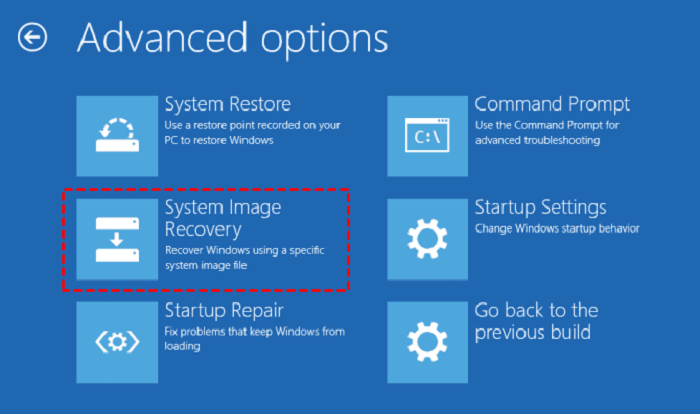
Step 7. Select "Troubleshoot," and then click on "Advanced Options."

Step 8. When prompted to enter your Microsoft account's password, enter the password. Click on "System Image Recovery".
Step 9. Select Windows 10, tick "Use the latest available system image," and click on "Next" in the Windows Recovery Environment.
Step 10. Select "Format and repartition disks," and then complete the restoring of the system image process by clicking on "Next," followed by "Finish," and then click on "Yes."
3. Extend Partition Size
If you've replaced your old hard drive with a newer one that's larger, after restoring your system image, you'll have unused space on the new drive. To make use of this extra space, you'll need to expand the partition to accommodate new data and any other operations you want to perform.
Here's how you can extend the partition size:
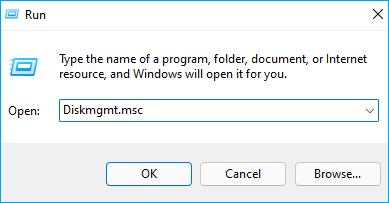
Step 1. Open the Run dialog box by pressing "Win+R."
Step 2. Type "diskmgmt.msc" to open Disk Management.
Step 3. Right-click on the drive and select "Extend Volume". You will enter the Extend Volume Wizard, then click "Next".
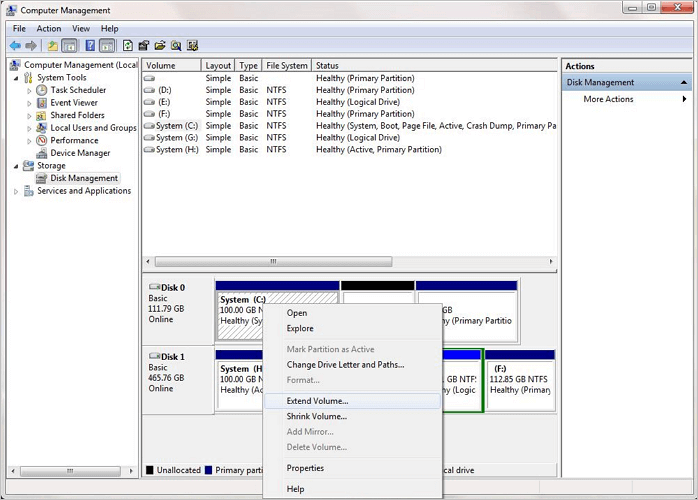
Step 4. To allocate an unallocated volume to a drive, select the unallocated volume you want to allocate and click on "Next."
Step 5. Once the volume allocation is completed, click on "Finish."
You may be interested in other Backup and Restore Tips:
- An Ultimate Guide: How to Use Backup and Restore
- Windows 7 Backup and Restore Blank Screen Fixes
- Windows 11 Backup and Restore (Windows 7) Guide
Method 2. Restore System Image Using Qiling Backup
Qiling Backup's System Transfer tool is a powerful method for restoring system images. It allows users to transfer files and operating systems from one disk to another with just one click, backing up disks, partitions, files, and even OSs. The backup files or system image can be saved to the cloud, NAS, or local drives.
Qiling Backup's system recovery speed is quick, especially when restoring a system image or backup on a different drive. Additionally, the backups can be password-protected for added security.
Qiling Backup offers both a free and paid version, with the free version providing most of the functionality, and the paid version adding features like scheduling backups and system cloning.
Some of the most notable Qiling Backup features are:
- Restore System to Different Hardware.
- Differential and incremental backups.
- Password-protect the backups.
- Save the backups to Cloud, NAS, or a local drive.
To restore a system image to a new hard drive, you'll need to first create a system image using Windows' built-in tool, and then use the same tool to restore the image to the new drive. The process is similar to restoring a system image to the same drive, but with the added step of preparing the new drive for the restore process.
Step 1. Create an Emergency Disk to USB
1. Connect an empty USB flash drive or external hard drive (with over than 100GB space) to your PC.
Note: Initialize the USB or external hard drive as MBR, creating two partitions: the first as FAT32 and the second as NTFS.
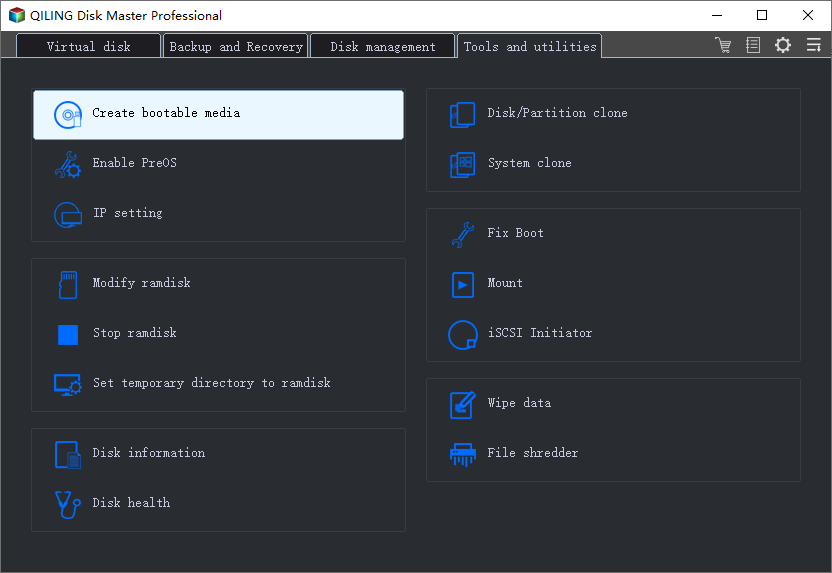
2. Run Qiling Backup and click "Tools" > "Create bootable Disk".
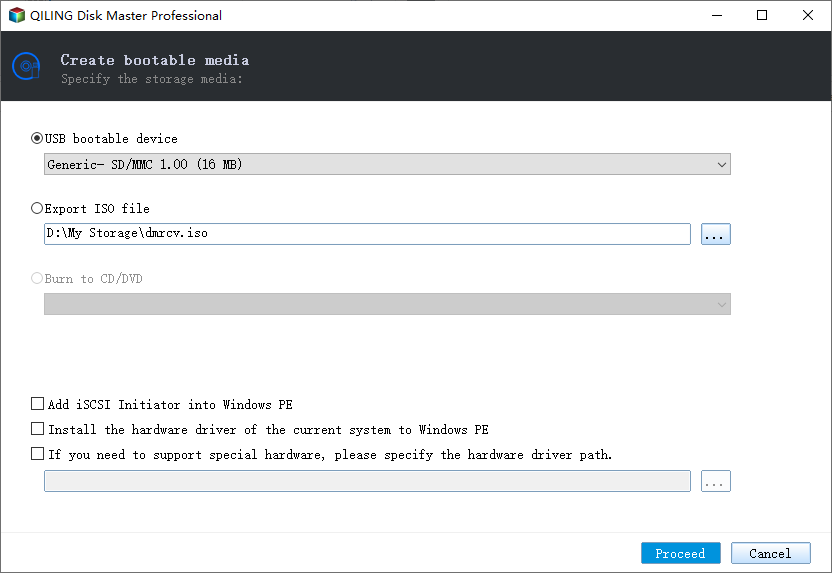
3. Choose USB as the disk location to create the emergency disk and click "Create".
The bootable disk will allow you to boot a computer and transfer a system image to a new PC.
Step 2. Create System Backup Image on Source Computer
1. Click on the "System backup" option on the main page, and Windows OS will be selected by default.
2. To save a system image, choose the second partition of the USB drive that contains the emergency disk.
You can save a system backup image to an external disk that's equal to or larger than the size of your system's C drive.

3. Click "Proceed" to start creating a system backup image to the target device, initiating the backup process.
Step 3. Boot Target Computer from Qiling Backup bootable Disk
1. Insert the Qiling emergency disk and system backup image USB into the new computer, and it will be recognized as a bootable device. This will allow you to restore the system to its previous state, effectively "ejecting" the old computer's system and replacing it with a fresh one.
2. Restart PC and press "DEL/F2/F10/F12" to boot into BIOS.
3. To resolve the issue, go to the boot menu and set the computer to boot from the Qiling Backup emergency disk.
To restore a system image to a GPT disk, you need to change the boot mode to UEFI in BIOS, allowing your computer to enter the Qiling Backup main interface.
Step 4. Transfer System to the New Computer
Note: Restoring a system image to a new computer will erase the data on the target disk, so it's essential to back up any important files beforehand or use an empty disk to avoid data loss.
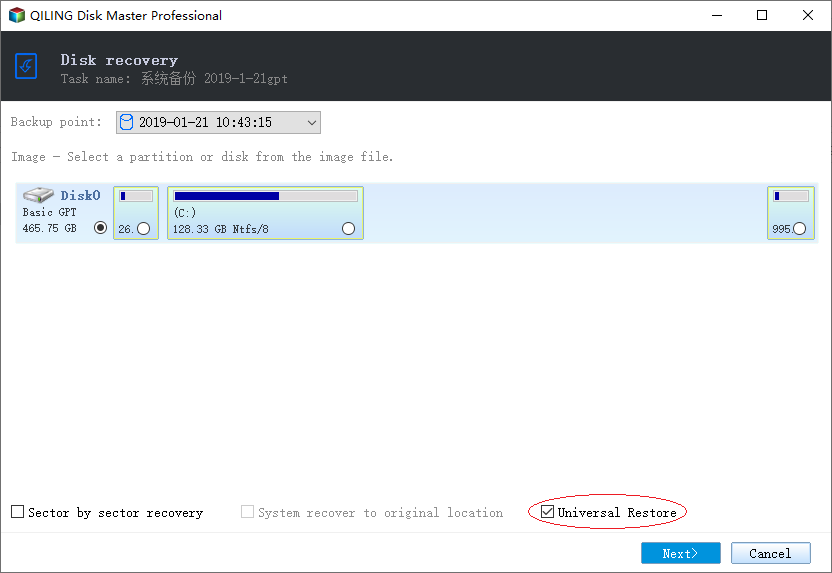
1. On the main Qiling Backup interface, click "Backup and recovery" then select "Browse for recovery".

2. Select the system image on your USB external drive and click "OK" to continue.

3. To transfer the system, you will need to create a transfer media, such as a USB drive, with the system's files and settings. This process will preserve all of your data, settings, and installed programs.
Step 5. Restart PC with transferred system
1. To restore your computer to its original state, enter the BIOS settings and set the computer to boot up from the drive where you transferred the system. This will allow the computer to load the operating system and other software from the transferred drive, effectively restoring the computer to its original state.
2. Save all changes and restart your computer.
3. To ensure a smooth transition to the new computer, it's recommended to update all drive drivers and programs to their latest versions. This will guarantee that all hardware and software components are compatible and functioning properly on the new device.
FAQs
1. Can I restore a system image to a new hard drive?
You can restore a system image of your old hard drive to your new hard drive, which will transfer all of your files, settings, and applications to the new drive, making the transition as seamless as possible.
2. How do I restore Windows 10 to a new hard drive?
- To create a system image of the previous drive and save it on a USB flash drive, you can use the built-in Windows Backup and Restore feature. First, insert the USB flash drive into the computer, then open the Control Panel and click on "Backup and Restore" under the "System and Security" section.
- Turn off your PC, and install the new hard drive on your PC.
- Insert the USB flash drive, and power on your PC.
- Press F8 to enter the Advanced options window.
- Click on Troubleshoot, followed by Advanced Options.
- To recover Windows 10, select System Image Recovery, enter your Microsoft account's password, and then click on Windows 10.
- Select Use the latest available system image, and click Next.
- To configure the installation, select the "Format and repartition disks" option, click "Next", then "Finish", and confirm with "Yes".
3. How do I restore a system image to a new SSD?
The process of restoring a system image to a new SSD is the same as restoring the system image from one hard drive to another. This involves booting from the recovery media, selecting the system image to restore, and following the on-screen instructions to complete the process.
Final Thought
Hard disks can degrade over time, posing a risk of data loss if they fail unexpectedly. To avoid this, creating a system image of your disk can be a reliable solution, safeguarding your data.
Restoring the system image allows you to replace the old drive with a new one, restoring all data and the operating system with ease.
Creating a system image is a straightforward process that can be completed using Windows' built-in Backup and Restore feature. However, Qiling Backup offers an even simpler and faster alternative for creating system images.
Related Articles
- How to Copy and Backup Files without Admin Rights
- Bare Metal Backup and Restore Windows 10 Tutorial | Your Full Guide Is Here
- 2 Ways: How to Backup Partition to Image File for Free
- Top 10 Best Email Backup Software in 2022 [New]
- How to Reset Windows 11 without Losing Data and Apps
You may want to fix some system problems by resetting Windows 11, so how can you do it, is there a way to reset Windows 11 without losing data or apps? - Backup and Restore Windows 11 Image to New Hard Drive Easily (3 Ways)
Backups are very important to protect your system and data just in case you need to restore Windows 11 image to new hard drive for a quick disaster recovery.