How to Back Up Windows Server 2016 [Step by Step]
Having a backup of Windows Server 2016 is essential to prevent data loss in various situations, such as operating system issues, and ensure business continuity.
Backing up Windows Server 2016 can be done in two ways: using Windows Server Backup or reliable data recovery software. This article will guide you through the process of backing up your Windows Server 2016, providing a step-by-step approach to ensure your data is safely preserved.
Why Do You Back Up Windows Server 2016?
Backing up Windows Server 2016 is crucial for data security, especially for enterprises where data loss can have devastating consequences. Various causes, such as hardware failure, software corruption, or human error, can lead to data loss, making it essential to have a backup system in place to prevent or minimize data loss.
- You may face unexpected events like a power failure or device breakdown, which can disrupt your work or daily activities.
- Data loss can occur due to hardware failure, physical damage, or software issues, such as software upgrades or malfunctions.
- In some cases, human errors can result in significant data loss.
- Regardless of the potential data loss, it's crucial to have a plan in place beforehand to mitigate any consequences.
- If you don't have a backup solution, you can expect your anxiety and stress levels to skyrocket.
Using server backup software is a secure method to protect crucial data, especially in enterprise environments where Windows server is commonly used. This approach is a more reliable option compared to data recovery, which can be a costly and uncertain process.
Back Up Windows Server 2016 with Windows Server Backup Feature
One of the best ways to back up Windows Server 2016 is via the Windows Server Backup (WSB). This essential backup software is a great tool for servers, but before using it, it's essential to know more about its features.
What Is Windows Server Backup
Windows Server Backup (WSB) is a feature of Windows that provides recovery and backup options for users on Windows Server. To use WSB, it must first be installed on the Windows Server. Once installed, users can back up specific files, folders, system states, particular volumes, or even the entire server.
The Windows Server Backup allows for easy data recovery, enabling users to restore files, folders, system states, applications, and volumes with minimal effort. In the event of hard disk failure, the bare metal recovery option is available.
Microsoft introduced a feature to manage backups for both remote and local computers, aiming to help anyone needing a Windows Server backup.
To back up Windows Server 2016 using Windows Server Backup, you need to first install the feature and then configure a backup job. Follow the detailed steps below to get started.
How to Install Windows Server Backup
Step 1. To add roles and features, go to Server Manager, press the "Manage" option, and tap on "Add roles and features".
Step 2. Scroll down under the Features section on the Select Feature page until you reach the Windows Server Backup option.
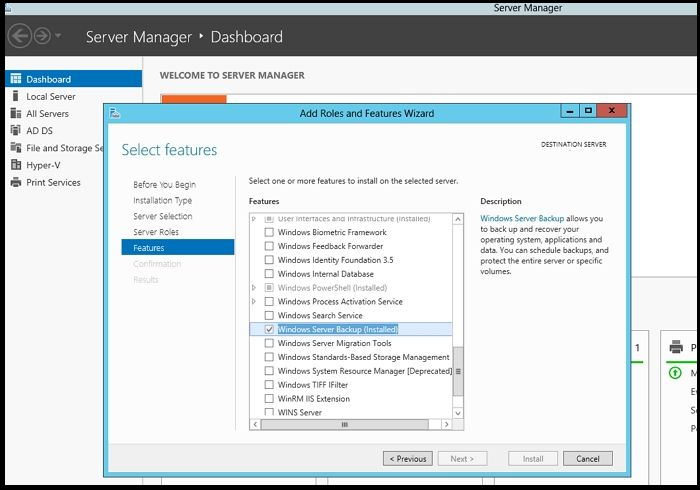
Step 3. On the Confirm Installation Selections page, tick-mark the option and press the Next button. It will lead to the Confirm Installation Selections page.
Step 4. Check the "Windows Server Backup" checkbox, click "Next", and then click "Install" to begin the installation. Wait for the installation to complete.
- Notice:
- After installing the feature, you can start using it without needing to reboot or restart your Windows Server.
After installing Windows Server Backup, you can choose from various backup options, such as backing up the entire server, specific files and folders, critical volumes, individual volumes, or the system state. Once you have decided on a backup plan, you can proceed with the backup process.
Steps to Back Up Windows Server 2016
Here are the steps to perform a one-time backup using Windows Server Backup:
Step 1. To proceed, launch Server Manager, then navigate to the "Tools" section and select "Windows Server Backup" from the drop-down list, allowing the Windows Server Backup to open.

Step 2. On the right side, you'll see the Action menu with three options: backup schedule, backup once, and recover and schedule backup. Select the one that suits your needs.
Step 3. On the Backup Options page, select the "Different options" and press the "Next button".
Step 4. The next page is the Select "Backup Configuration" page, offering two options: Full server and custom.
Step 5. If you choose the full server, the entire server will have a backup, whereas custom allows users to select the files or folders they want to back up.
Step 6. On the Specify Destination Type page, select the full Server option, click Next, and then choose between Local drives and Remote shared folder.
Step 7. Select the Local drives option and tap the Next button.
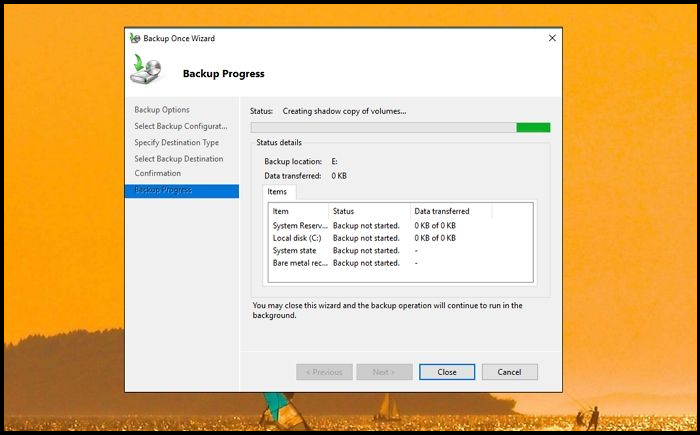
Step 8. On the Select Backup Destination page, choose the drive where you want the backup, then press the "Next" button. On the Confirmation page, select the "Backup" option.
The backup process is now running in the background, and it may take a few minutes or longer to complete, depending on the size of the data being backed up.
Perform Windows Server Backup 2016 with Software
To back up Windows Server 2016, you can also consider using a professional software like Qiling Backup Enterprise, which can help you back up your server seamlessly.
Qiling Backup offers multiple versions tailored to different business needs, including Workstation, Server, Advanced Server, and Technician, each with its own pricing and features to cater to various user requirements.
Main features:
- Safeguards different business environments and sizes
- Comes with different cost-effective packages
- Reliable SQL Server backup software and Exchange Backup tool
- Business-level protection against various disasters
- Free trial with access to round-the-clock tech support
How to Back Up Windows Server 2016 via Software
Follow the steps below to back up your Windows Server 2016 using Qiling Backup Enterprise:
Step 1. Open Qiling Backup Enterprise, click "Backup and recovery" to set a new backup.

Step 2. To back up a disk or partition, select the "Disk/partition backup" option and choose the system to be backed up.
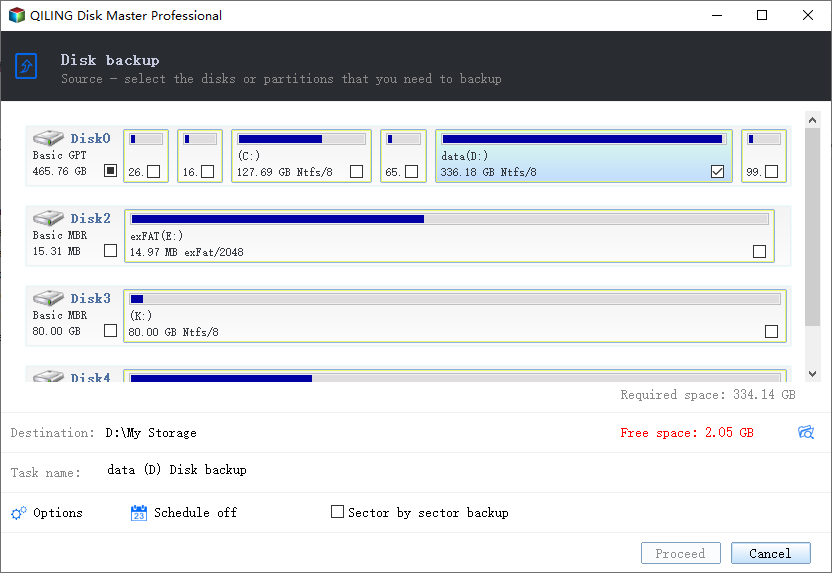
Step 3. Choose a destination where you want to save the backup, then click the "Browse" icon to select it.

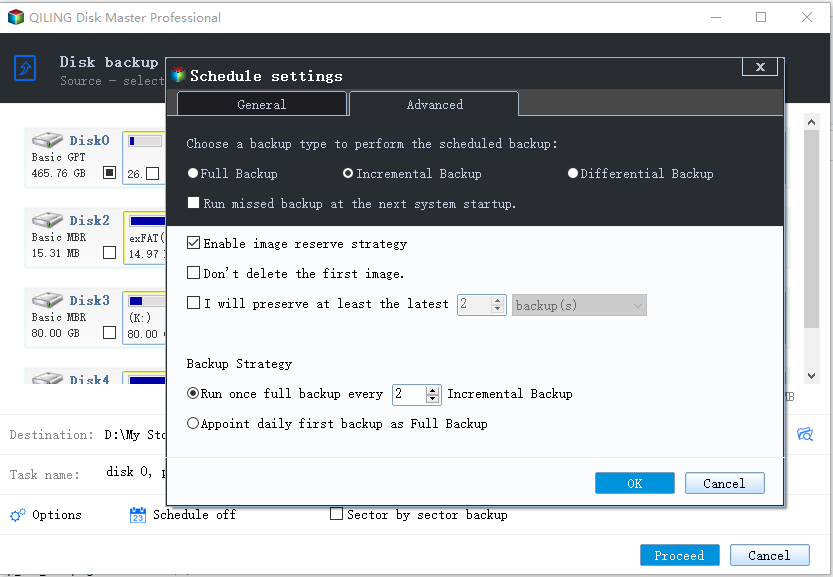
Step 4. To customize your backup scheme, click on "Schedule: Off". This allows you to view and adjust settings for "Schedule", "Backup cleanup", and "Advanced Settings". Click the "New" button under the "Schedule" catalog to create a new backup schedule.
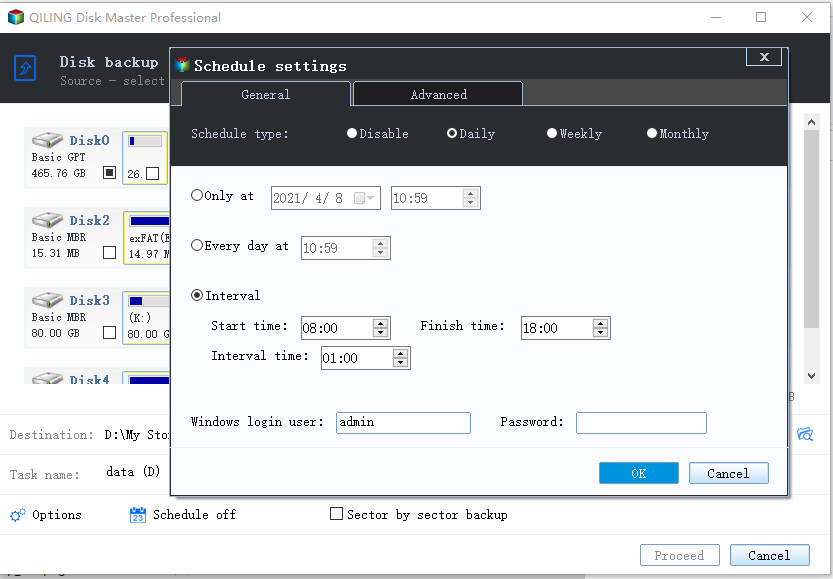
Then set the backup frequency based on your needs.
Step 5. Click "Backup options" on the bottom-left corner of the interface.
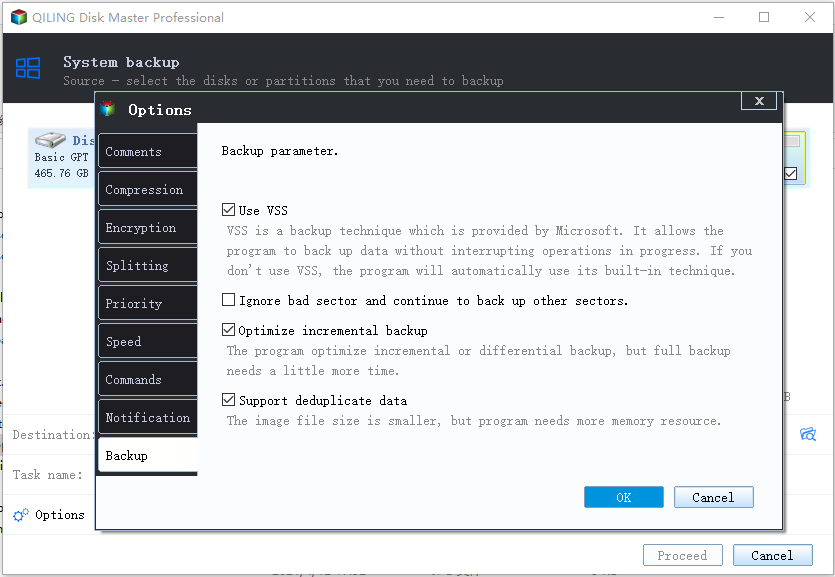
You can customize various settings such as performance, encryption, and email notifications here, and click "OK" to save your changes and return to the main interface.
Step 6. Once you have completed all the settings, click on the "Proceed" button to initiate the system backup process.
Conclusion
Windows Server 2016, primarily used in enterprise environments, requires robust backup solutions to prevent data loss and chaos in case of system failure. Two main approaches exist to ensure business continuity.
For reliable data backup, consider using Windows Server Backup, a built-in backup solution, or opt for professional software like Qiling Backup Business, which offers a trusted data backup solution.
Qiling Backup Business is a top-notch backup software solution that's easy to use and offers a wide range of features, with a free trial option available, making it a great choice for businesses.
Windows Server Backup 2016 FAQs
Below are some common questions and answers about backing up Windows Server 2016 to help you learn more.
1. How can I check my Windows Server 2016 backup?
- To check the Windows Server 2016 backup status, you need to go to the Control Panel.
- To back up and archive your server, select the server from the server box and then navigate to the Backup and archiving section.
- To check the server status, press the Backup and Restore Manager options. This will display the current status of the server, indicating whether it is online, offline, or in a suspended state.
2. How does Windows Server Backup work?
Windows Server Backup works like any Windows Backup, taking a backup of all files or a selected one, and identifying incremental or full backups to work accordingly.
3. Can I back up Windows Server 2019?
To back up Windows Server 2019, you can use Windows Server Backup 2019, but it has a limitation compared to the 2016 version. The 2019 version requires backing up the entire volume, and does not allow backing up individual folders.
4. What does it mean to back up a Server?
Backing up the server involves enabling the backup of various components such as files, databases, data, applications, or the entire server on an external storage device or another server, ensuring data safety and recovery in case of system failures or disasters.
Related Articles
- How to backup system with Qiling Backup
- How to Back Up Windows Server 2019 Files in 2 Ways [Proven Solutions]
- 3 Best Scheduled Disk Cloning Software for Windows | 2022 New
- FIXED: Windows Server Backup Stuck on Reading Data
- Step-by-step Guide: How to Backup PC to WD My Cloud Home
To backup your PC, follow the guide to learn how to do it on Windows 11 and 10 using a WD My Cloud Home. Alternatively, if you have hard drives from non-WD brands, you can use Qiling Backup. - How to Backup Programs before Reinstalling Windows 10/8/7?
This article will introduce you how to backup programs before reinstalling Windows 10/8/7 with best free backup software - Qiling Disk Master.